Using Twinmotion with Rhino
-
Intro
-
Installing Twinmotion
-
Export geometry from Rhino to Twinmotion
-
Navigation
-
Materials
-
Assets
-
Ambience
-
Exporting
-
Virtual Reality
-
Tips & Tricks
Information
| Primary software used | Rhino |
| Course | Using Twinmotion with Rhino |
| Primary subject | Other |
| Secondary subject | Other |
| Level | Intermediate |
| Last updated | April 7, 2026 |
| Keywords |
Responsible
| Teacher | |
| Faculty |
Using Twinmotion with Rhino 0/9
Using Twinmotion with Rhino
Explanation on how to import Rhino geometry in Twinmotion and execute basic 3D visualization.
Twinmotion is a powerful, intuitive real-time visualization and rendering software. It is primarily used by architects and designers to create interactive, photorealistic renders (images) of their 3D models, allowing environments, materials, lighting, and objects to be easily added. With just a few clicks, your design can also be viewed in VR.
This tutorial explains how you can import your Rhino geometry in Twinmotion and is aimed at beginners. It explains the basic information that is required to create your first render with Twinmotion. However, creating a nice render is not easy, and requires time, effort, and experience. Read this tutorial carefully and make sure to try all settings for yourself to develop your own style.
Using Twinmotion with Rhino 1/9
Installing Twinmotionlink copied
Install Epic Games Launcher
- Navigate to the Epic Games Store (https://store.epicgames.com/en-US/) and download the Epic Games Launcher.
- Open the Epic Games Launcher
- Create an EPIC Games-account or log in if you already have one.
Download and Install Twinmotion
- While inside the Epic Games Launcher, navigate to “Unreal Engine” in the menu on the left.
- Navigate to “Twinmotion” at the top of your screen.
- Select the most recent version of Twinmotion that you have access to.
- For this tutorial, we are using 2024.1.2.
Install the Datasmith Exporter for Rhino
- To visualize geometry from Rhino in Twinmotion, the Datasmith Exporter plugin is highly recommended.
- Navigate to the website in the following link and (https://www.twinmotion.com/en-US/plugins) select “For Rhino”.
- Download the correct Datasmith Exporter for your operating system.
- Install the UnrealDatasmithRhinoExporter, following the instructions from Twinmotion.
Using Twinmotion with Rhino 2/9
Export geometry from Rhino to Twinmotionlink copied
Layers and Materials in Rhino
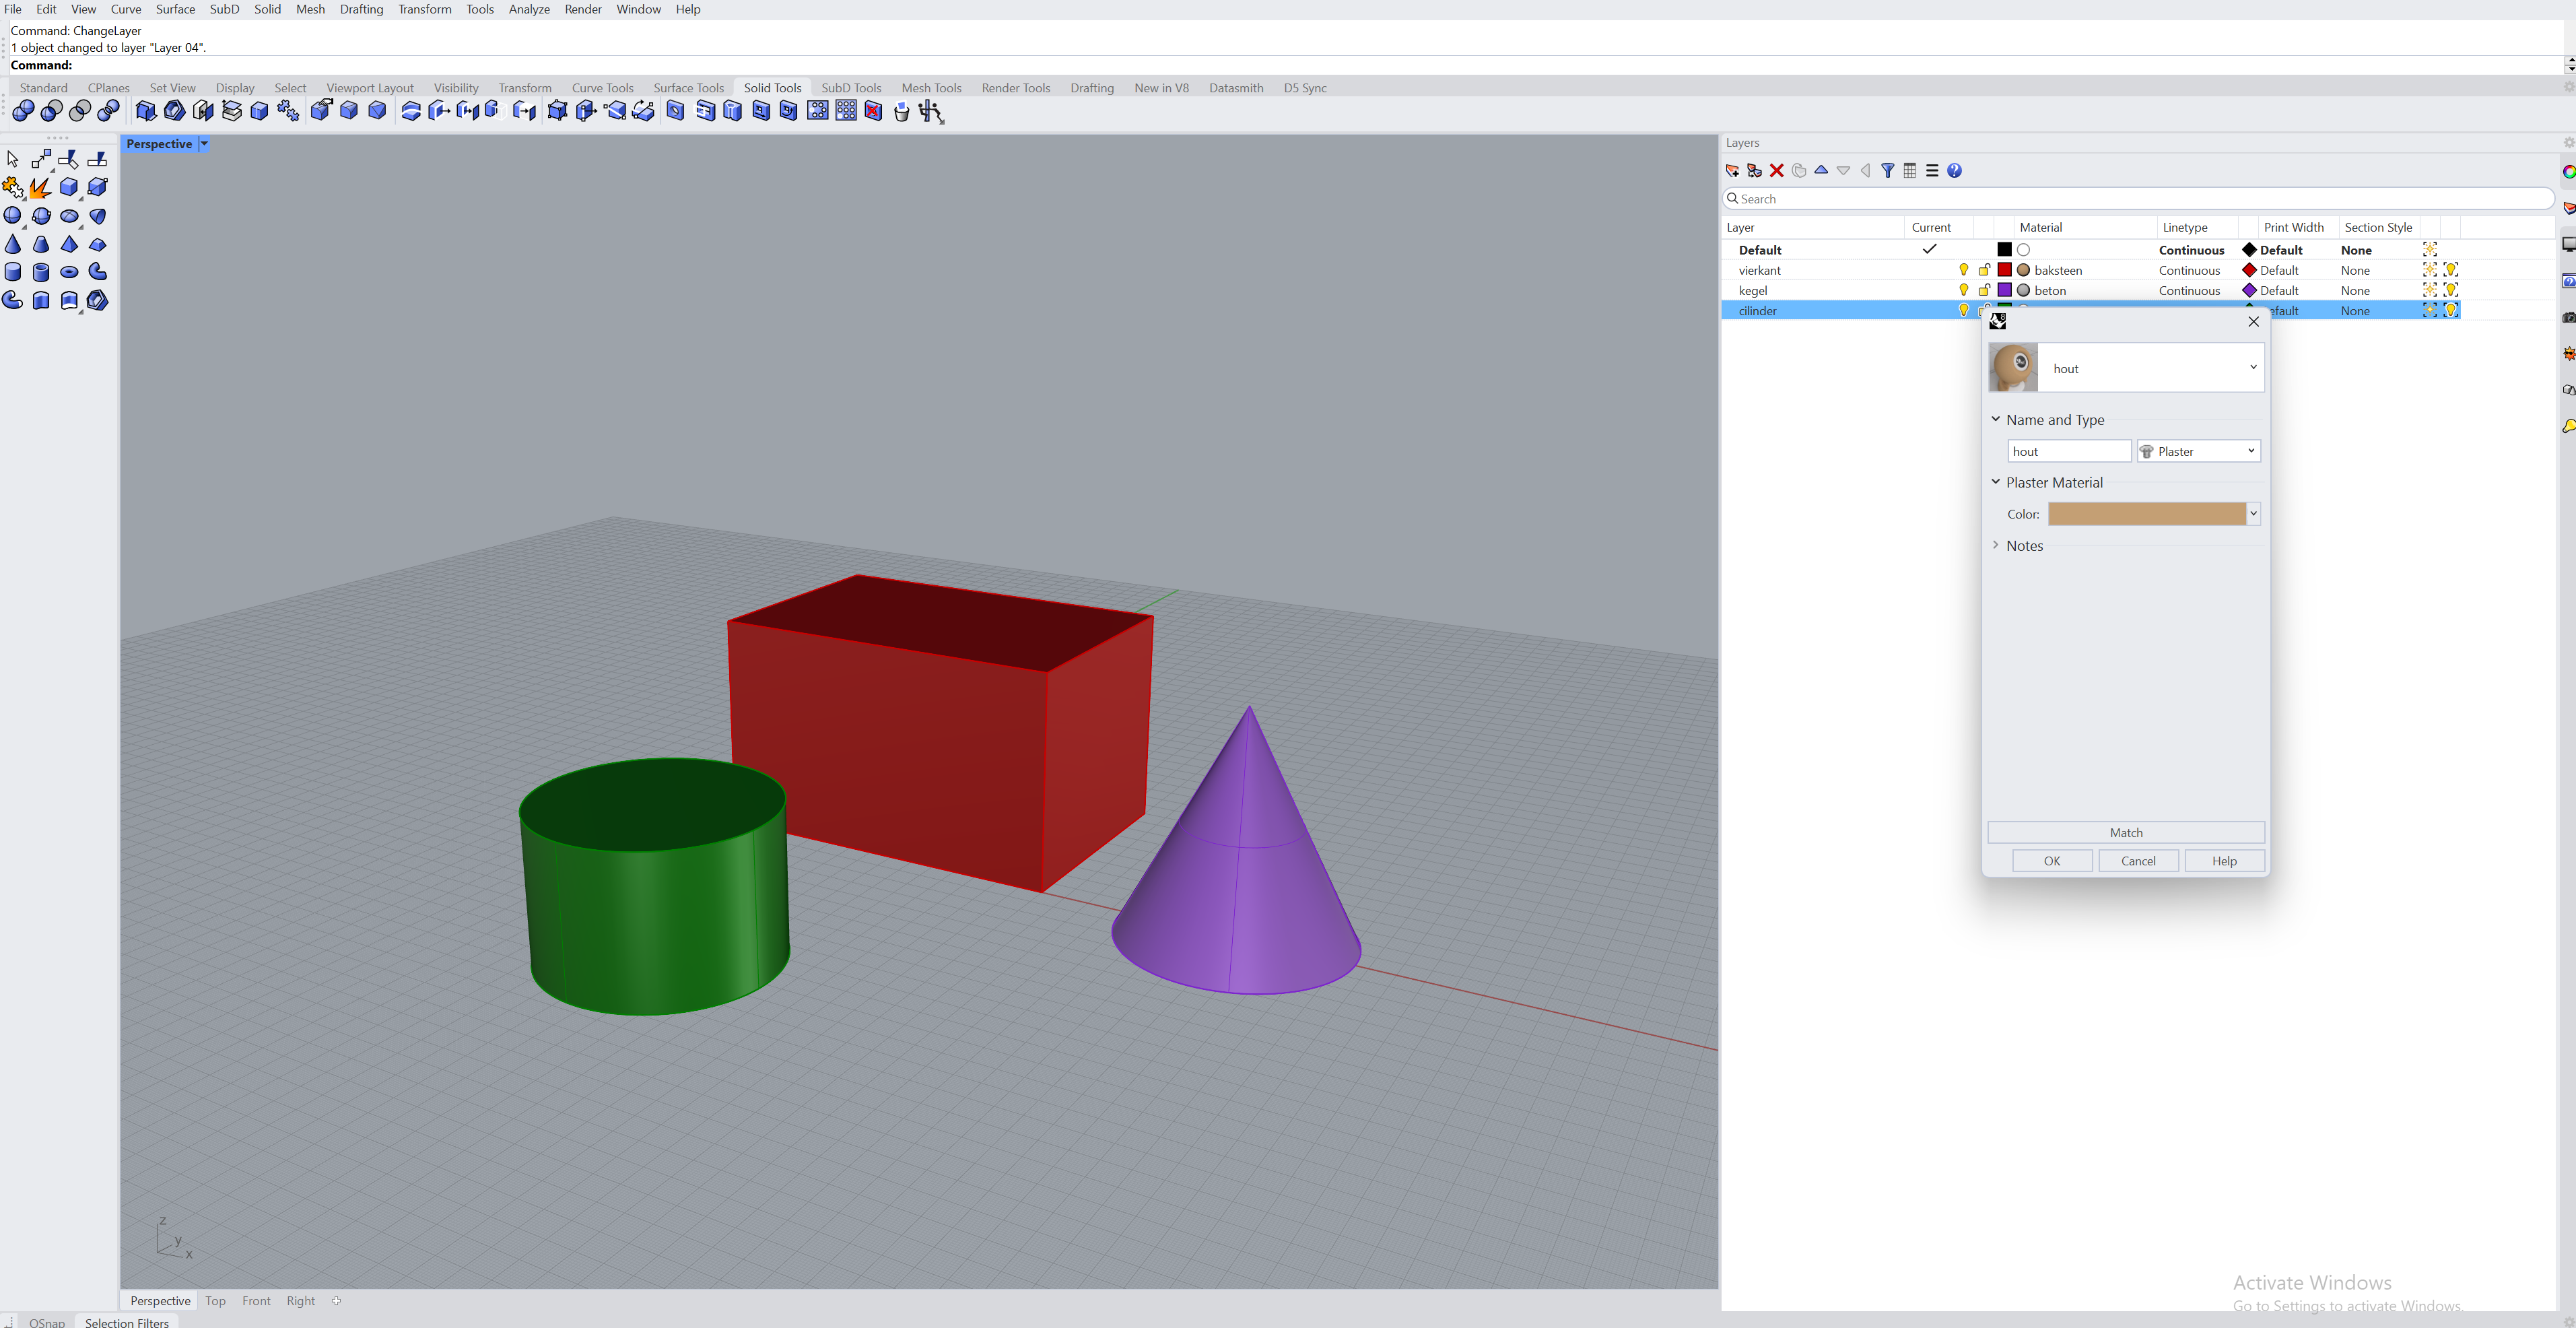
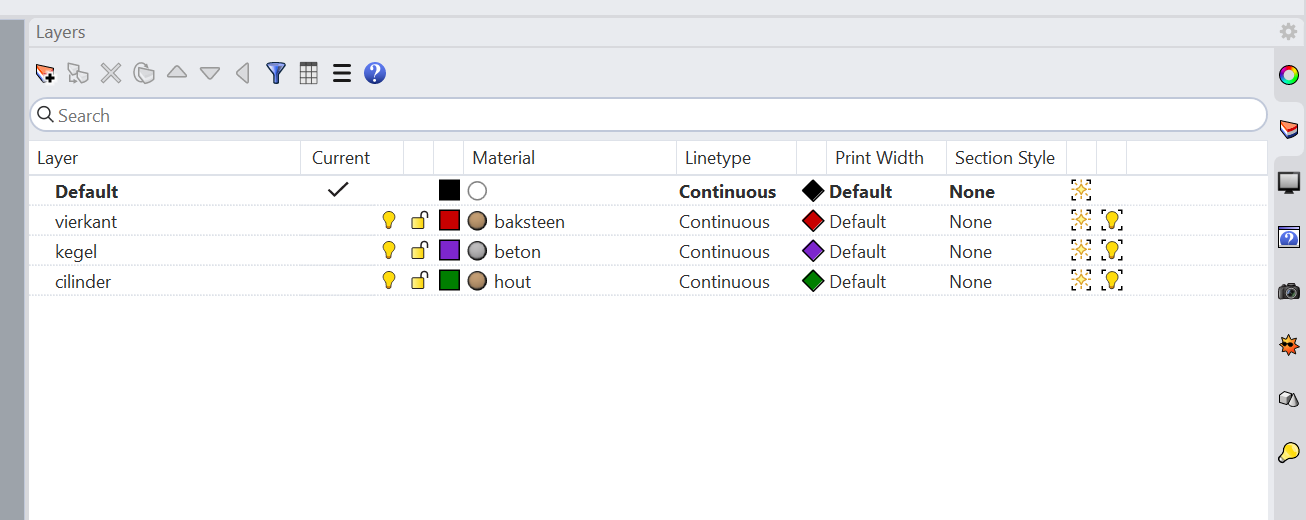
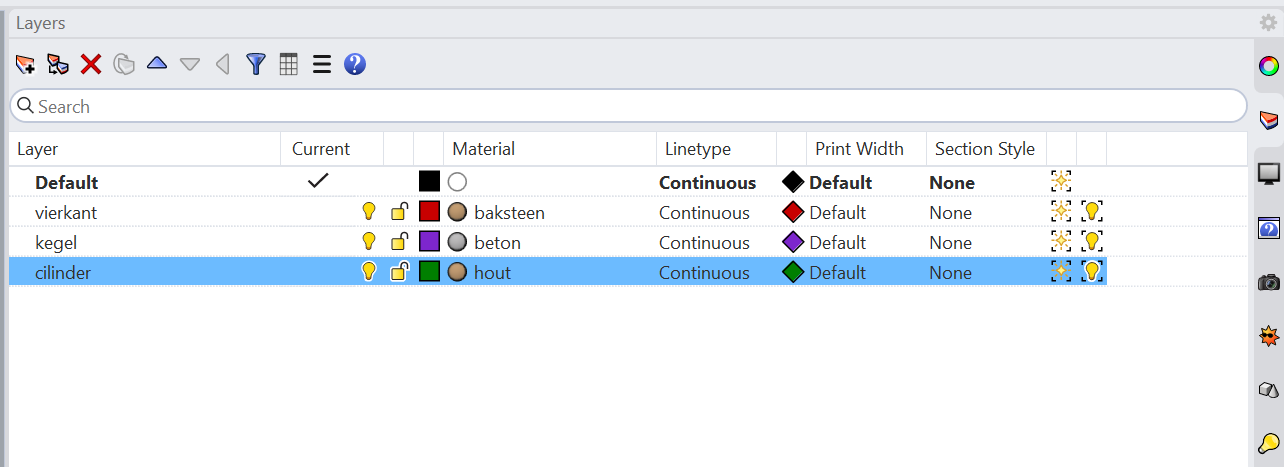
Open the Rhino-file that you want to visualize using Twinmotion. Make sure to organize the geometry in multiple layers. Give a different material to each layer. The exact material is irrelevant, as you will be assigning different materials in Twinmotion anyway.
The reason for this is, in short, that this helps preserve your layer structure in Twinmotion. When you export geometry to twinmotion, all layer information is lost, but material information is kept.
Export Geometry Data to Twinmotion
Open the Datasmith toolbar in Rhino
Click on ‘Export 3D View’ to export a .udatasmith file in Twinmotion. Make sure to save this file with a recognizable name in a location where you can find it.
- Sometimes, people might recommend the usage of a direct link. Using a direct link to update your Twinmotion file after changes to Rhino geometry is slightly easier but not recommended. It often crashes and is usually irrecoverable, forcing you to start from scratch.

Sometimes, when exporting a .udatasmith file, additional folders are created. Twinmotion needs these. Make sure that you can still find them. It is recommended to store all files and folders that are created in the exporting process in the same folder as your rhino and Twinmotion project files.

Import Data in Twinmotion
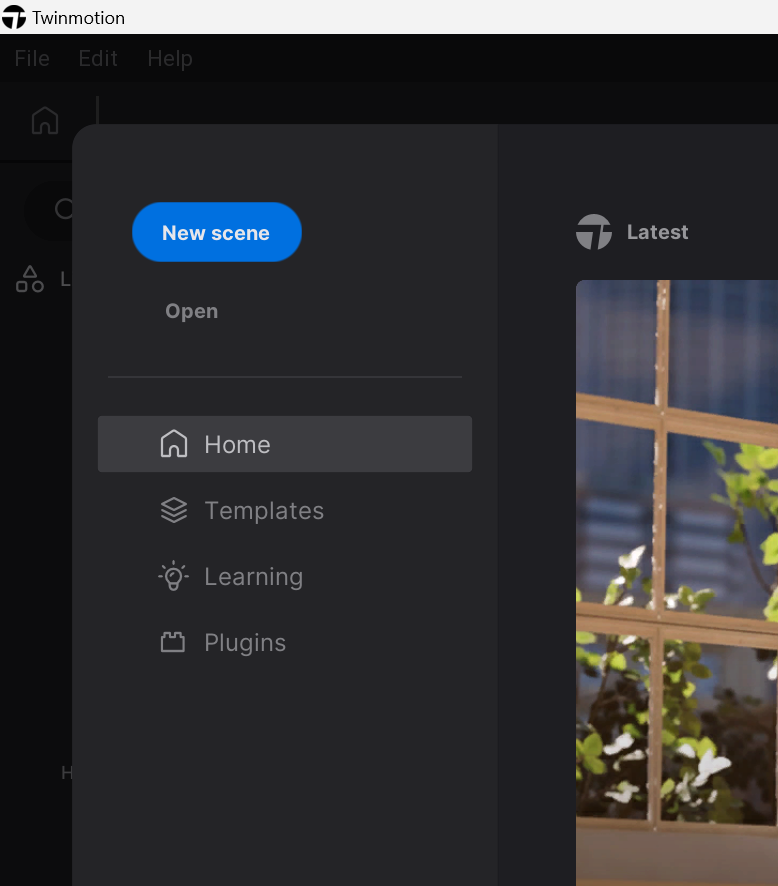
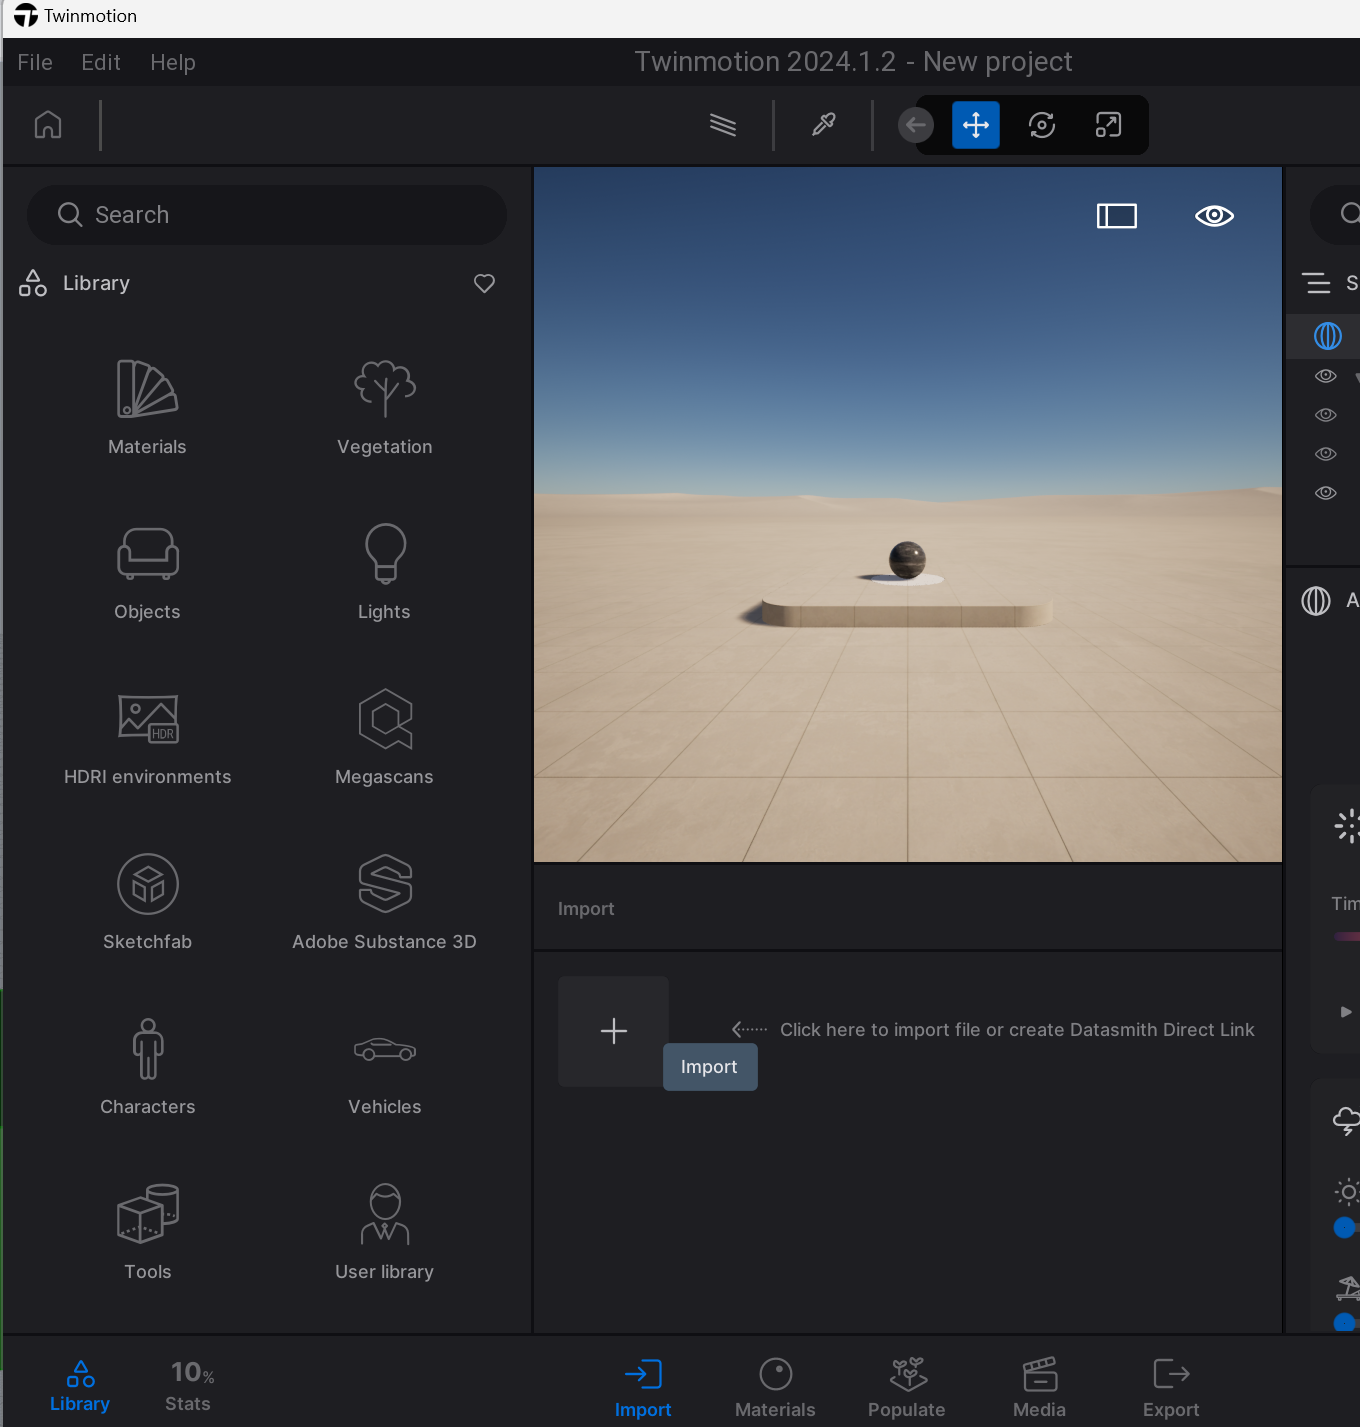
- Open Twinmotion and make a new scene.
- Open the “Import” menu at the bottom of your screen. Once you have one or more files loaded, they will show up here.
- Click on the + icon in the menu that pops up. It is also possible to use the hotkey Ctrl + L.
- Select “GEOMETRY”
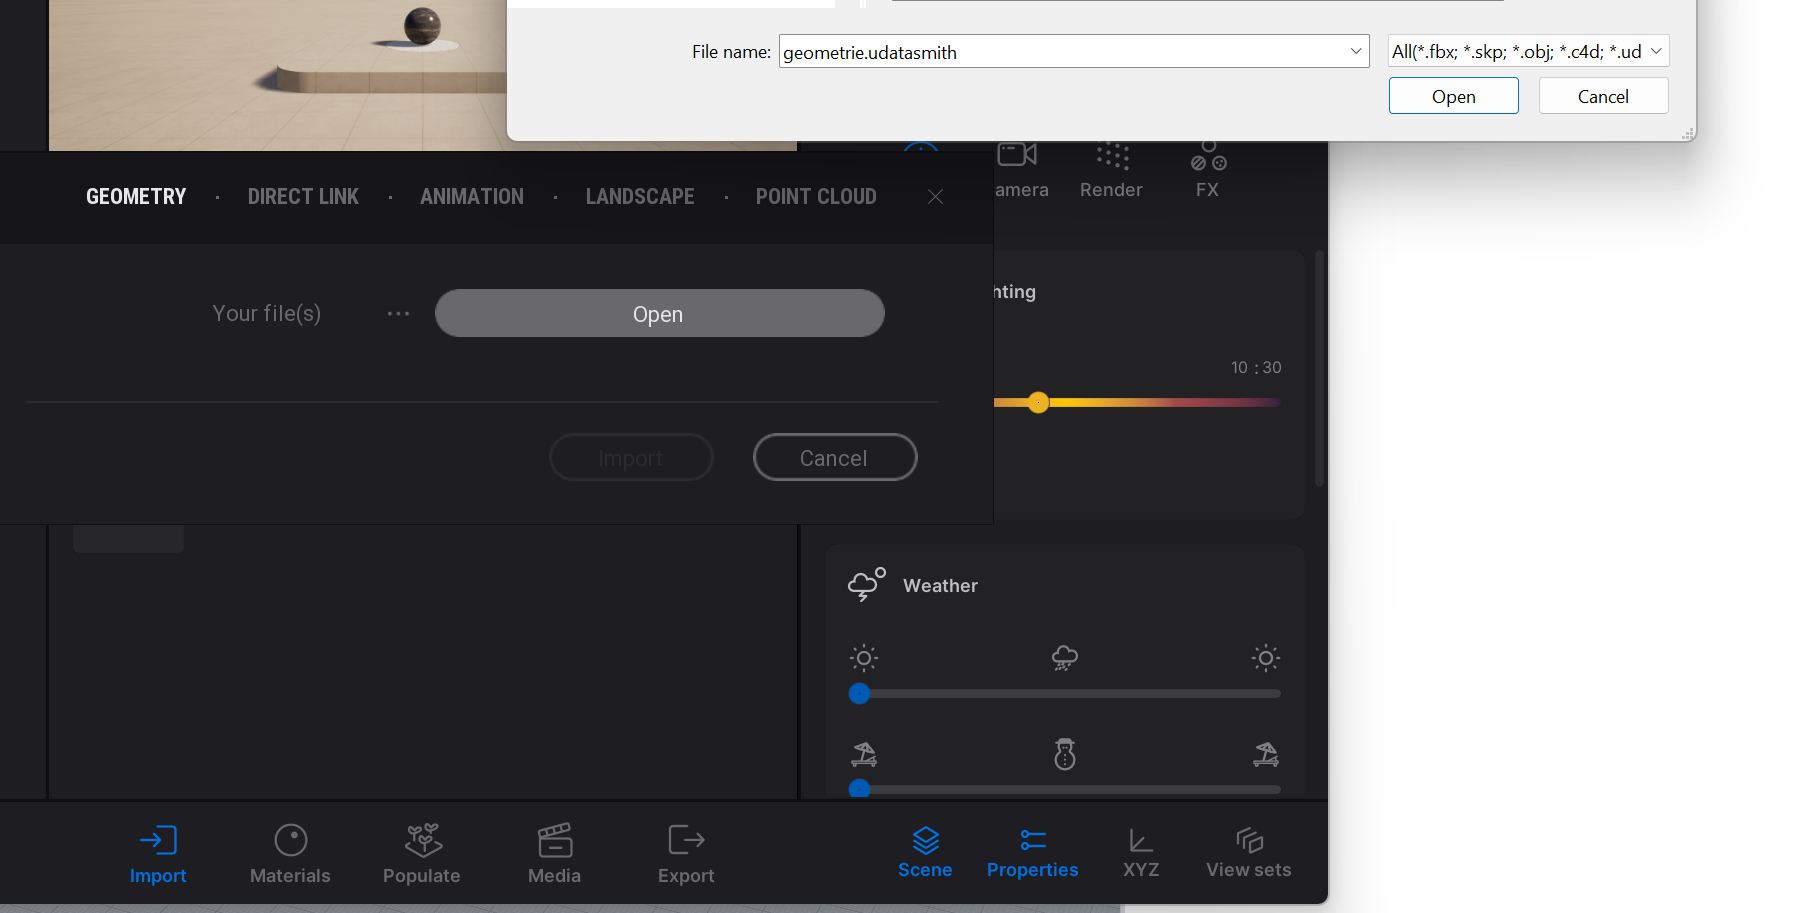
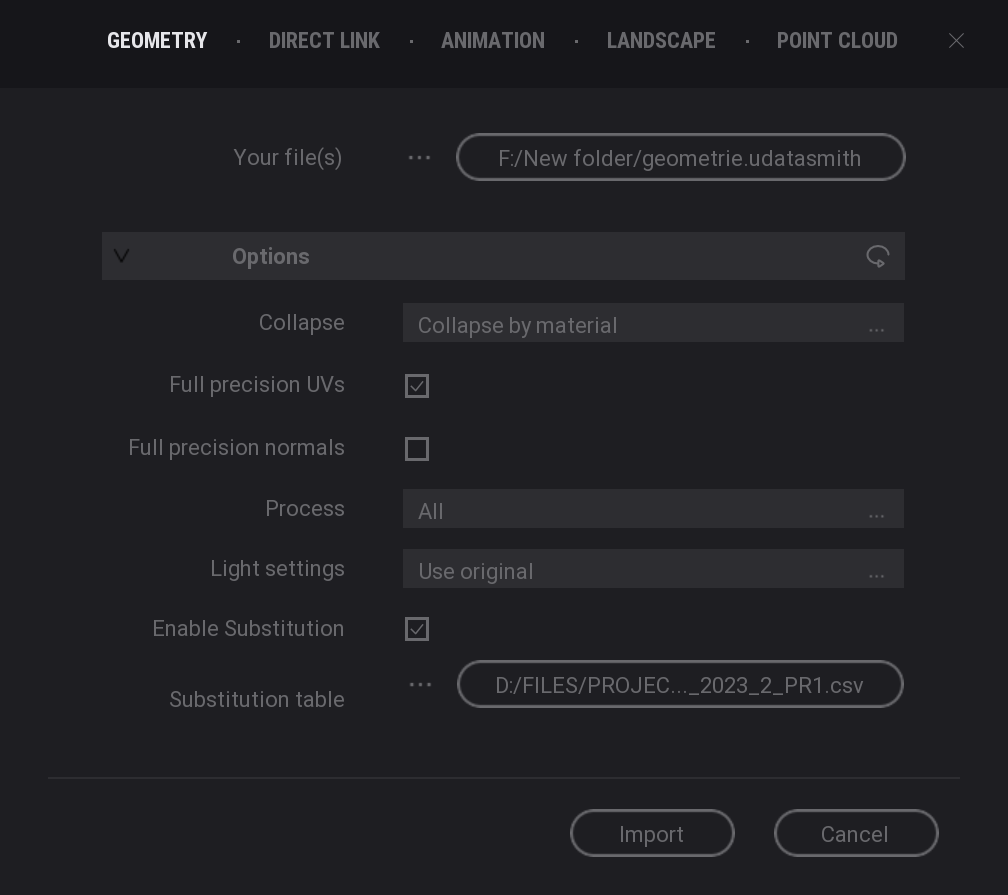
The following settings are recommended:
- Collapse: by material
- Use Full precision UVs: checked
- Full precision normals: unchecked
- Light settings: Use original
- Enable substitution: Checked
It is recommended to generate a new substitution table. This can be done by clicking on the three dots next to “substitution table” and then clicking “generate default table”. Save it in a convenient location where you might be able to retrieve it.
- It is recommended to store this substitution table in the same folder with your rhino, twinmotion and .udatasmith files.
- The substitution table links rhino materials and geometry to the materials that are assigned in Twinmotion. It guarantees that you can make changes to your rhino geometry without having to redo all your render settings in twinmotion.
After clicking “OK”, your data should show up in your scene. If you do not see your geometry, there can be several explanations.
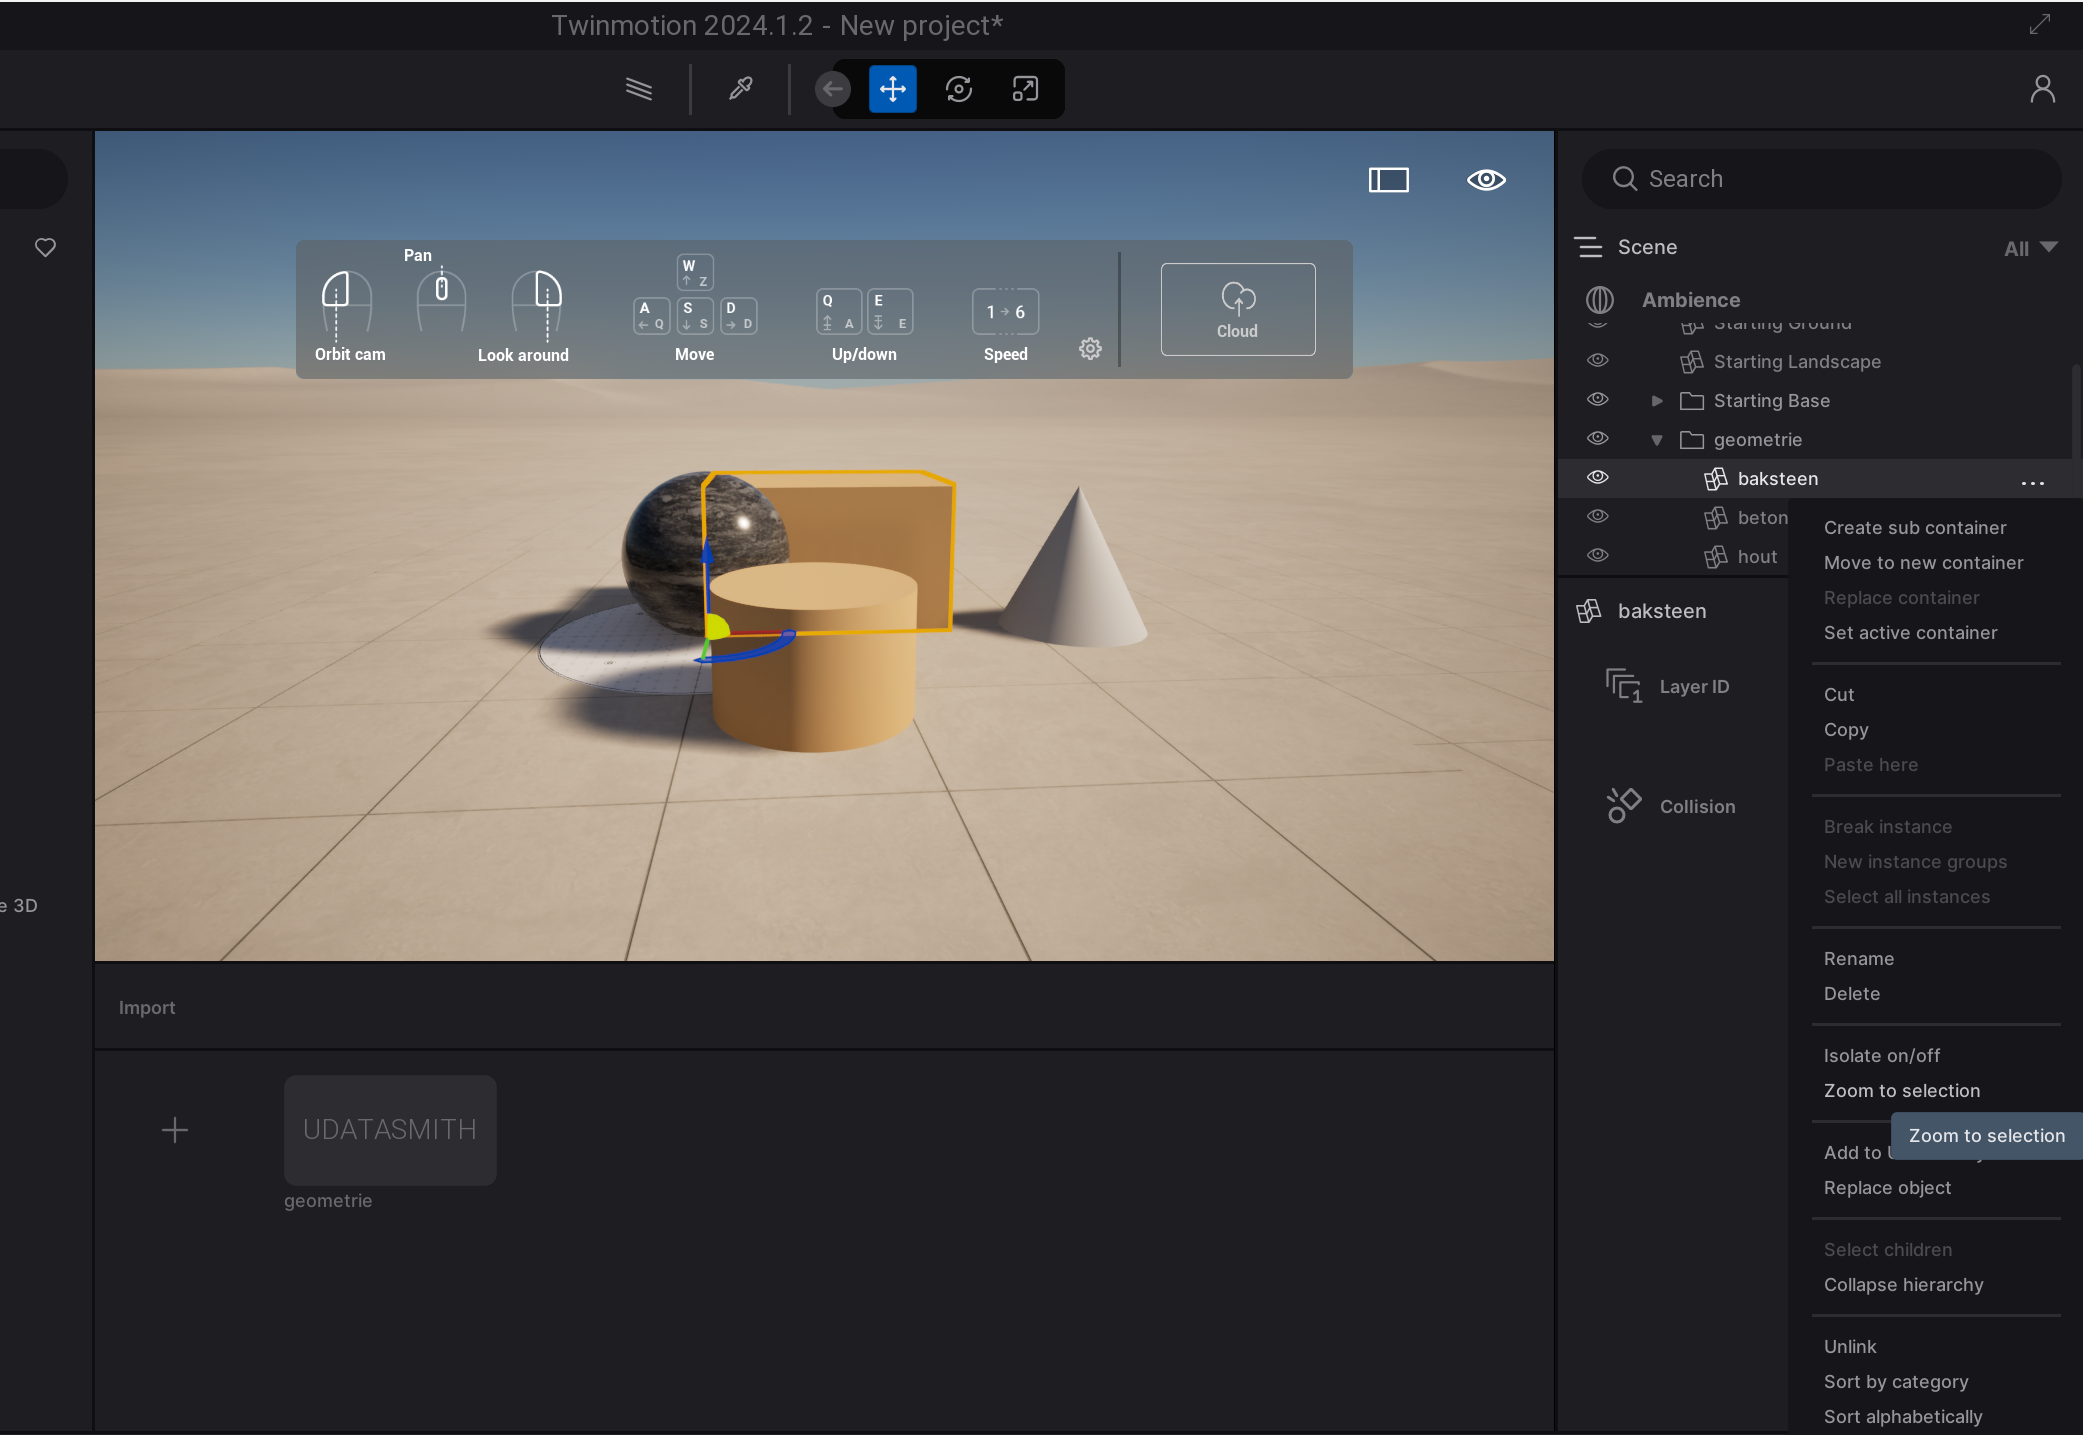
- Your geometry is too far from the origin. Your geometry should still show up in the scene graph on the right of your screen. Open this graph by clicking on “Scene” at the bottom right of your screen. You can find your geometry in the Twinmotion viewport by right clicking on a part of your geometry and selecting “Zoom to selection” in the menu that pops open.
- The faces of your geometry are flipped. Make sure to only export enclosed geometry (closed polysurfaces, extrusions, etc.) to Twinmotion. Your geometry should still show up in the Scene graph. It should also be visible from a different direction in the viewport.

Synchronizing changes in Rhino to Twinmotion
After setting up a Twinmotion file, it is still possible to make changes in the geometry (as long as you correctly followed the previous steps). After changing the geometry in rhino, using the existing layer structure, you can export a .udatasmith file again. It is both possible to overwrite the existing .udatasmith file as well as creating a new one.
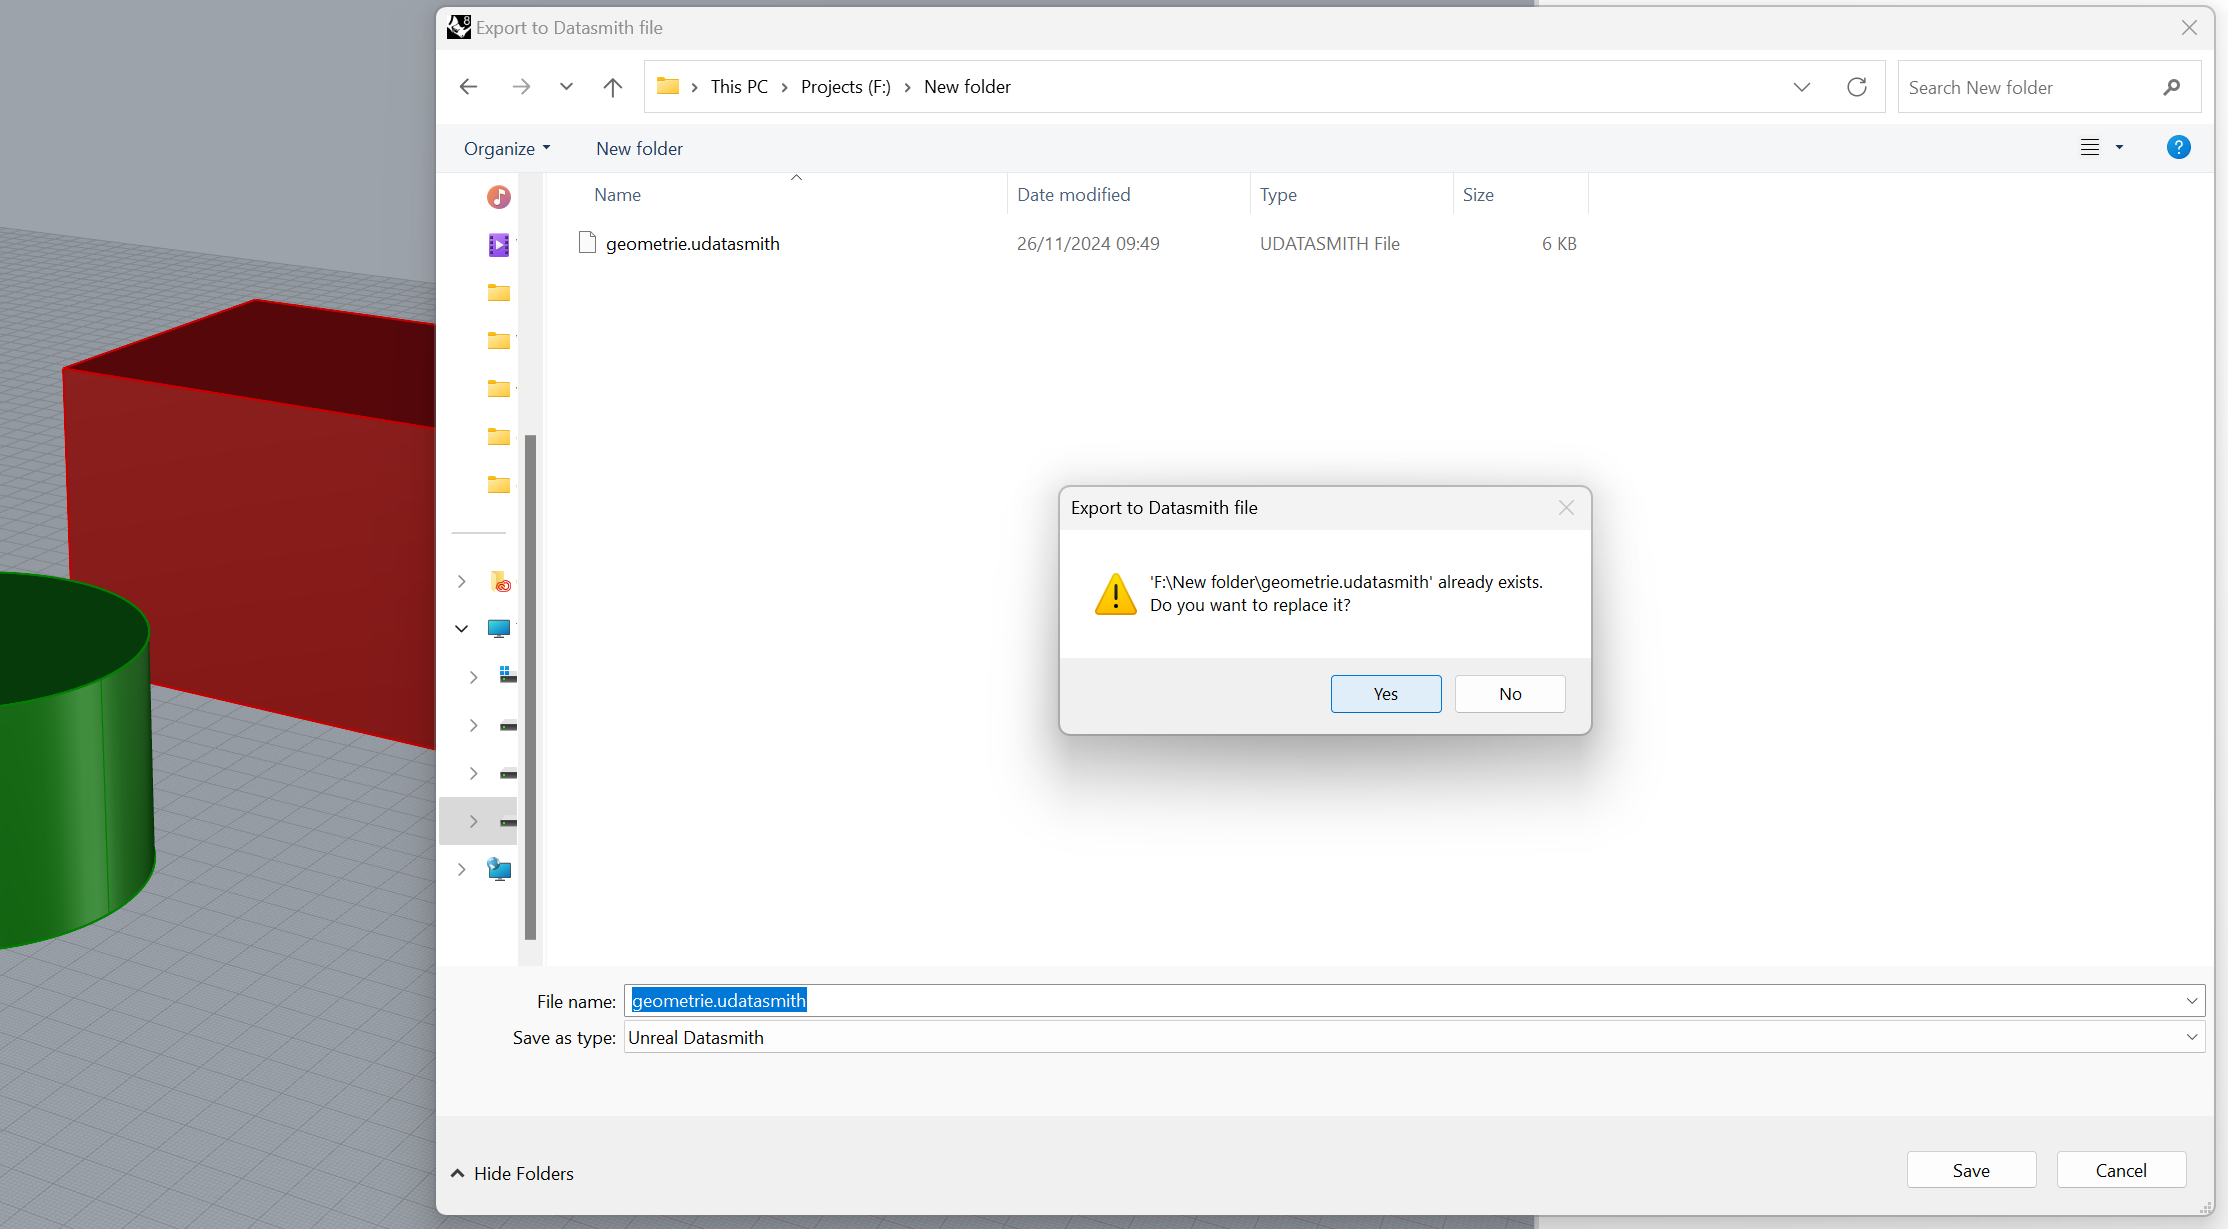
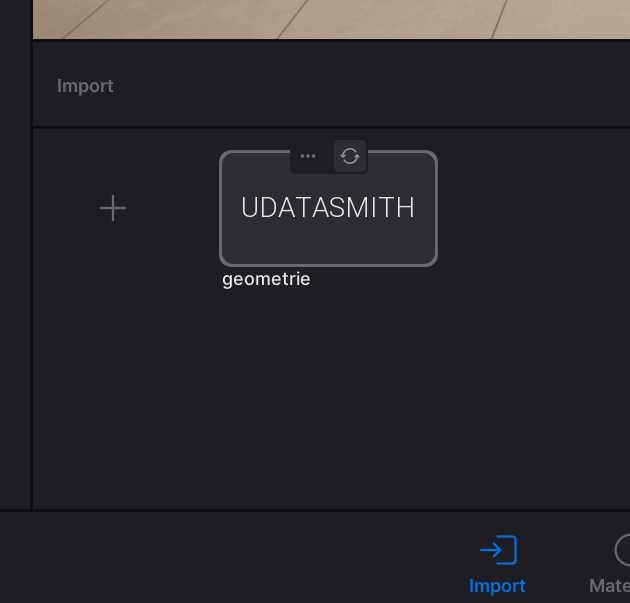
In twinmotion, navigate to the “Import” tab that you previously used to load a new datasmith file. If you overwrote the existing .udatasmith file, you can simply press the “refresh button” that appears when you hover over the loaded .udatasmith file. If you saved a new .udatasmith file, you must press the 3 dots, which lets a small menu appear. In this menu, click on “file settings”. In this menu, change the linked file to your new .udatasmith file by clicking on the linked file next to “Your file(s)” and opening your new .udatasmith file.
Using Twinmotion with Rhino 3/9
Navigationlink copied
Basic movement
|
W |
Move forward |
|
S |
Move backwards |
|
A |
Move left |
|
D |
Move right |
|
Q |
Move up |
|
E |
Move down |
|
Mousewheel |
Zoom in / Zoom out |
|
Left mouse button |
orbit |
|
Right mouse button |
Rotate camera |
It is possible to change the movement speed. You can do this by pressing 1,2,3,4,5 and 6. 1 Is slowest, 6 is fastest

Using Twinmotion with Rhino 4/9
Materialslink copied
Assigning Materials
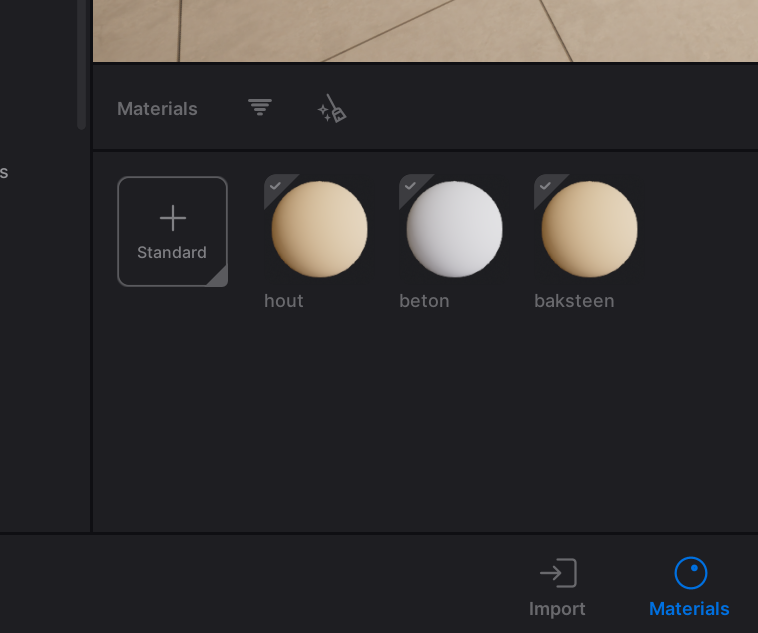
In Twinmotion, navigate to the materials on the bottom of your screen. Here you can find an overview of the material layers you made in Rhino.
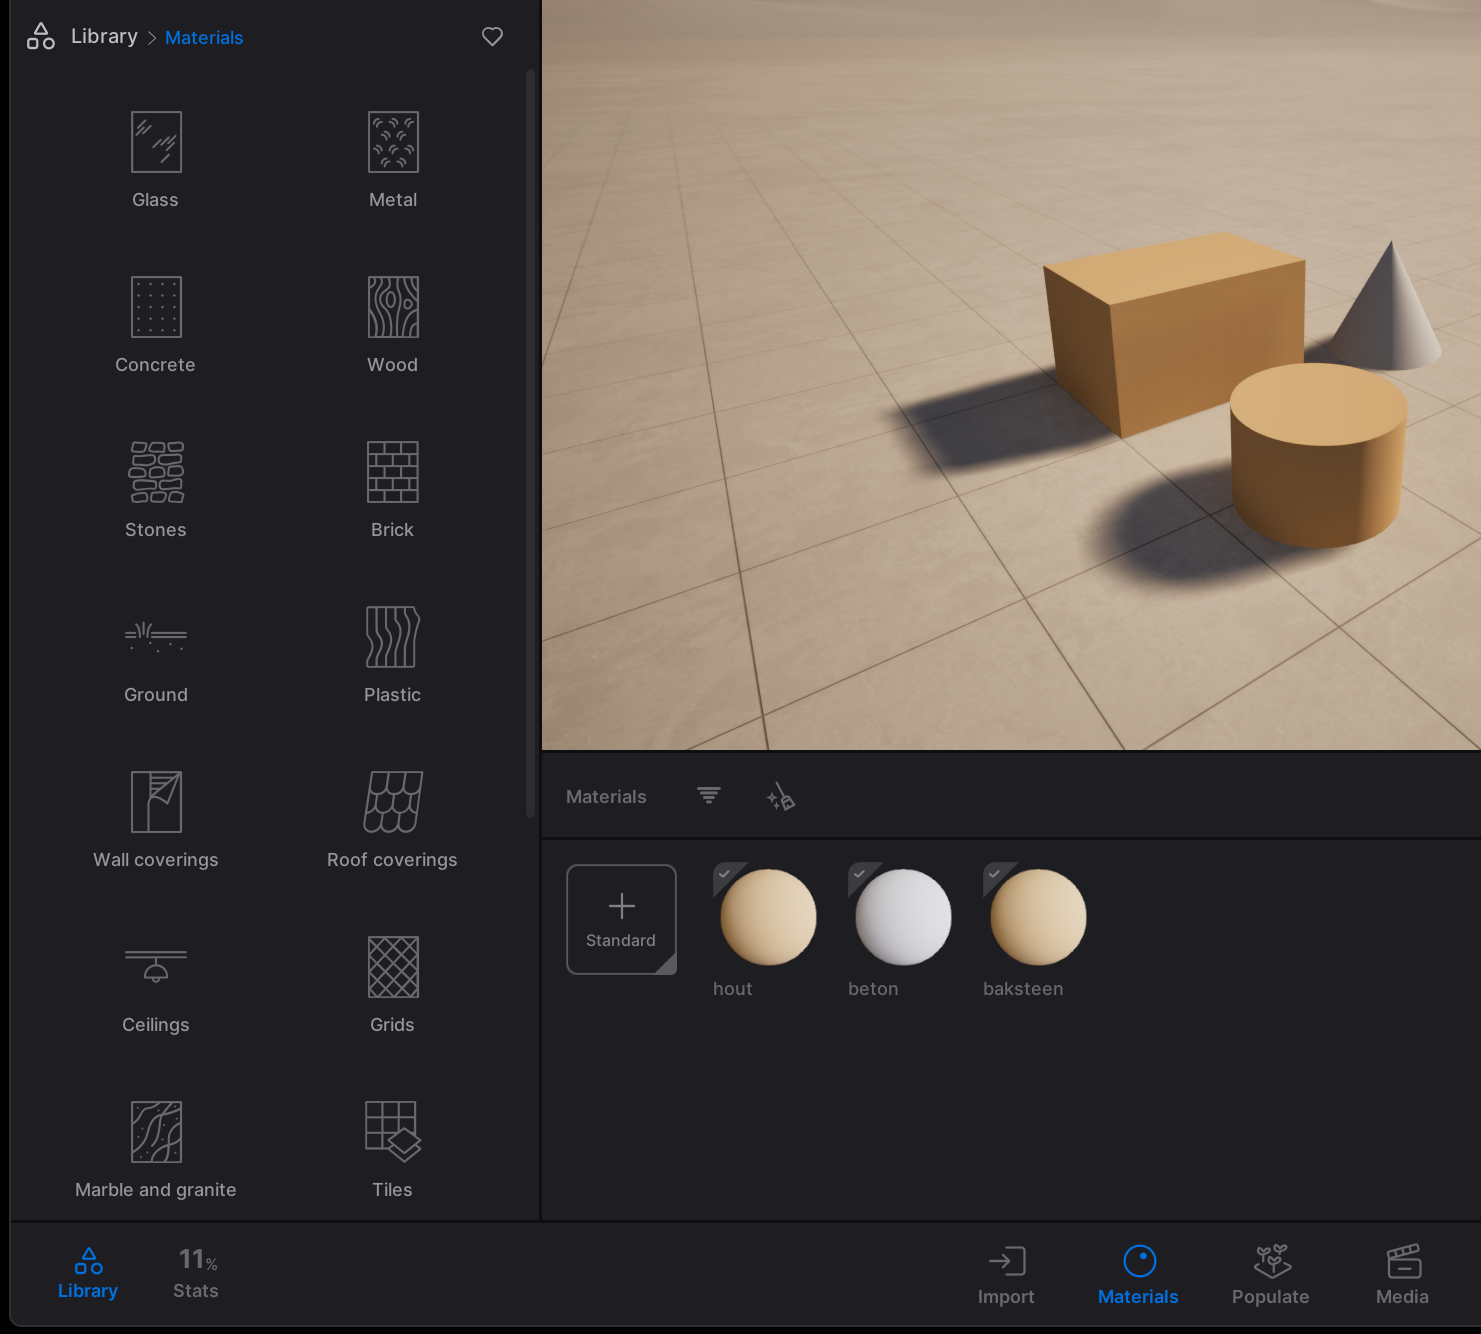
Navigate to the library on the left side of your screen.
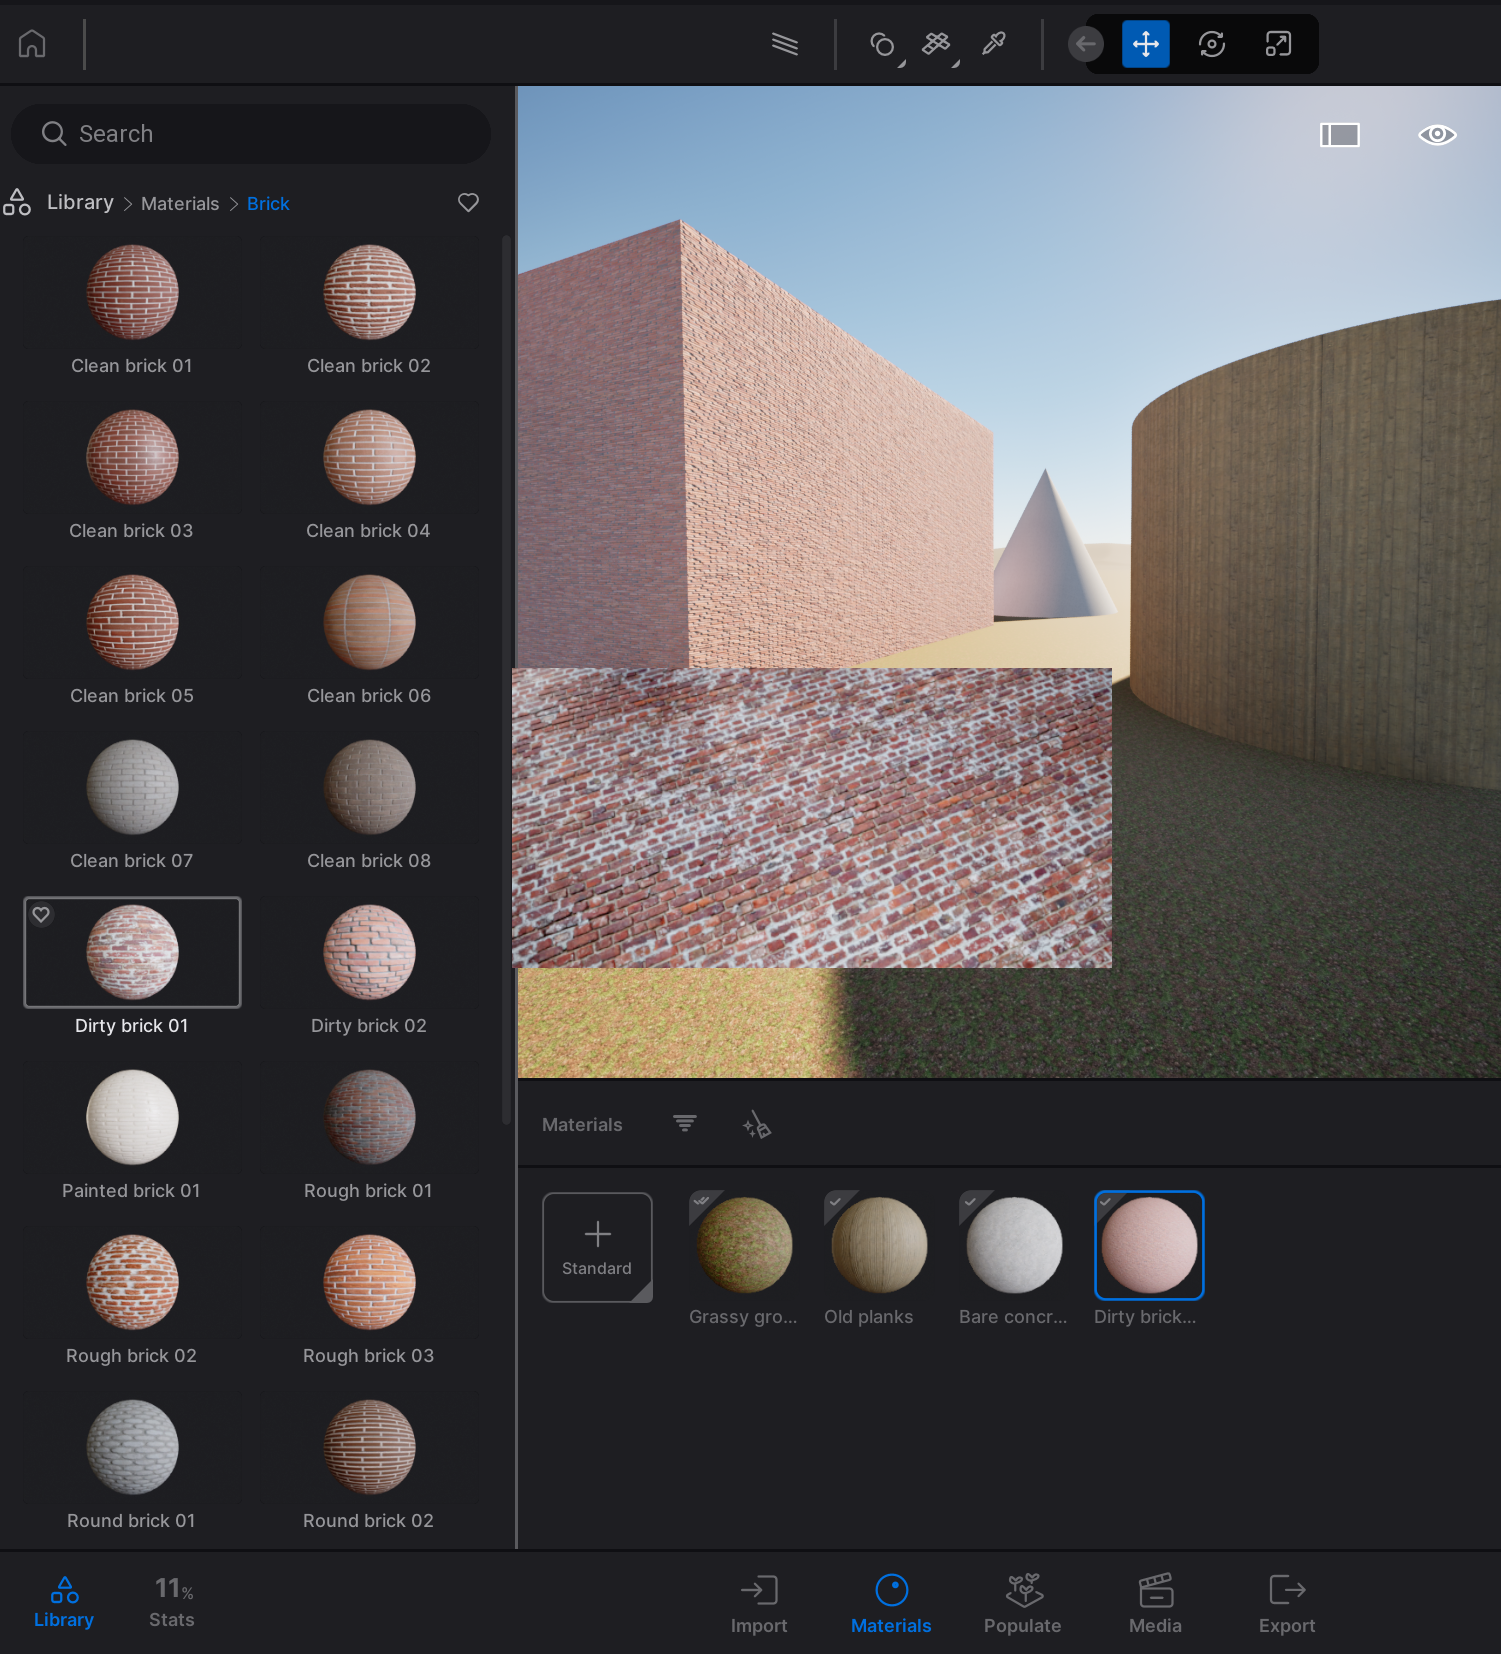
Go to Materials and choose the material that you want to use.
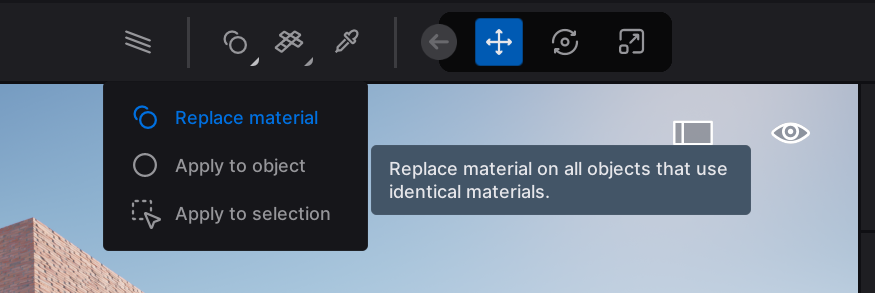
Replacing materials can be done in several ways, all of which involve dragging a material onto the object that you want to use it on. You can change the way you can replace materials by clicking on the dropdown menu that appears when you click on the small icon at the bottom right of the 2 circles that intersect each other at the top center of your screen.
- By default, dragging a material onto an object will place this new material on top of all objects that use the same material.
- The dropdown menu also allows options for applying a material to a specific object or to a selection of objects.
Material Settings
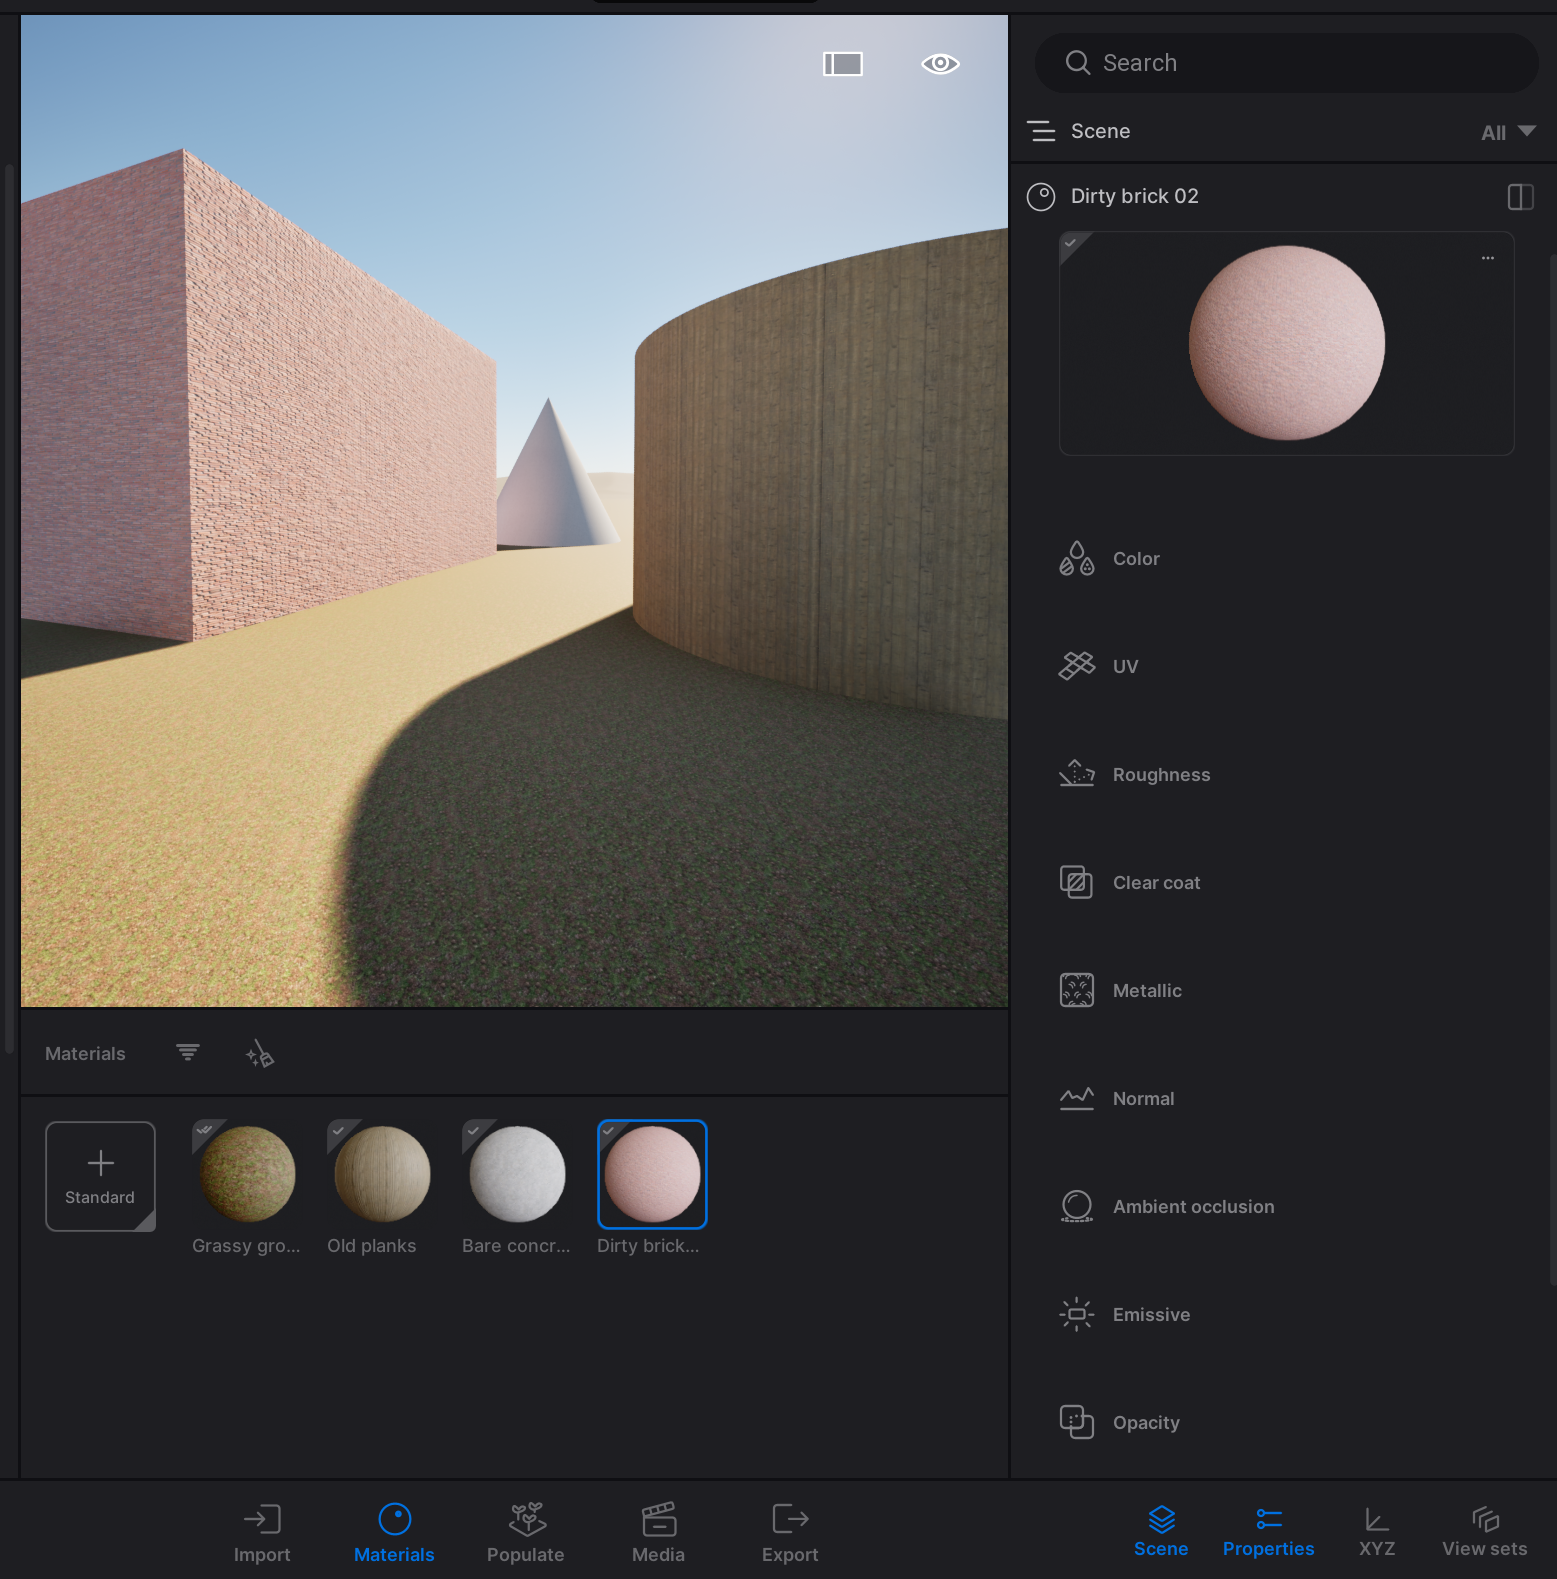
Navigate to the material properties tab. This can be done by selecting Material in the viewport with the pipette at the top center of your screen. The material properties will appear on the bottom right of your screen.
The material settings tab includes many settings for manipulating your materials. It is vital for getting a nice render. It is best to experiment with the settings to see what they do.
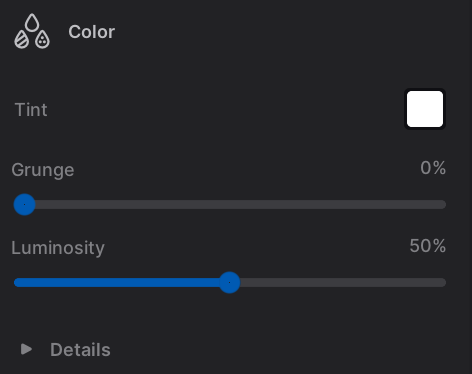
Some notable material settings include:
- Tint: The color of a material.
- Grunge: creates a dirty pattern on a material. It increases realism and decreases repetition.
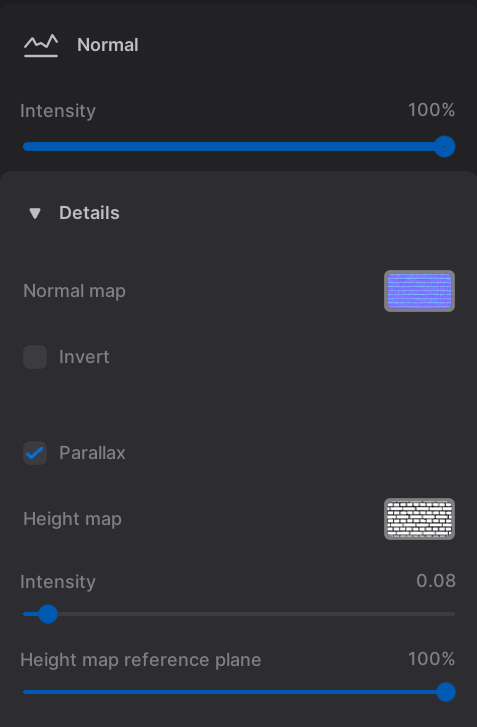
Normal: Creates depth in a material.
- Make sure to try to enable the parallax. This creates 3D depth in an otherwise 2D material.
- Sometimes it is needed to copy the normal map and place it in the spot for the parallax.
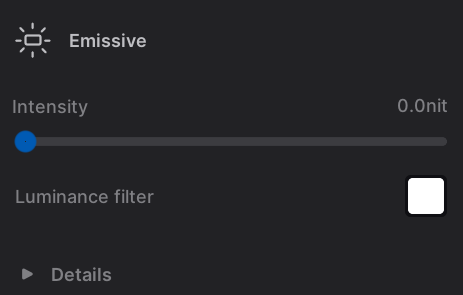
Emissive: Can make materials emit light.
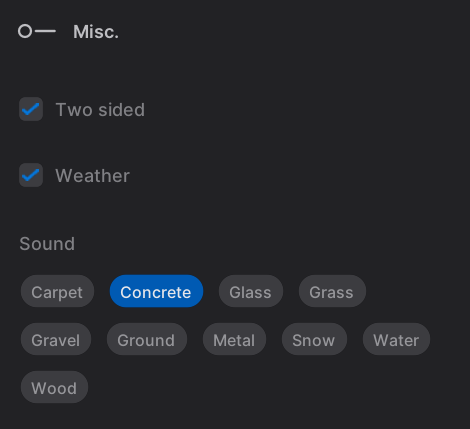
Misc.: Two sided: Forces Twinmotion to render a surface on two sides.
- By default, to save computing power, Twinmotion only renders one side of a surface. If you placed a surface that only shows from one side, enabling this option solves this issue.
More relevant information can be found on https://dev.epicgames.com/documentation/en-us/twinmotion/settings-for-standard-materials-in-twinmotion
UV Mapping
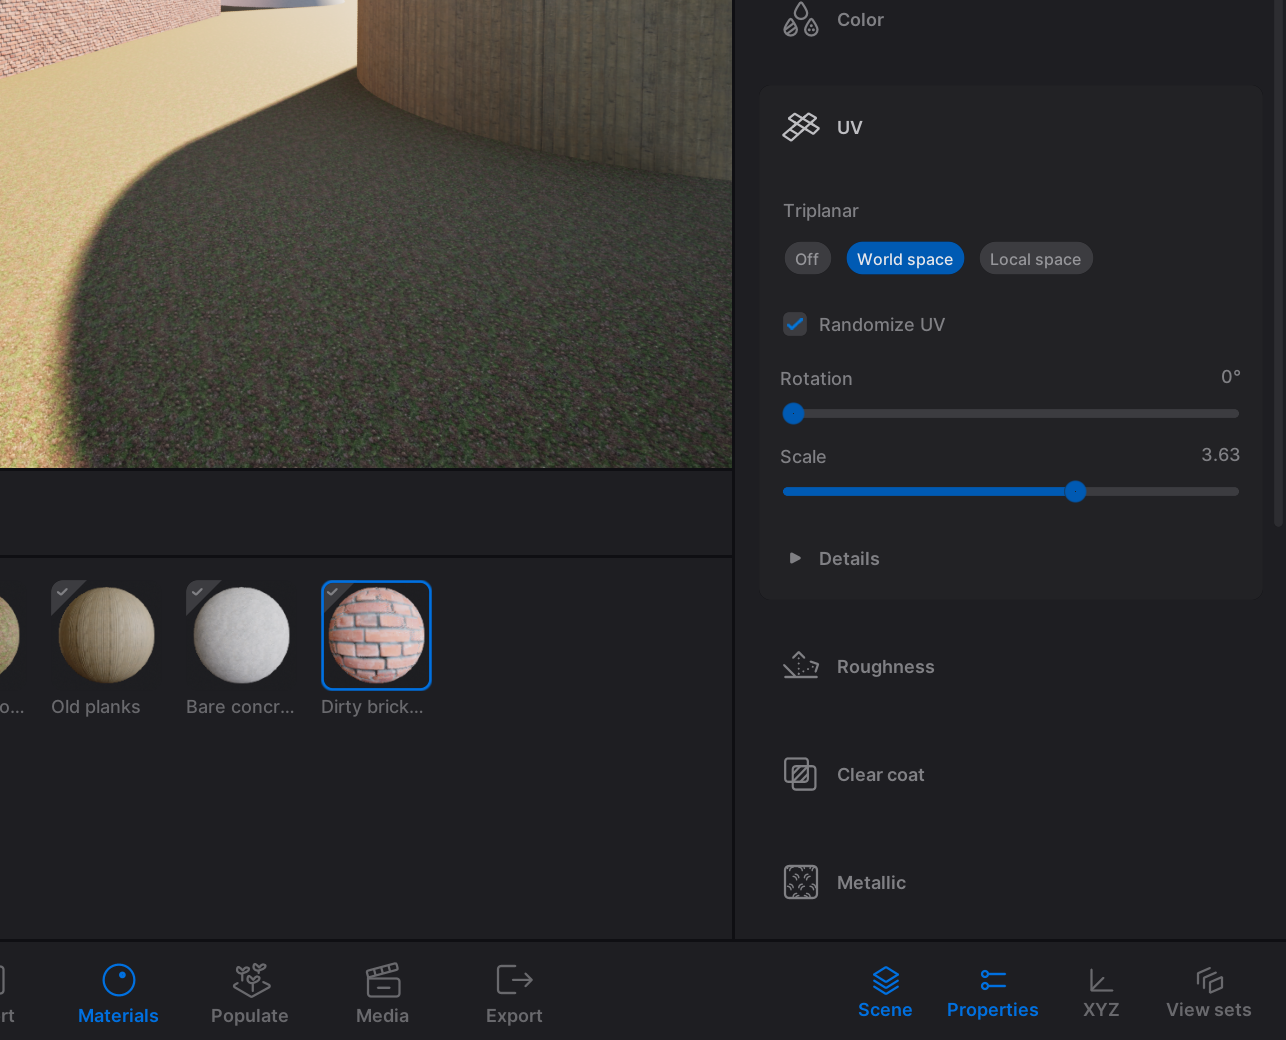
To ensure correct scaling and orientation of your materials, it is recommended to create a custom texture map. This can be done in Rhino as well as Twinmotion. Rhino offers more options to do this, but 9/10 times this is not needed. Therefore, this tutorial explains the way to do it in Twinmotion.
In the Properties tab, navigate to UV.
At Triplanar, select World Space. This will make sure that materials for objects are properly aligned with other objects.
Checking Randomize UV will make sure that materials are aligned randomly. This is useful when you want to eliminate repetition, for example in grass or gravel textures.
Using Twinmotion with Rhino 5/9
Assetslink copied
Place Assets
Go to the library on the left of your screen.
Assets can be found under Vegetation, Objects, Characters and Vehicles. Assets can be placed in the model by simply dragging them into the viewport.
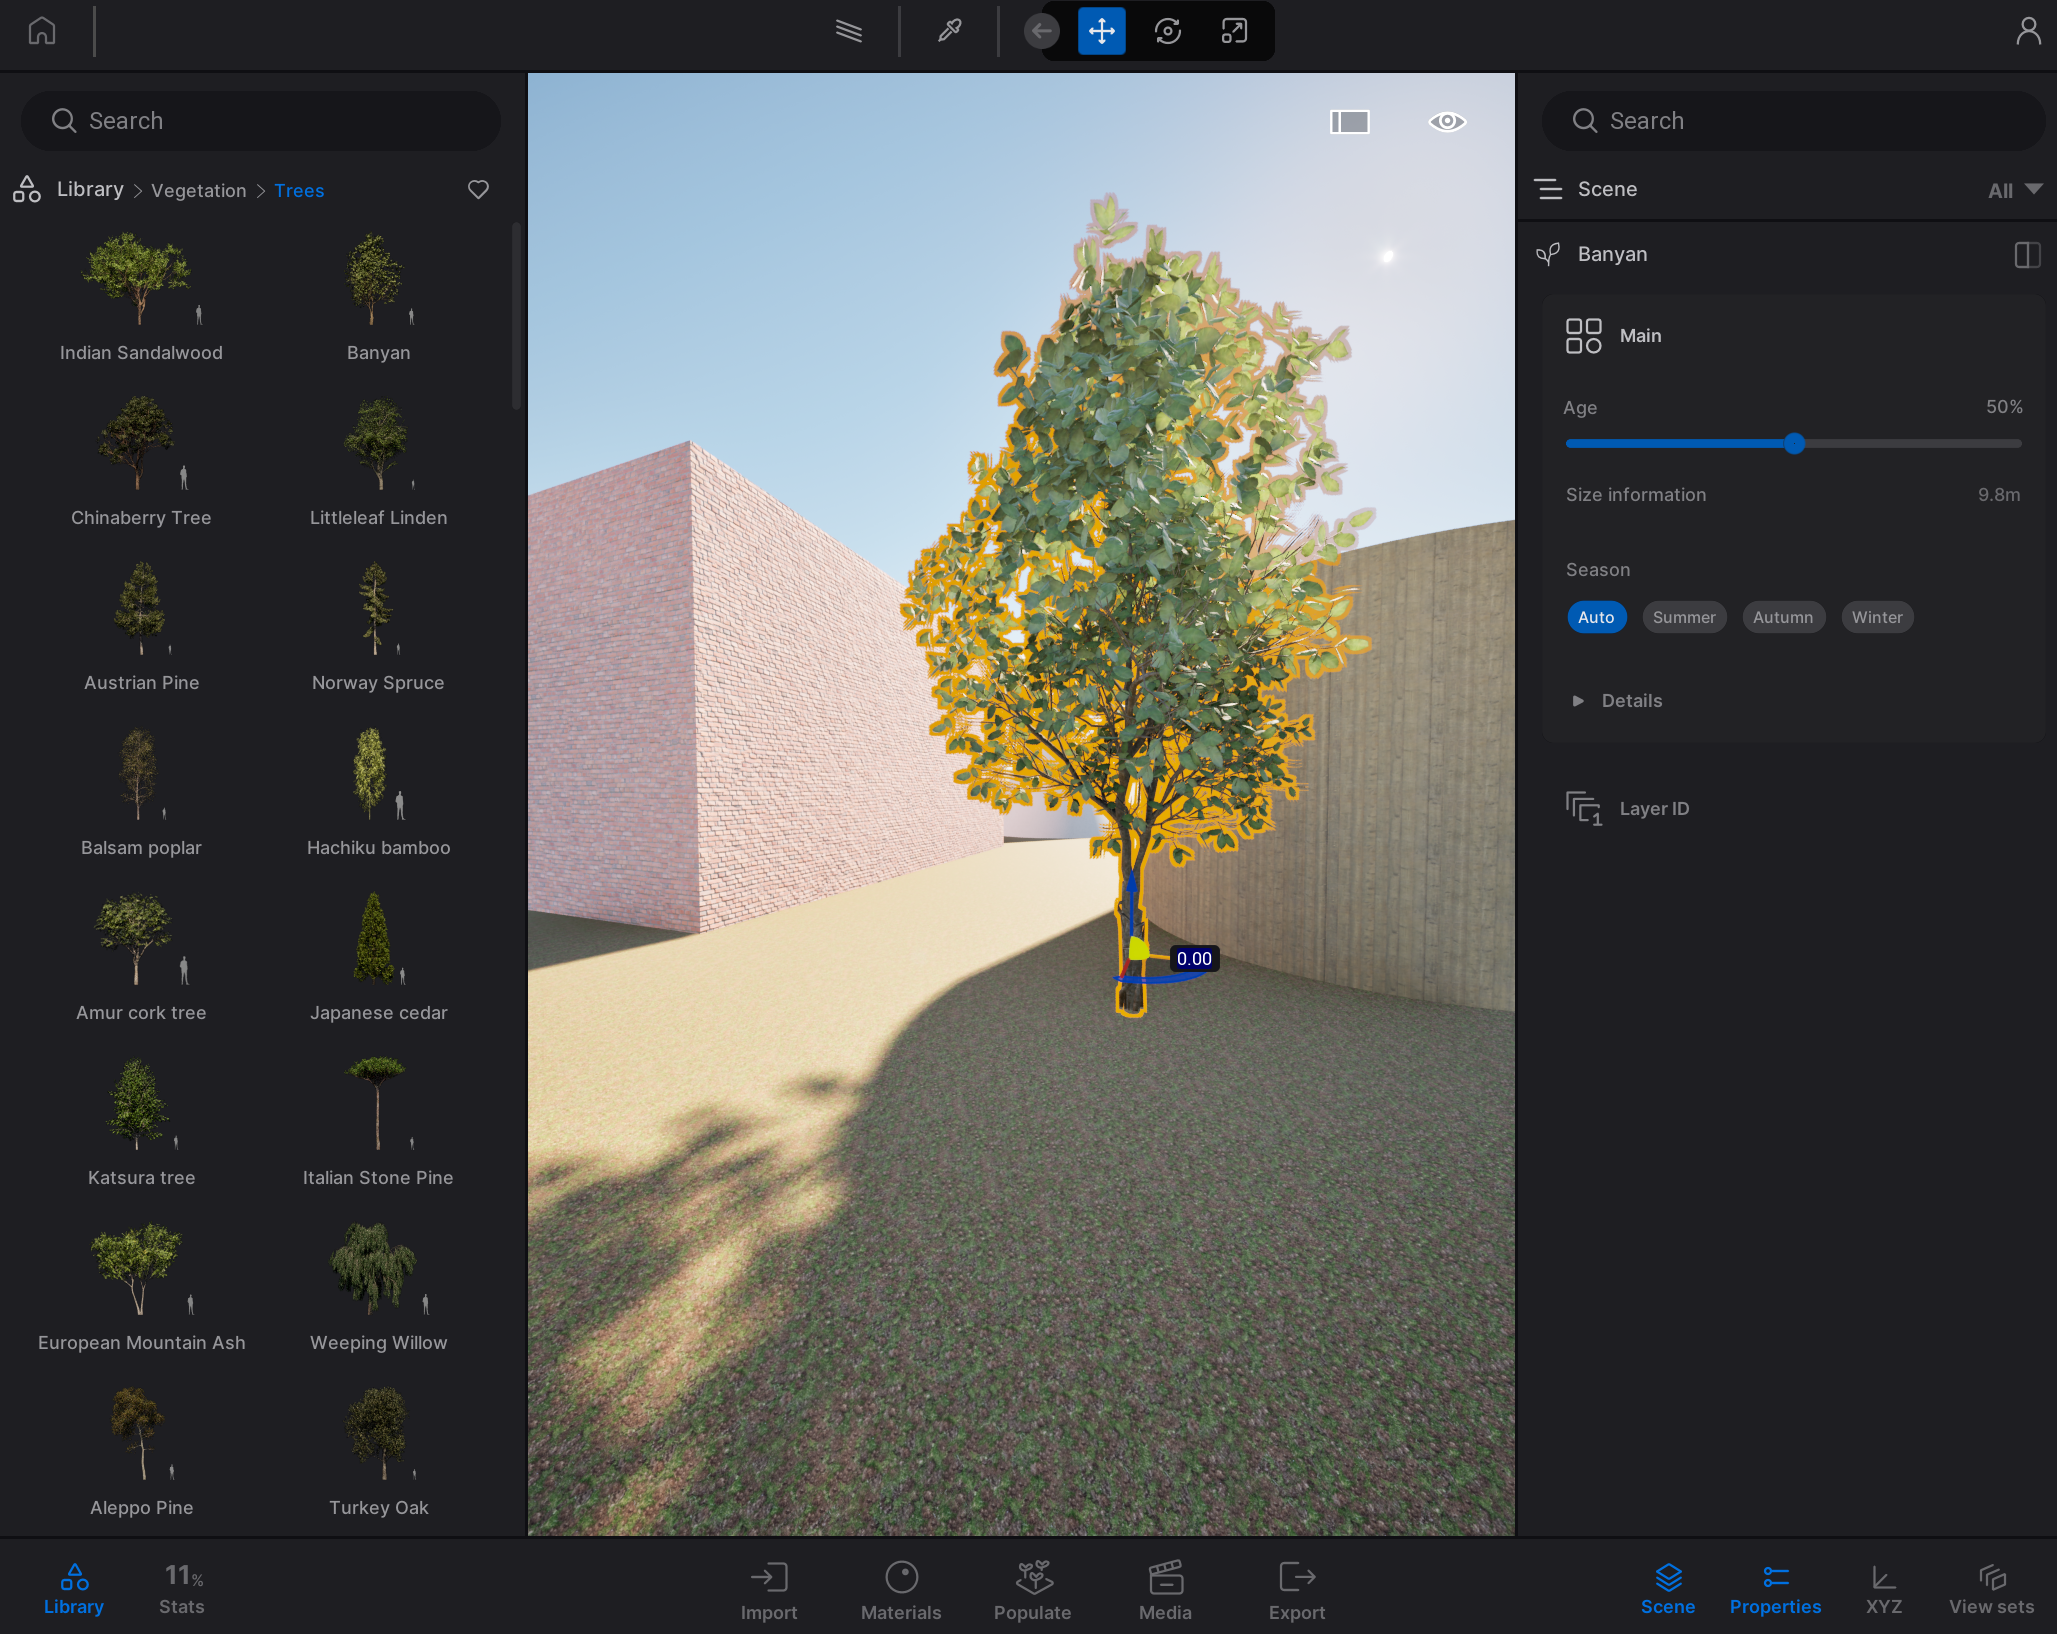
If you want to place the same object multiple times in the same file, it is recommended to do this as instances. Click on the asset you want to duplicate. Drag the gumball while holding shift to copy the object. When the settings appear, make sure that “Instance” is checked. Change the other settings as you like.
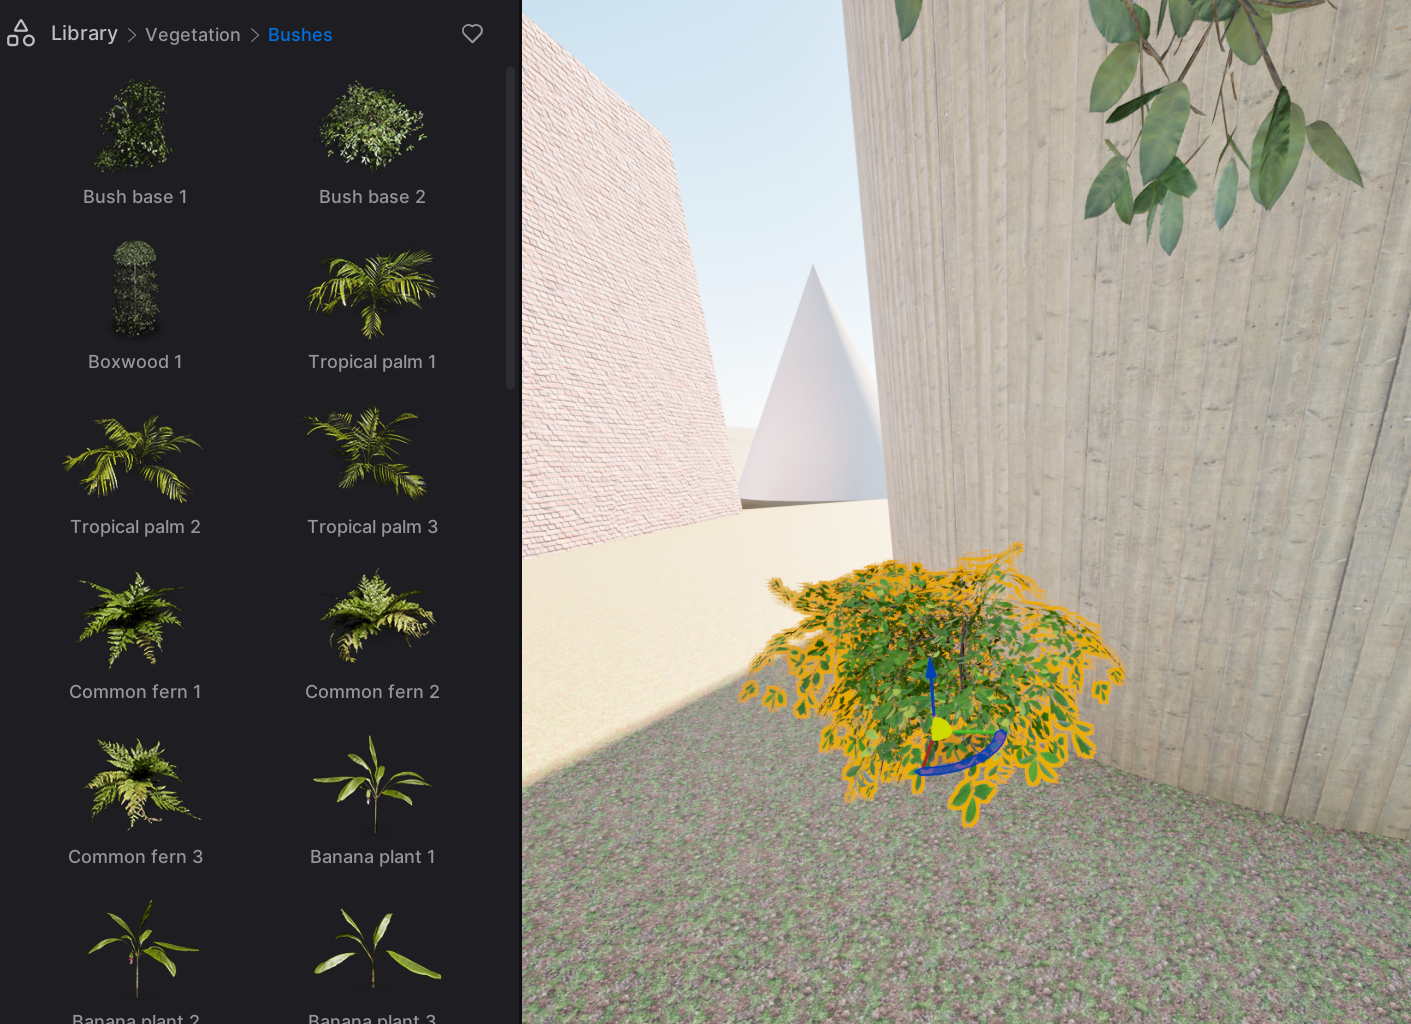
By using “Instances” instead of “copies” (or dragging the same asset multiple times in the model”, the computer only has to load the asset once instead of as many times as you added this asset. Depending on how many assets you use, this can save a lot of computing power/speed.
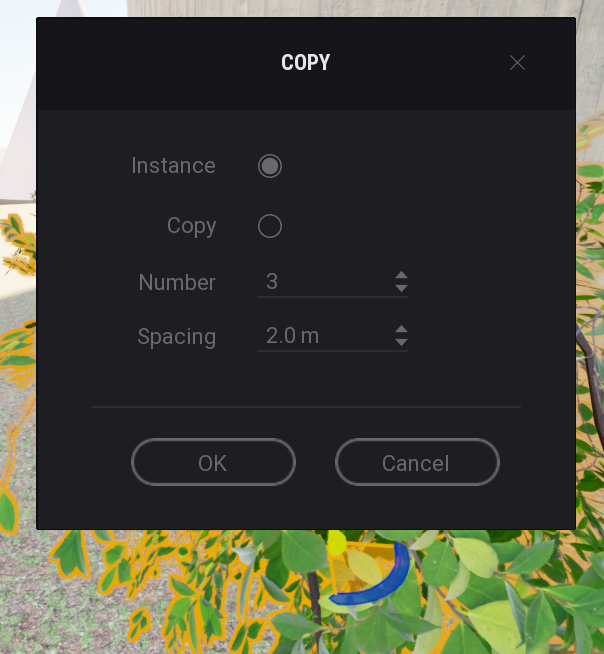
When using instances, it is possible to change the settings for all instances of the same object at the same time. This can be very useful for lighting when you do not want to change the settings for all lights individually.
Populate
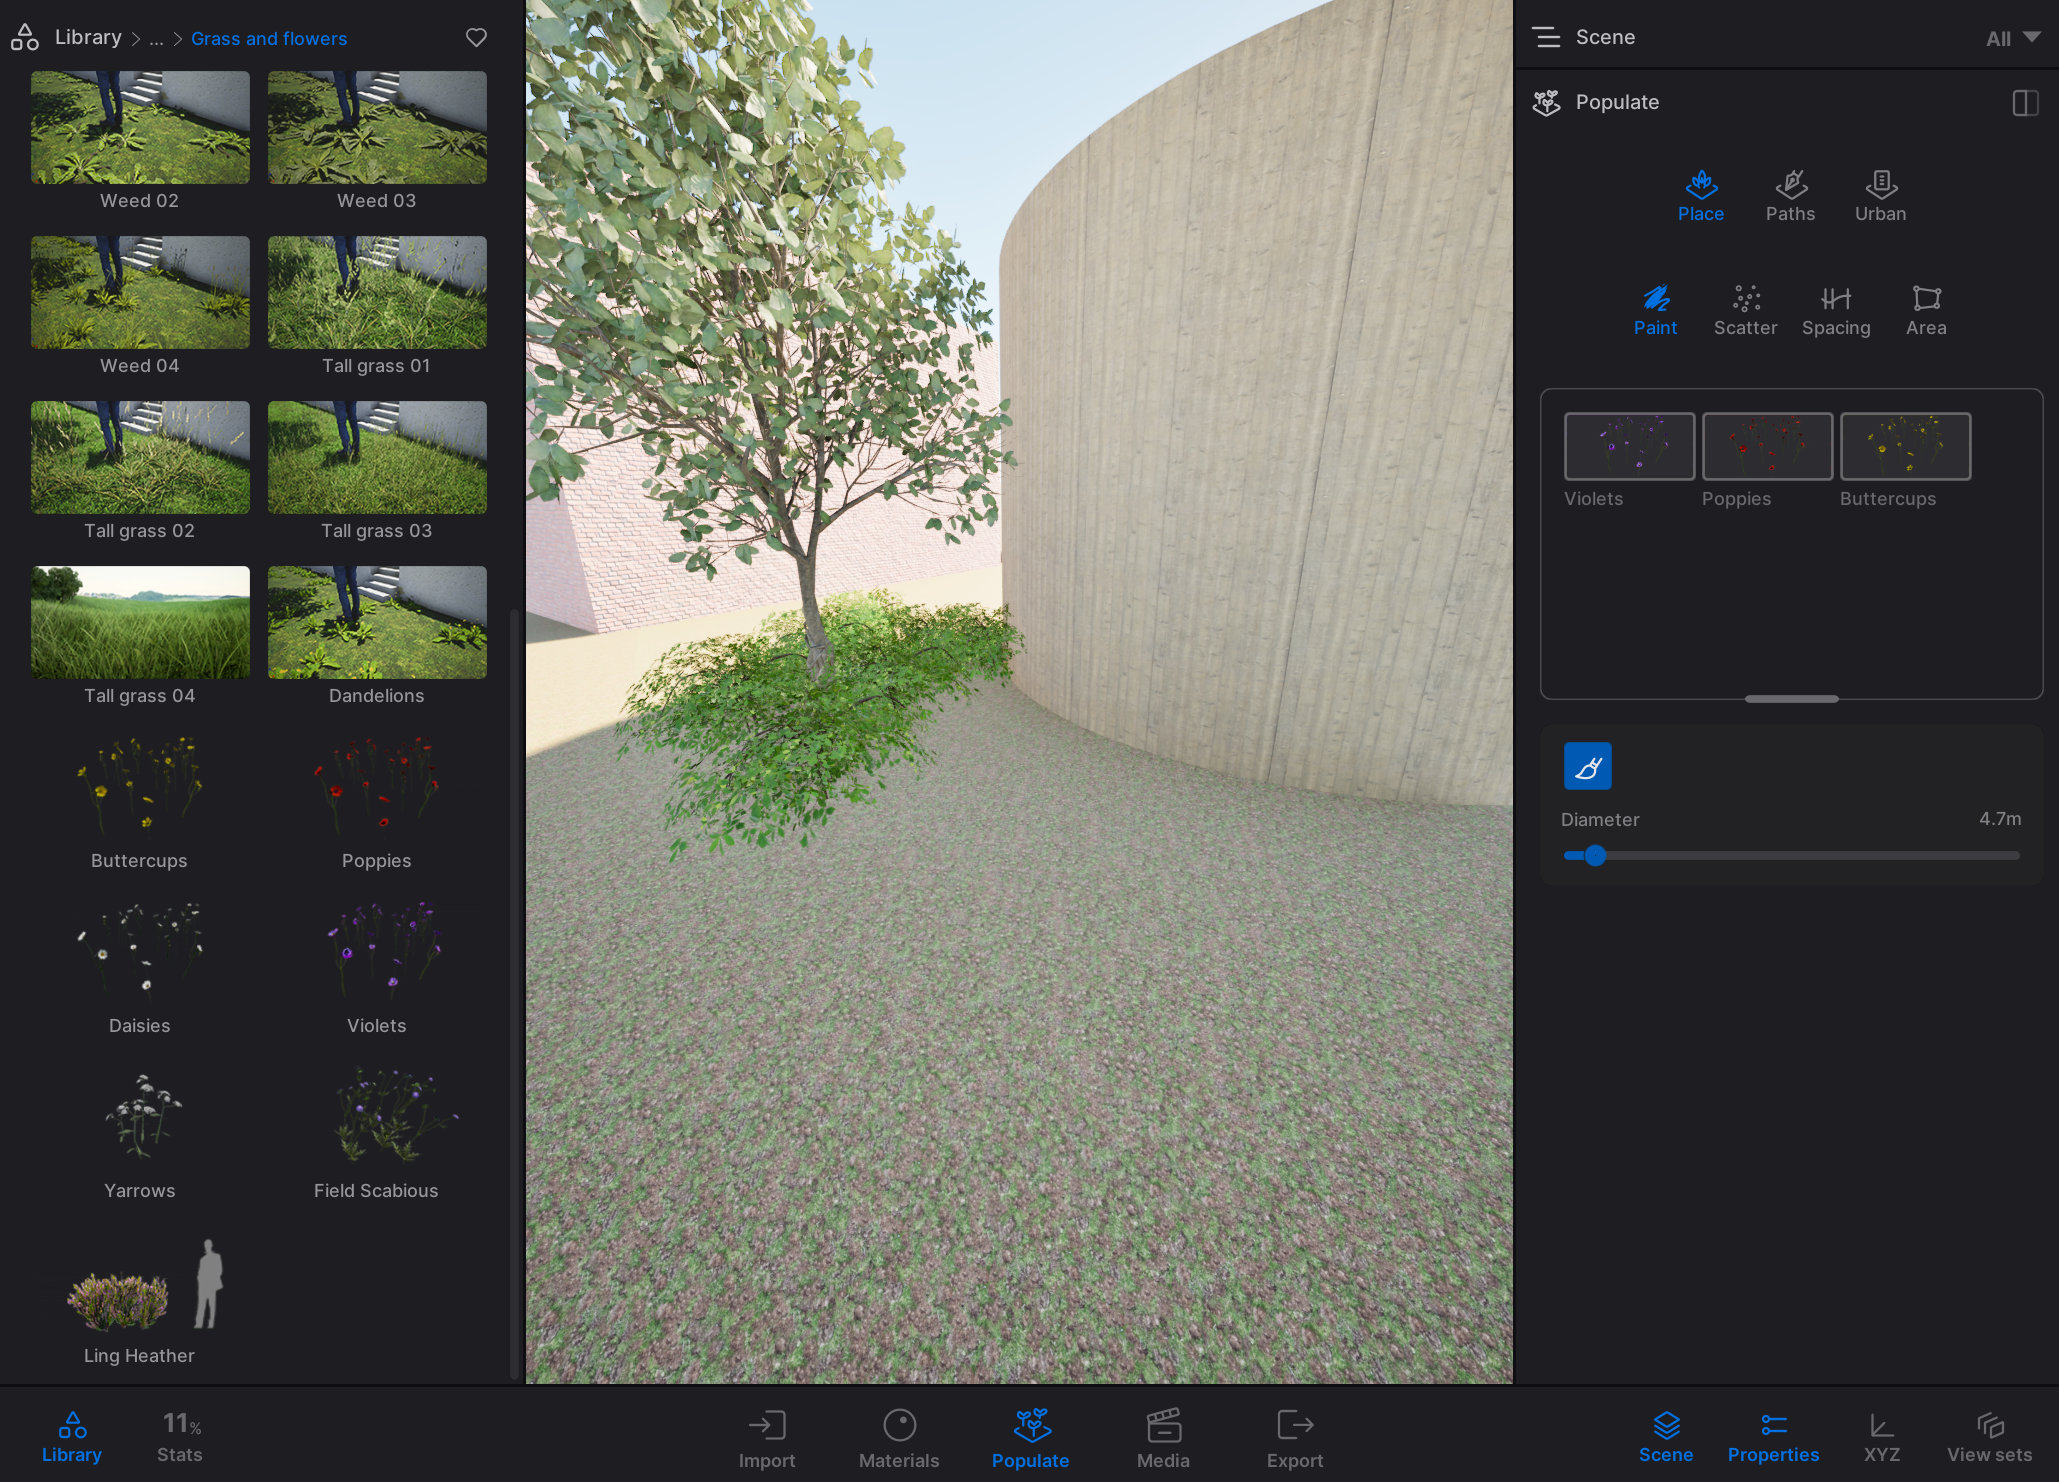
The populate panel, that can be found at the bottom center of your screen and will appear on the right side of your screen, includes ways in which the user can more efficiently place certain assets.
The place tool is primarily used for static objects such as trees, rocks or grass. It is best to learn the way this tool works by testing each method for yourself.
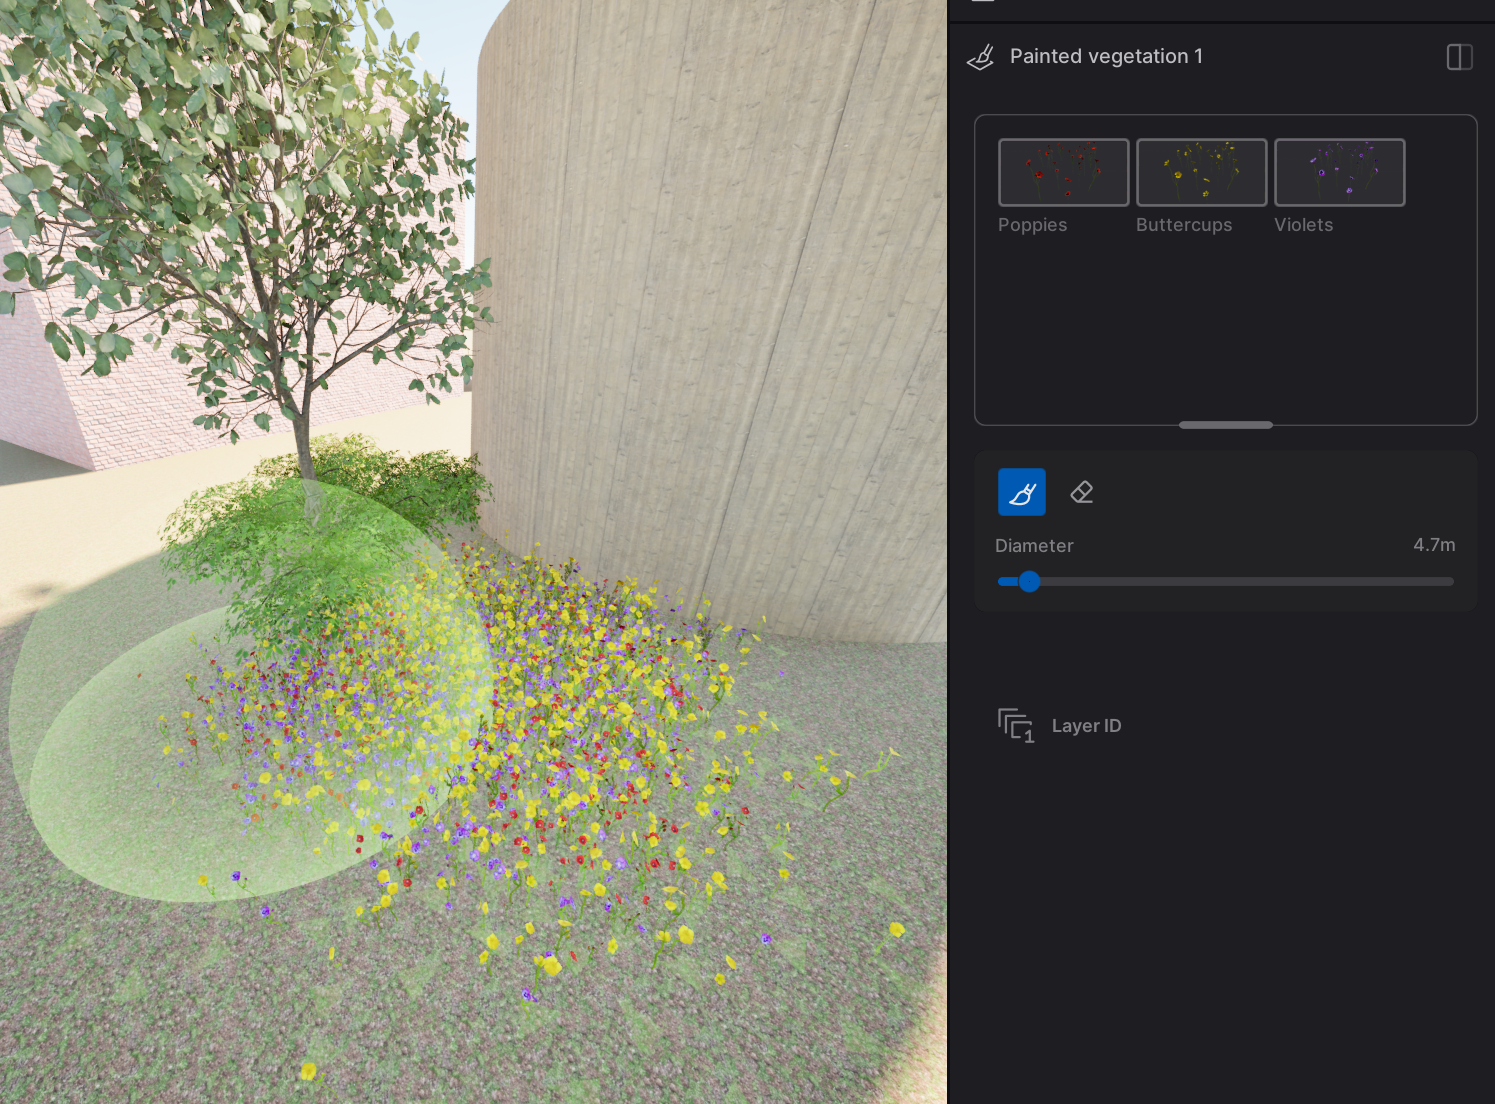
- Select the method of your choosing (like “paint”)
- Place the objects you want to use in the rectangle that appears underneath the chosen method.
- Press the tool at the bottom left of the rectangle to draw where you want your objects to appear.
- “Scatter” places the objects onto an entire object.
The Paths tool allows you to draw a path for moving people, bikes or cars. Customize as you like.
Urban allows you to place an actual urban context in your model.
Lights
Add light sources to Twinmotion by navigating to the library on the left of your screen and dragging a light source into your scene.
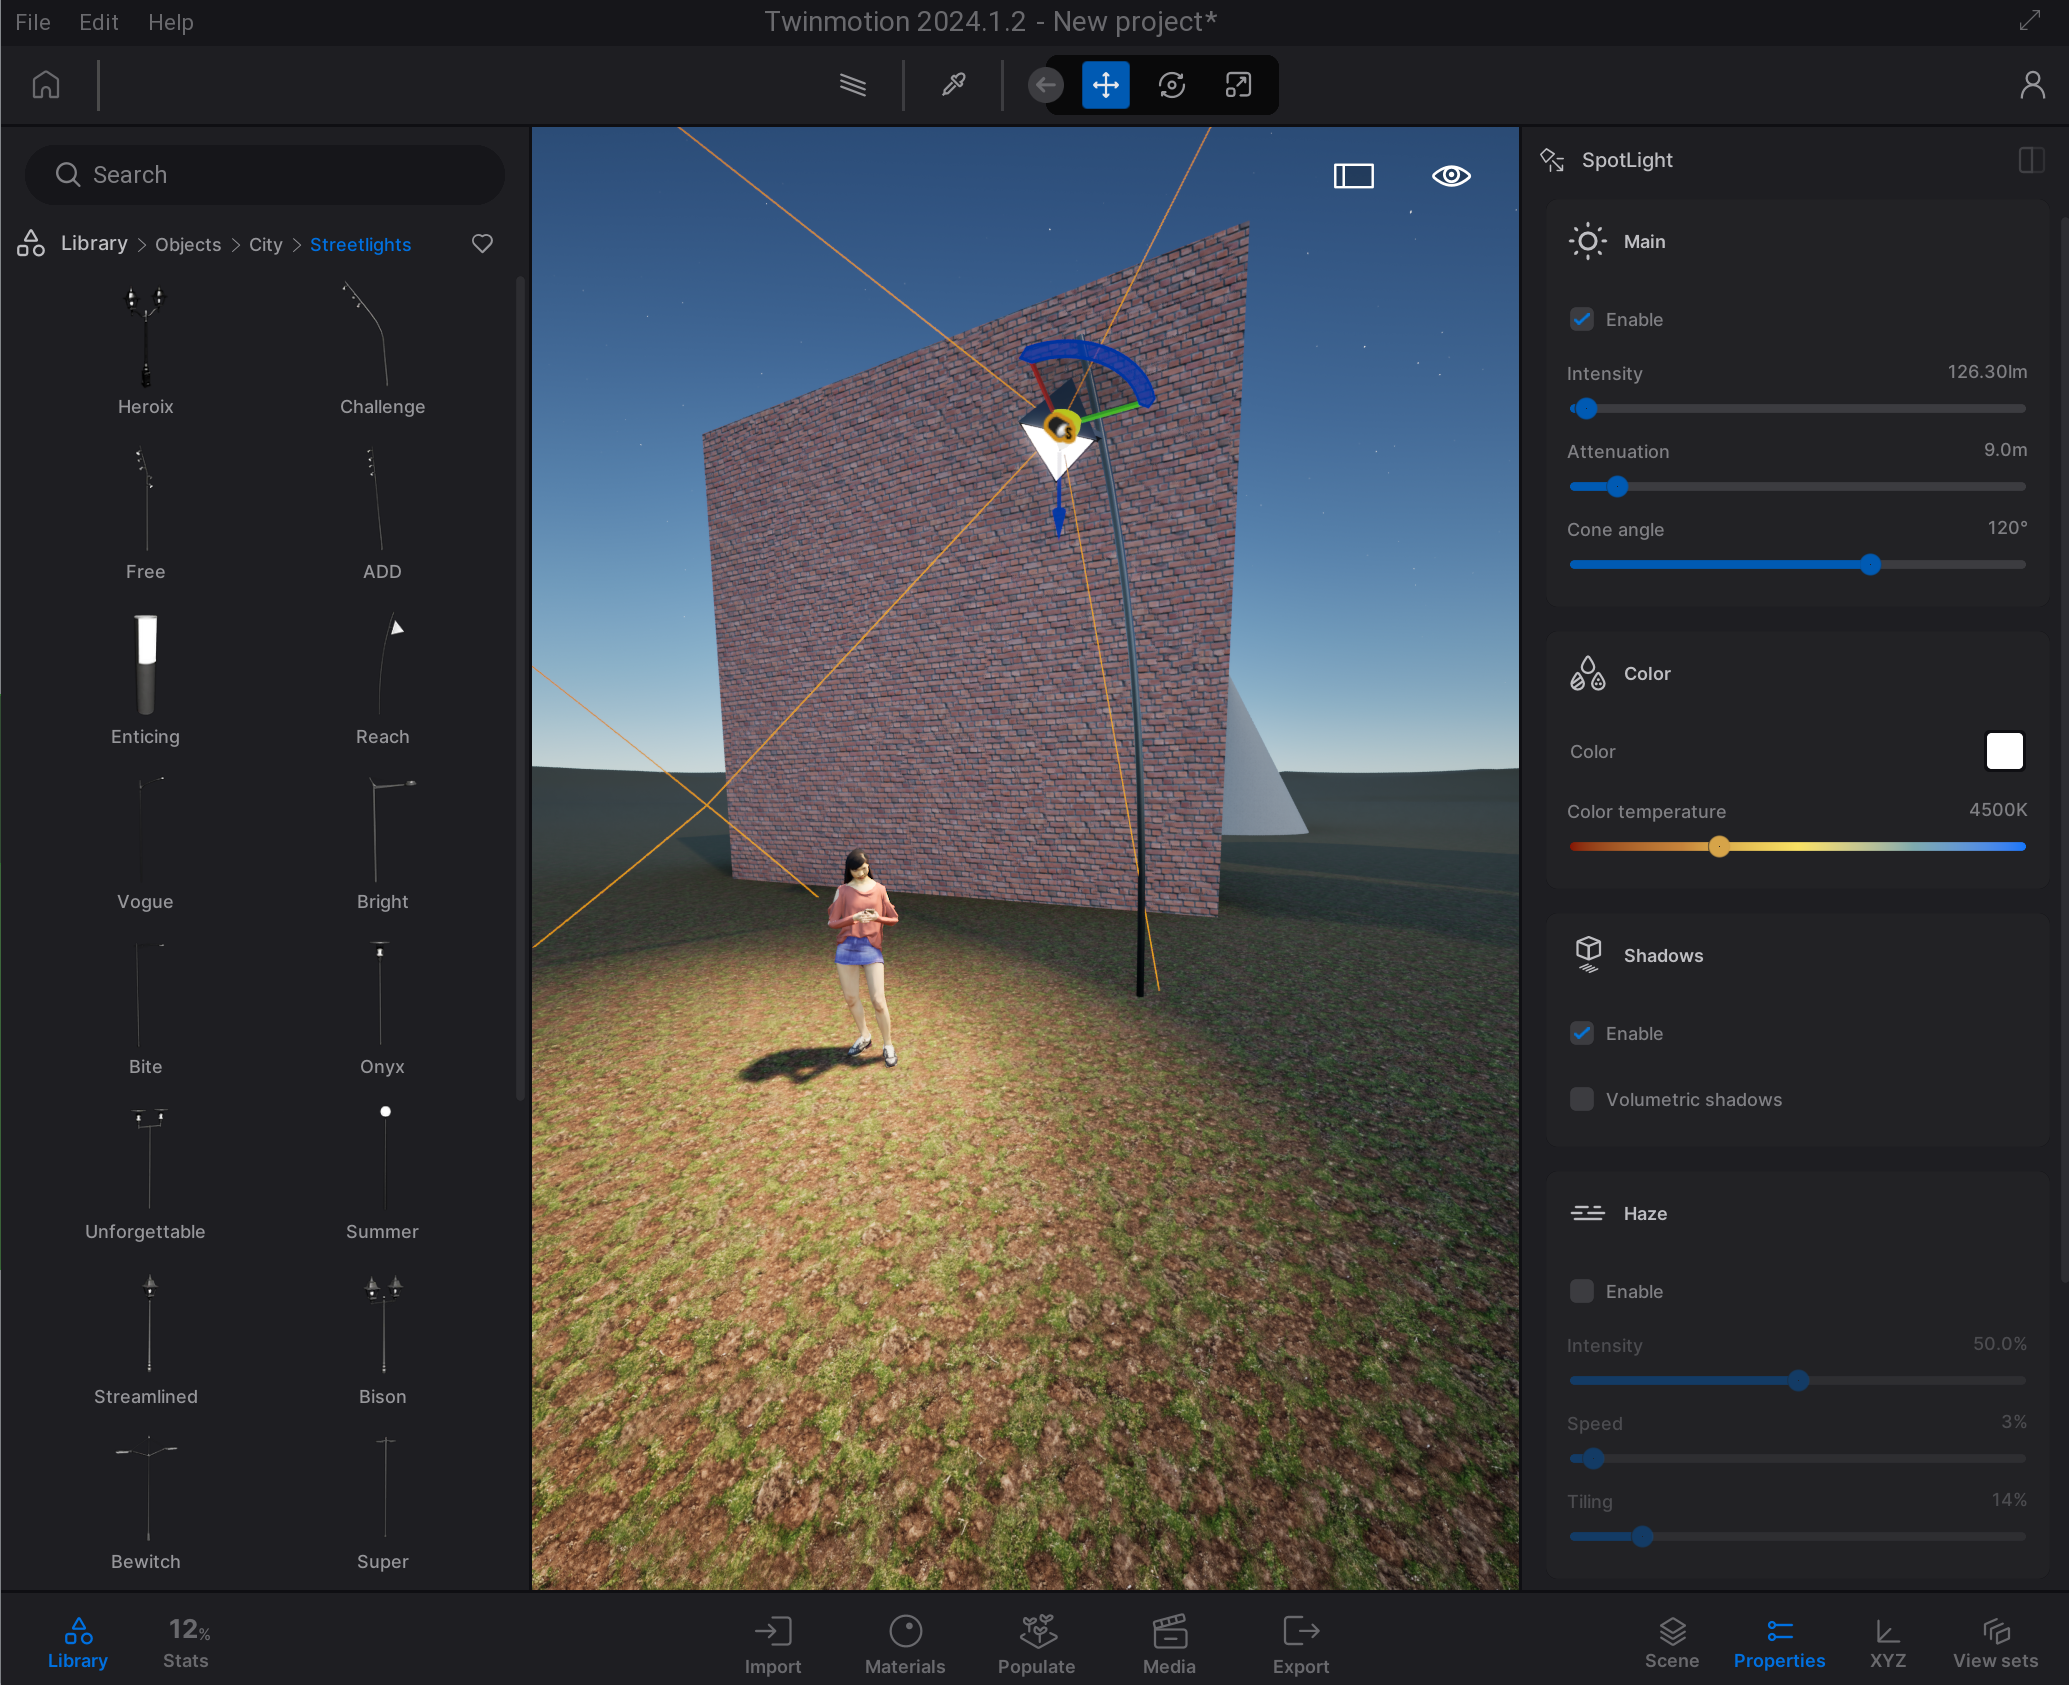
Open the light properties by clicking on the light source.
Turn the shadows on by clicking on “Shadows” and check “Enable”.
The lighting color can be changed under “Color”.
The amount of light can be changed under “Main” with the Intensity slider.
Make sure that the “Enable” box under “Main” is checked, otherwise the light turns off.
- This setting is useful when you want to turn it off in a certain picture or video.

Using Twinmotion with Rhino 6/9
Ambiencelink copied
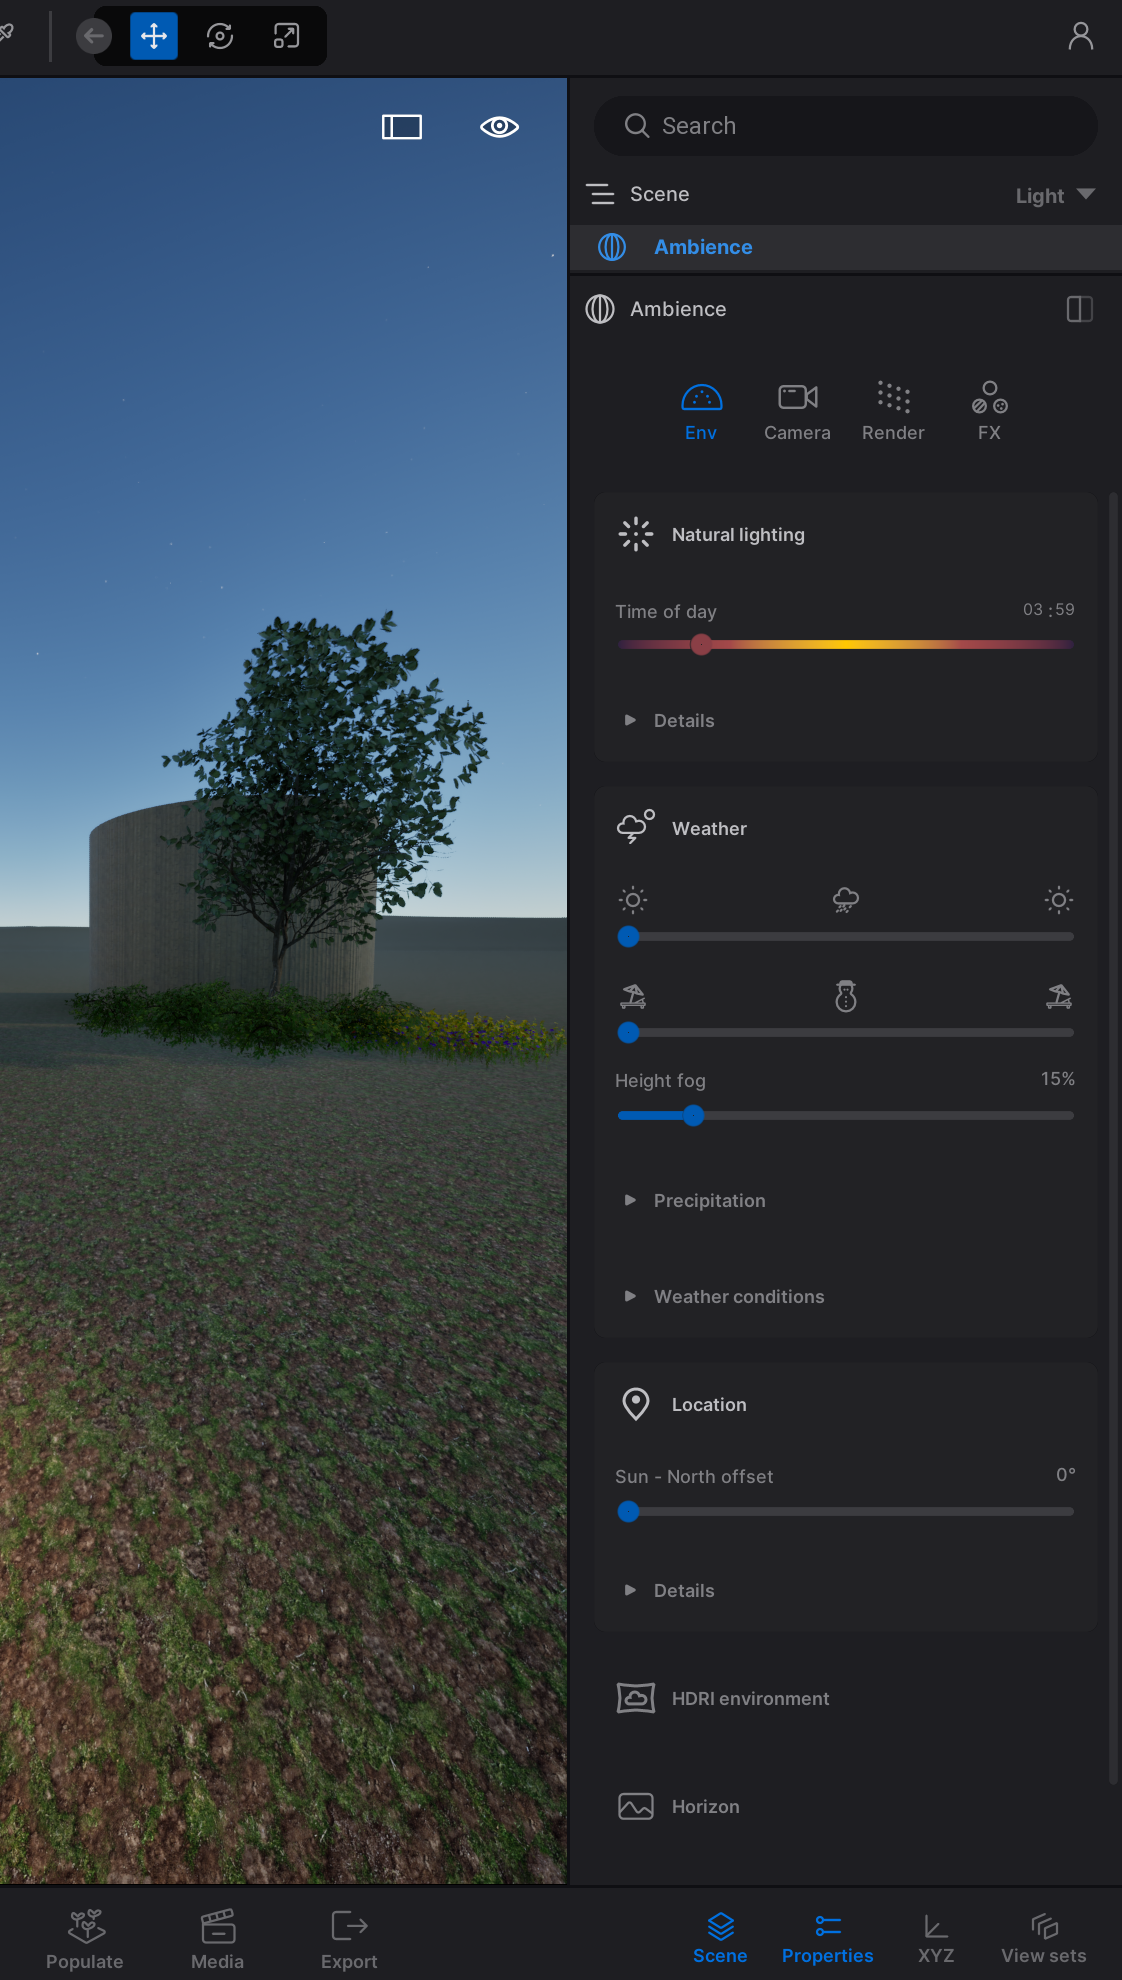
In your scene graph, select “Ambience”. This will open a menu with settings that are related to the environment (lighting, weather, etc.), your camera, render quality and effects. Make sure to play with settings from all tabs at the same time, there is no correct order.
Environment
The environmental properties in Twinmotion are quite extensive and require personal preference and lots of trial and error.
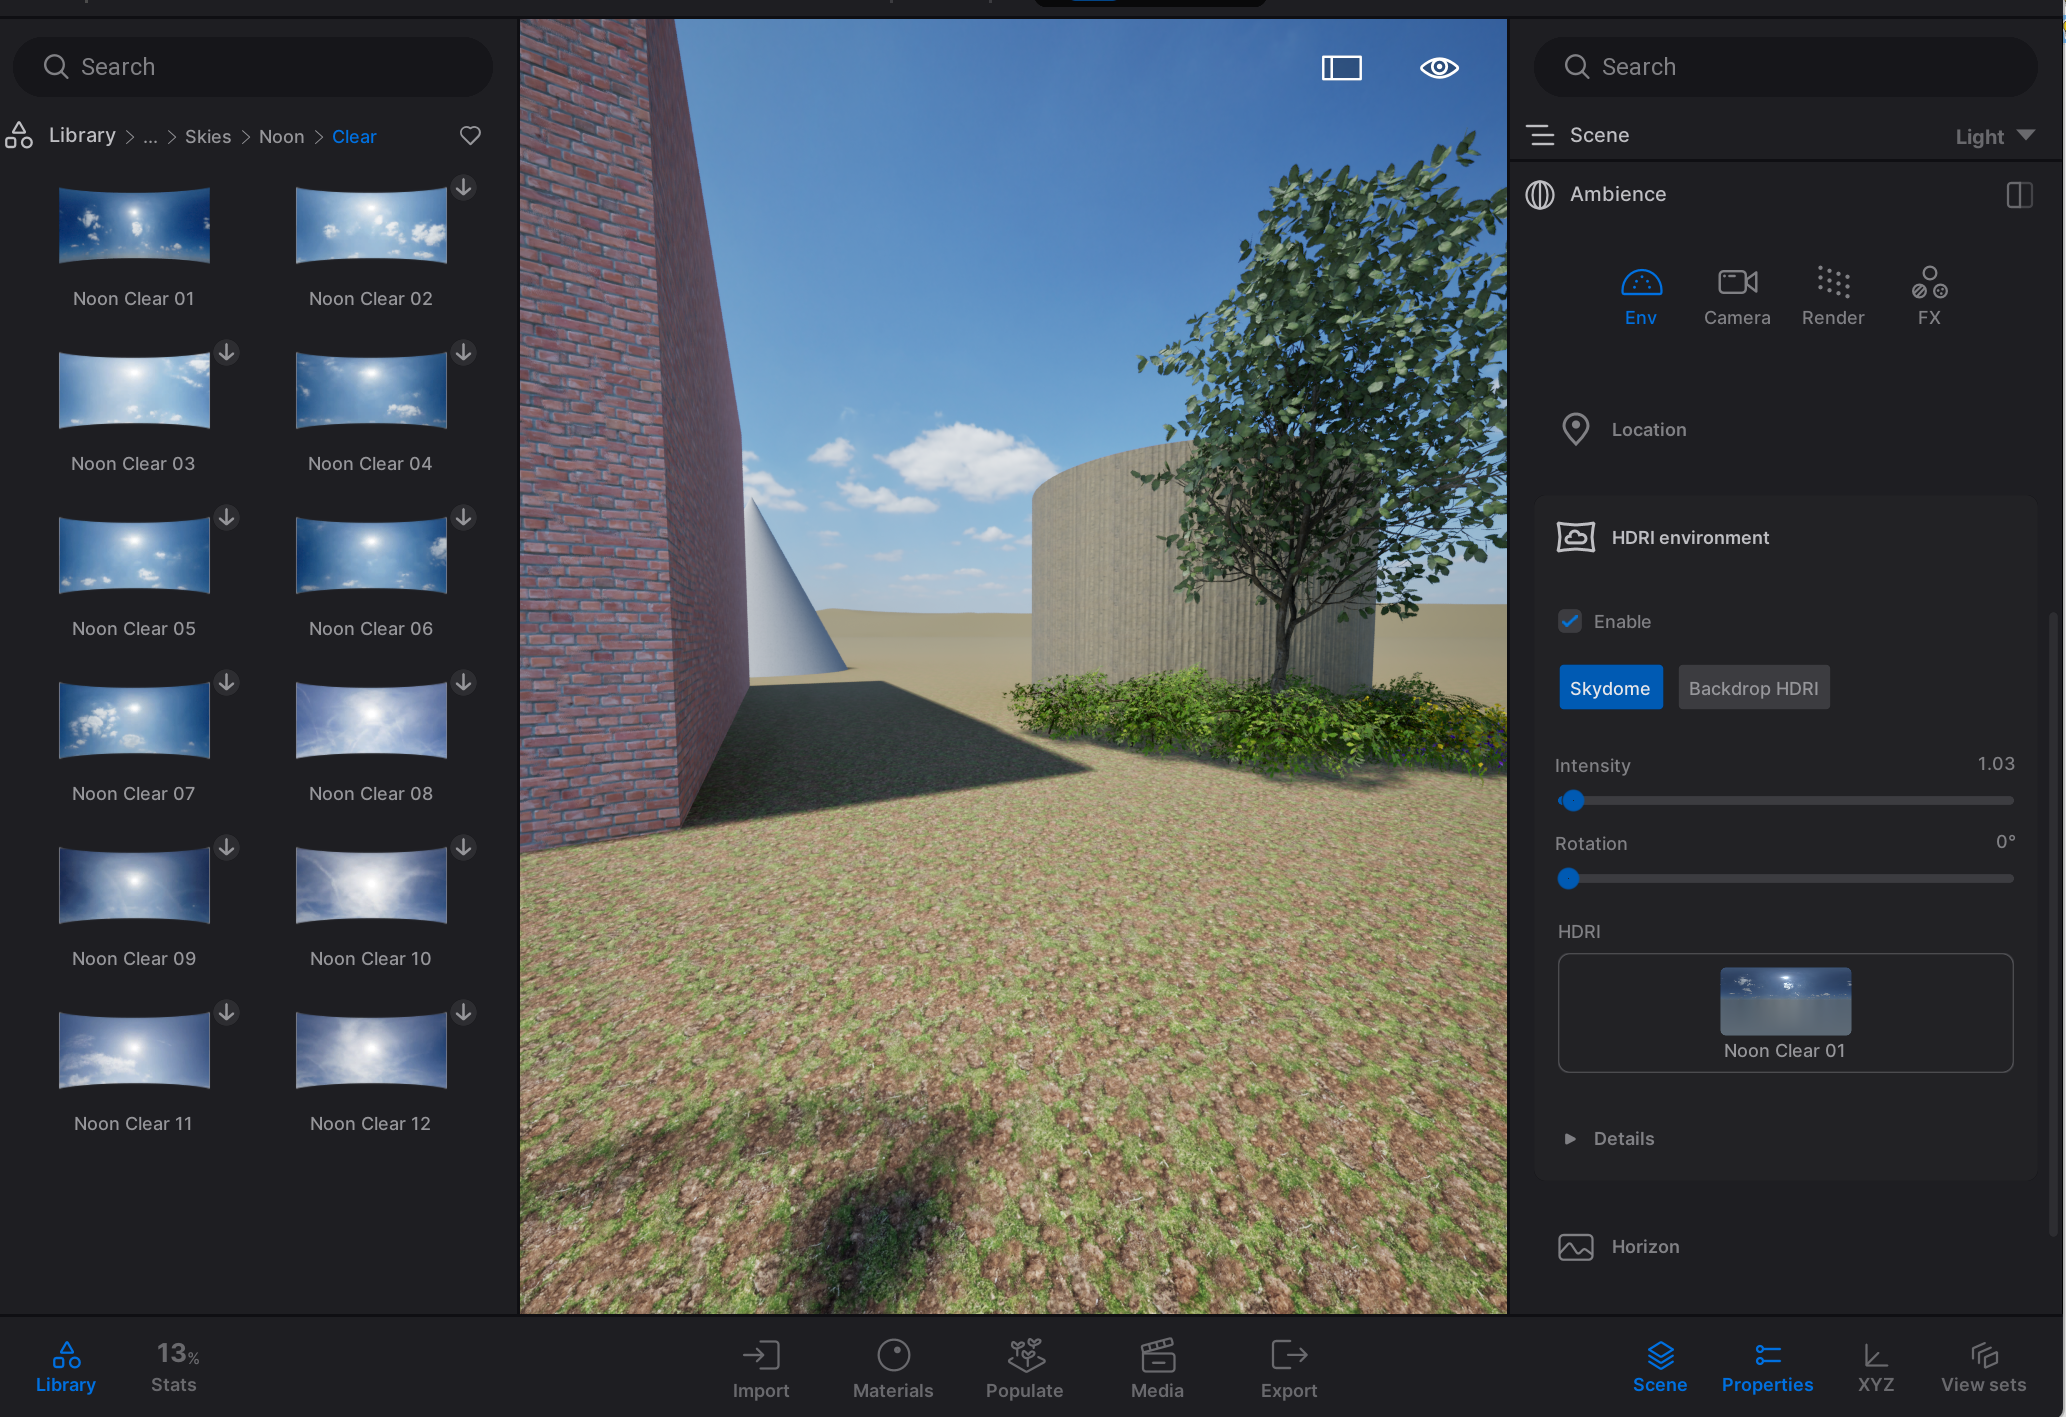
Add an HDRI to your model by opening the library on the left of your screen, selecting HDRI environments, choosing an HDRI and dragging it into the model.
- The sky dome HDRI’s are under “skies” and only include a sky, in conterdiction to other HDRI’s that might include a forest, city or field.
- Using an HDRI allows you to have very accurate lighting as well as lots of possibilities regarding unique and dramatic sky domes.
In the ‘HDRI‘ menu, experiment with both the rotation and intensity settings. Adjusting the intensity is particularly crucial, as it plays an important role in achieving sufficient brightness in your render while maintaining high-quality lighting.
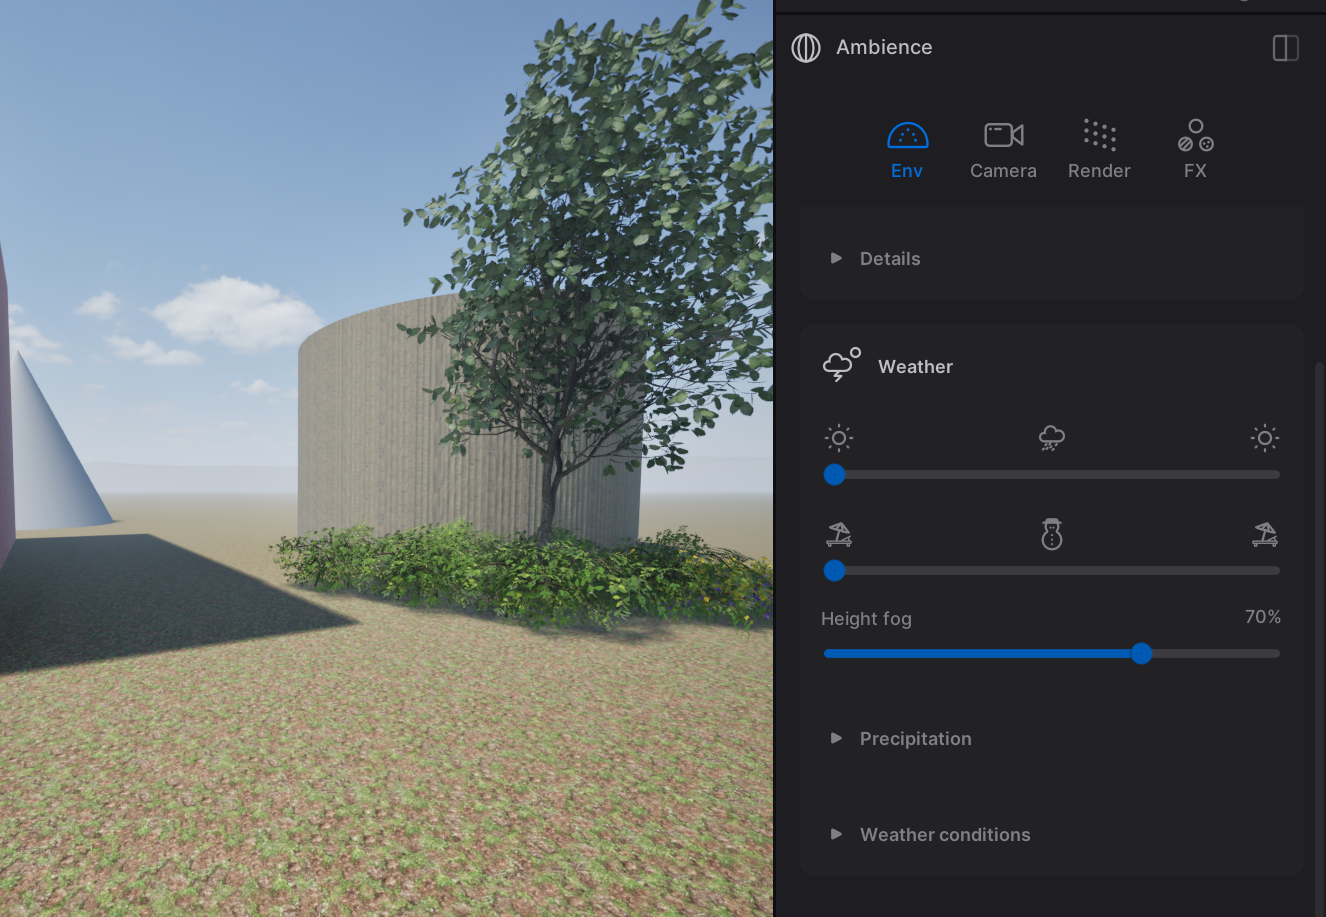
It is possible to change the weather and the season by changing the settings in the “Weather” tab. It is possible to render rain as well as snow. However, the rain particles turn off when the path tracer is turned on.
In the “Weather” tab, there is a slider that controls the height fog. This can be used to hide the horizon when it is visible in your model.
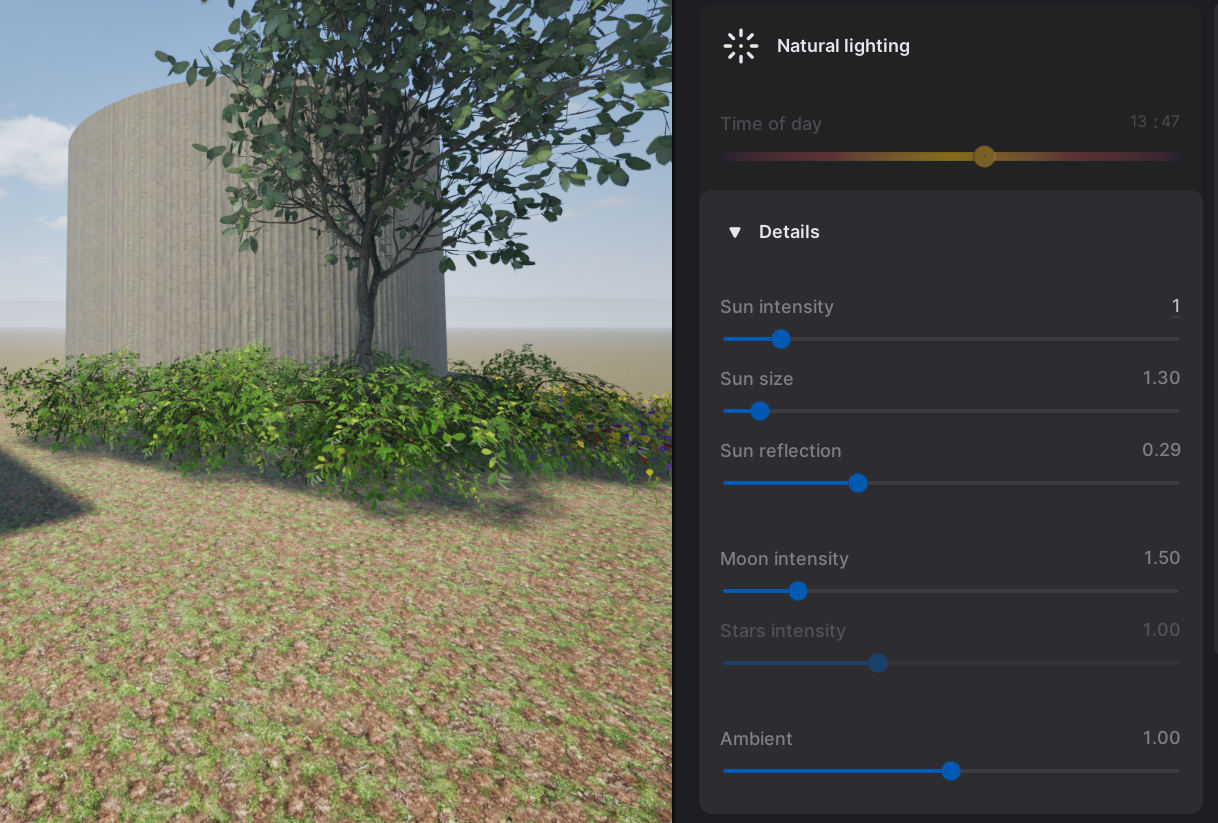
The “Natural Lighting” tab includes settings regarding special lighting. By increasing the sun’s intensity, you can make more light come from a certain location (the sun), while the ambient setting controls the base lighting in your entire scene.
Camera
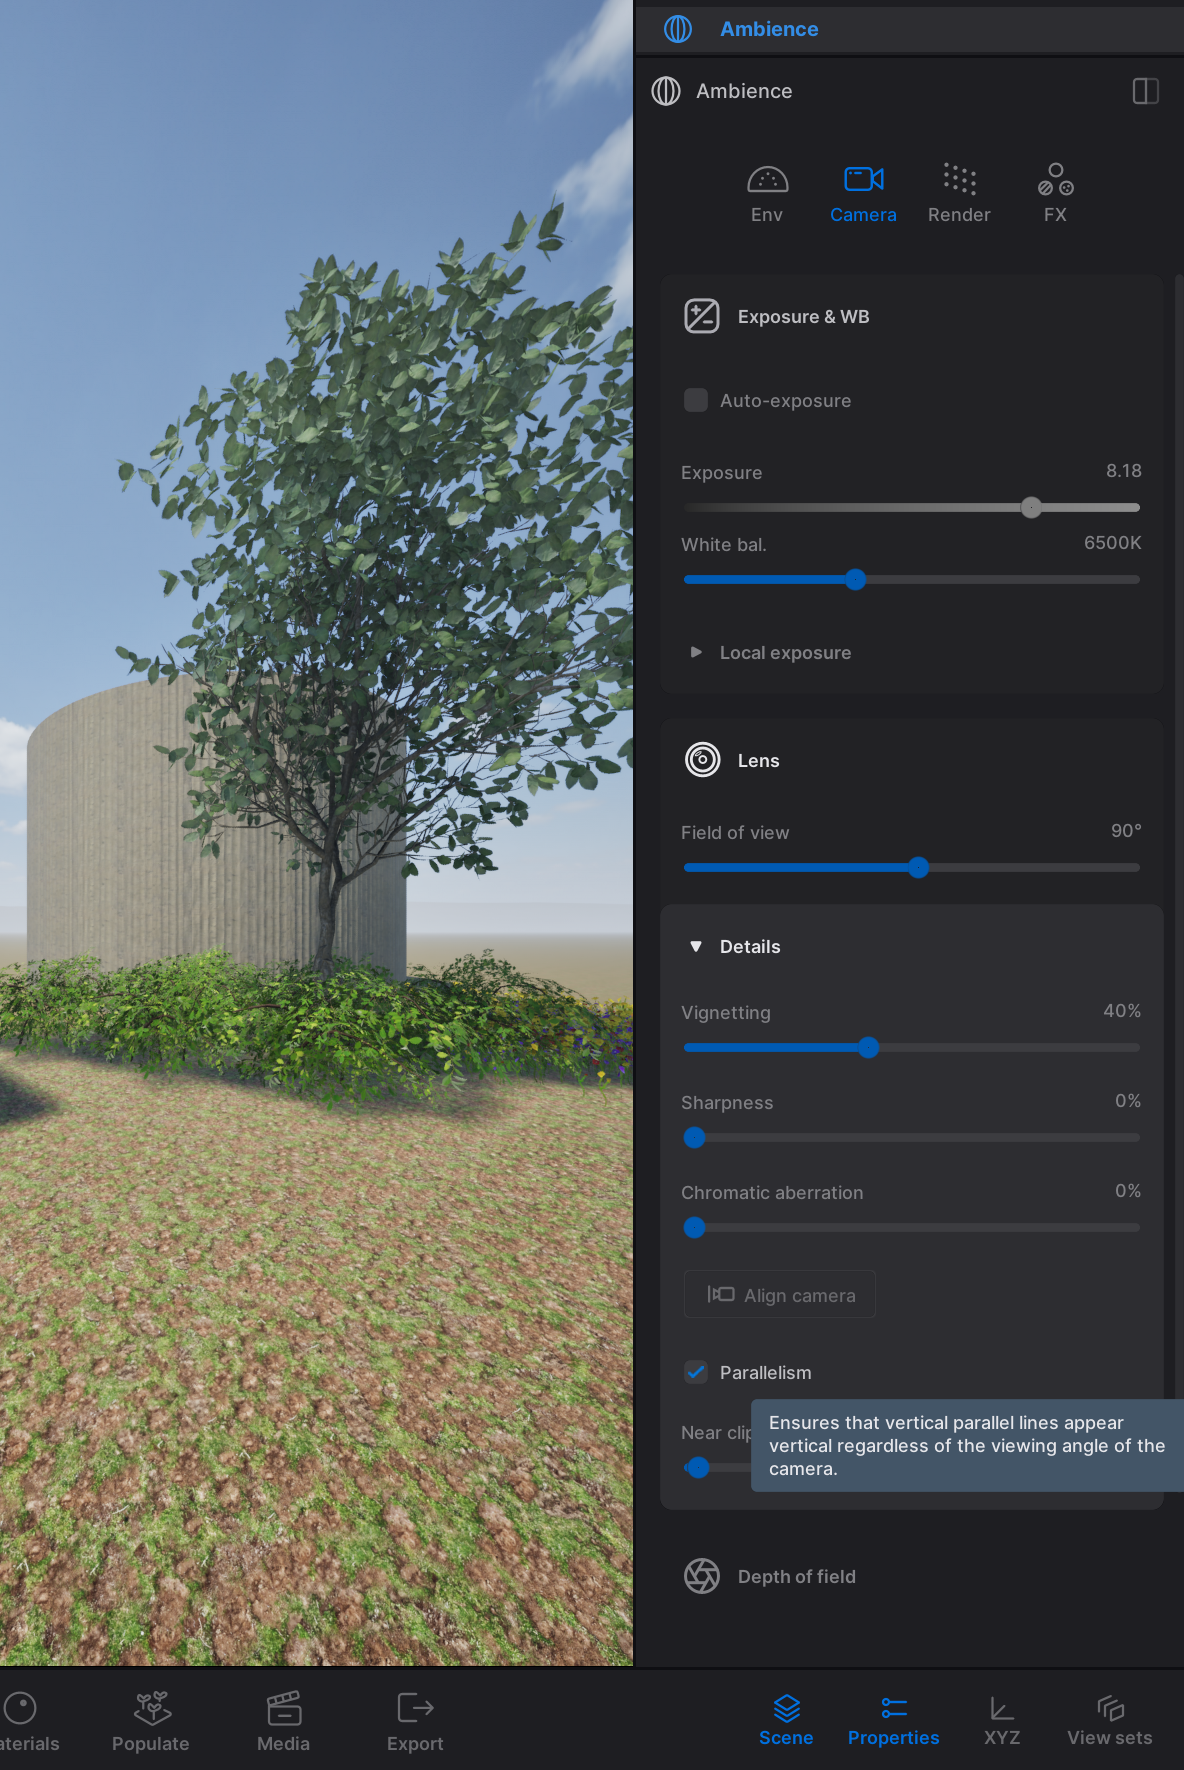
Turn off Auto-exposure. Doing this gives you more control over the brightness of your renders.
- Normally, the Exposure should be around 0.
Under the “Lens” tab, you can find settings for the camera zoom as well as some other settings regarding the lens.
The focal length controls the zoom of your camera.
Turn Parallelism on. This setting makes lines from the bottom to the top of your screen lines truly straight. This is the industry standard for architectural visualizations.
Render
The Render tab includes the settings for the type of rendering engine you want to use.
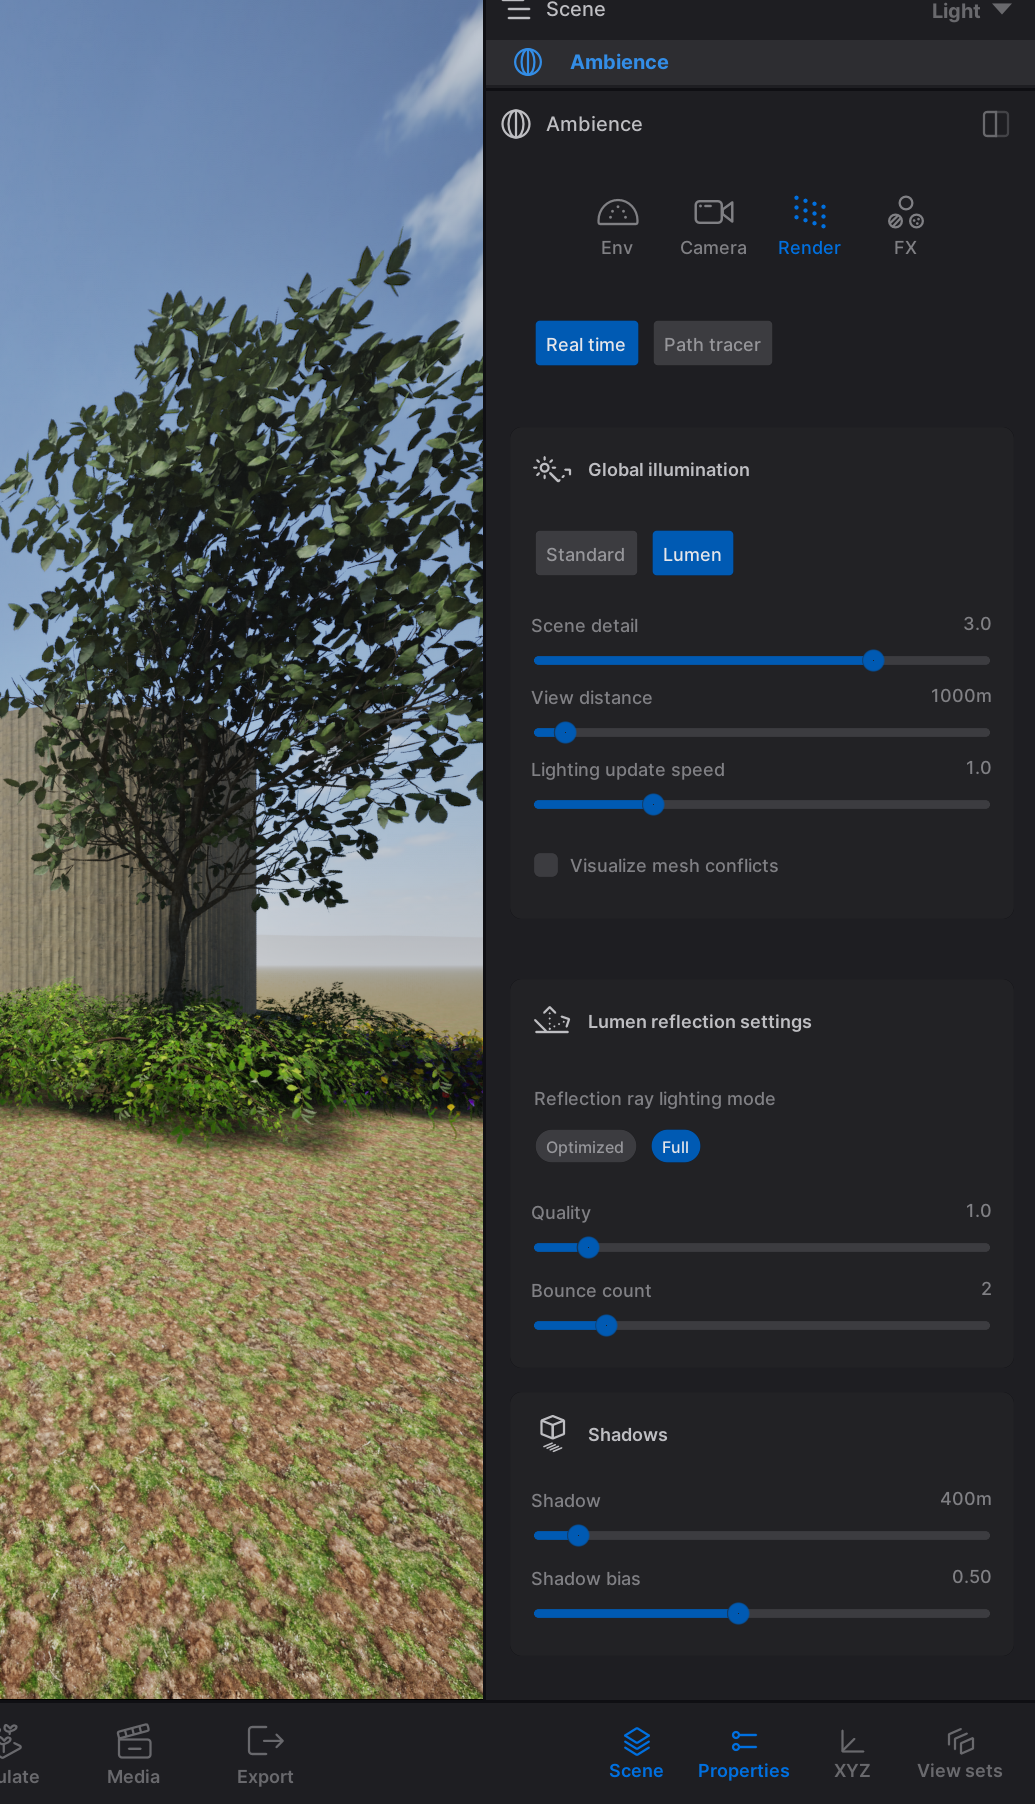
Choose “Real Time” for a fast render in real time.
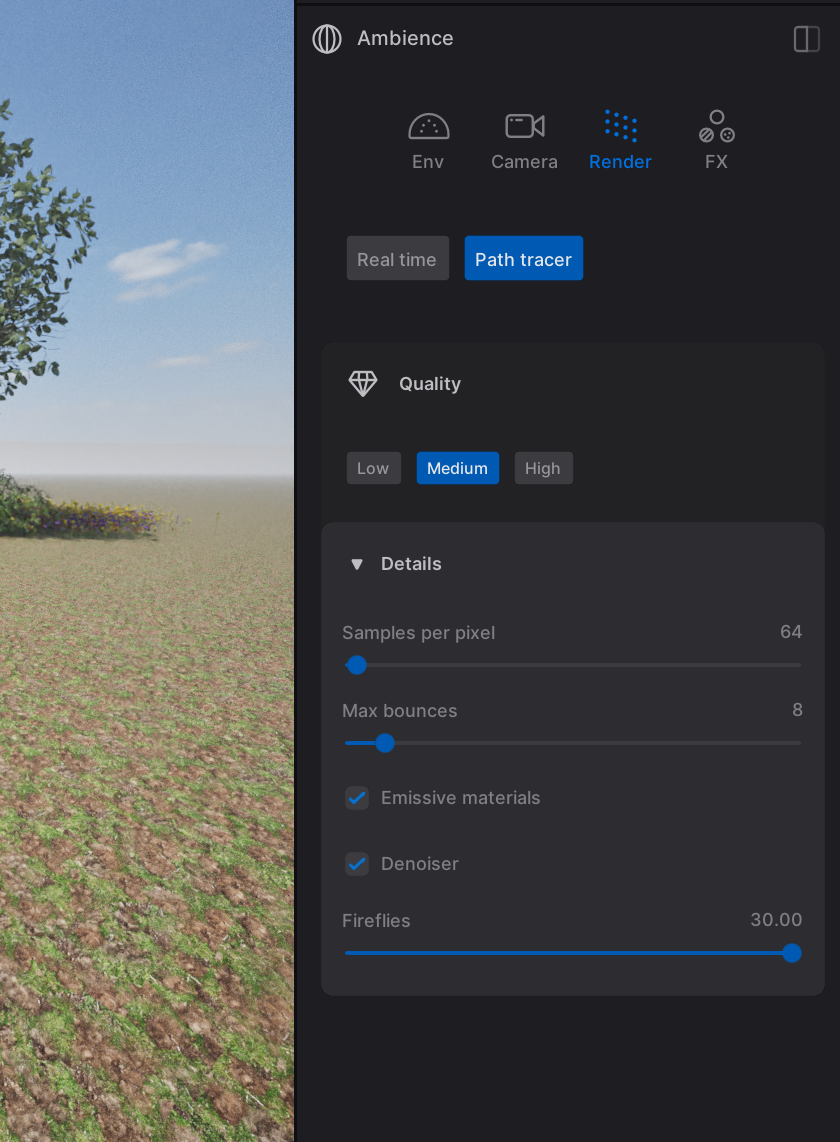
Choose “Path tracer” for a high-quality render with more accurate lighting.
- The path tracer is able to depict reflections much more accurately than the real time renderer. However, you trade computing time for accuracy. Rendering with the path tracer takes significantly more time, and not all computers are capable of doing this.
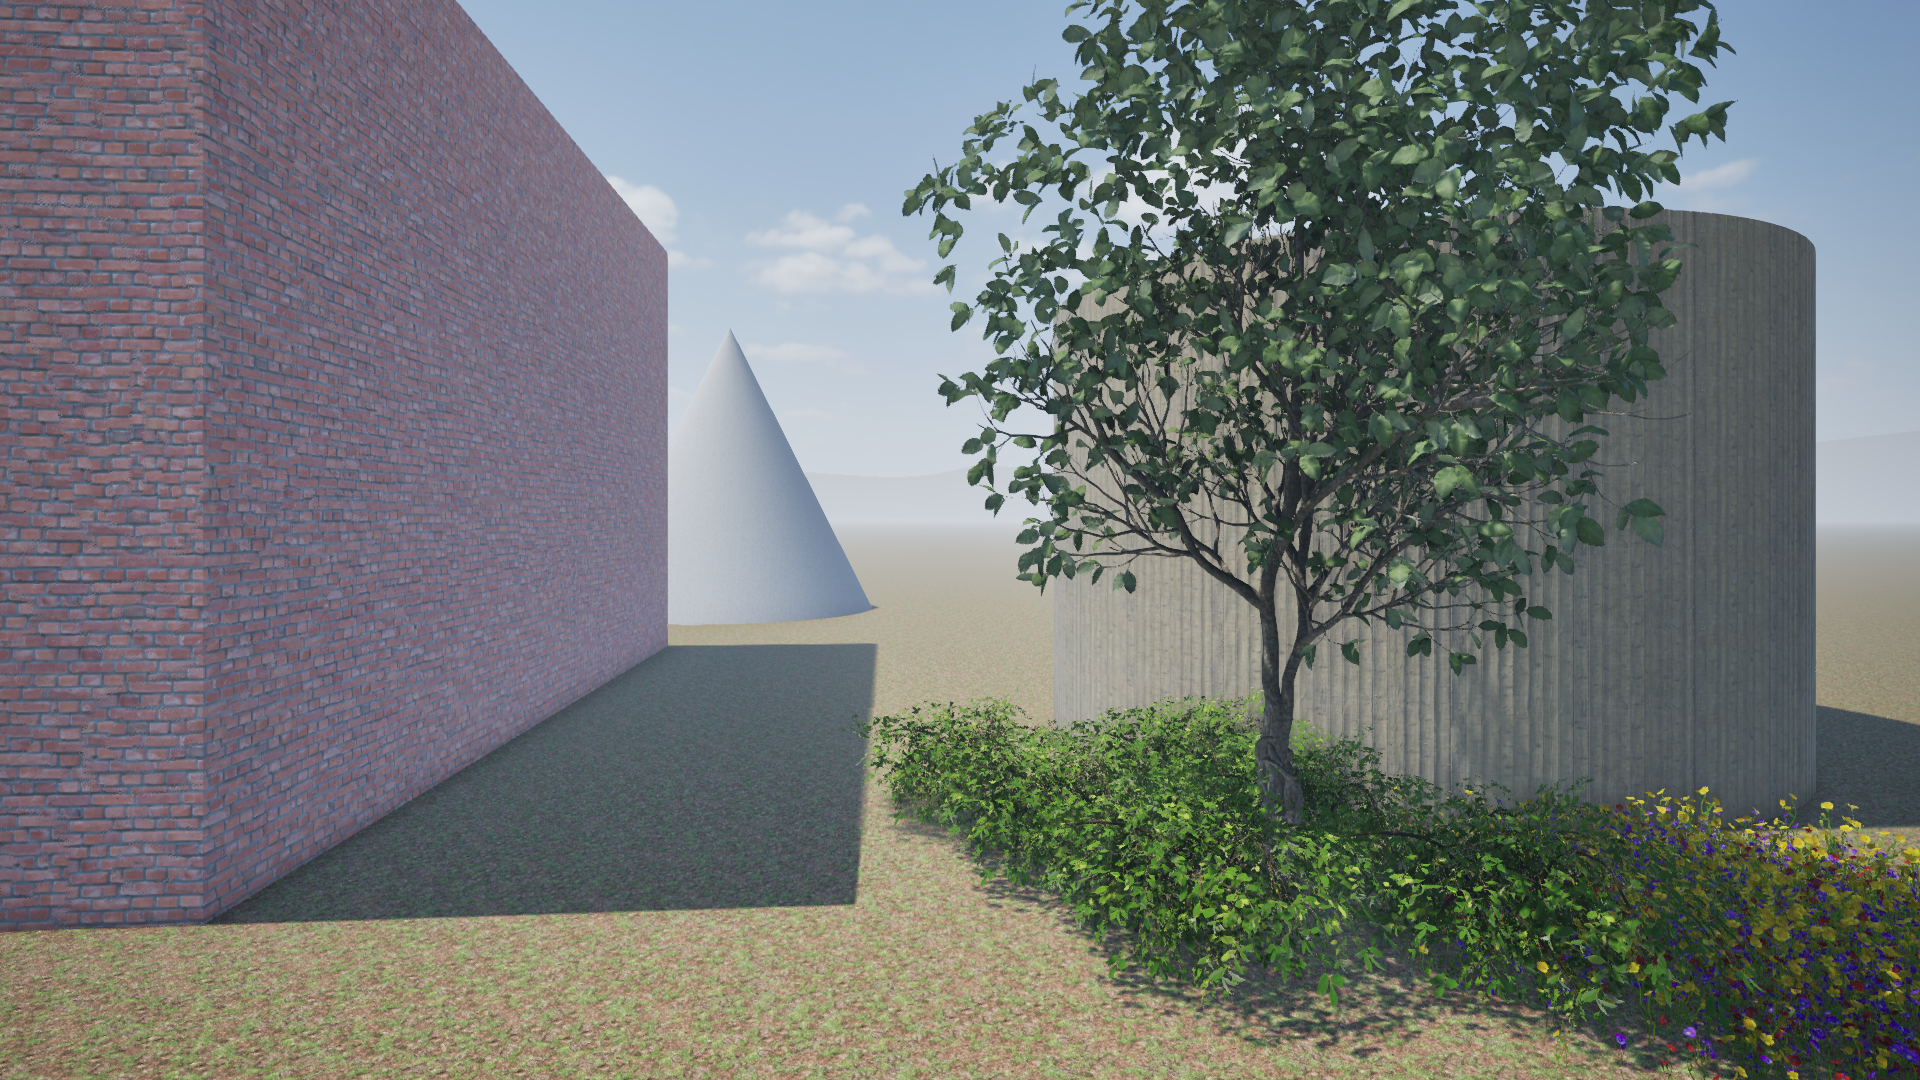
While having the Real time renderer enabled, enable “Lumen”. “Lumen” is a method that gets similar results to the path tracer, while using significantly less computing power. It is great for VR, videos, seeing changes to your settings fast or for computers that aren’t strong enough for the path tracer.
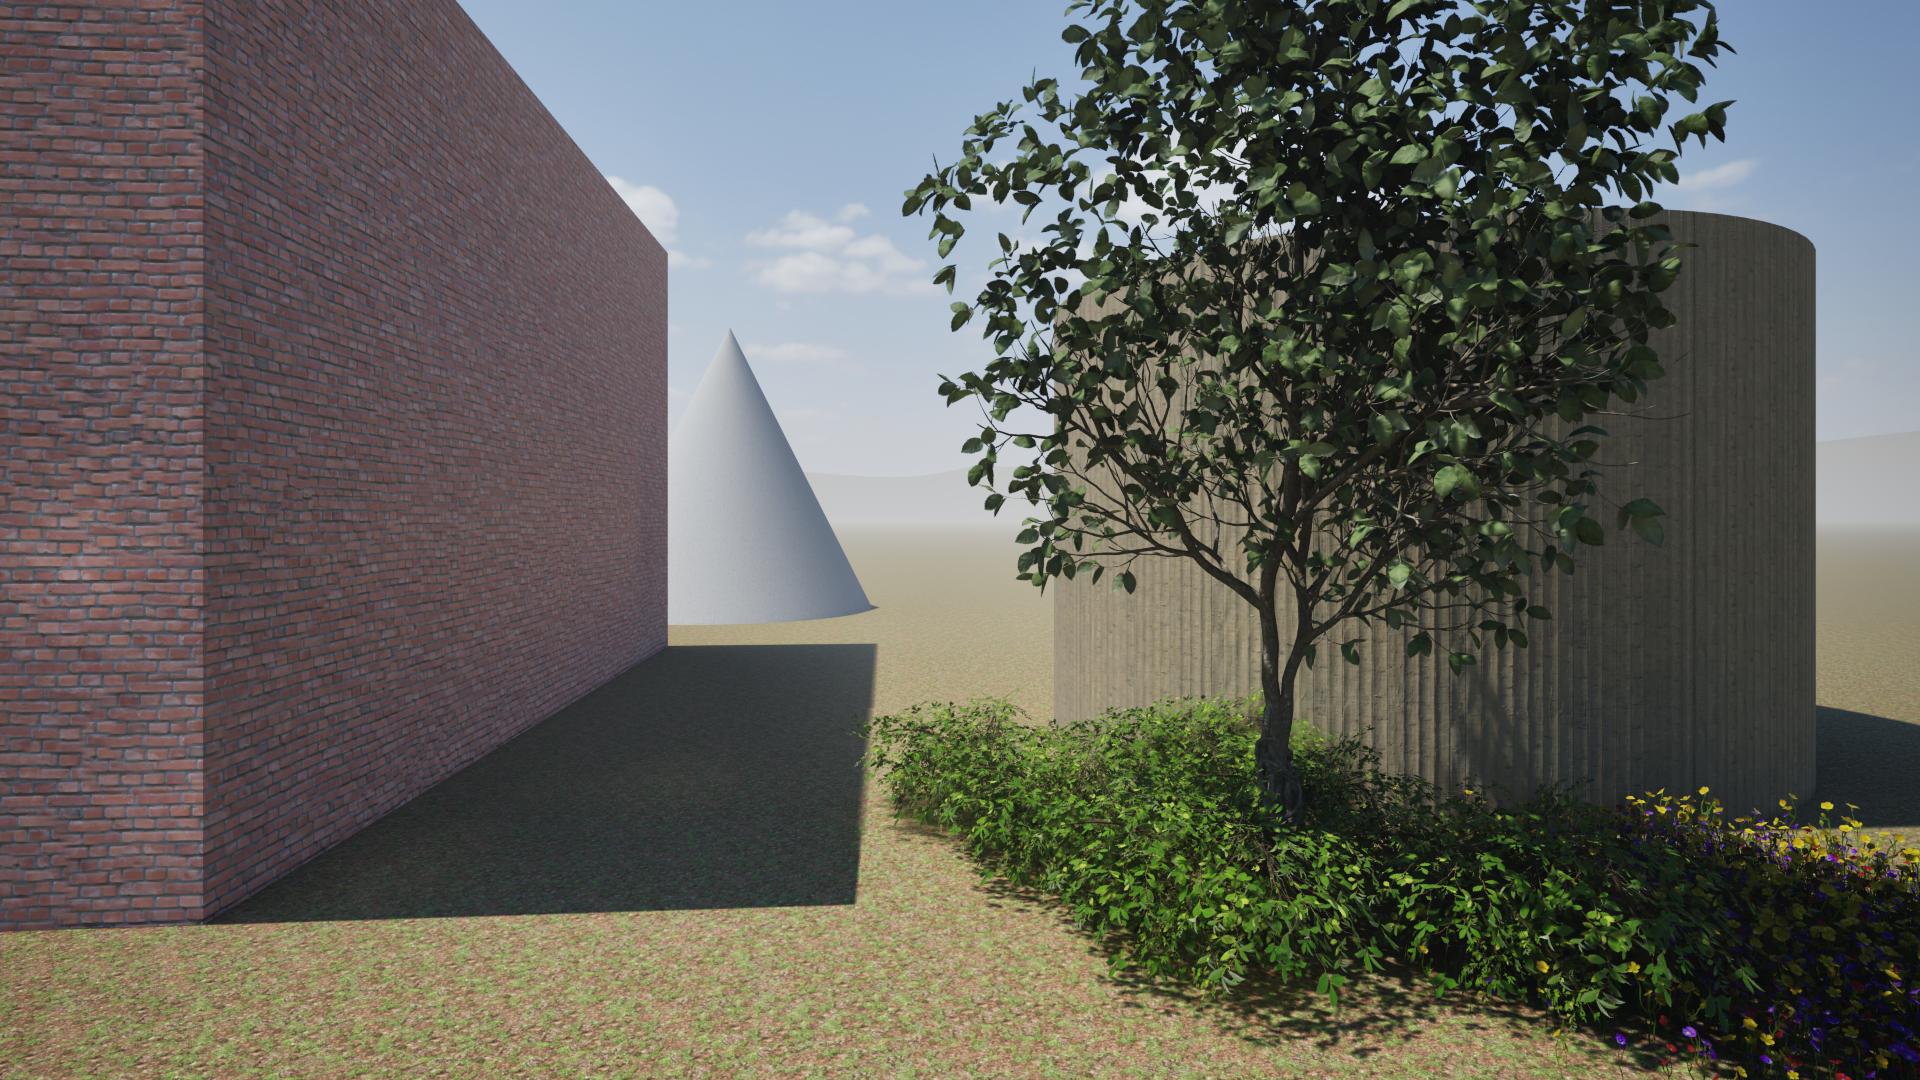
While it is possible to use Twinmotion FX, it is usually better to use a type of postprocessing software to add these effects.
The Clay render effect can be used when you want to make a render without textures.
Image
Change the size of your format to the desired size of your render.
- Use 4K for a high-quality image on a poster or in a presentation.
- Use 2k for a faster rendering time.
Use tiled rendering if your computer can’t handle rendering the entire image at once.
Using Twinmotion with Rhino 7/9
Exportinglink copied
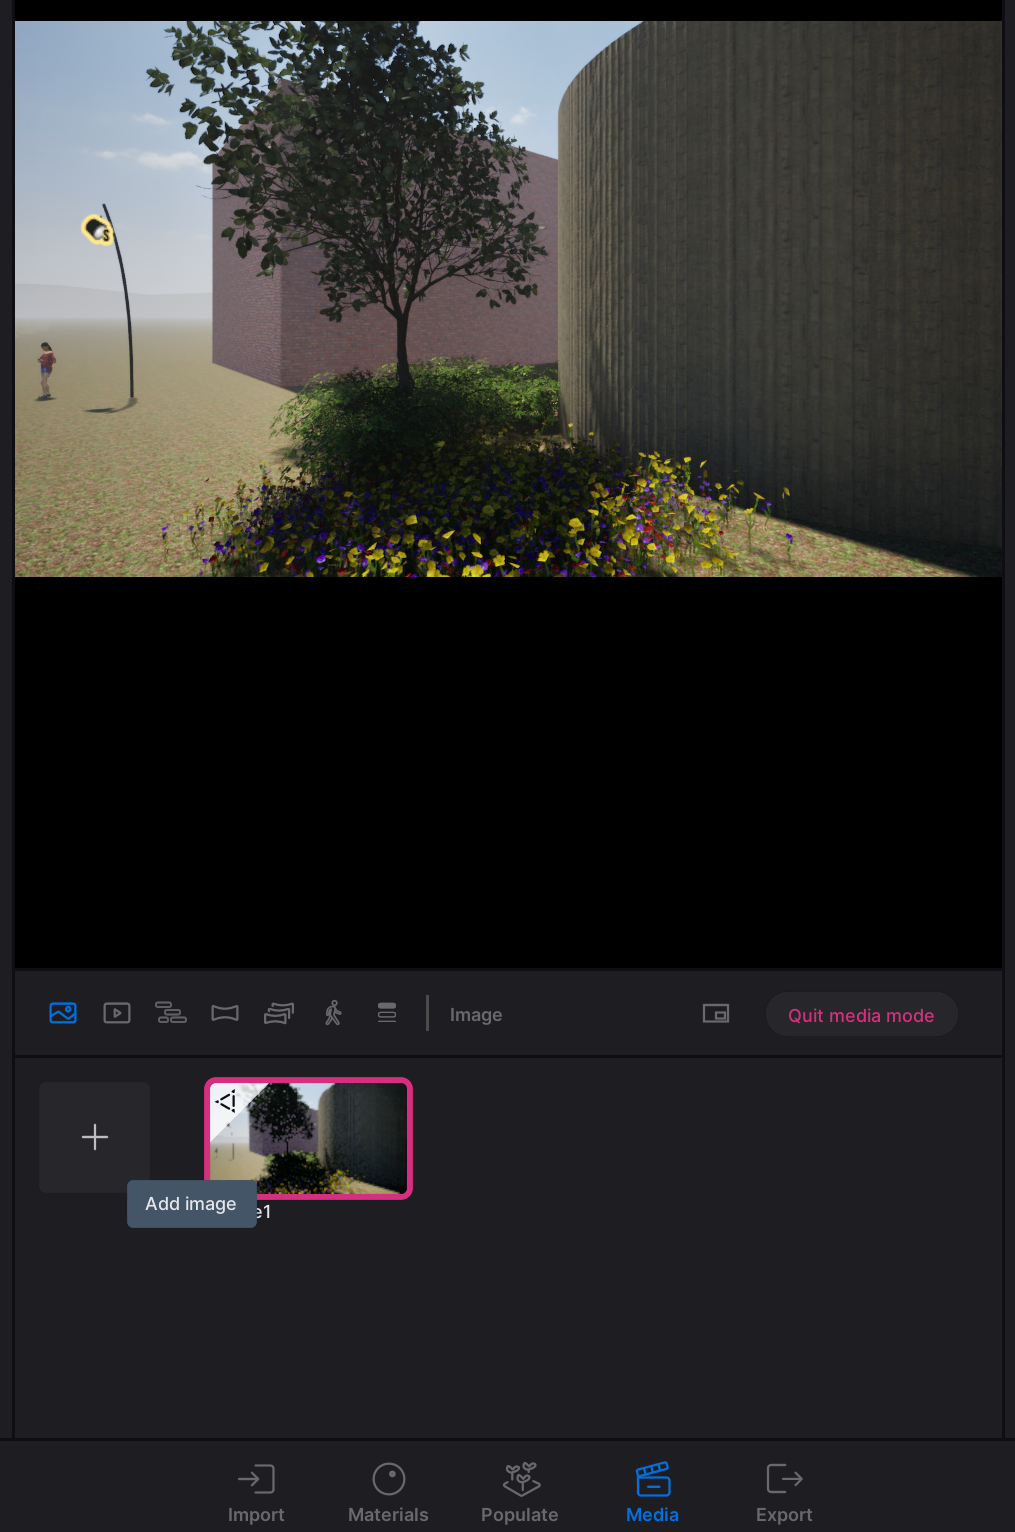
Open the “Media” tab at the bottom center of your screen.
Select “image”. This is the leftmost option at the top of the media menu.
Clicking the + icon will create an image with your current camera potion and ambience settings. If you change the camera position or ambience settings for this image, make sure to click on the “refresh” button that appears when you hover above the image that you’ve created.
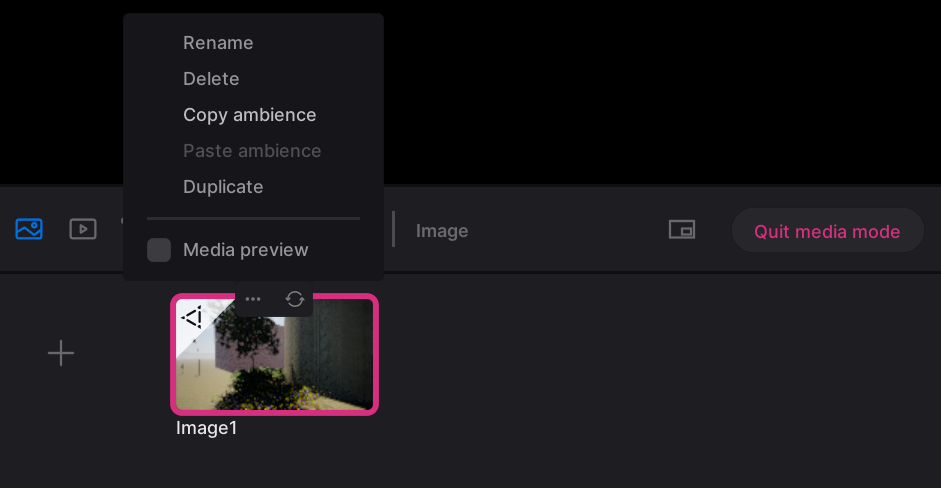
It is possible to copy the ambience settings from one image to the next by clicking on the 3 dots that appear above the image when hovering over it and then selecting “copy ambience”. Now hover above the second image, click on the three dots and “paste ambience”.
Videos
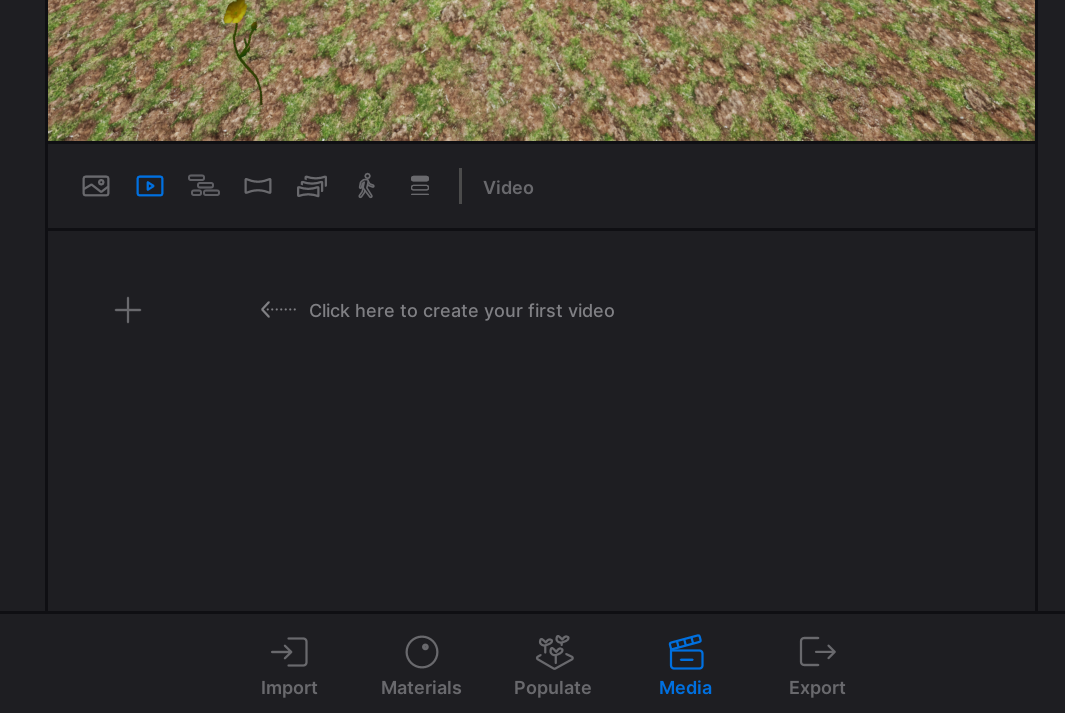
Open the “Media” tab at the bottom center of your screen.
Select “video” from the top of the media menu.
Clicking the + icon will create a video. The first frame has your current camera potion and ambience settings. If you change the camera position or ambience settings for this image, make sure to click on the “refresh” button that appears when you hover above the image that you’ve created.
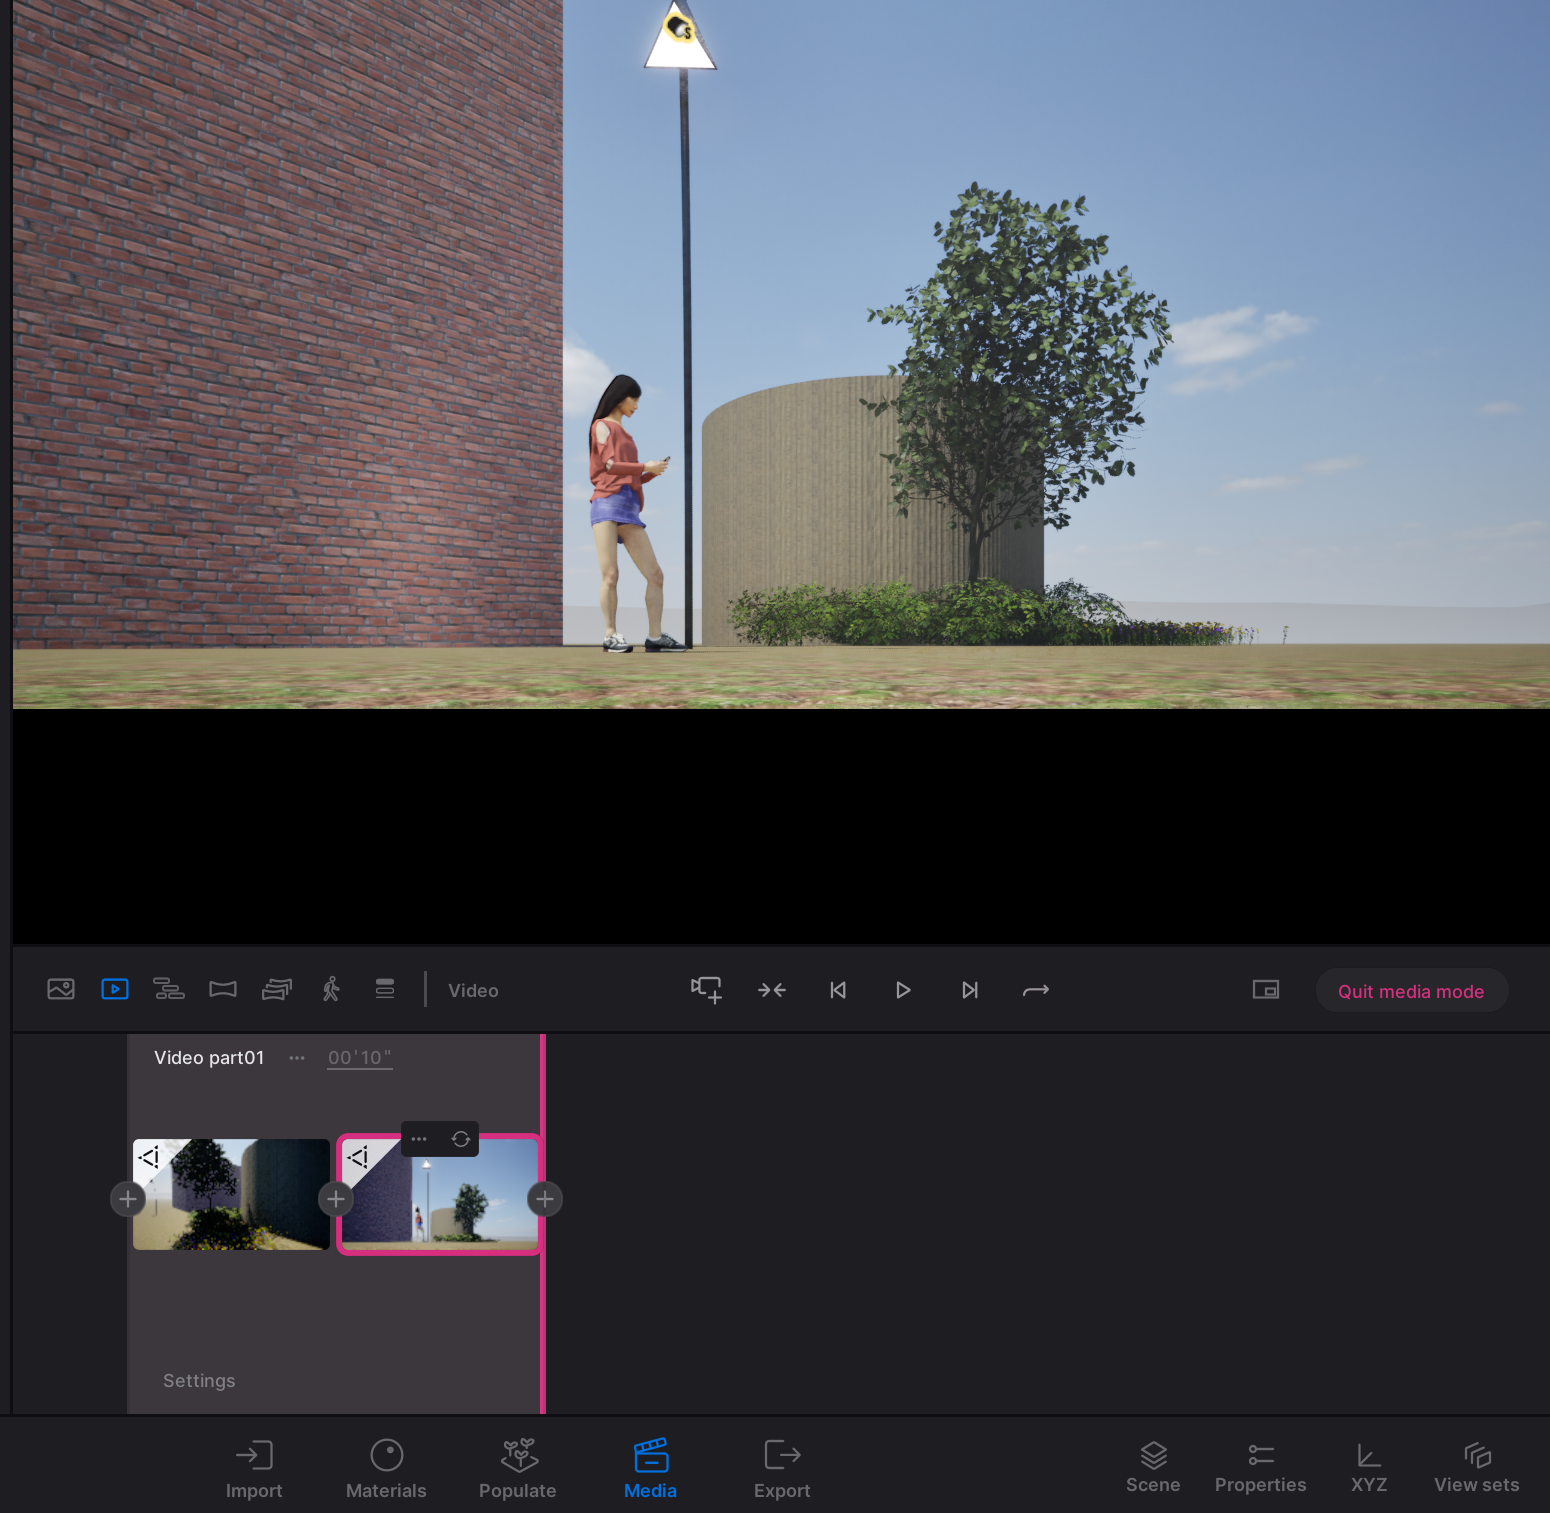
The video that plays, plays a path between the frames that you specify. You can specify the time that the video takes to move along this path above the frames.
It is possible to create different sections by clicking the camera with + icon at the center top of the media menu.
Play the video by pressing the “play” icon at the center top of the media menu.
It is possible to change the ambience settings for different frames.
Export
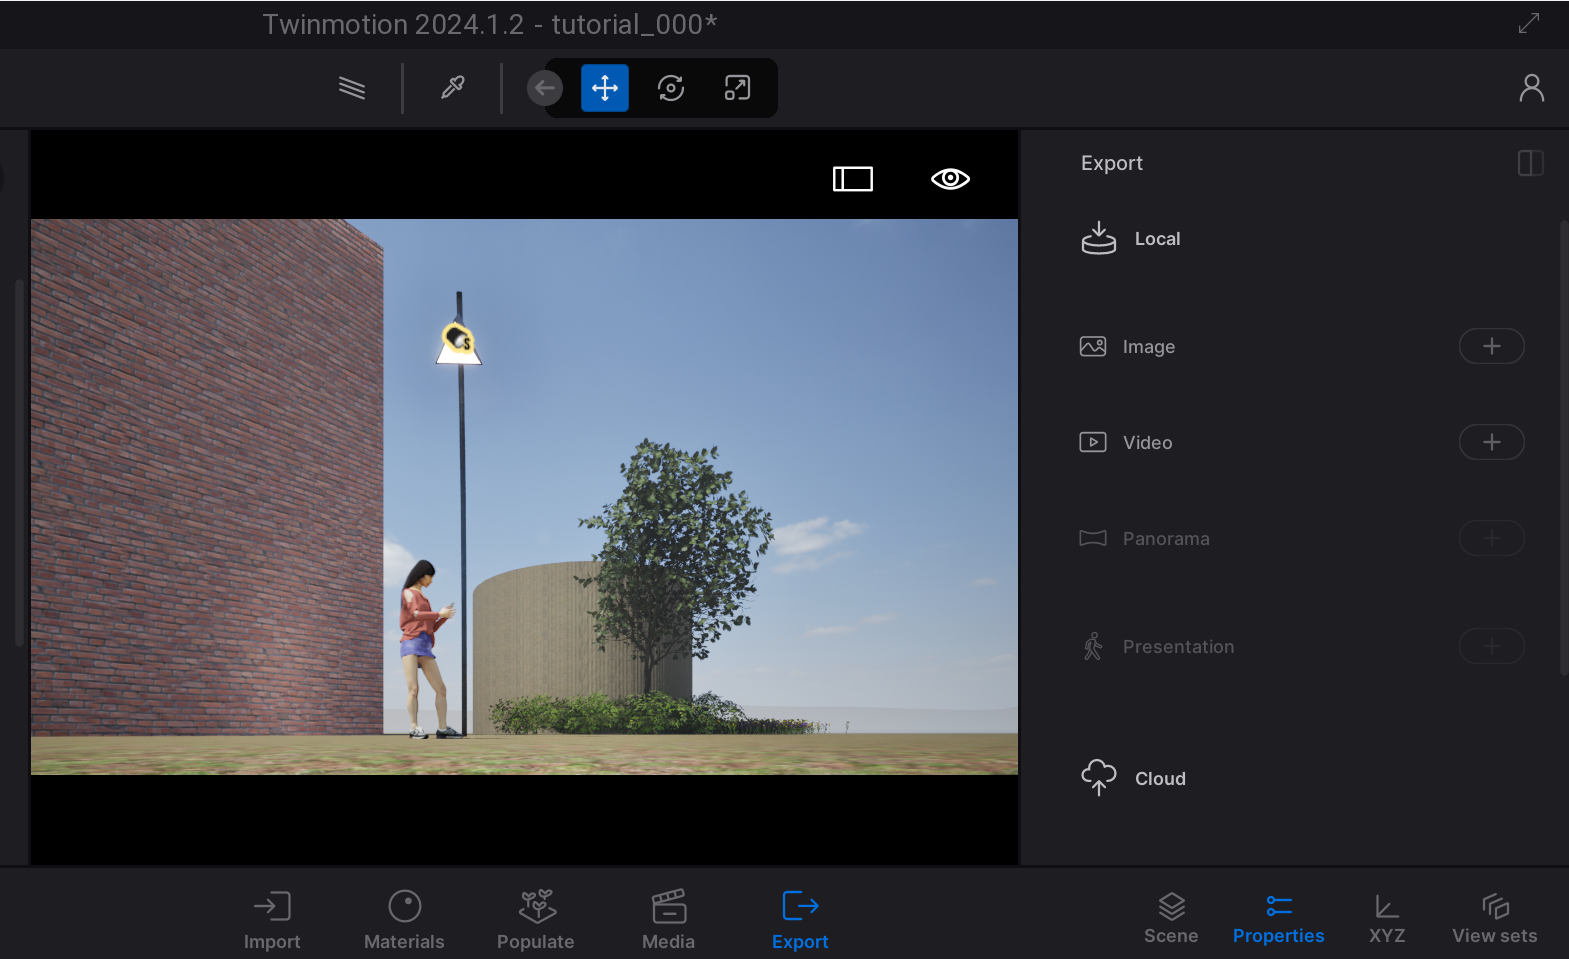
Open the “Export” tab at the bottom center of your screen. The export menu will open on the right side of your screen.
On the + icons next to image, video, etc., select the images, videos., etc. that you want to export.
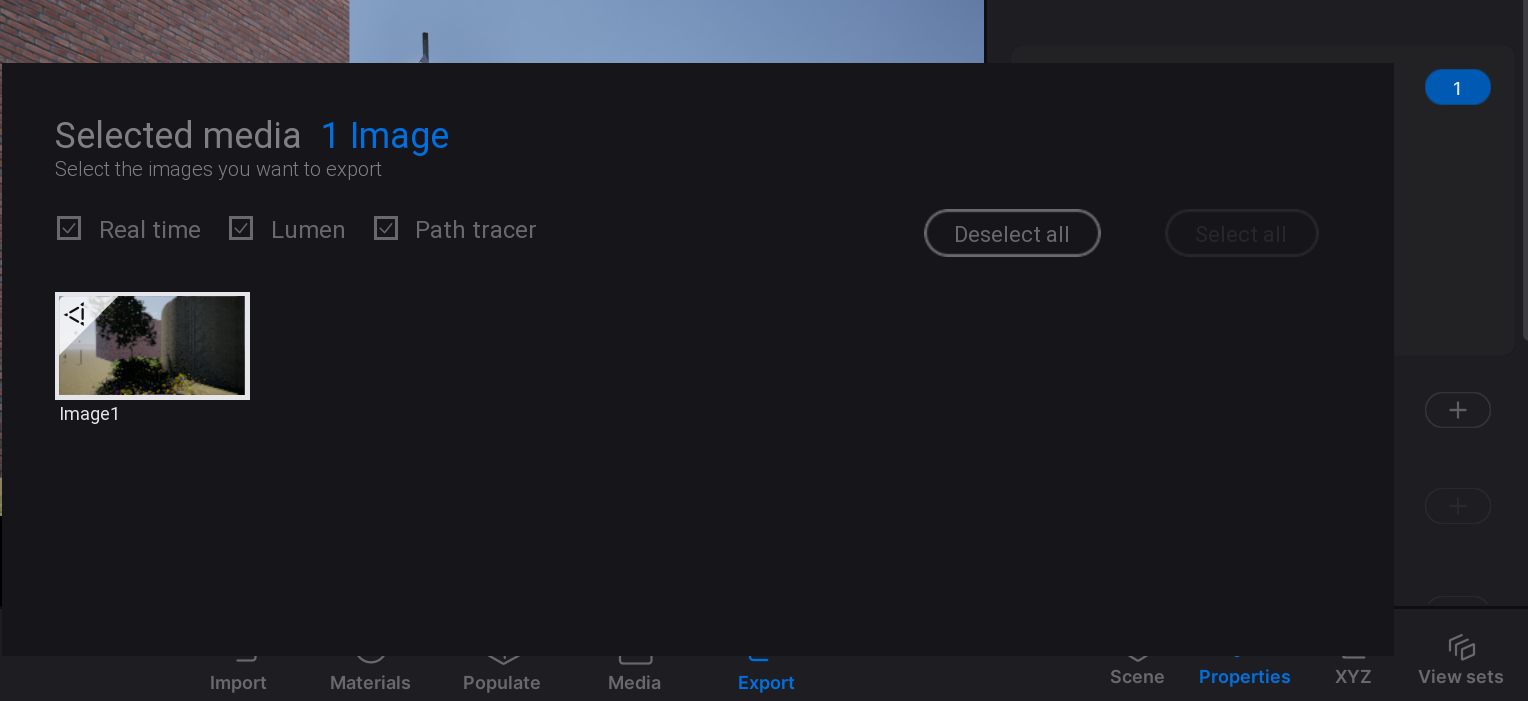
Select the file formats that you want to export.
- For images, .png is recommended.
- For videos, .mp4 is recommended.
- For personal preferences in postprocessing, experiment with different filetypes.
Using Twinmotion with Rhino 8/9
Virtual Realitylink copied
VR-Headset
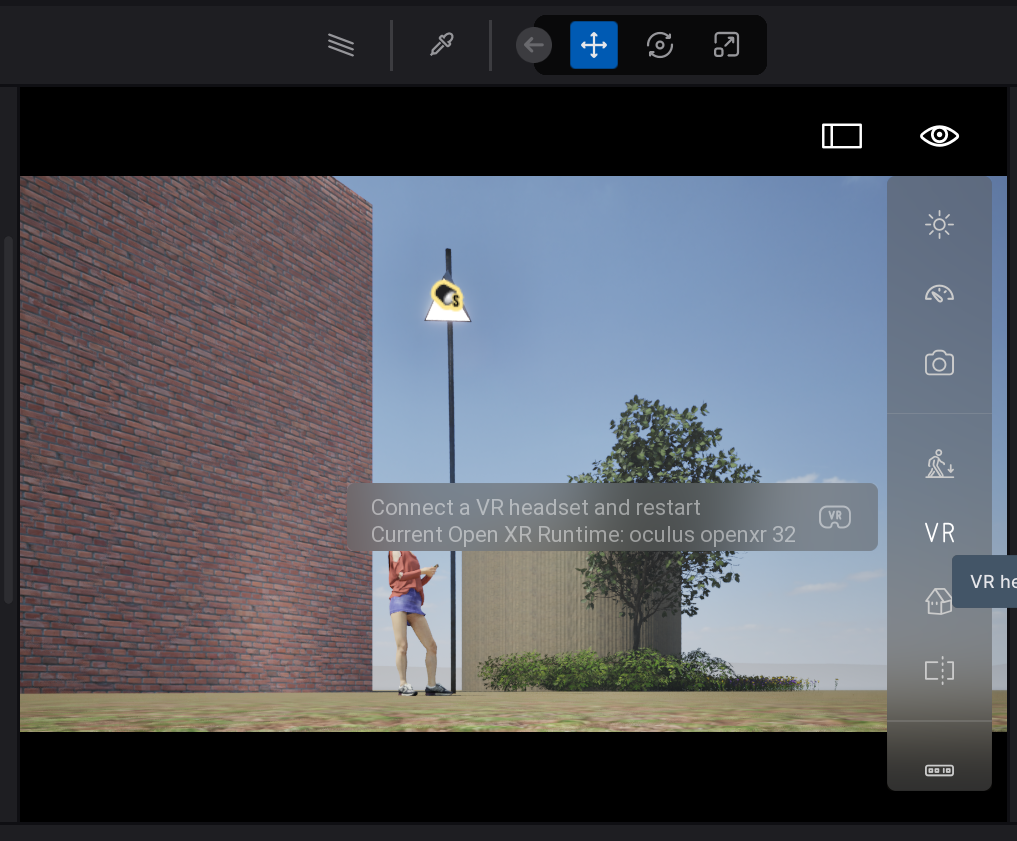
VR visualization in Twinmotion is quite easy. Visualizing in VR can be especially useful to quickly get a grasp of scale and feeling for your designs, as well as to convince others of your plans.
Connect the headset of your choosing BEFORE opening Twinmotion.
Select the “eye” icon at the top of your screen, right next to the Scene graph.
Select “VR” and put on your headset. Navigate using teleportation using your controllers.
Panorama picture
A panorama picture can be made from the media menu, in a similar way to creating an image. It is also exported in the same manner as a regular image.
You can visualize a panorama picture in VR using various apps in a browser, on a phone or through a specialized app on a VR-headset like immergallery on the Oculus Quest (https://immervr.com/).
Using Twinmotion with Rhino 9/9
Tips & Trickslink copied
Working in Separate Layers in Rhino
Divide your project into different layers within Rhino to keep your workflow organized. This not only helps with managing your model but also makes it easier to modify specific components, especially when assigning different materials to each layer.
Using Your Own 2D Objects
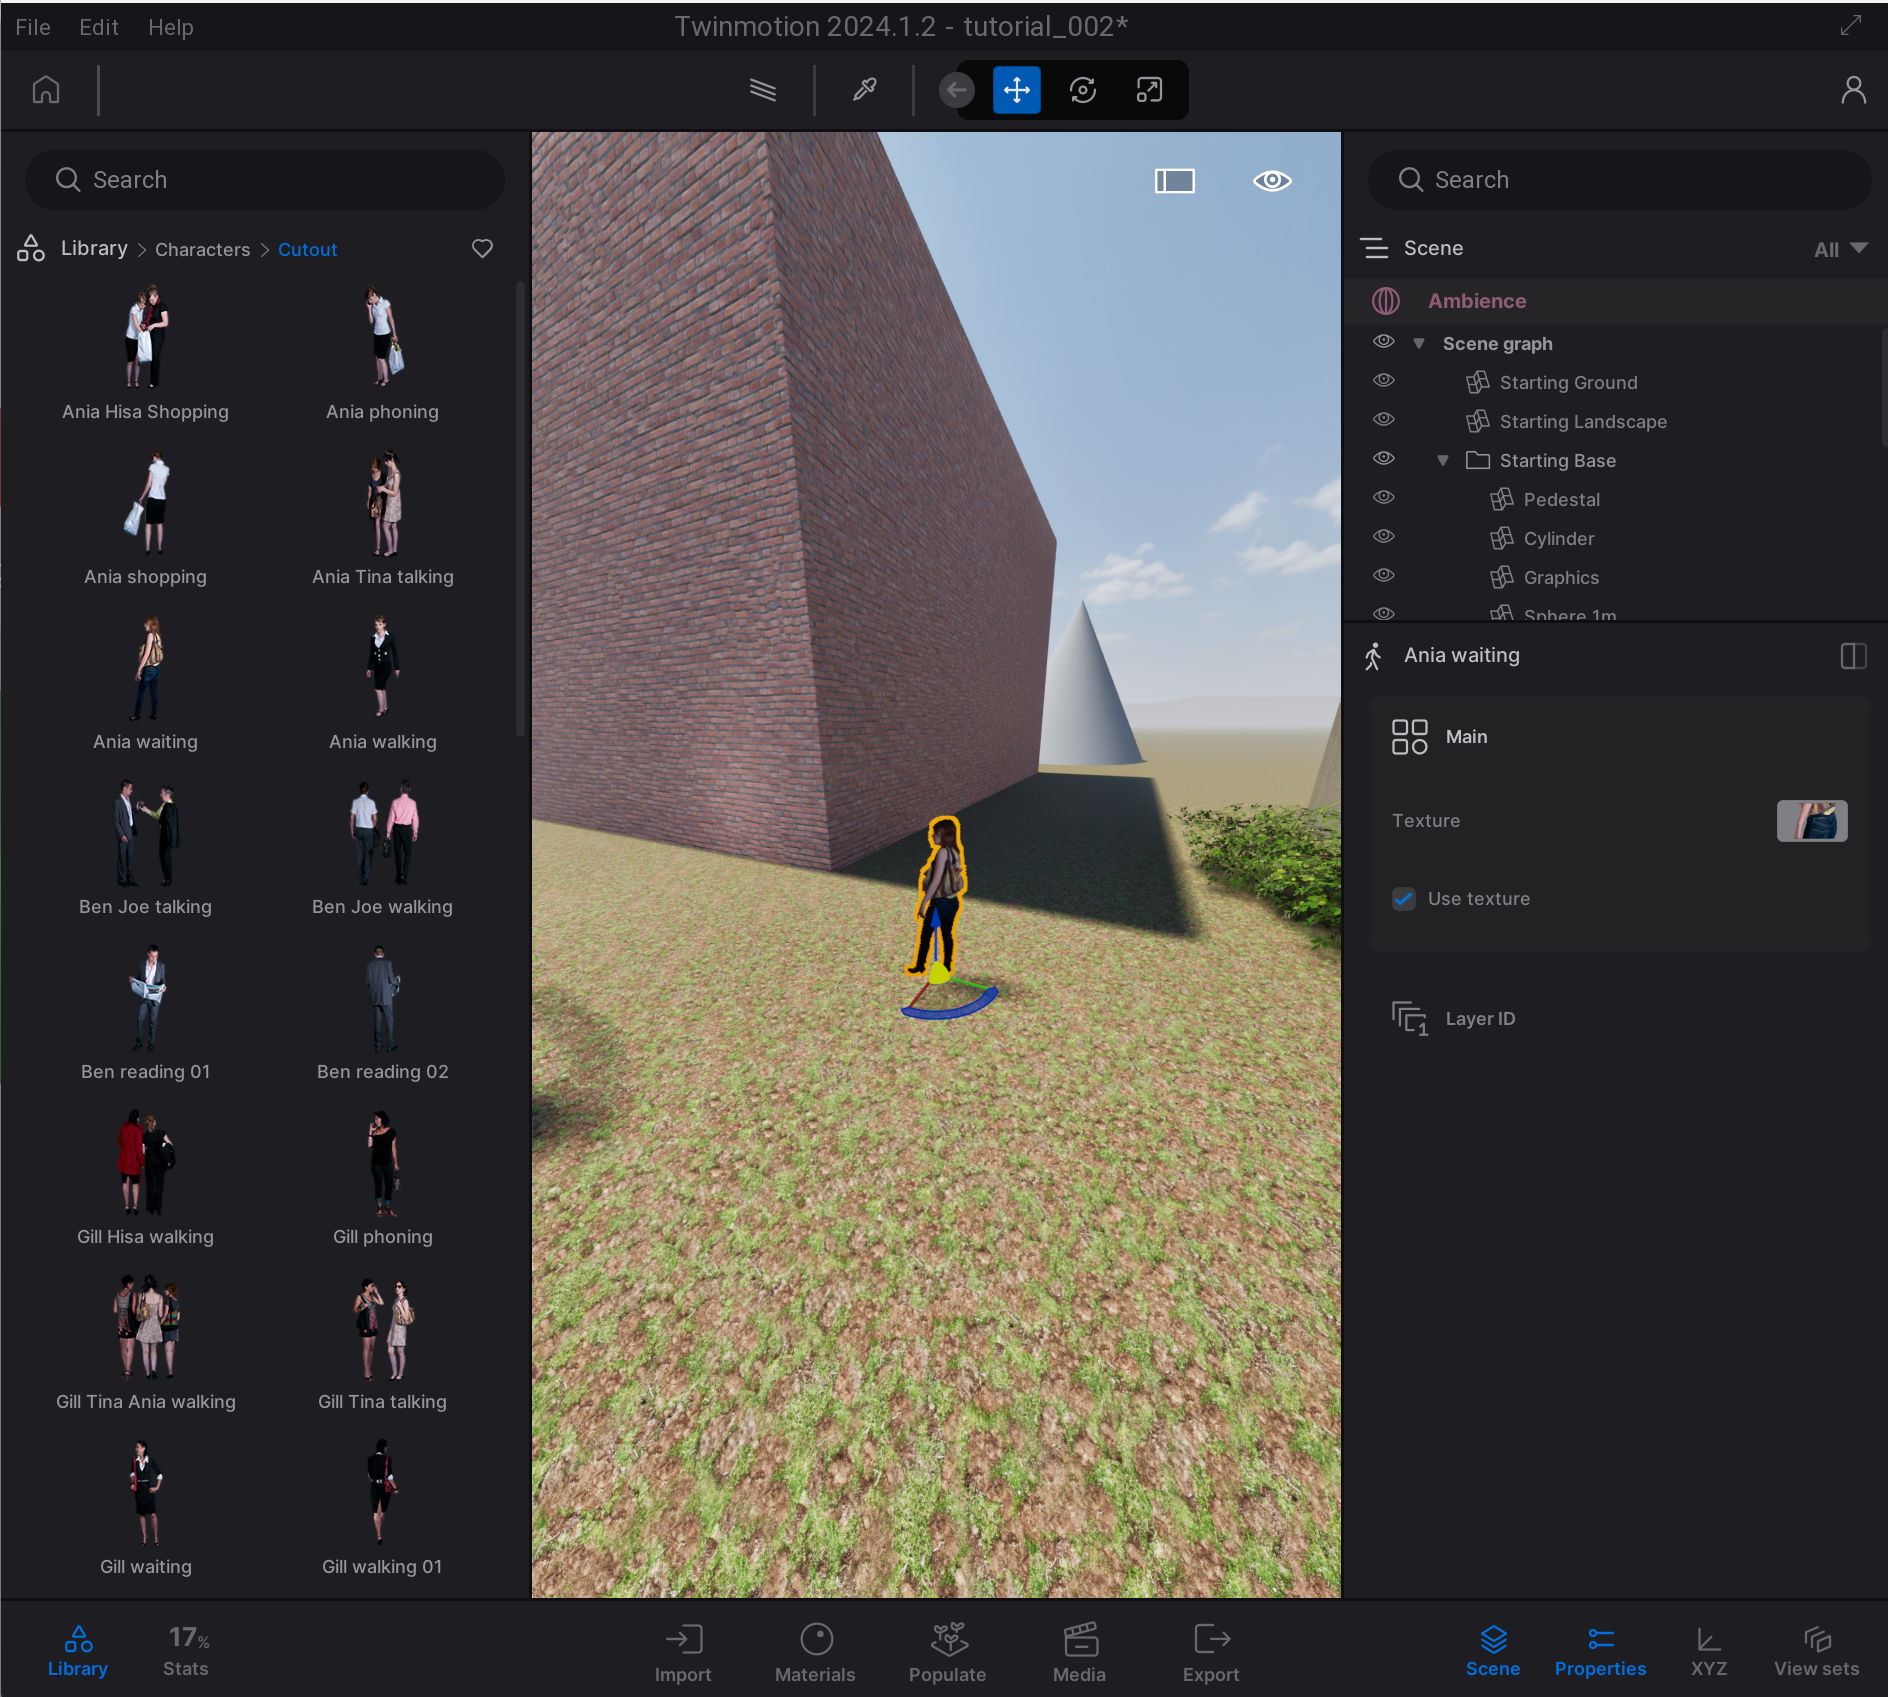
Draw your objects by hand or digitally, remove the background, and save them as PNG files in a folder with a recognizable name. (It’s important that the image edges align with the object and that there’s no space between the object and the bottom edge of the image.)
Open your Twinmotion file and navigate to:
Place any character.
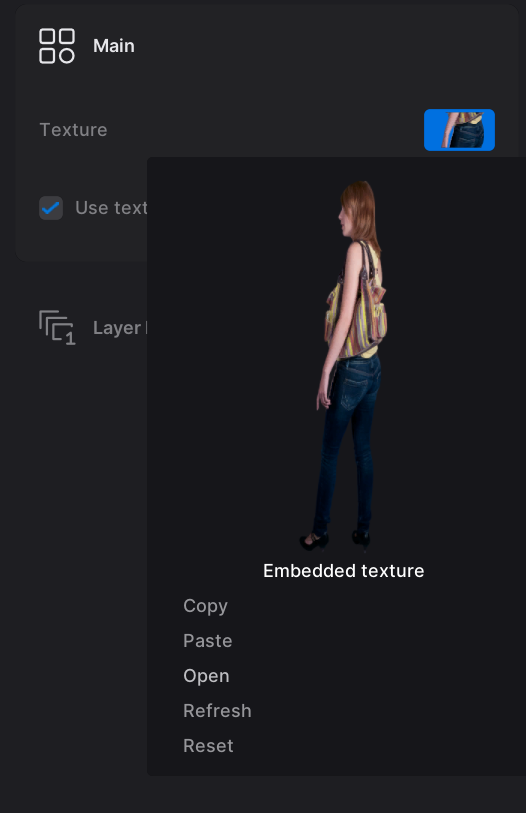
Select the character and go to Properties. Click:
and select your custom image.
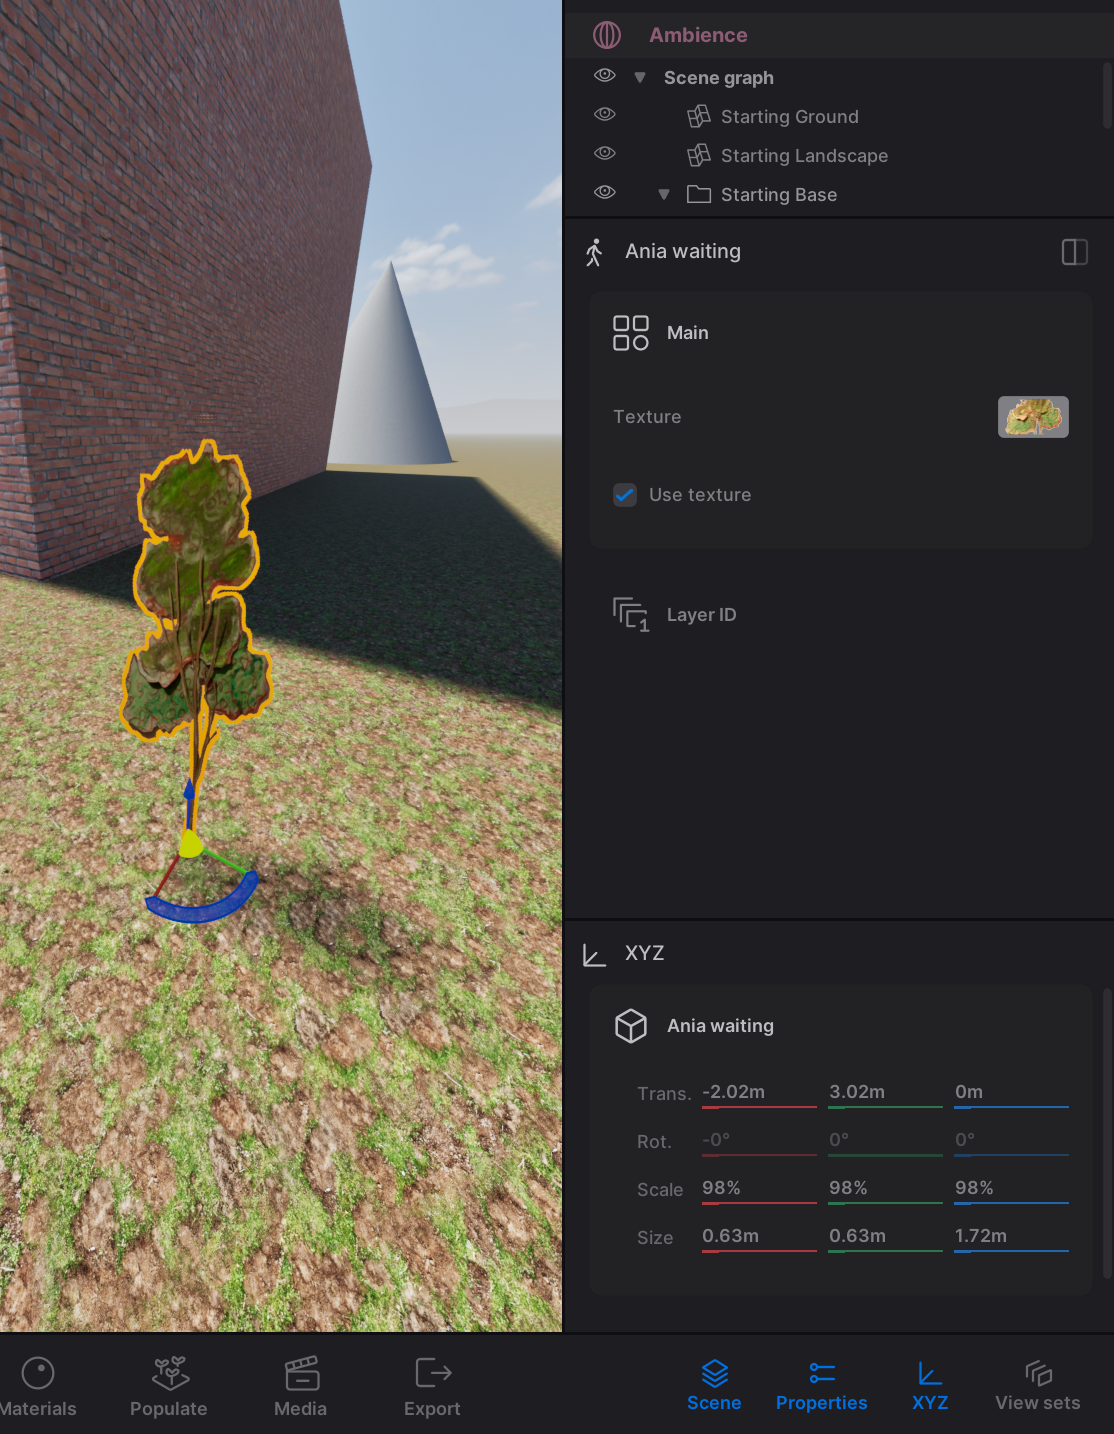
Adjust the X and Z scale percentages under XYZ to ensure the proportions of your object are correct.
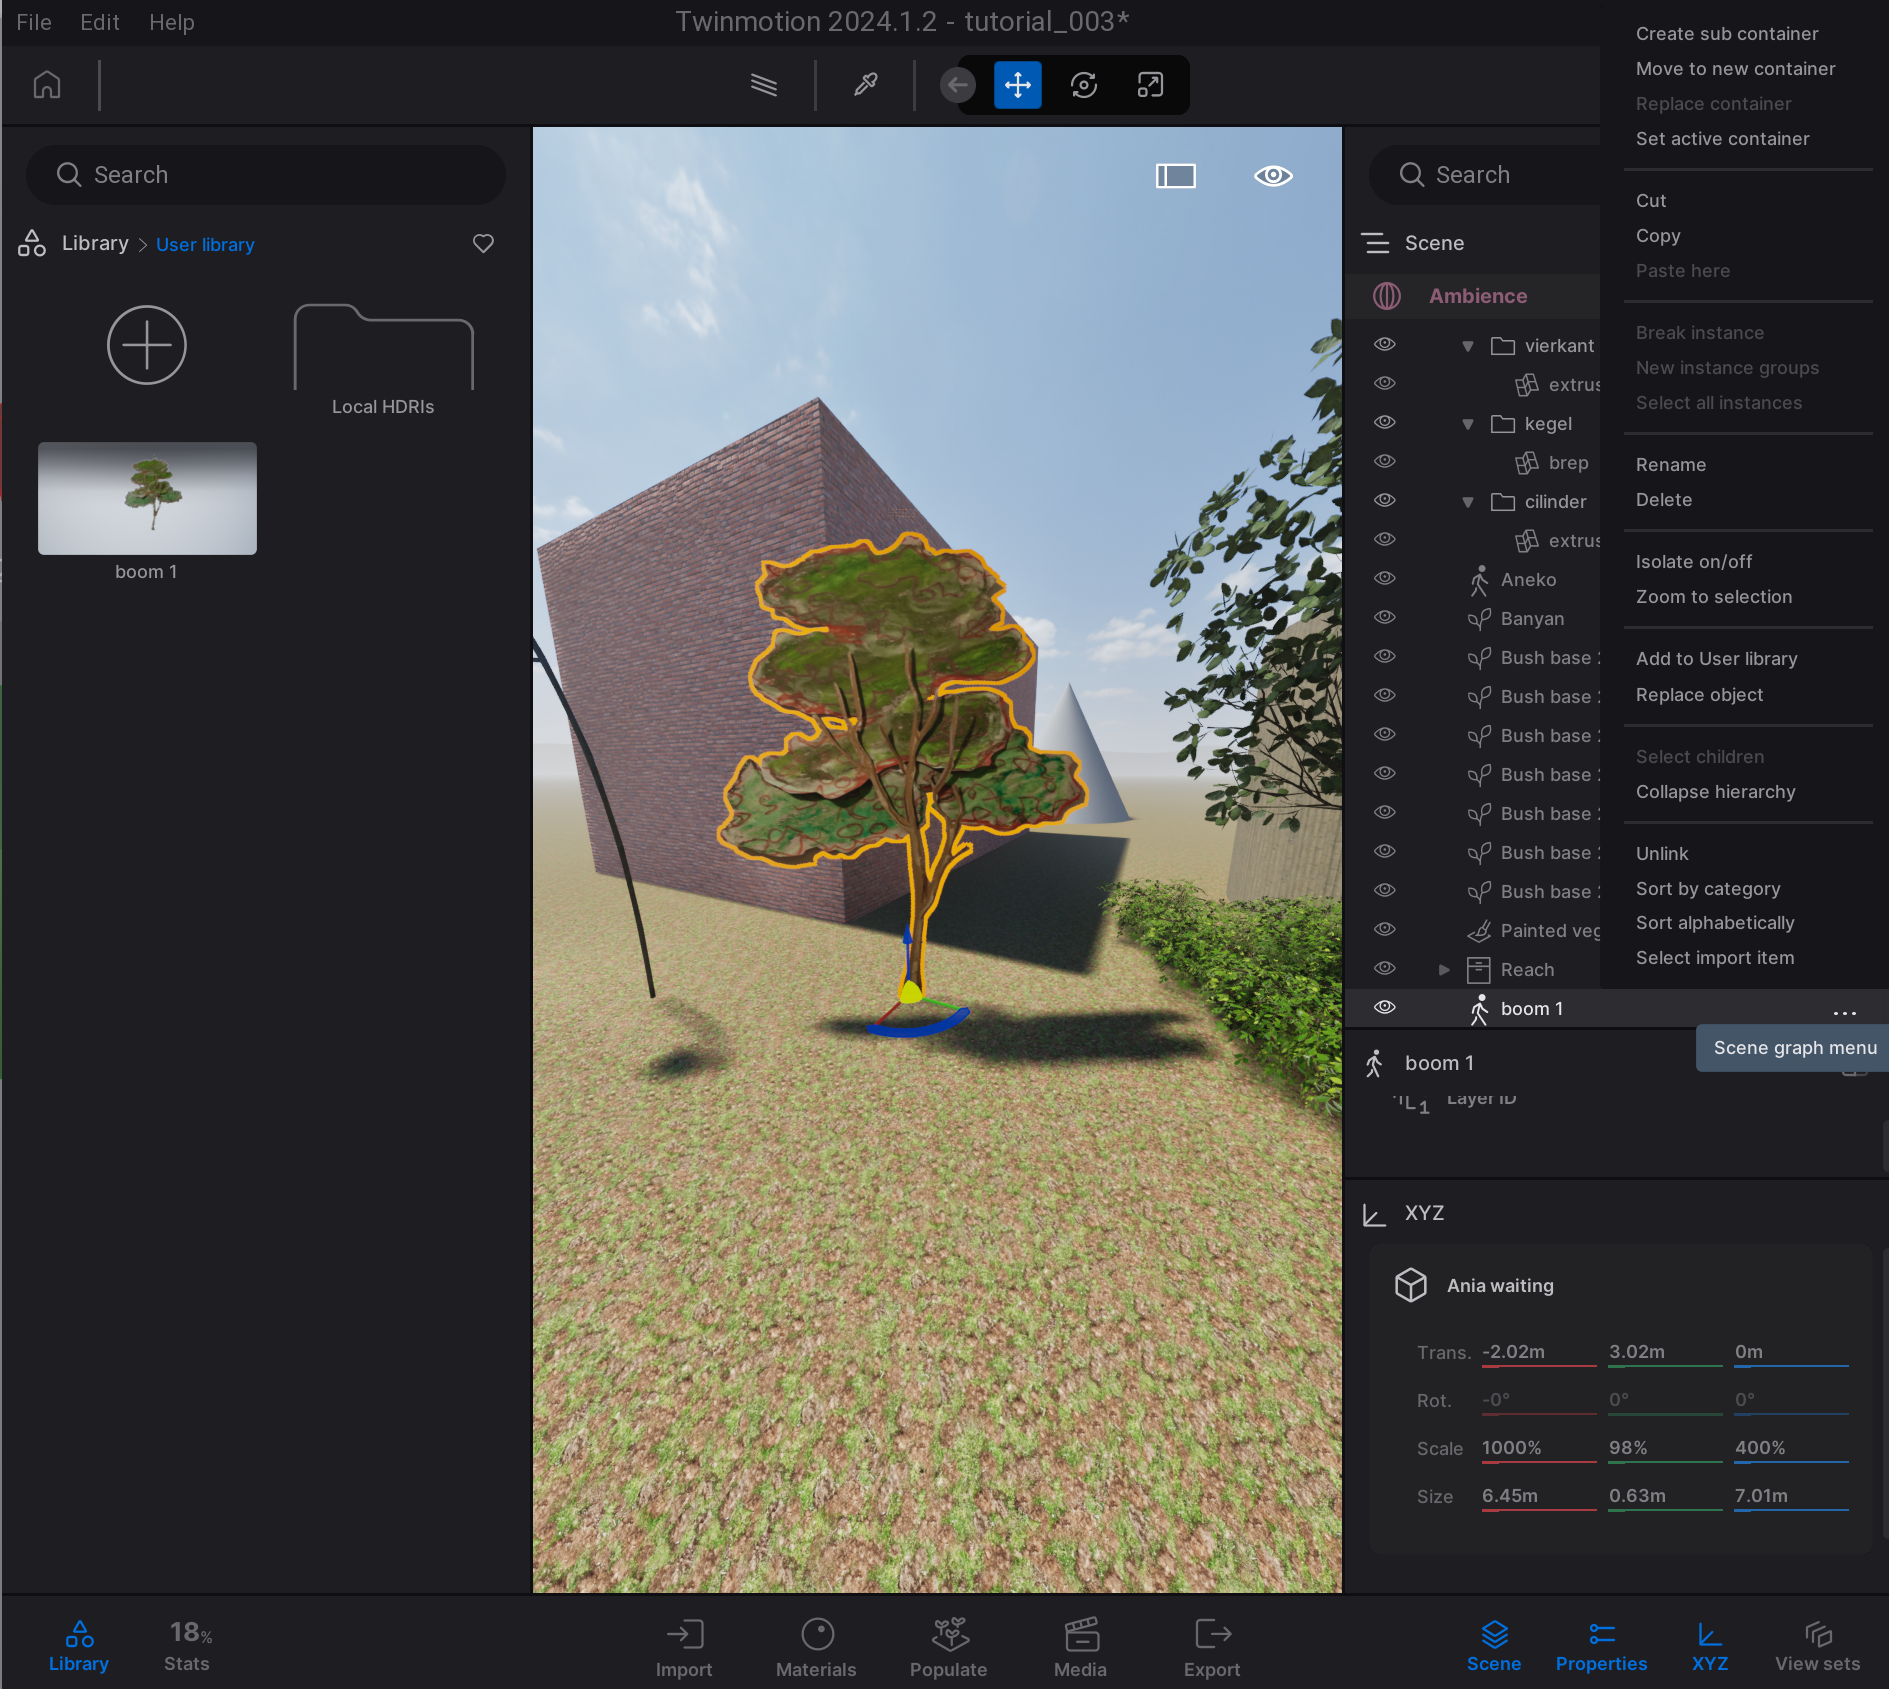
Go to Scene, right-click on the object, give it a custom name, and click Add to User Library.
Navigate to:
where your object should now appear.
Object Visible in Rhino but Not in Twinmotion
If an object is visible in Rhino but not in Twinmotion, it may be a surface with its orientation facing away from the camera. Here are three possible solutions:
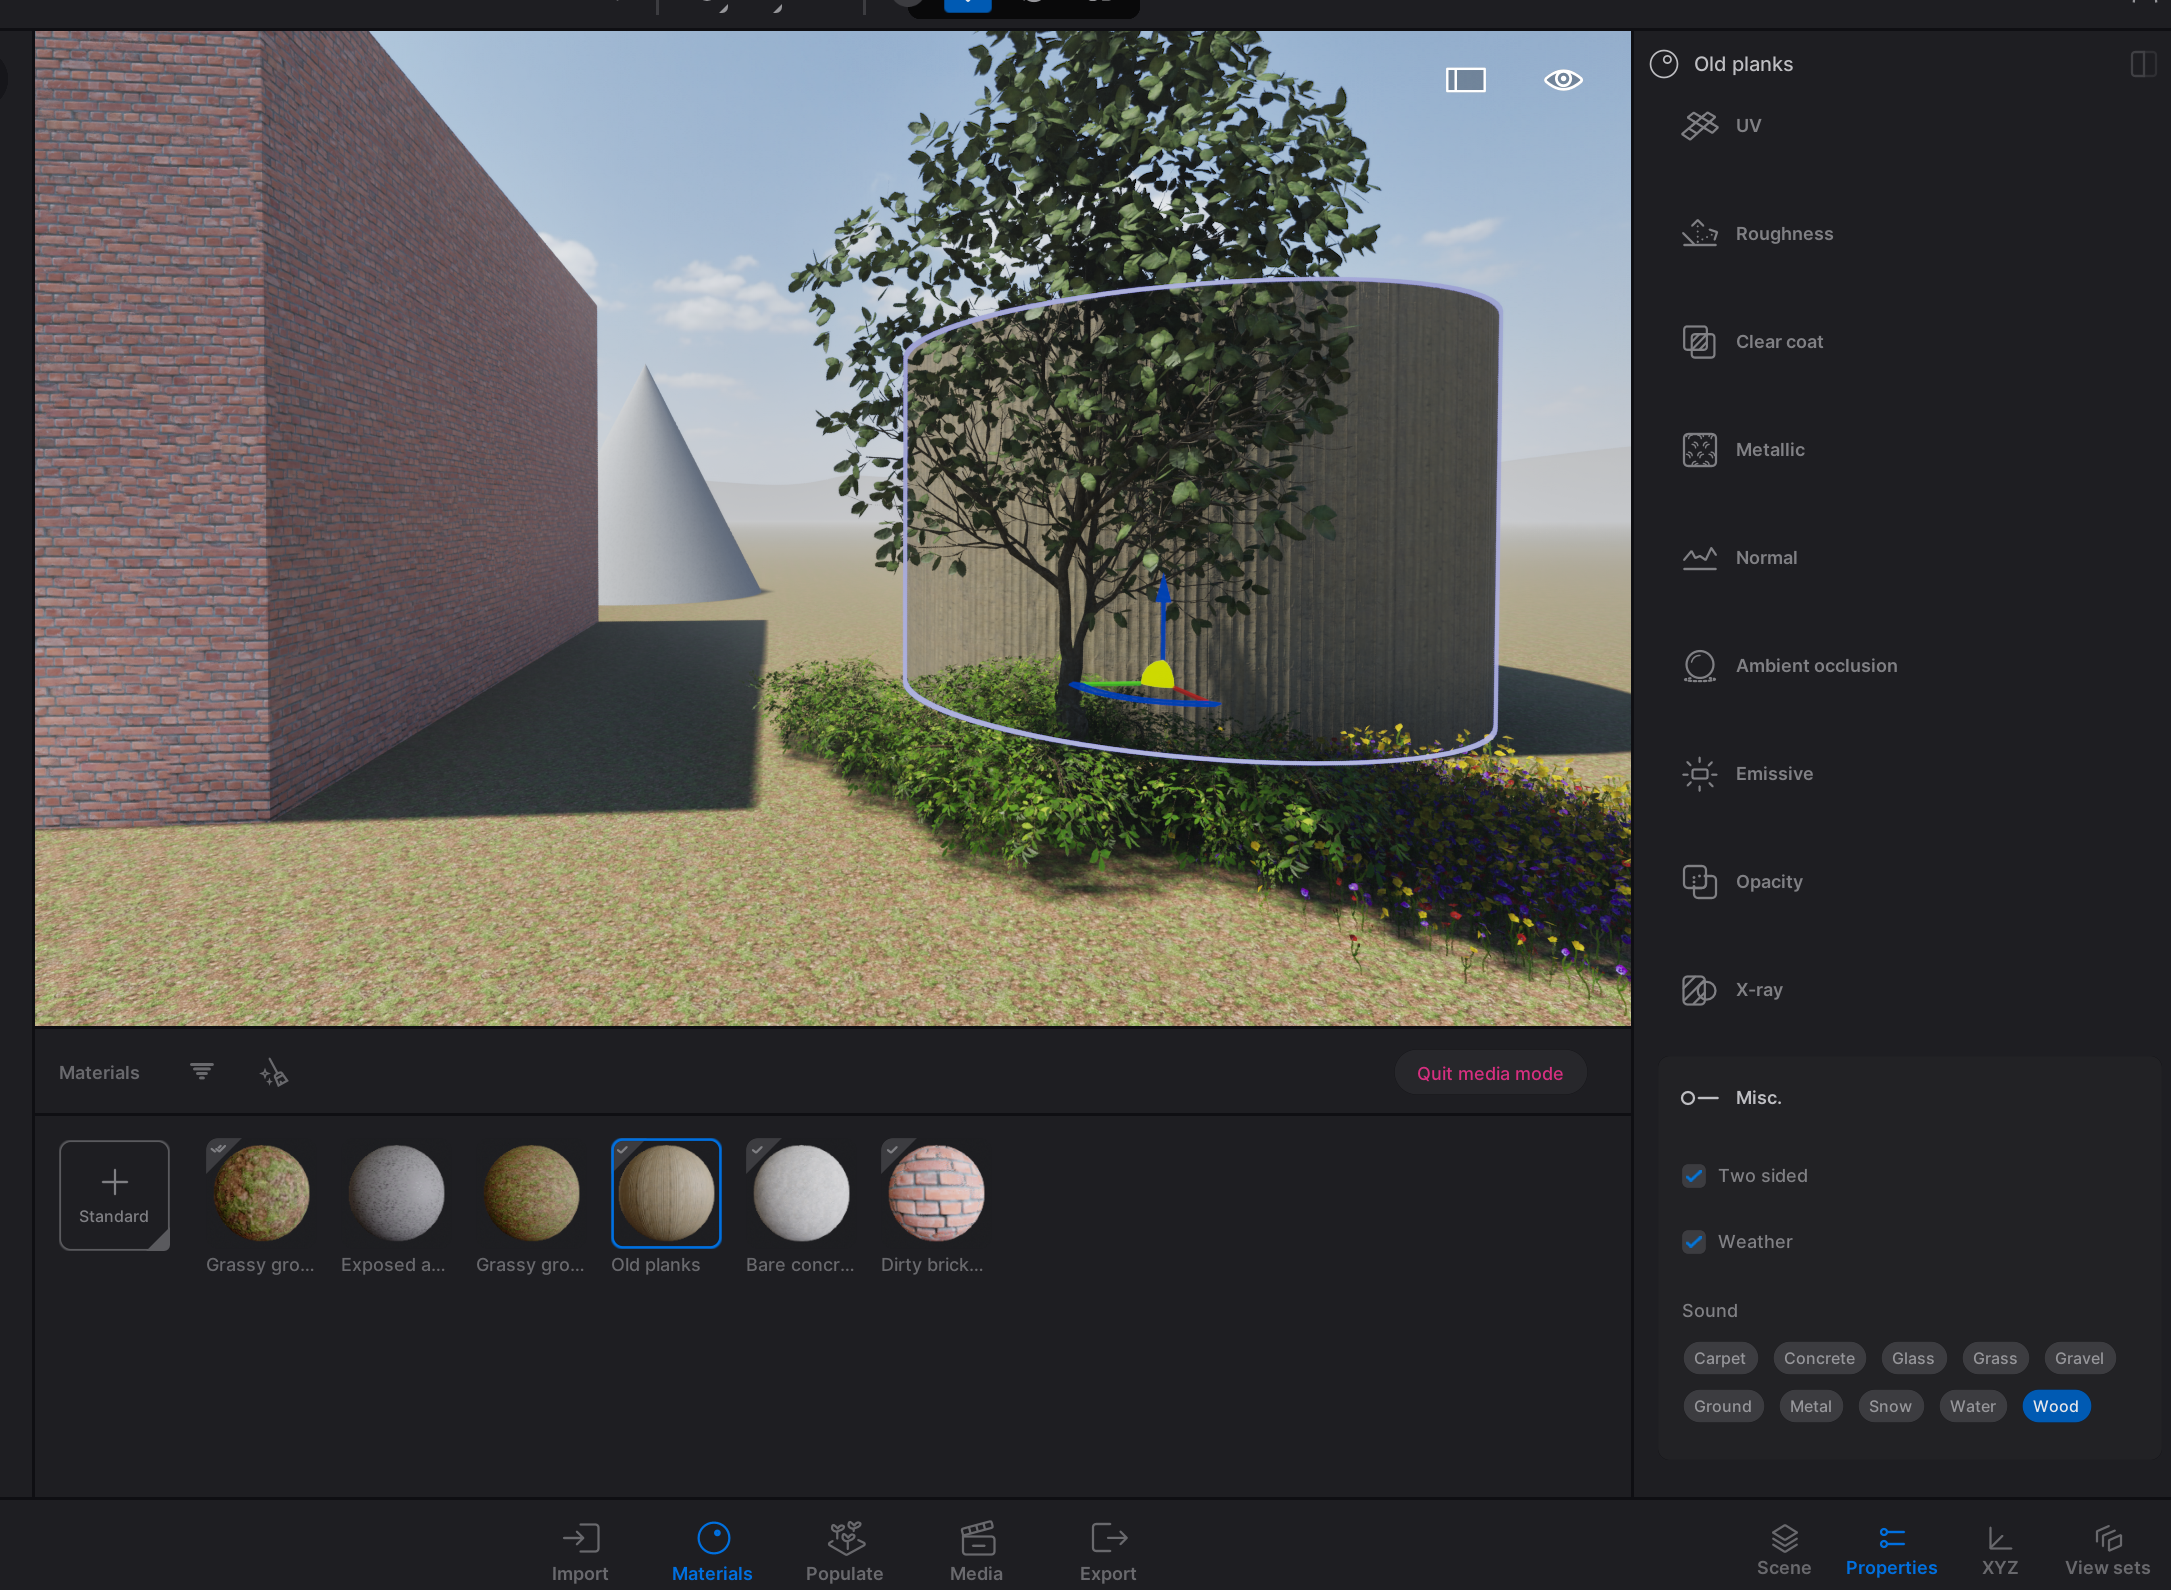
Make the Material Double-Sided: In Twinmotion, set the material to be visible on both sides of the surface. You can find this option under:
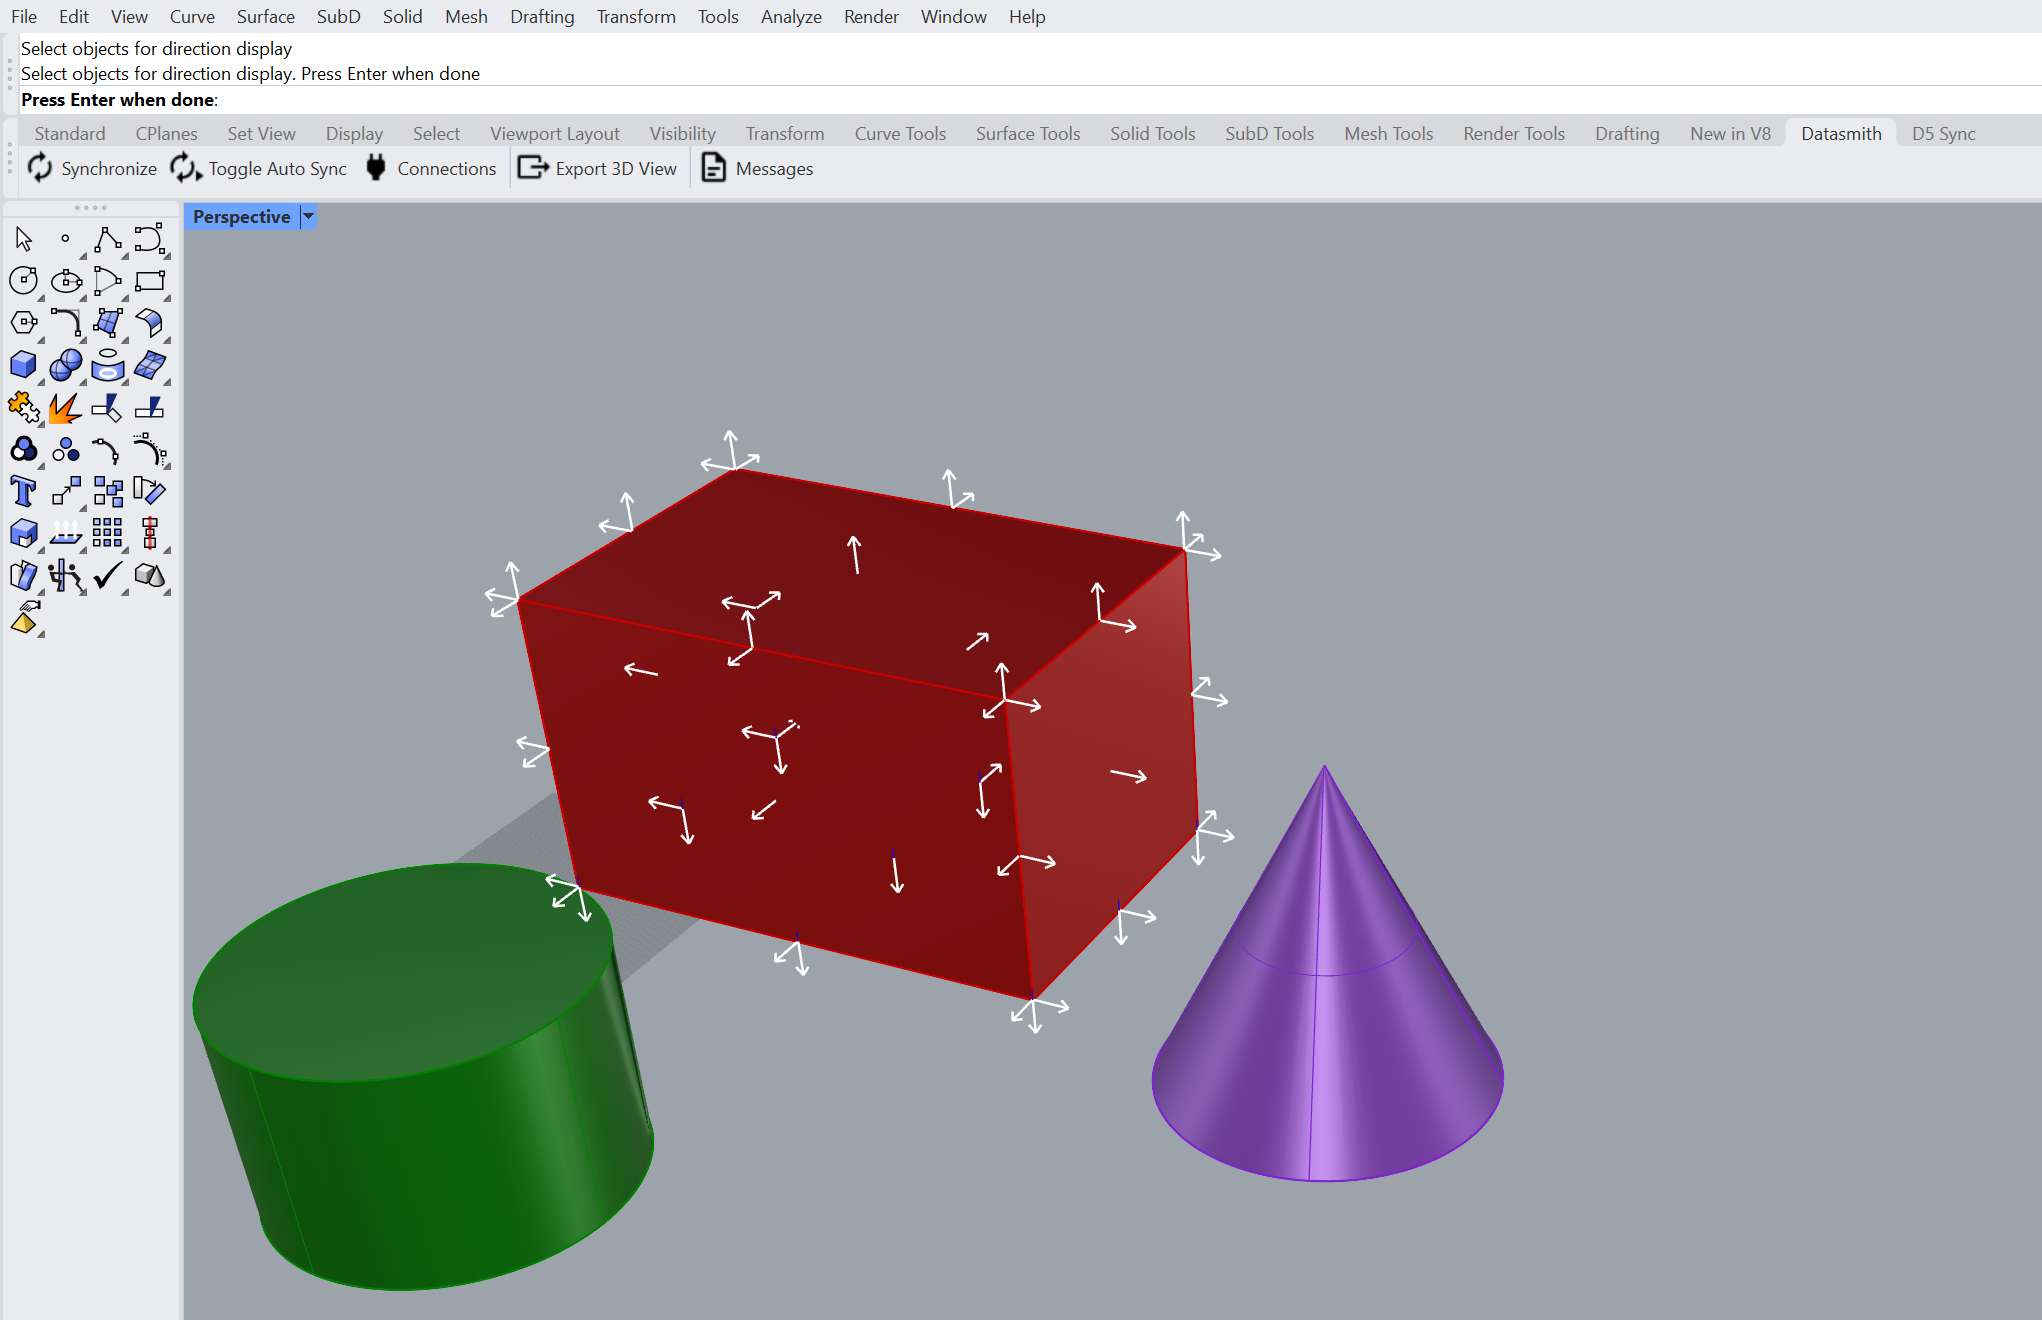
Extrude the Surface: Use the Rhino command ExtrudeSrf to convert the surface into a polysurface, which is also more realistic since real-world objects have thickness.
Correct the Orientation with Dir: Check the orientation in Rhino using the Dir command. The side where the arrows are pointing away is the side that will be visible in Twinmotion. Use Flip to reverse the side if necessary.
Disorientation (e.g., Falling Out of the World)
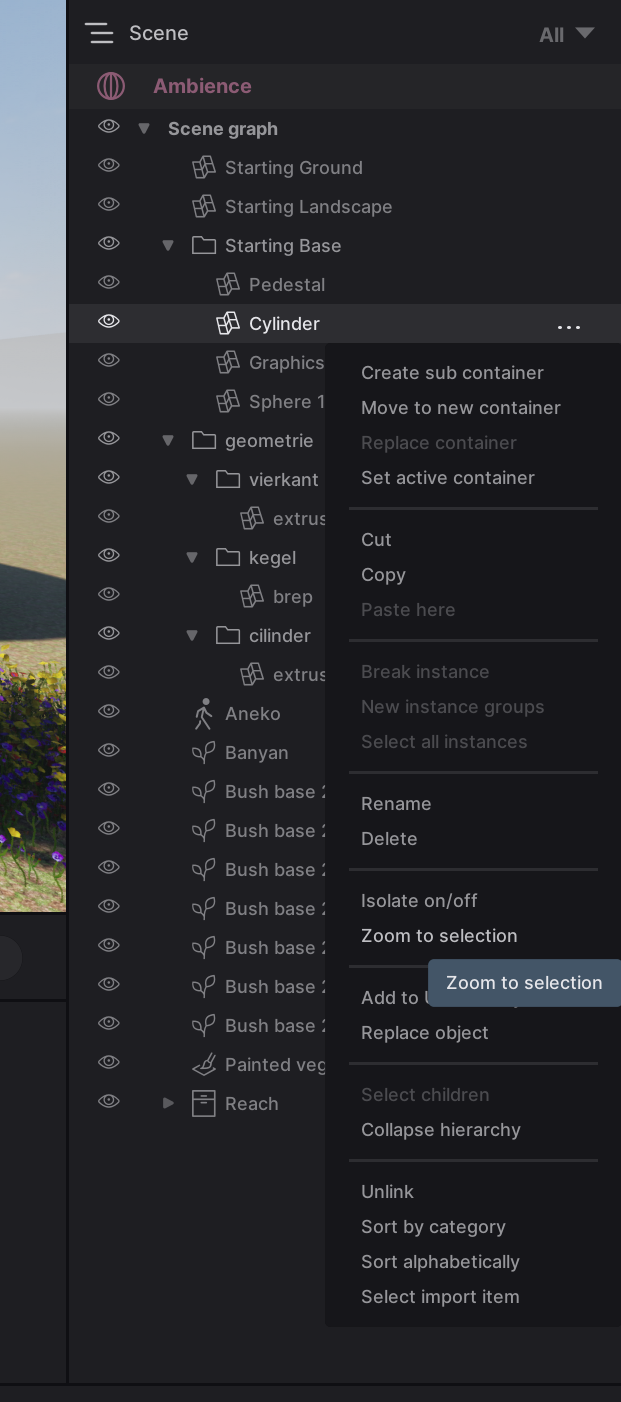
Accidentally zooming out too far or falling through an object in pedestrian mode can cause disorientation. Navigate to Scene, right-click on an object you want to go to and select Zoom to Selection (or press the shortcut key F). This will transport you to the selected object.
Version Management for Twinmotion Files
Save your Twinmotion files regularly as new versions (e.g., v1, v2, v3). This creates backups in case something goes wrong or if you’re unhappy with recent changes, allowing you to quickly revert to a previous version.
Substitution Table and Assets Folder
Keep all files that are used for the rendering in the same folder, including the rhino file, the Twinmotion file, the substitution table and all other dependencies. This way, it is easy to move your files to an external backup or different computer without losing data.
Write your feedback.
Write your feedback on "Using Twinmotion with Rhino"".
If you're providing a specific feedback to a part of the chapter, mention which part (text, image, or video) that you have specific feedback for."Thank your for your feedback.
Your feedback has been submitted successfully and is now awaiting review. We appreciate your input and will ensure it aligns with our guidelines before it’s published.
