Transferring image to Grasshopper geometry
-
Intro
-
GH script
-
Conclusion
Information
| Primary software used | Grasshopper |
| Course | Transferring image to Grasshopper geometry |
| Primary subject | Parametric Modeling |
| Secondary subject | General |
| Level | Advanced |
| Last updated | November 27, 2024 |
| Keywords |
Responsible
| Teacher | |
| Faculty |
Transferring image to Grasshopper geometry 0/2
Transferring image to Grasshopper geometry
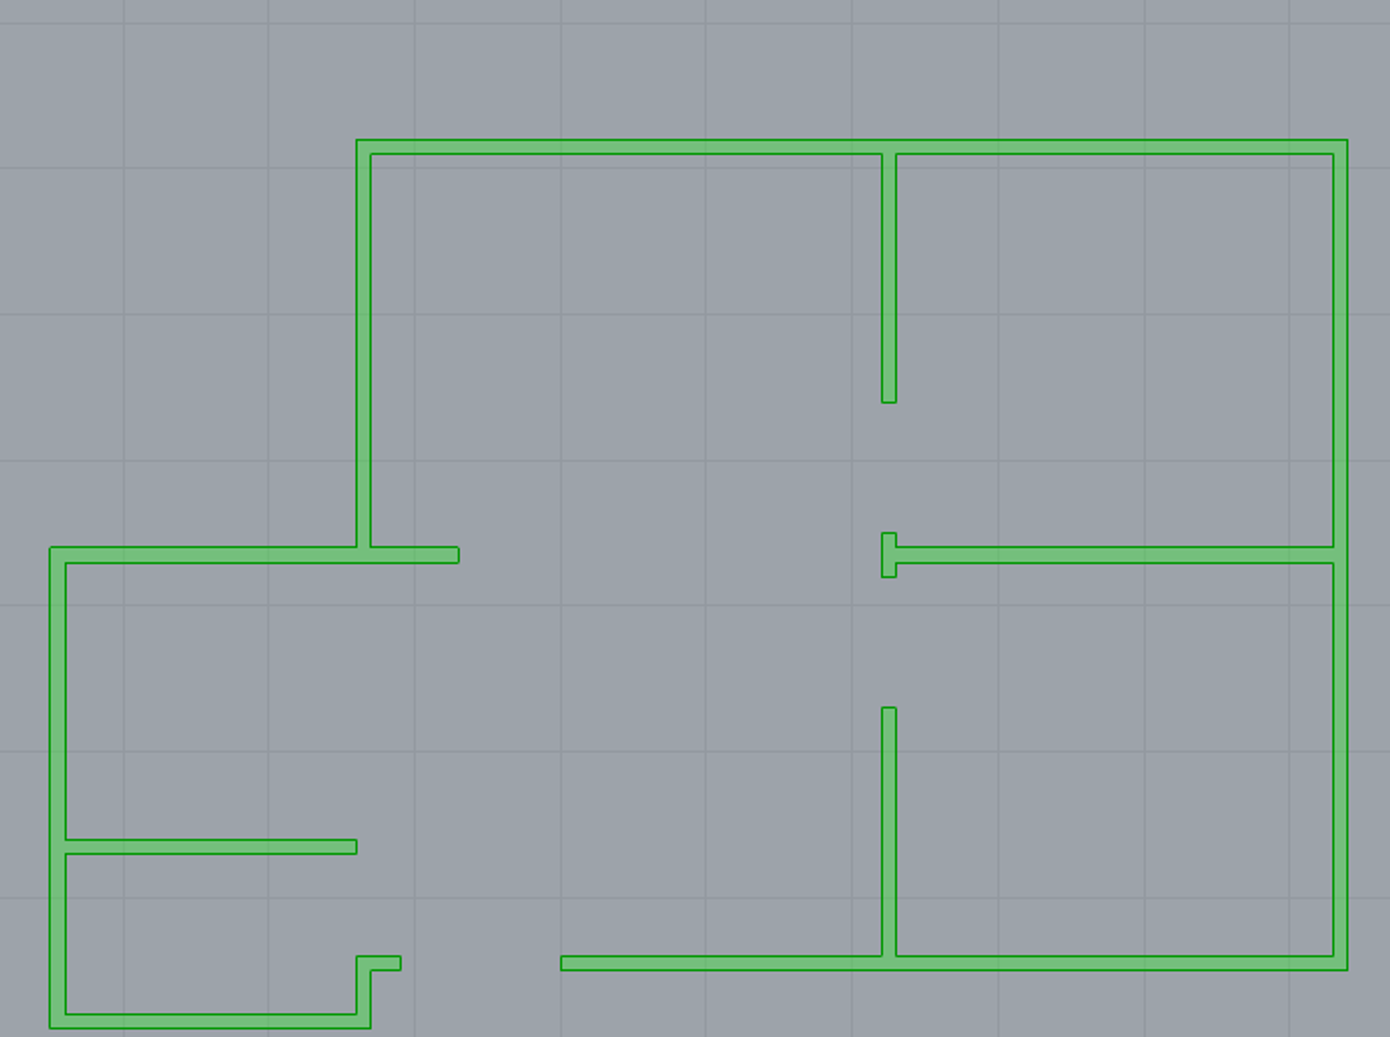
Here is an example of how to transfer a simple floorplan into Brep and points on Grasshopper using the brightness values of each pixel. However, this method is a hack specifically for floorplans without text and may not apply to other images.
Transferring image to Grasshopper geometry 1/2
GH scriptlink copied
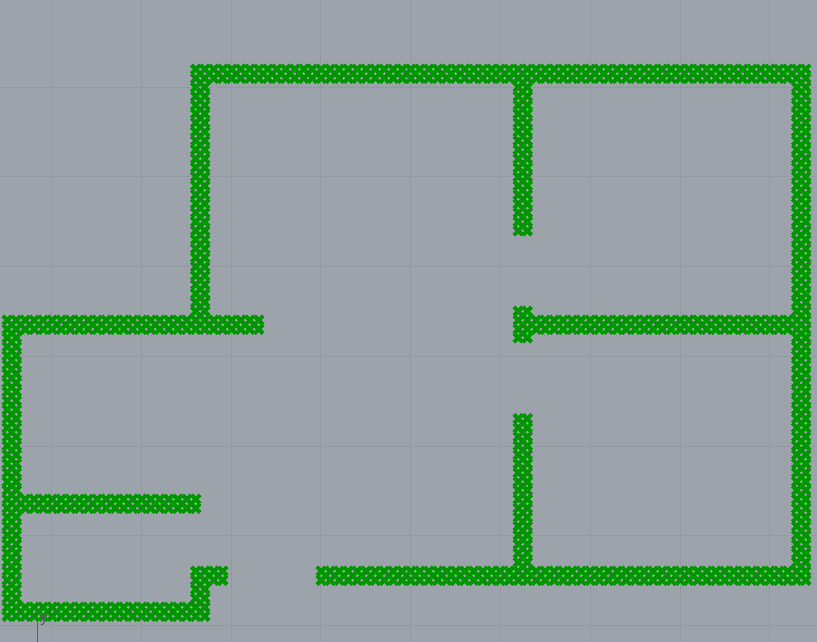
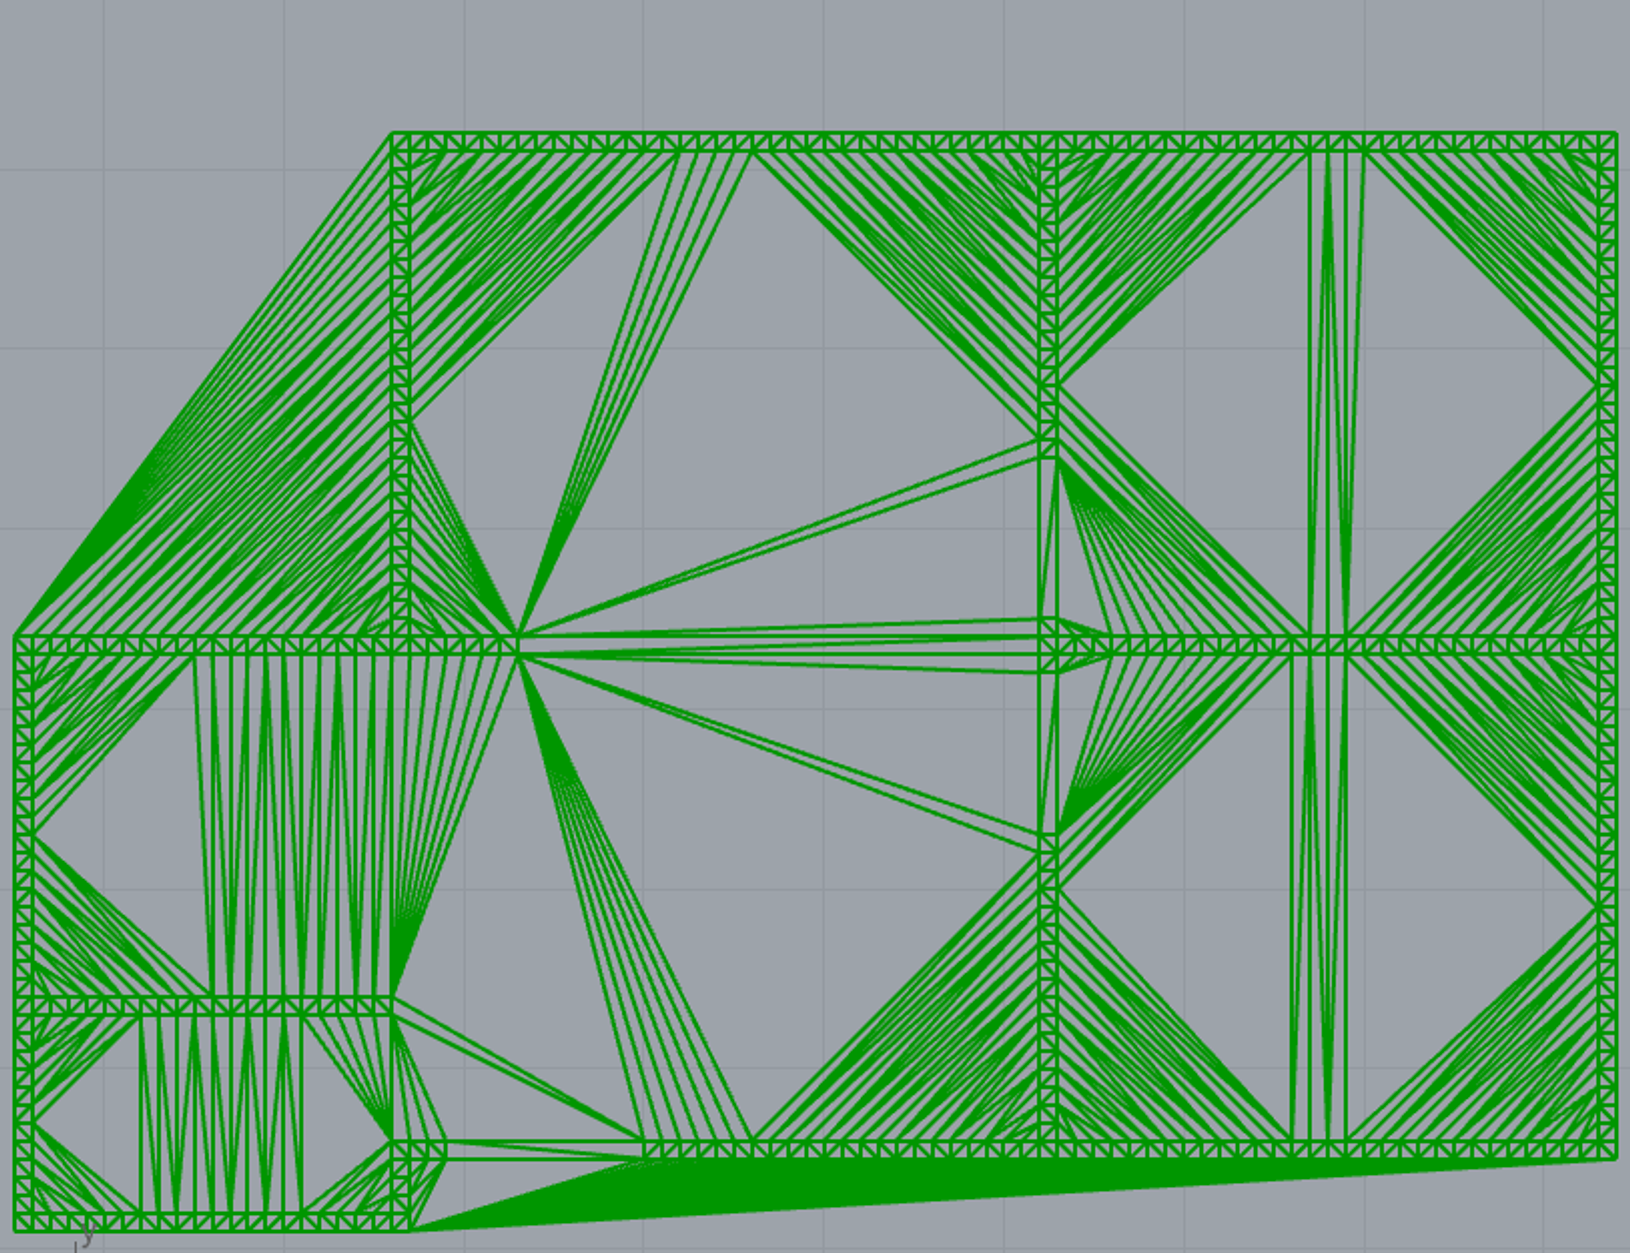
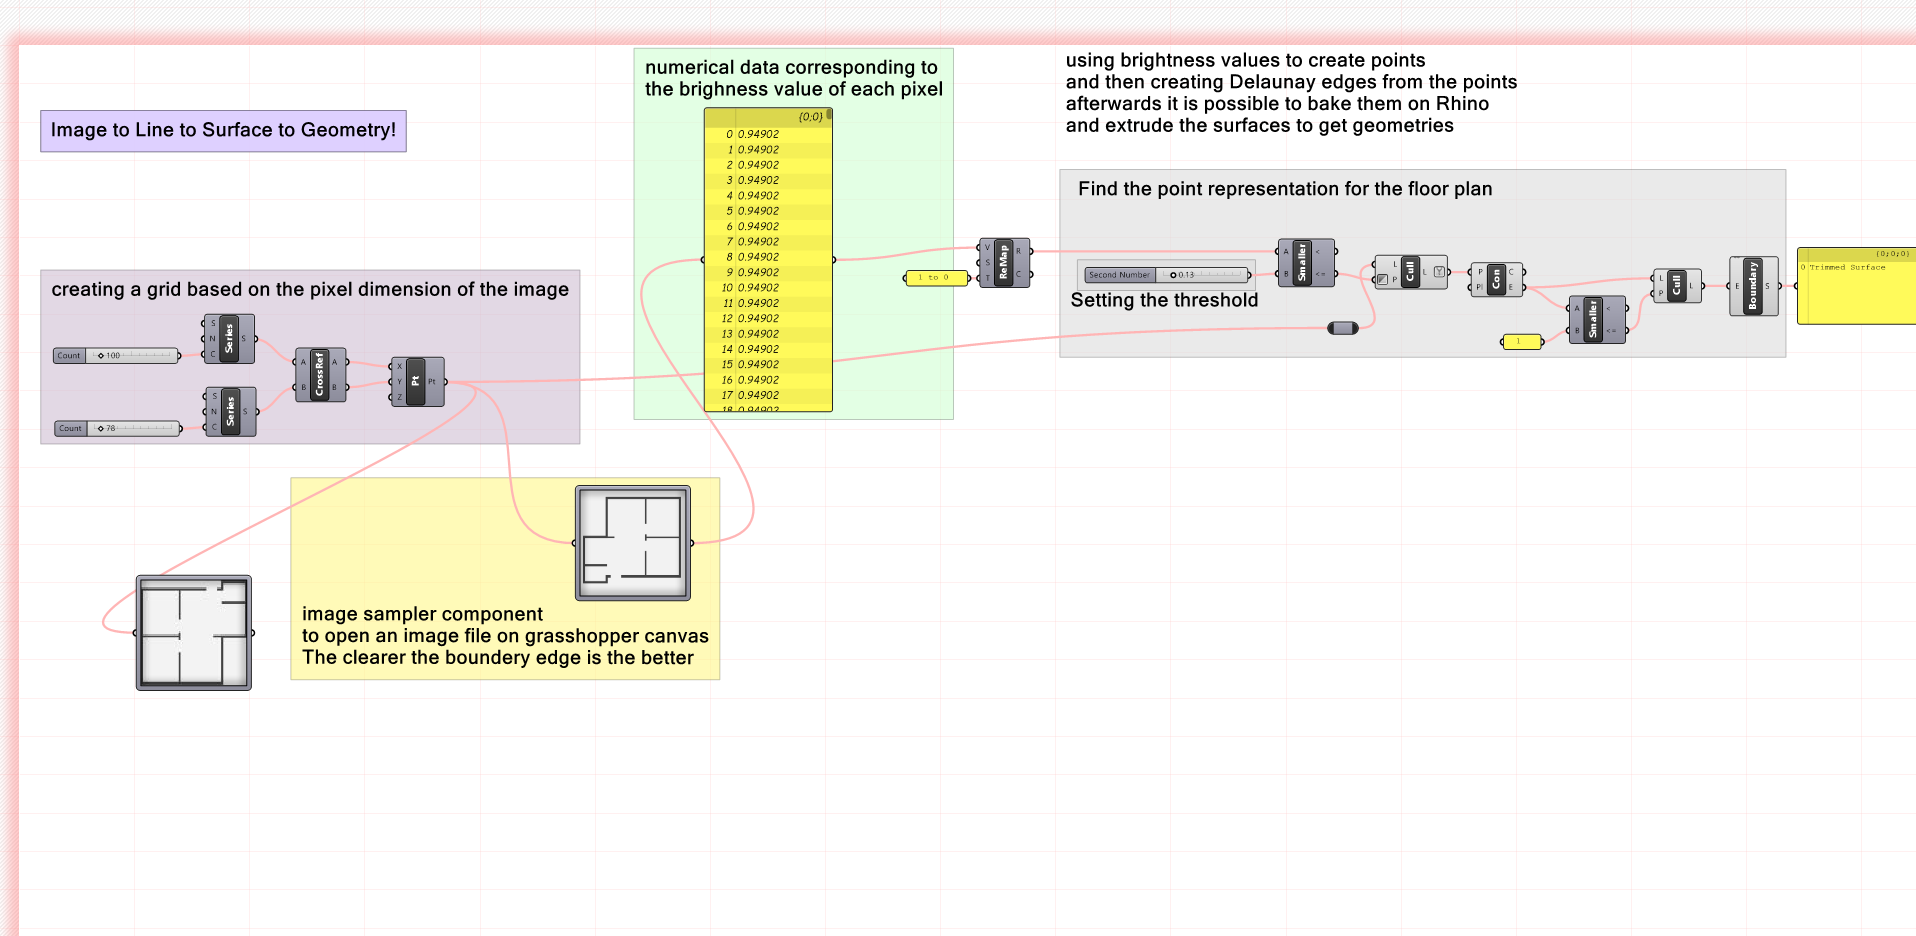
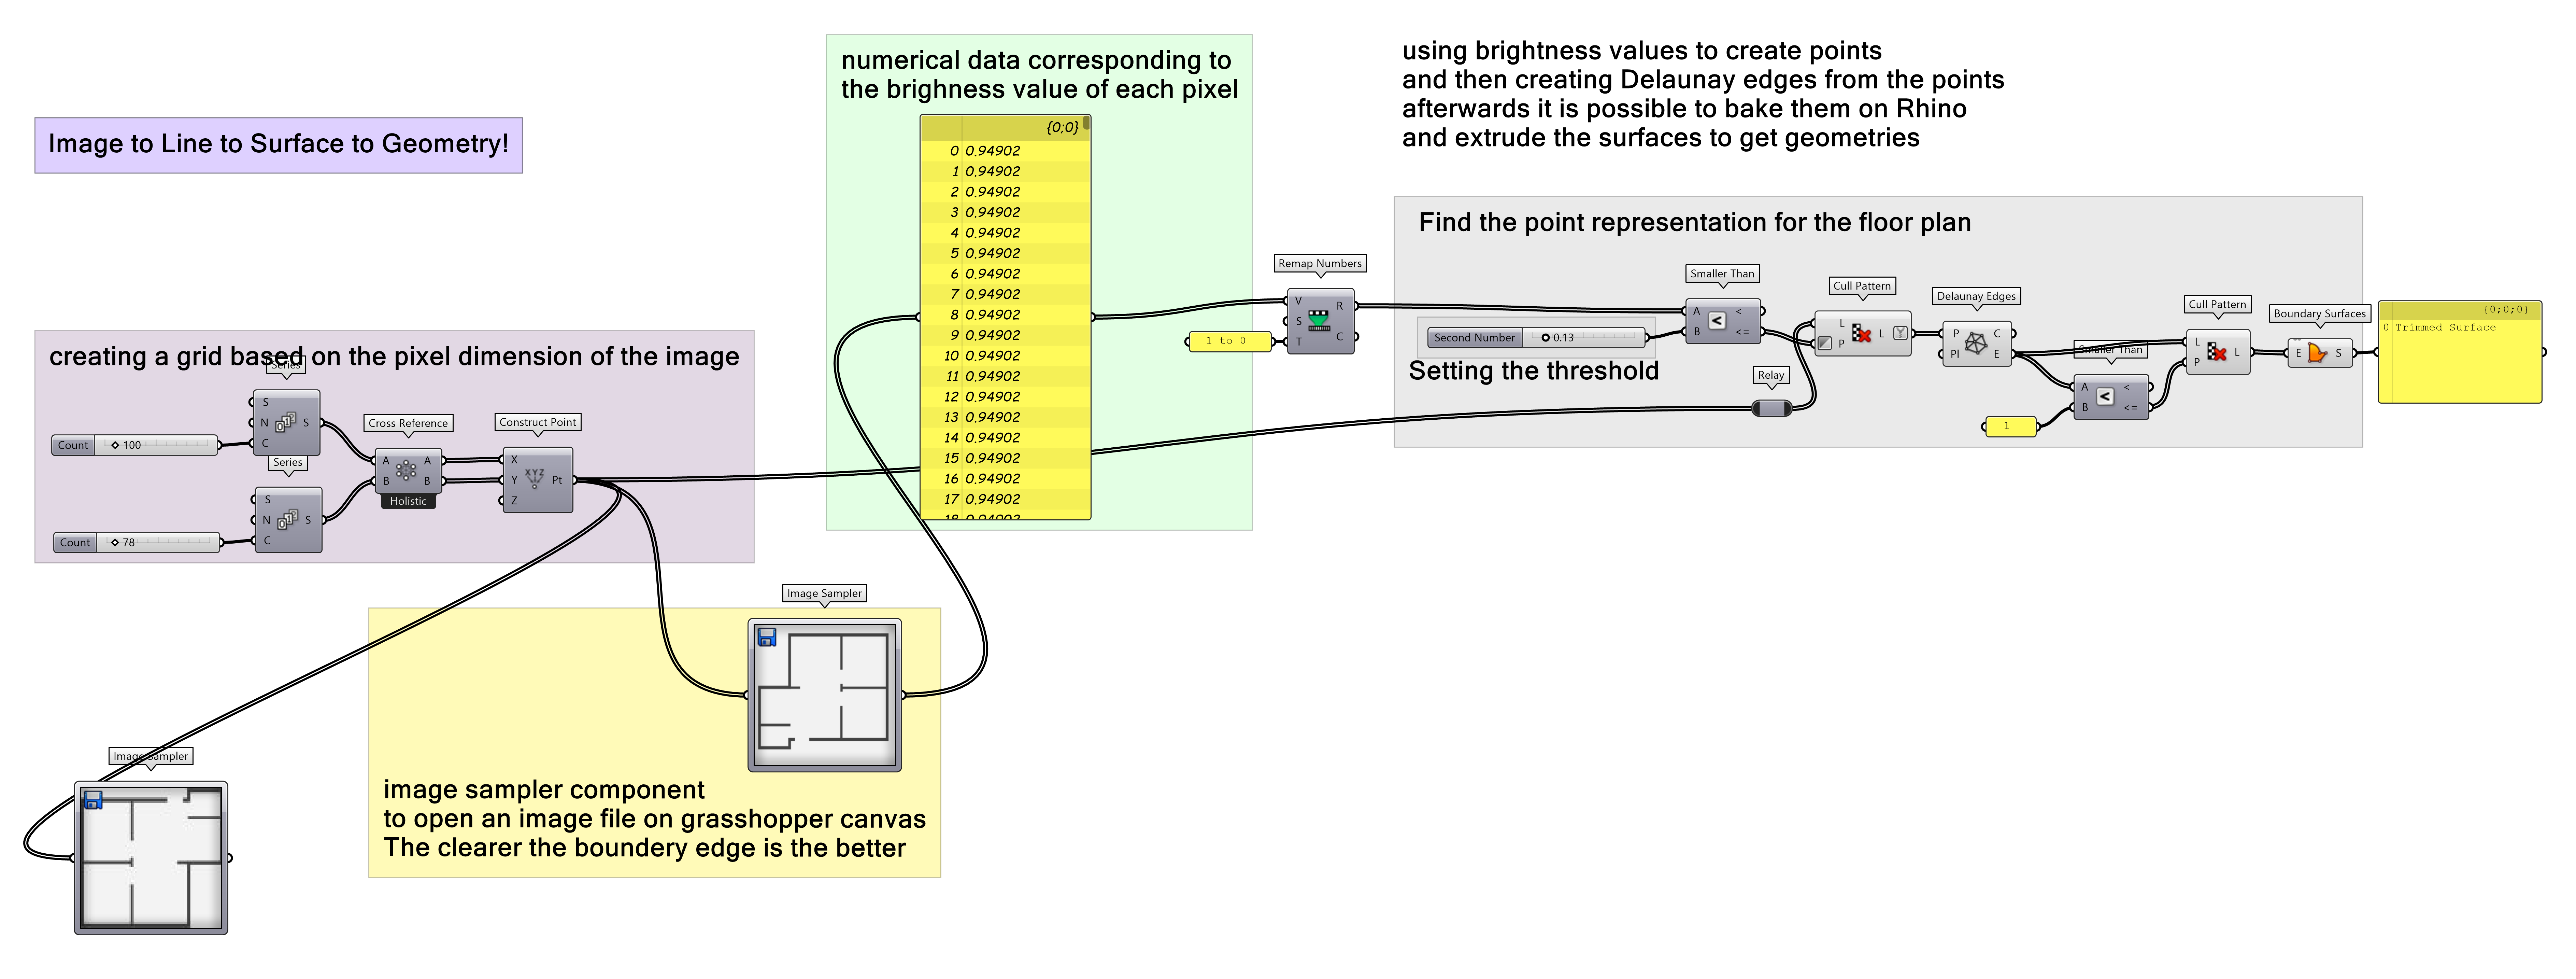
A simple floorplan into BREP and points on Grasshopper involves using the brightness value of each pixel in the image. The values are then projected onto a grid of points based on the image’s dimensions. Delaunay edges are then utilized to extract edges from the points. Applying a constraint makes it possible to extract the edges from the floor plan.
Transferring image to Grasshopper geometry 2/2
Conclusionlink copied
You now learned how to transfer an image to Grasshopper geometry. Here you can find an overview of the script.
Final exercise file
Here you find the final GH script of the tutorial.
Write your feedback.
Write your feedback on "Transferring image to Grasshopper geometry"".
If you're providing a specific feedback to a part of the chapter, mention which part (text, image, or video) that you have specific feedback for."Thank your for your feedback.
Your feedback has been submitted successfully and is now awaiting review. We appreciate your input and will ensure it aligns with our guidelines before it’s published.
