Speckle in Rhino
-
Intro
-
Installing Speckle for Rhino
-
Exchanging Data
-
Rhino BIM
Information
| Primary software used | Speckle |
| Course | Speckle in Rhino |
| Primary subject | Collaboration |
| Secondary subject | Collaboration |
| Level | Intermediate |
| Last updated | November 27, 2024 |
| Keywords |
Responsible
| Teacher | |
| Faculty |
Speckle in Rhino 0/3
Speckle in Rhino
This tutorial describes how to use Speckle for Rhino.
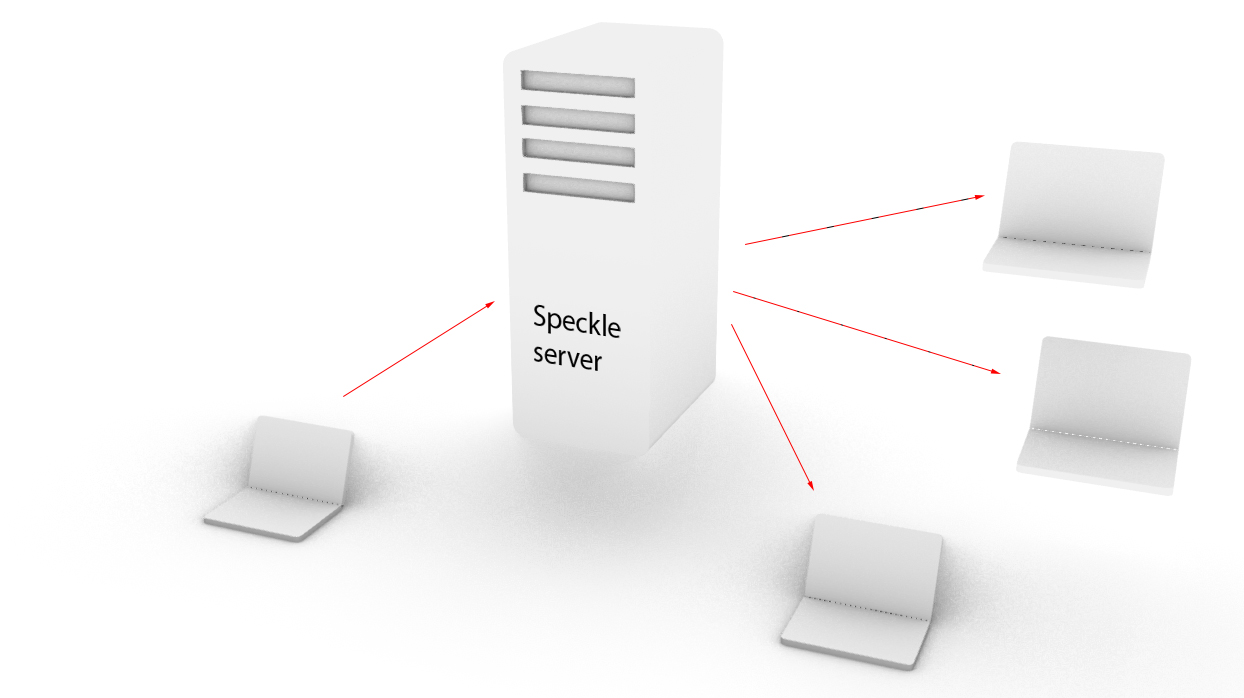
In Rhino the use of Speckle is limited to the transfer of geometry data to the Speckle server, while in grasshopper you can send additional data. If in a design team some designers are working on the structure, others on the cladding and others on the whole design, the data will also be distributed between the partners. Speckle will allow you to send and receive data to and from your design partners.
Speckle in Rhino 1/3
Installing Speckle for Rhinolink copied
Making an account
For using Speckle you need an account.
After opening Rhino, the software will automatically recognize the new Speckle plugin. You will get a message that Rhino is installing Speckle. Speckle may not be immediately visible in Rhino. Enter the SpecklePanel command to open the Speckle panel in your viewport.
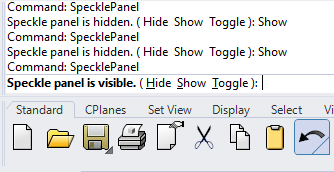
- Open the Speckle viewport in Rhino
- In the command line, click on Show
In the Speckle menu, you will need to create an account. If you don’t have yet an account it will ask you to make one. This account will give you access to the server and allows you to communicate with your design partners.
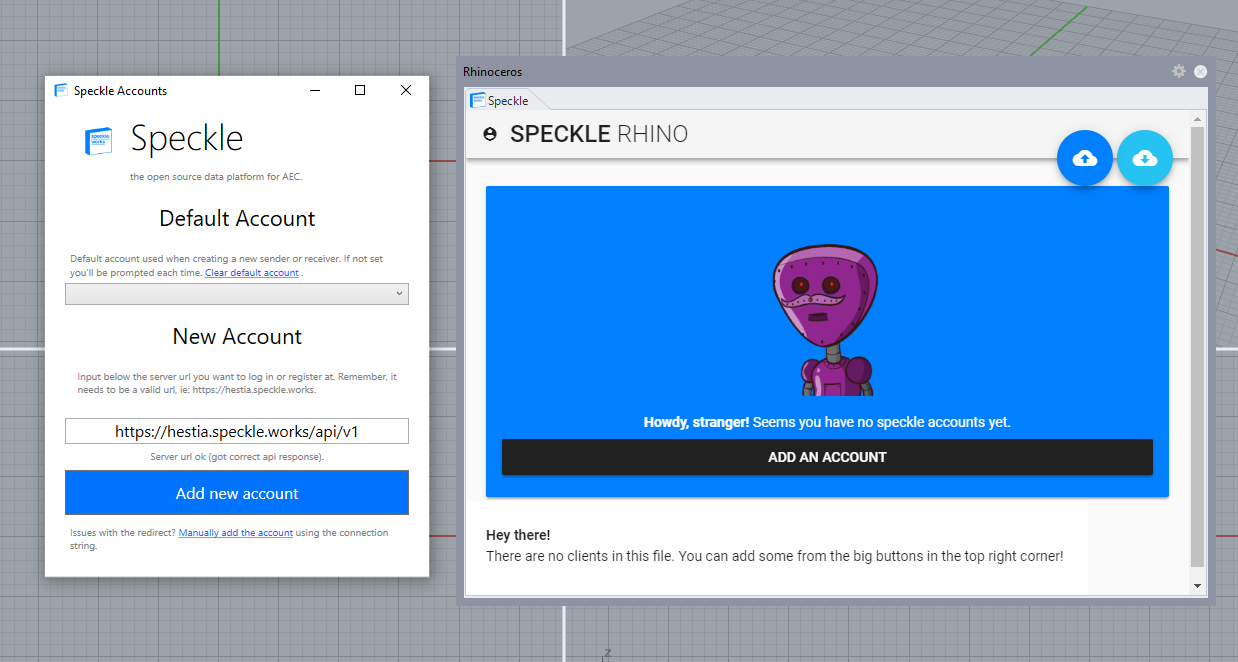
- Click on “Add an account”
- In the new opened viewport, enter the following URL: https://hestia.speckle.works/api/v1
- Click on “Add new account”
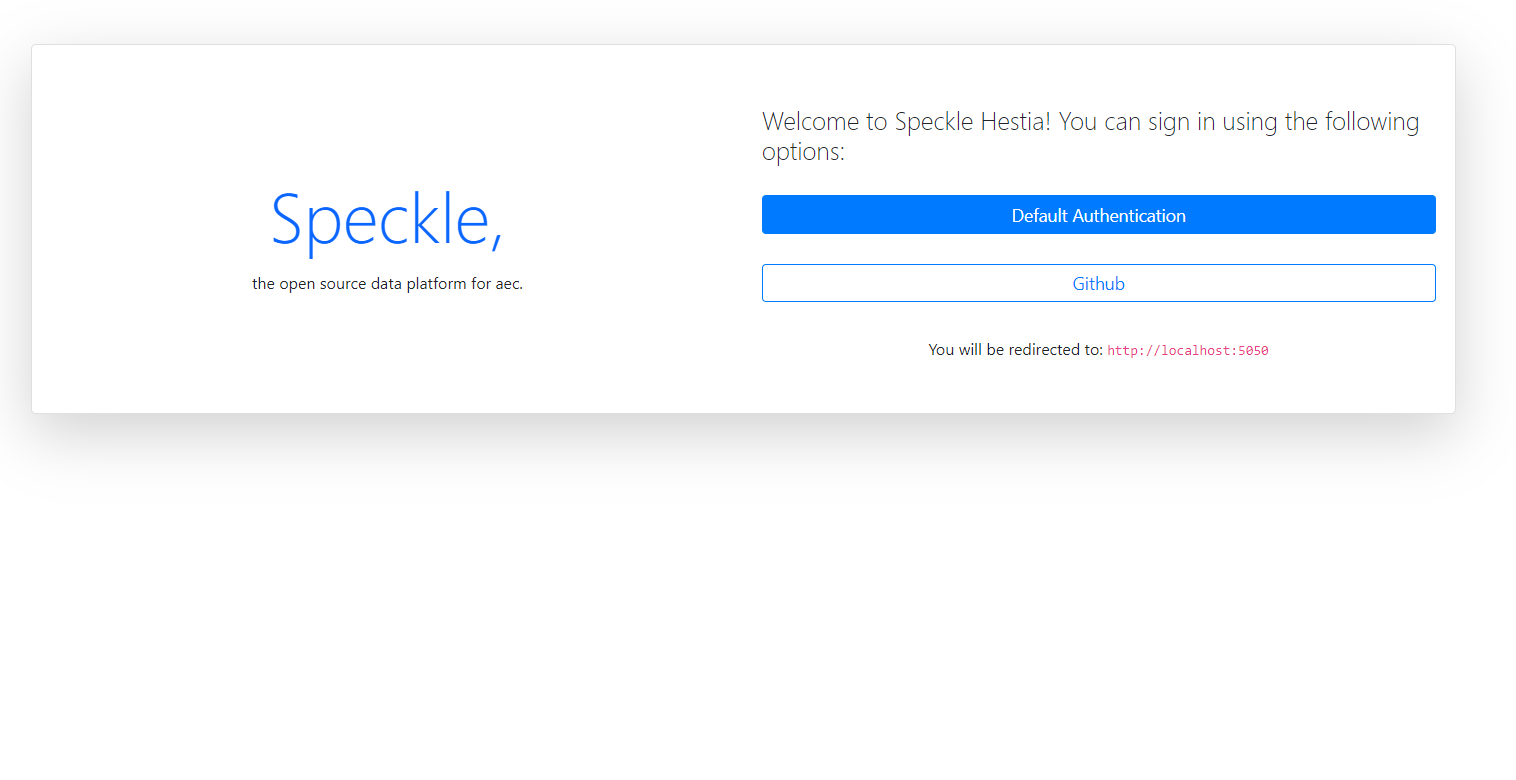
Your browser will now open a new webpage. You will need to do a default authentication.
- In the opened webpage, click on Default Authentication
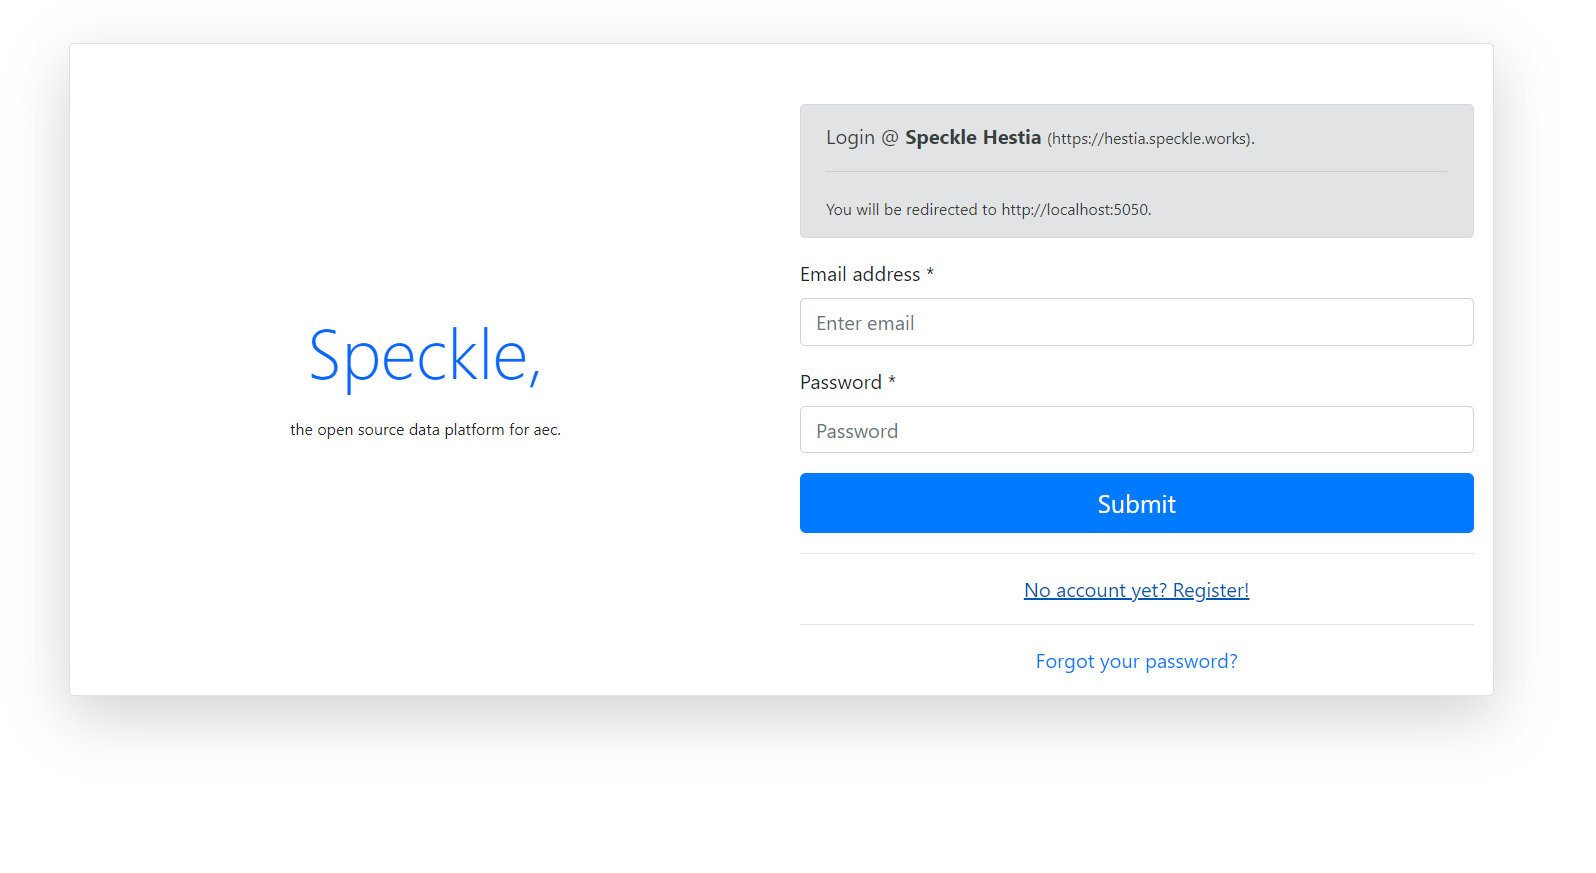
You will need to create a new account. With the account you can now log into the server and send and receive data.
- Click on “No account yet? Register!”
- Enter your personal details. Use your @student.tudelft.nl email address for your account
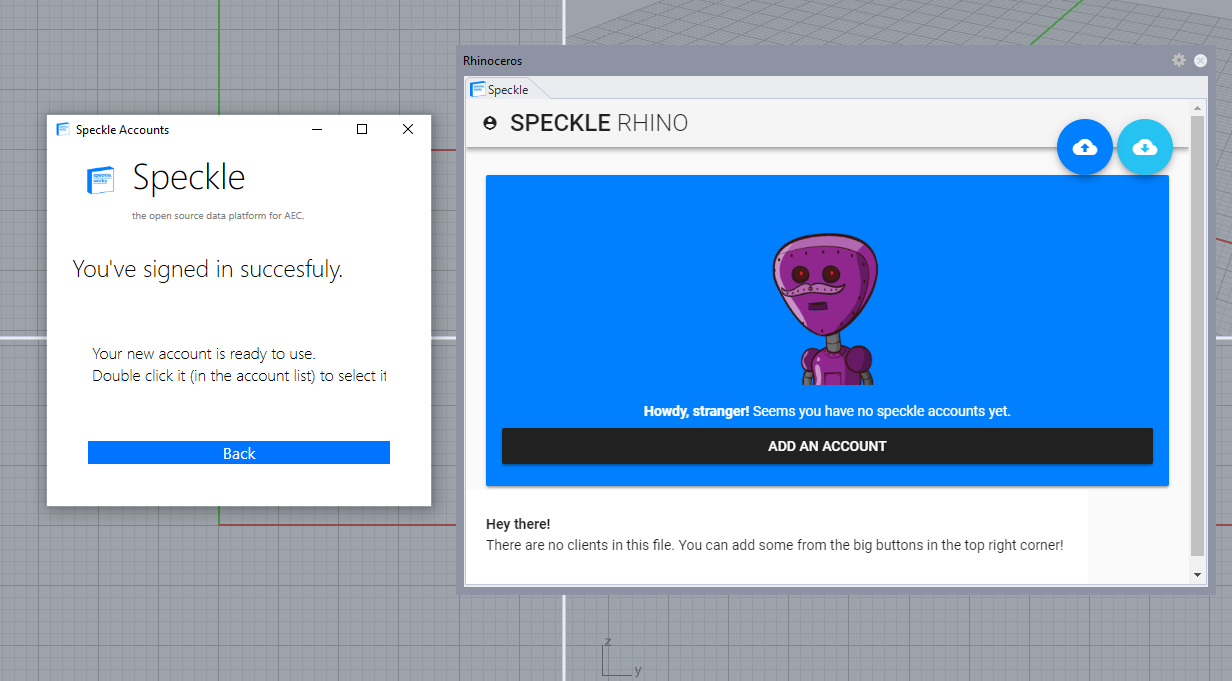
In your Rhino viewport, the Speckle viewport will tell you that you signed in successfully. Close the Speckle Accounts viewport.
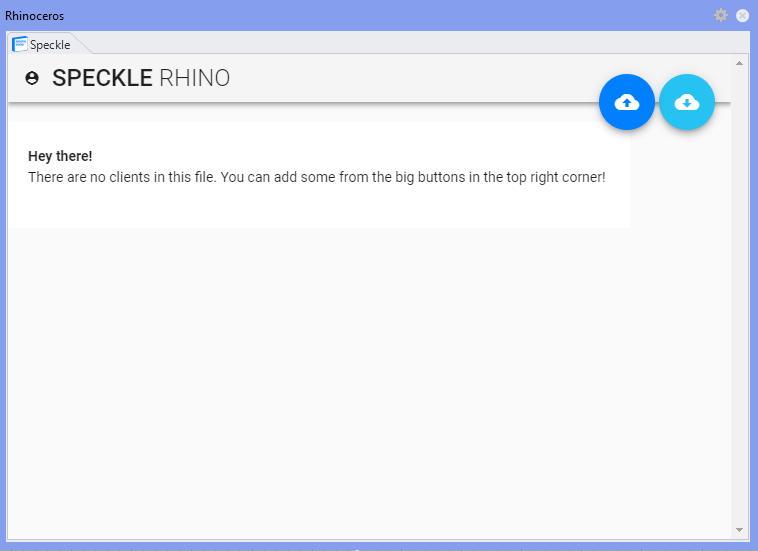
Your installation and sign-in is now completed.
Speckle in Rhino 2/3
Exchanging Datalink copied
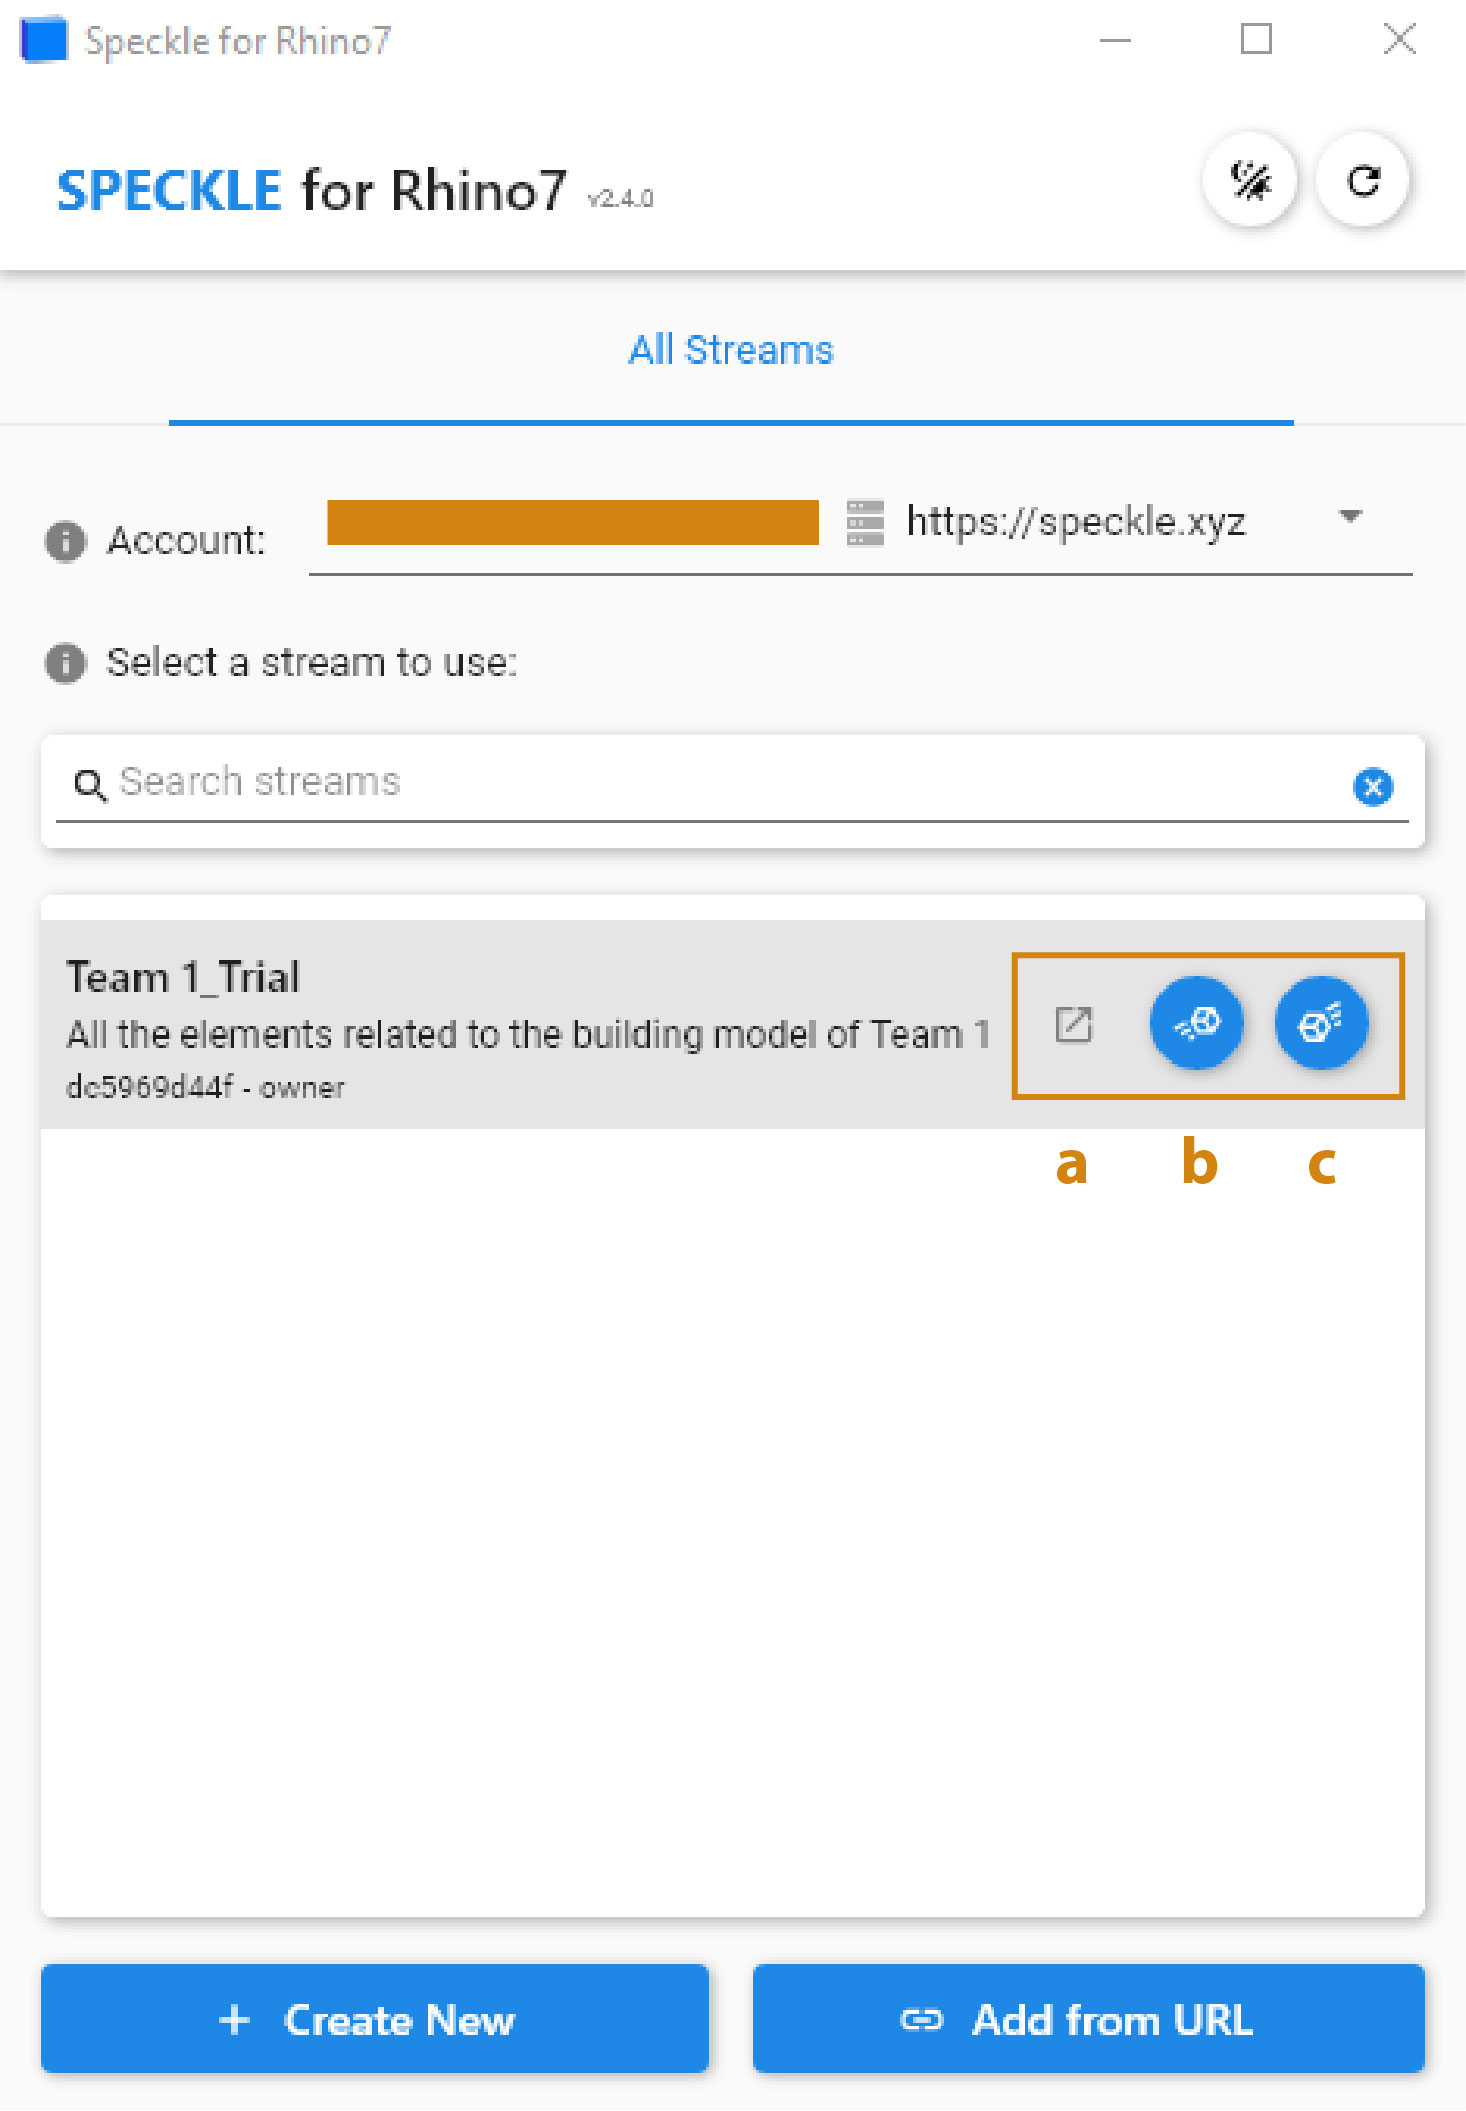
Type ‘Speckle’ in the Command Line and the Speckle Interface will appear. From there you can browse the streams that are connected to your account, create a new stream or add one using its streamID.
Next to each stream, you will find the buttons in order to:
- See the Stream in the Speckle Web App.
- Send Data to the Stream.
- Receive Data from the Stream.
Important to note: If you do not have your account connected, you will not be able to see your streams. Make sure you connect your Speckle account through the Speckle Manager.
Sending data in Rhino
With the account made it will be possible to send and receive data in Rhino. In this case a set of columns are made and will be send to the server. The following steps are needed:
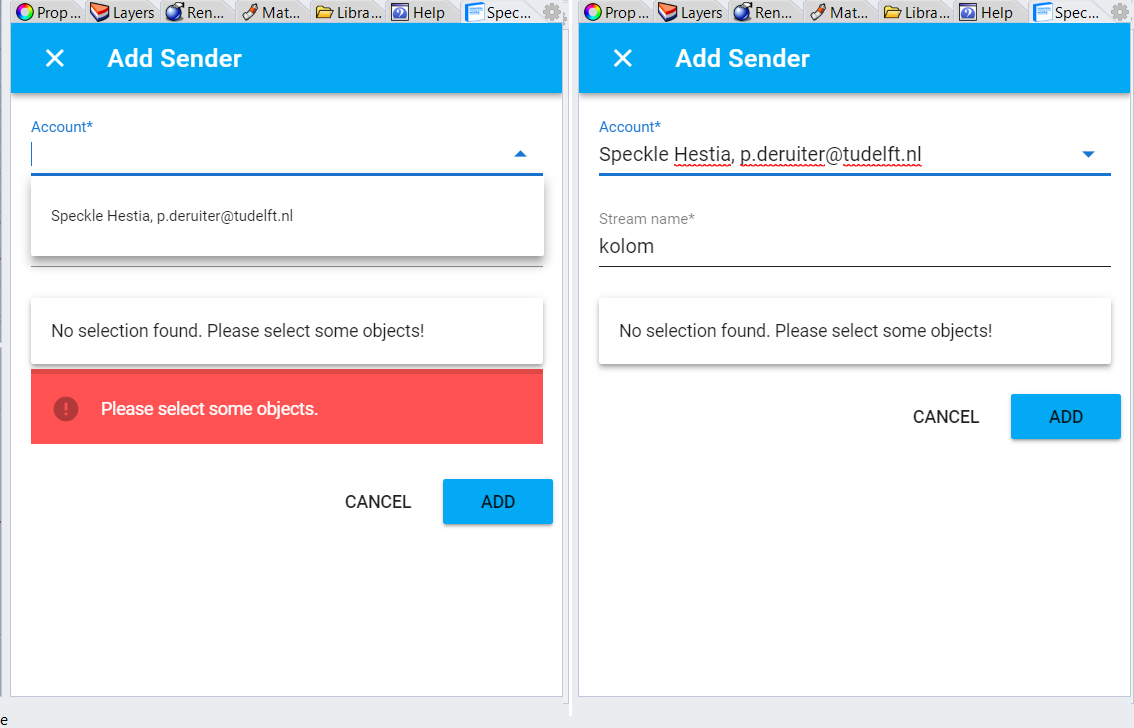
- Click on the dark blue send button
- Fill in the account name
- Define the name of the stream, so it can easily be recognized by the person who will download this stream.
- Select the objects you want to stream to the server
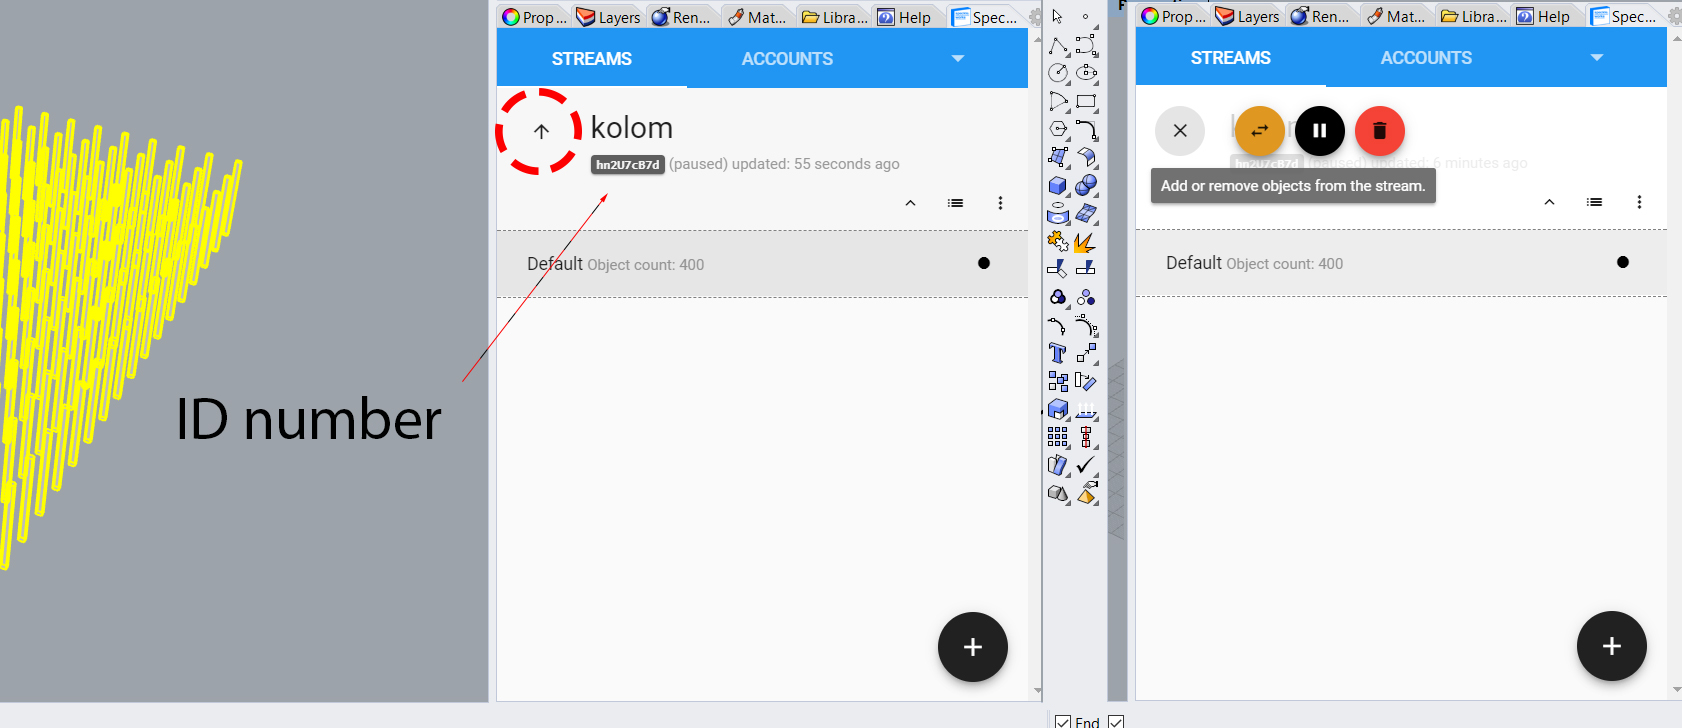
If you want to edit the stream by adding or deleting data then use the arrow in the menu to open the option of changing the content of the stream. You will have to update the stream after changing the content.
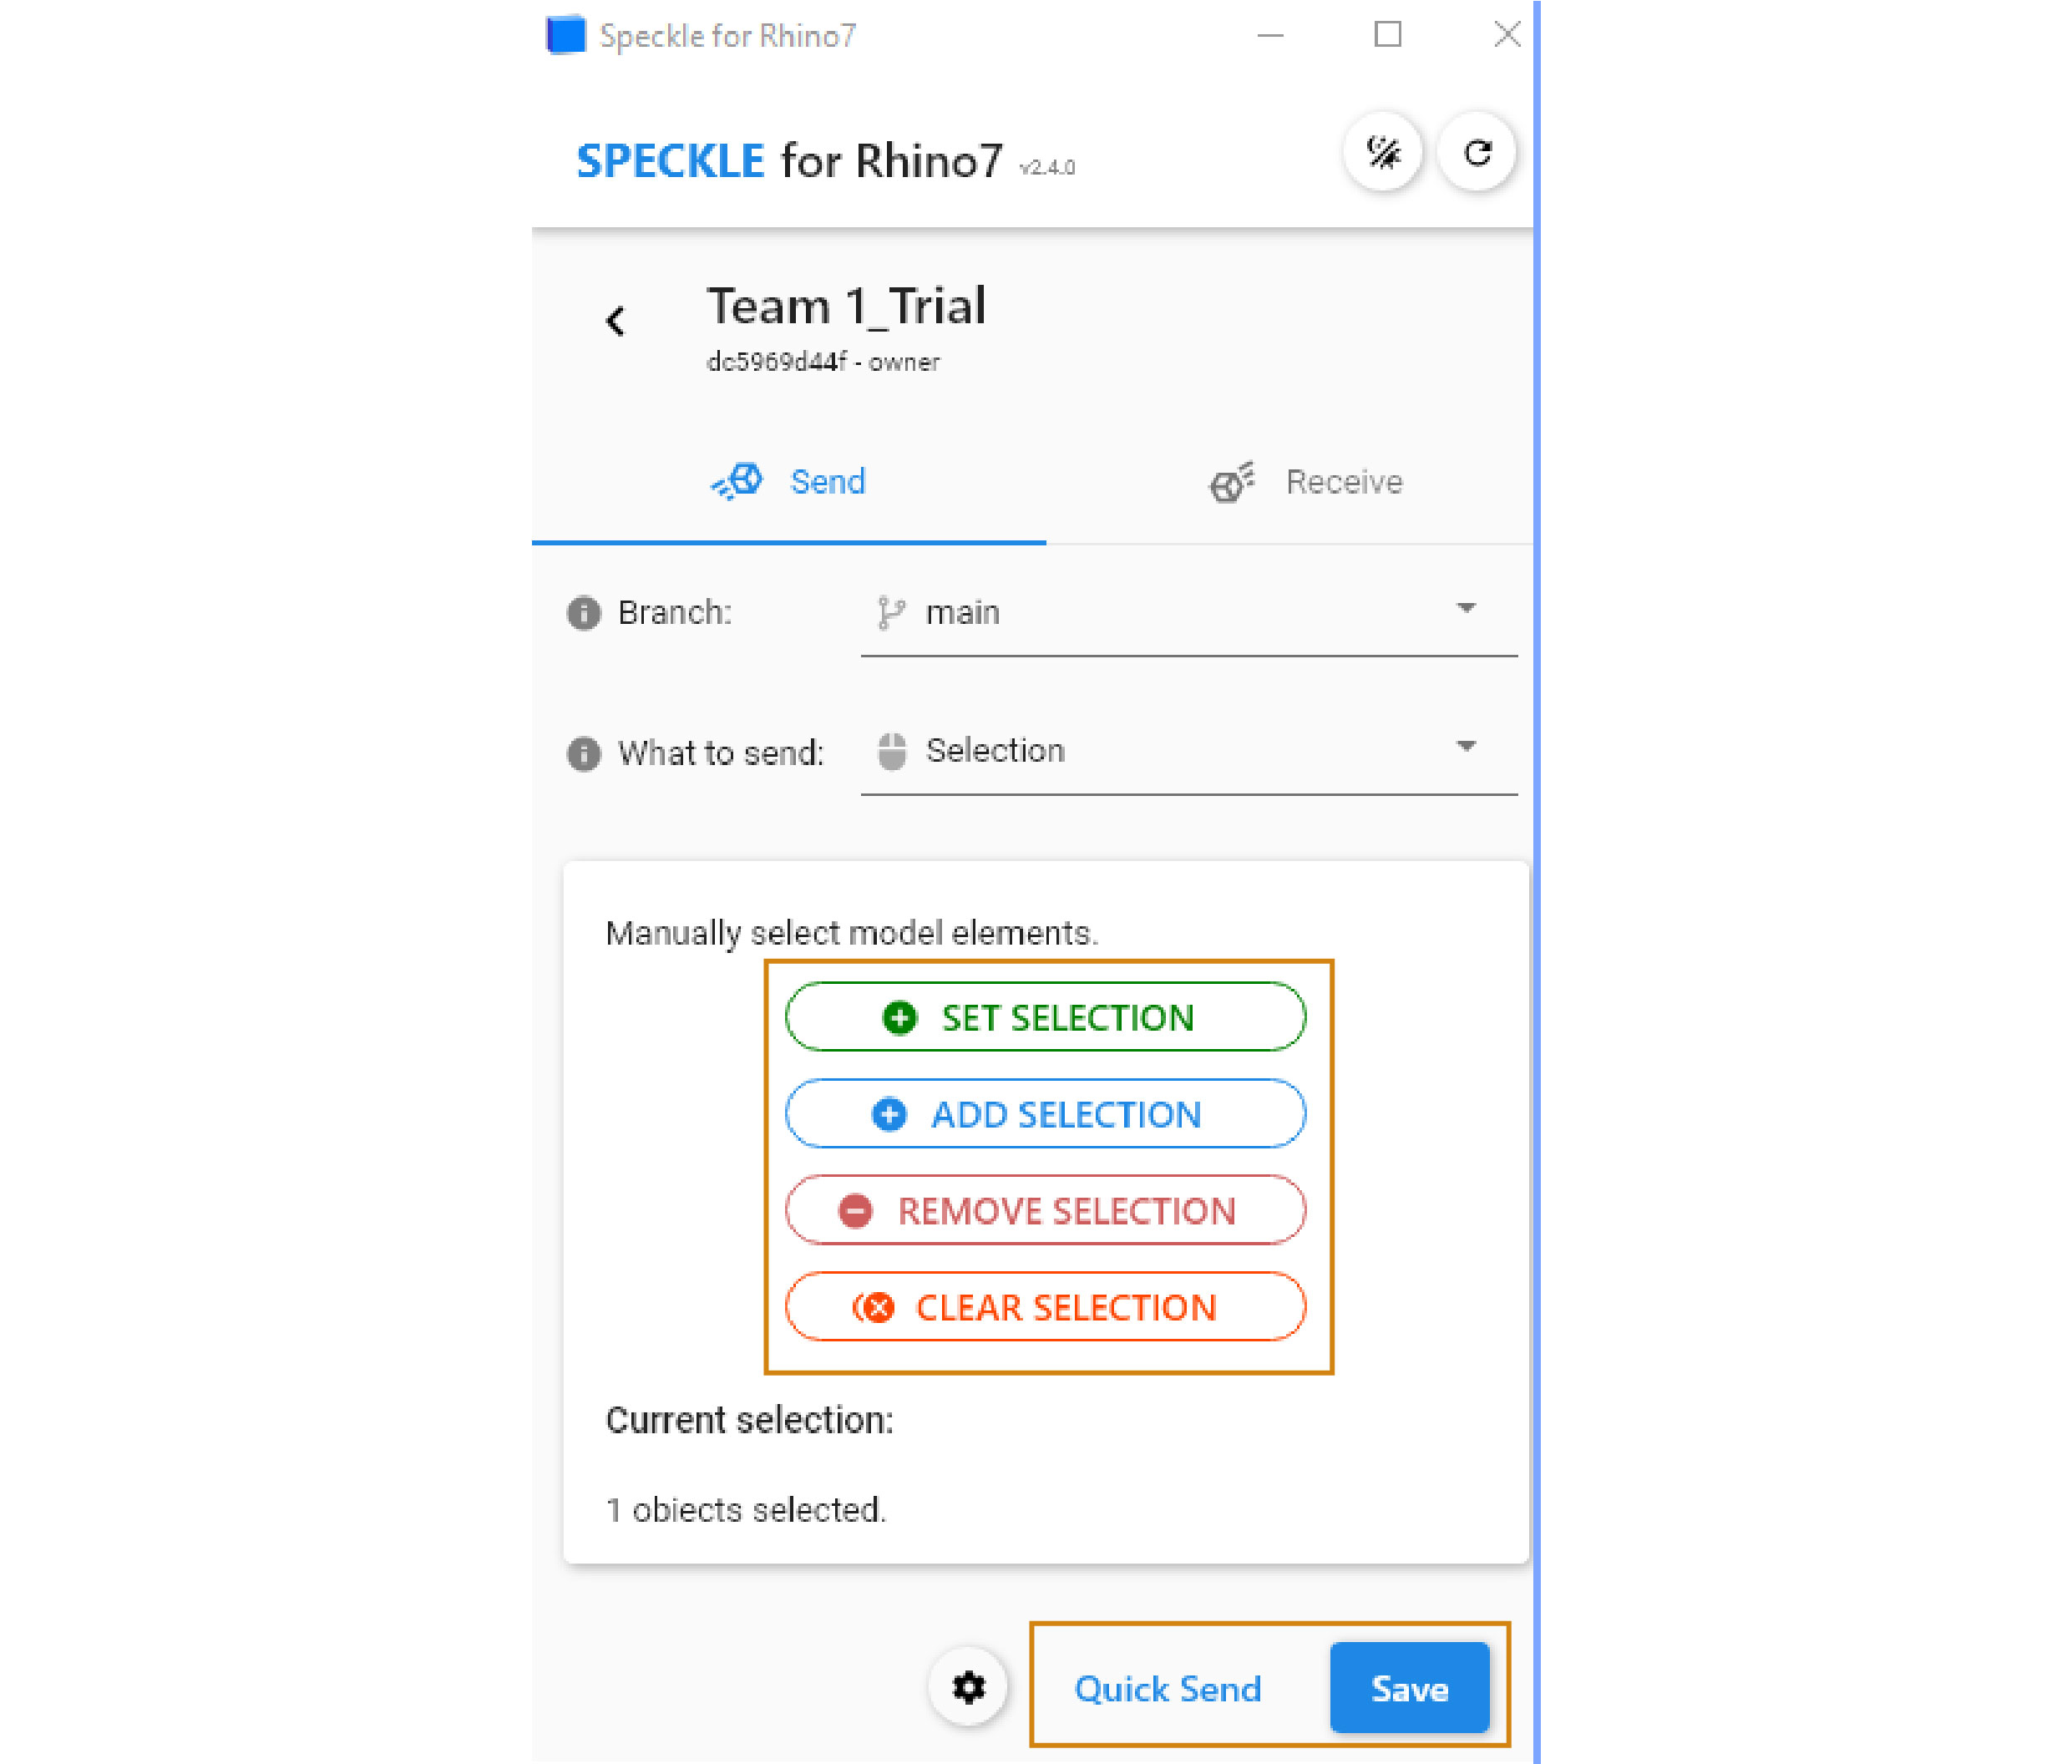
- Click on the ‘Send’ button.
- Select the geometries you want to send from Rhino.
- Use the highlighted buttons to define your stream selection (By browsing on top of each tab you can see their function description).
- Press ‘Quick Send’ to send your geometries in the cloud.
Important to note:
- In case you want to send a whole layer from Rhino, you should right-click on the name of the layer » Select Objects.
- Apply ‘Save’ in case you want to save the selection setup. However, it needs to be highlighted that in this regard the data is not directly sent to the Speckle platform! The selection setup is just saved in order to be sent in a later stage.
Receiving data in Rhino
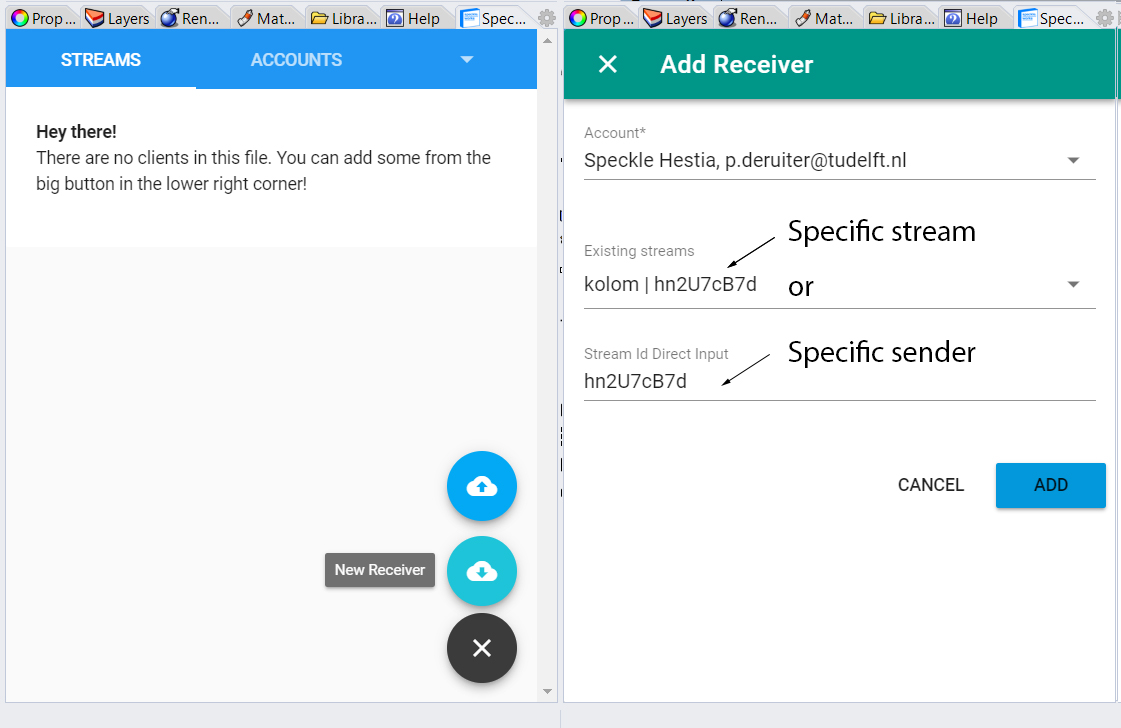
It is possible to open a specific stream of a sender or the whole stream of the sender. It is also possible to use multiple receivers from different senders or specific streams from a same sender.
The geometry will be displayed in Rhino. However it won’t be editable. Any update from the sender will trigger a response with the question if you want to update the stream.
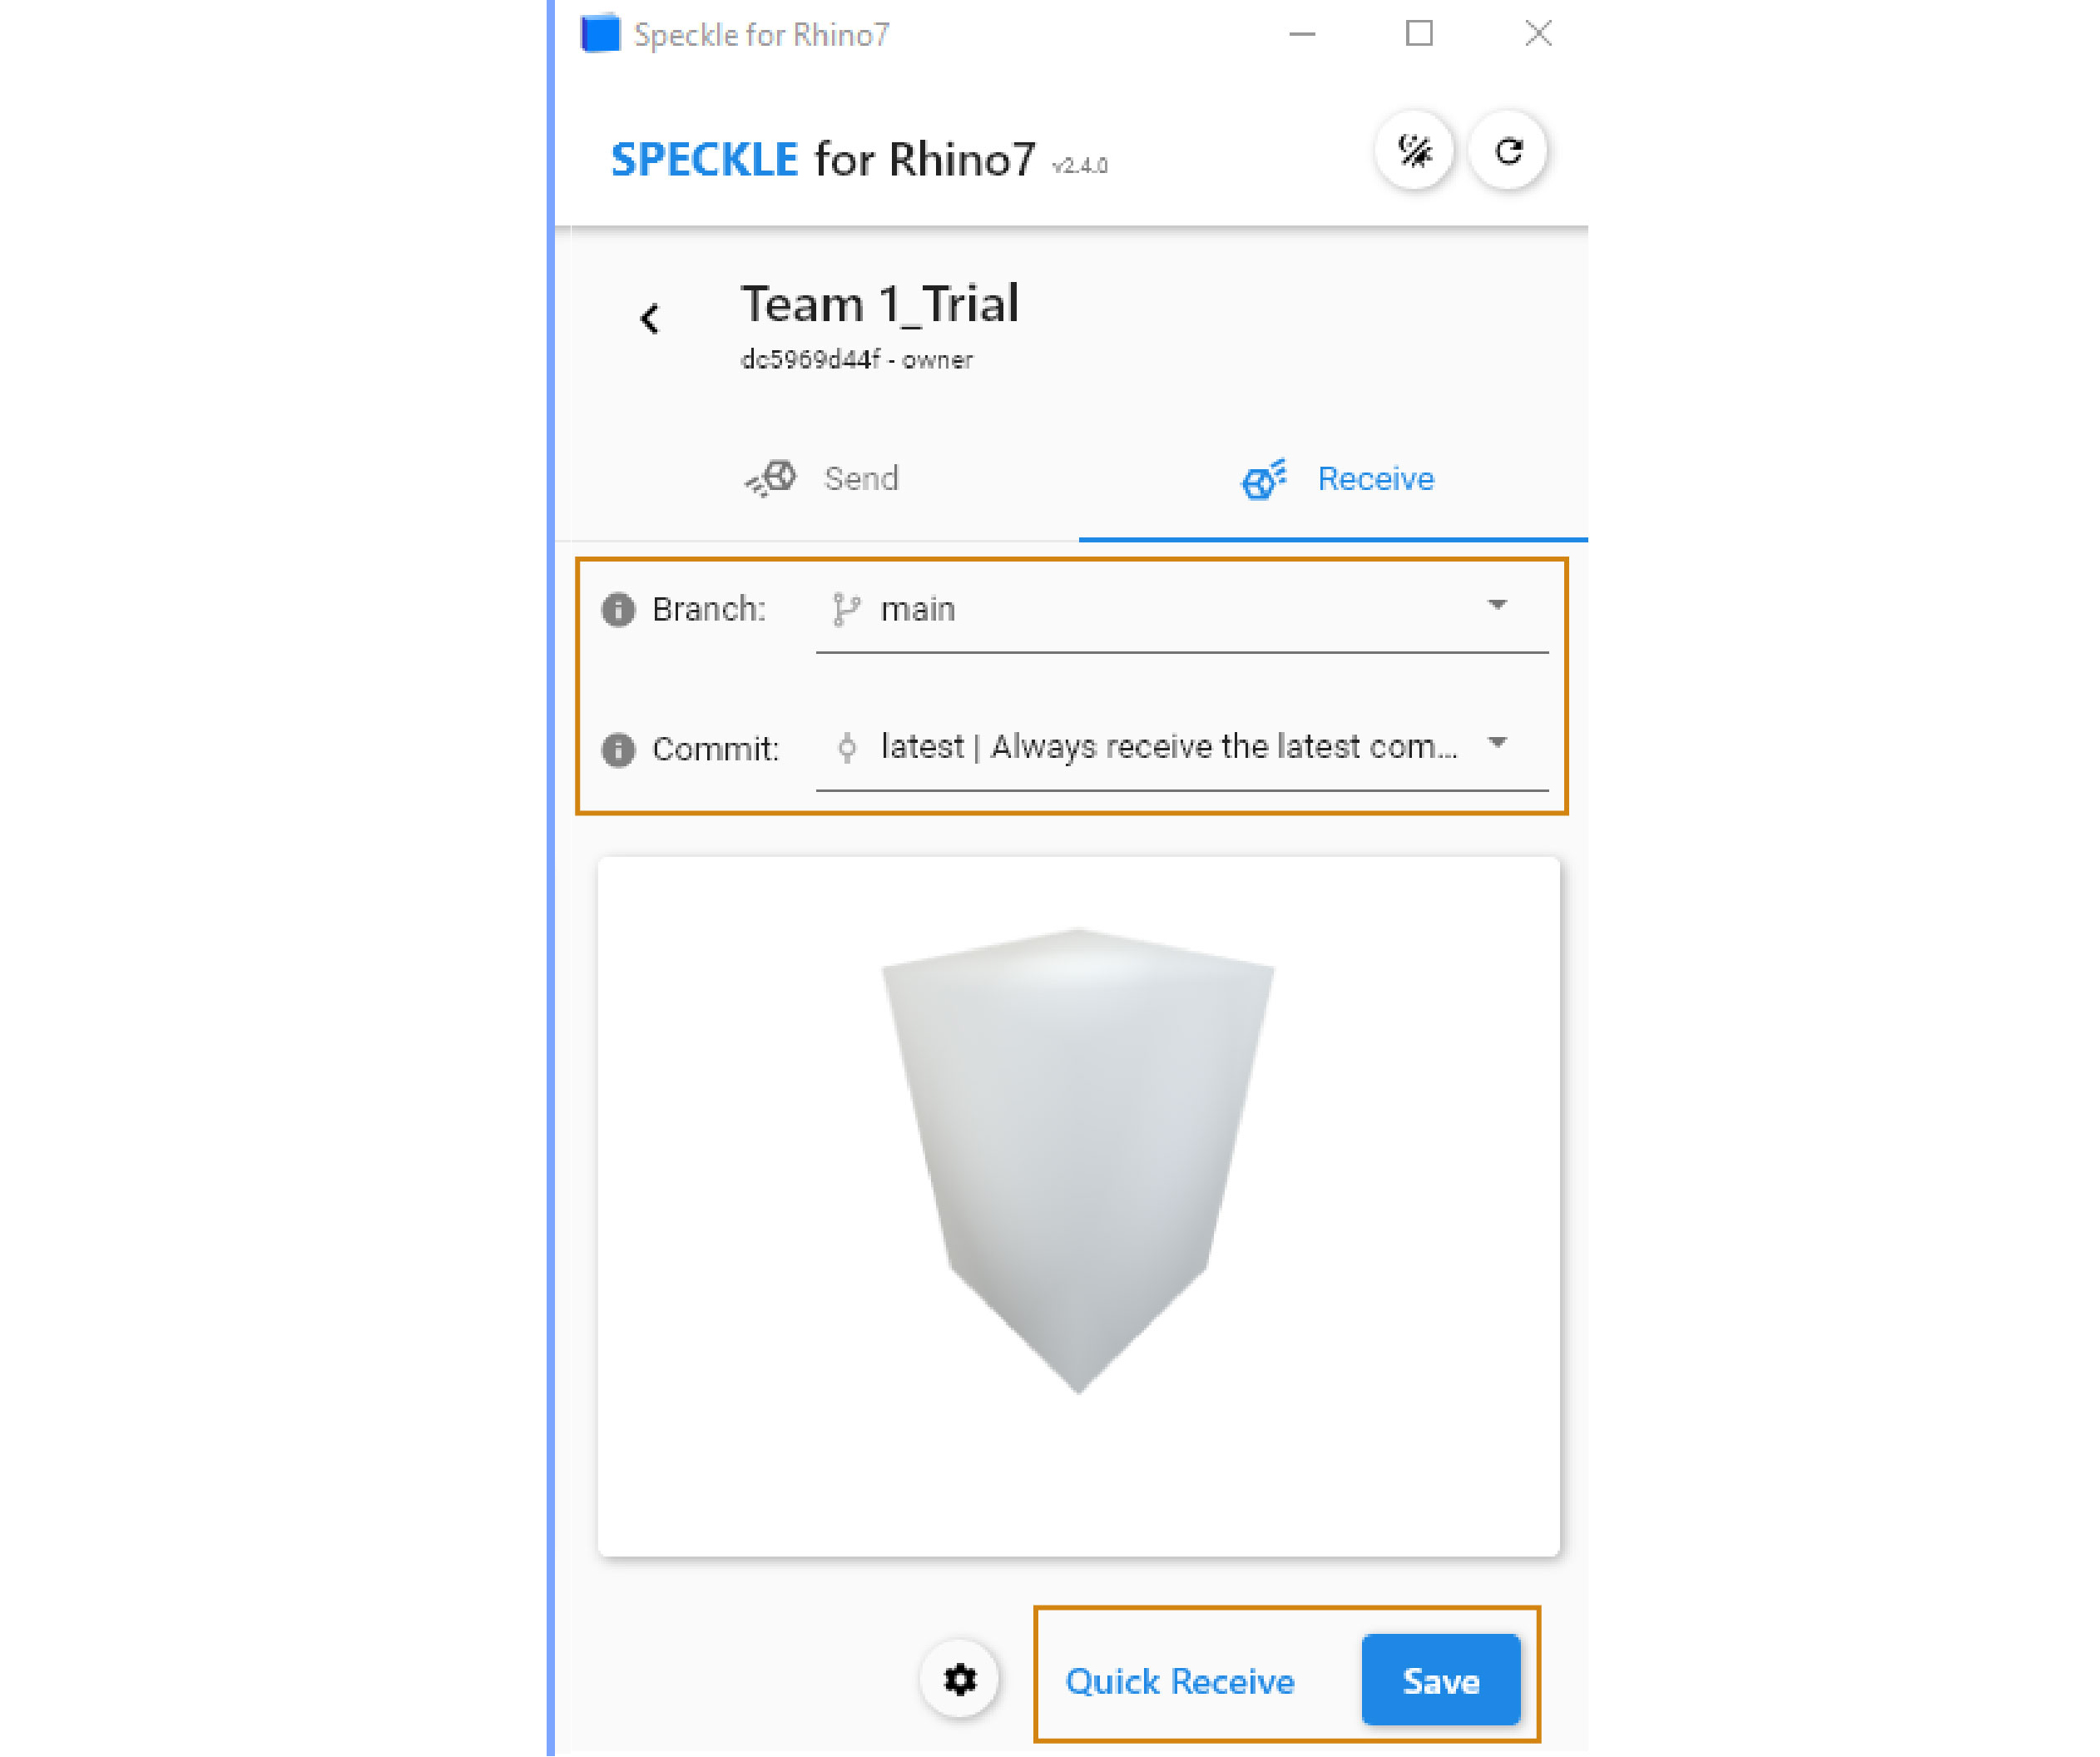
- Click on the ‘Receive’ button.
- In the tabs ‘Branch’ and ‘Commit’, you can specify the exact data you want to extract. You can choose the specific branch but also the specific model version (commit) that you want to extract every time.
- Press ‘Quick Receive’ to receive the requested geometries.
Important to note:
- Apply ‘Save’ in case you want to save the selection setup. However, it needs to be highlighted that in this regard the selection is not directly received from the Speckle platform, so you will not be able to see it in your file. The selection is just saved in order for you to come back and receive it at a later stage.
- Each time you receive data, they will be automatically stored in a new layer in your Rhino file in order to be easily selected and not interfere with the rest of the model. Afterwards, you should manually replace the old elements in the model and assign it to the respective layers so that, in the end, the updated version is incorporated.
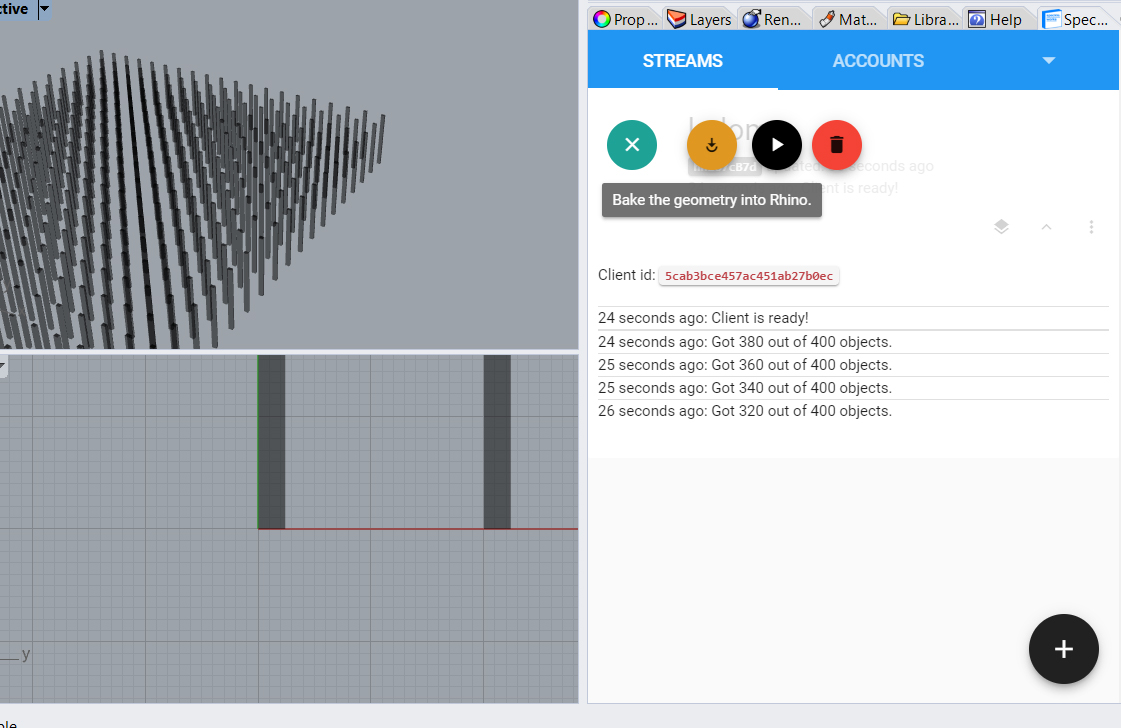
To edit the geometry you need to bake it. Keep in mind that the link with the stream will be severed and updates won’t take place anymore.
Speckle in Rhino 3/3
Rhino BIMlink copied
It is an important feature of Speckle for Rhino and serves for assigning BIM tags, such as walls and floors, to the geometries sent from Rhino. In this regard, the elements will not be sent as simple geometry but directly as a BIM component and they will get assigned in the respective category in Revit.
Important to note: The family type, such as Basic Wall or Single Flush Door cannot be specified and, therefore, the first available family type will be assigned to the elements in Revit. This feature is available through Speckle for Grasshopper so it is recommended to use that in case you want to transfer also these properties.
You can find the Rhino BIM components in:
See a detailed description about how to use them in Speckle Guide – Rhino.
Write your feedback.
Write your feedback on "Speckle in Rhino"".
If you're providing a specific feedback to a part of the chapter, mention which part (text, image, or video) that you have specific feedback for."Thank your for your feedback.
Your feedback has been submitted successfully and is now awaiting review. We appreciate your input and will ensure it aligns with our guidelines before it’s published.
