Speckle in Grasshopper
-
Intro
-
Exchanging Data
-
Sending & Receiving Data
-
User Data Utility
Information
| Primary software used | Speckle |
| Course | Speckle in Grasshopper |
| Primary subject | Collaboration |
| Secondary subject | Collaboration |
| Level | Intermediate |
| Last updated | November 27, 2024 |
| Keywords |
Responsible
| Teacher | |
| Faculty |
Speckle in Grasshopper 0/3
Speckle in Grasshopper
This tutorial describes how to use Speckle for Grasshopper.
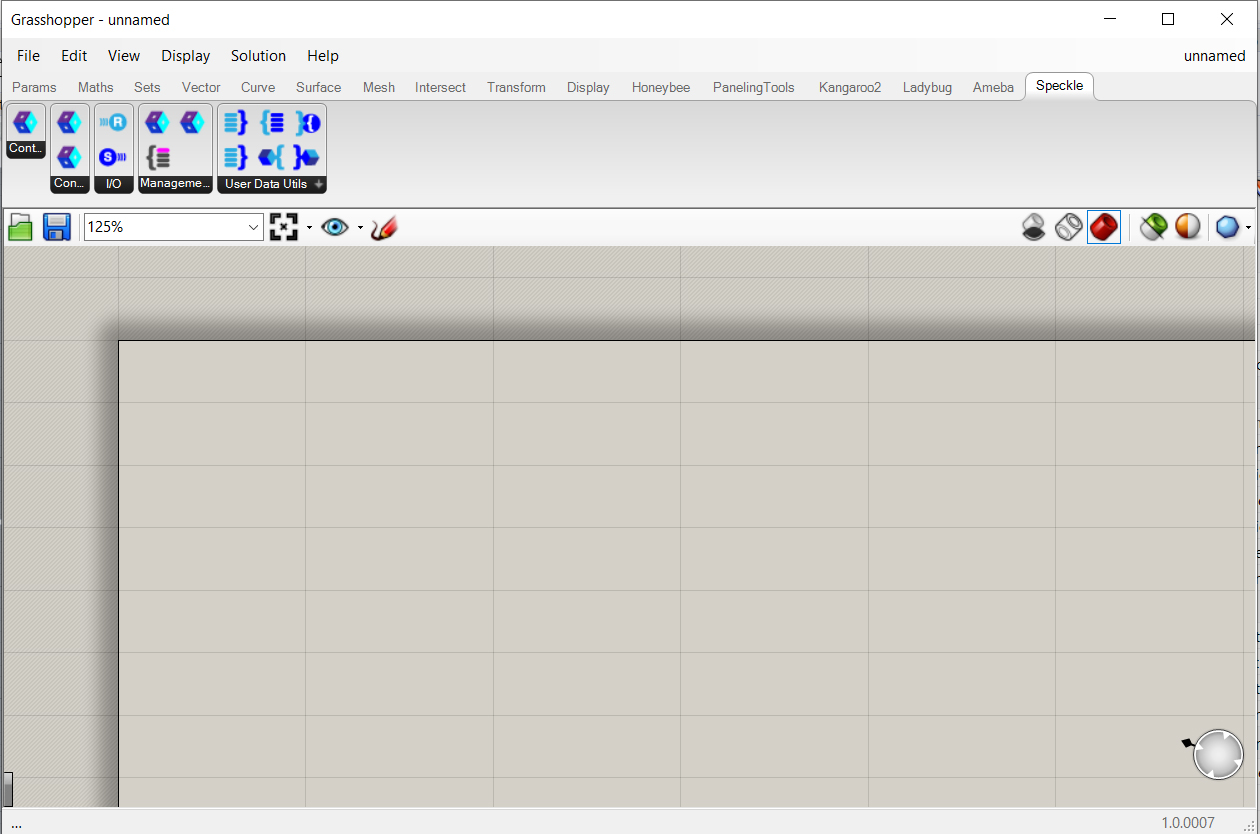
The options of speckle in Grasshopper are more extensive. Besides the option of sending and receiving of grasshopper data, there are options of linking non-formal data to a formal object. This can be very useful in communicating certain non-formal properties of the object which might be, for example, related to costs, material used, embedded energy etc.
Data like this is especially useful when working in design teams where the various disciplines need to exchange data which is useful for the various disciplines. This option is related to BIM. BIM stands for Building Information Modelling and is a method of efficiently handling and organizing design data from various disciplines in a common design space.
The common characteristic between the Speckle connectors for Grasshopper is that a node approach is used instead of the Speckle User Interface.
Speckle in Grasshopper 1/3
Exchanging Datalink copied
In order to be able to efficiently exchange data, you should first extract the respective stream, branch or commit id. You can do this in the following ways:
Through the Speckle Web App
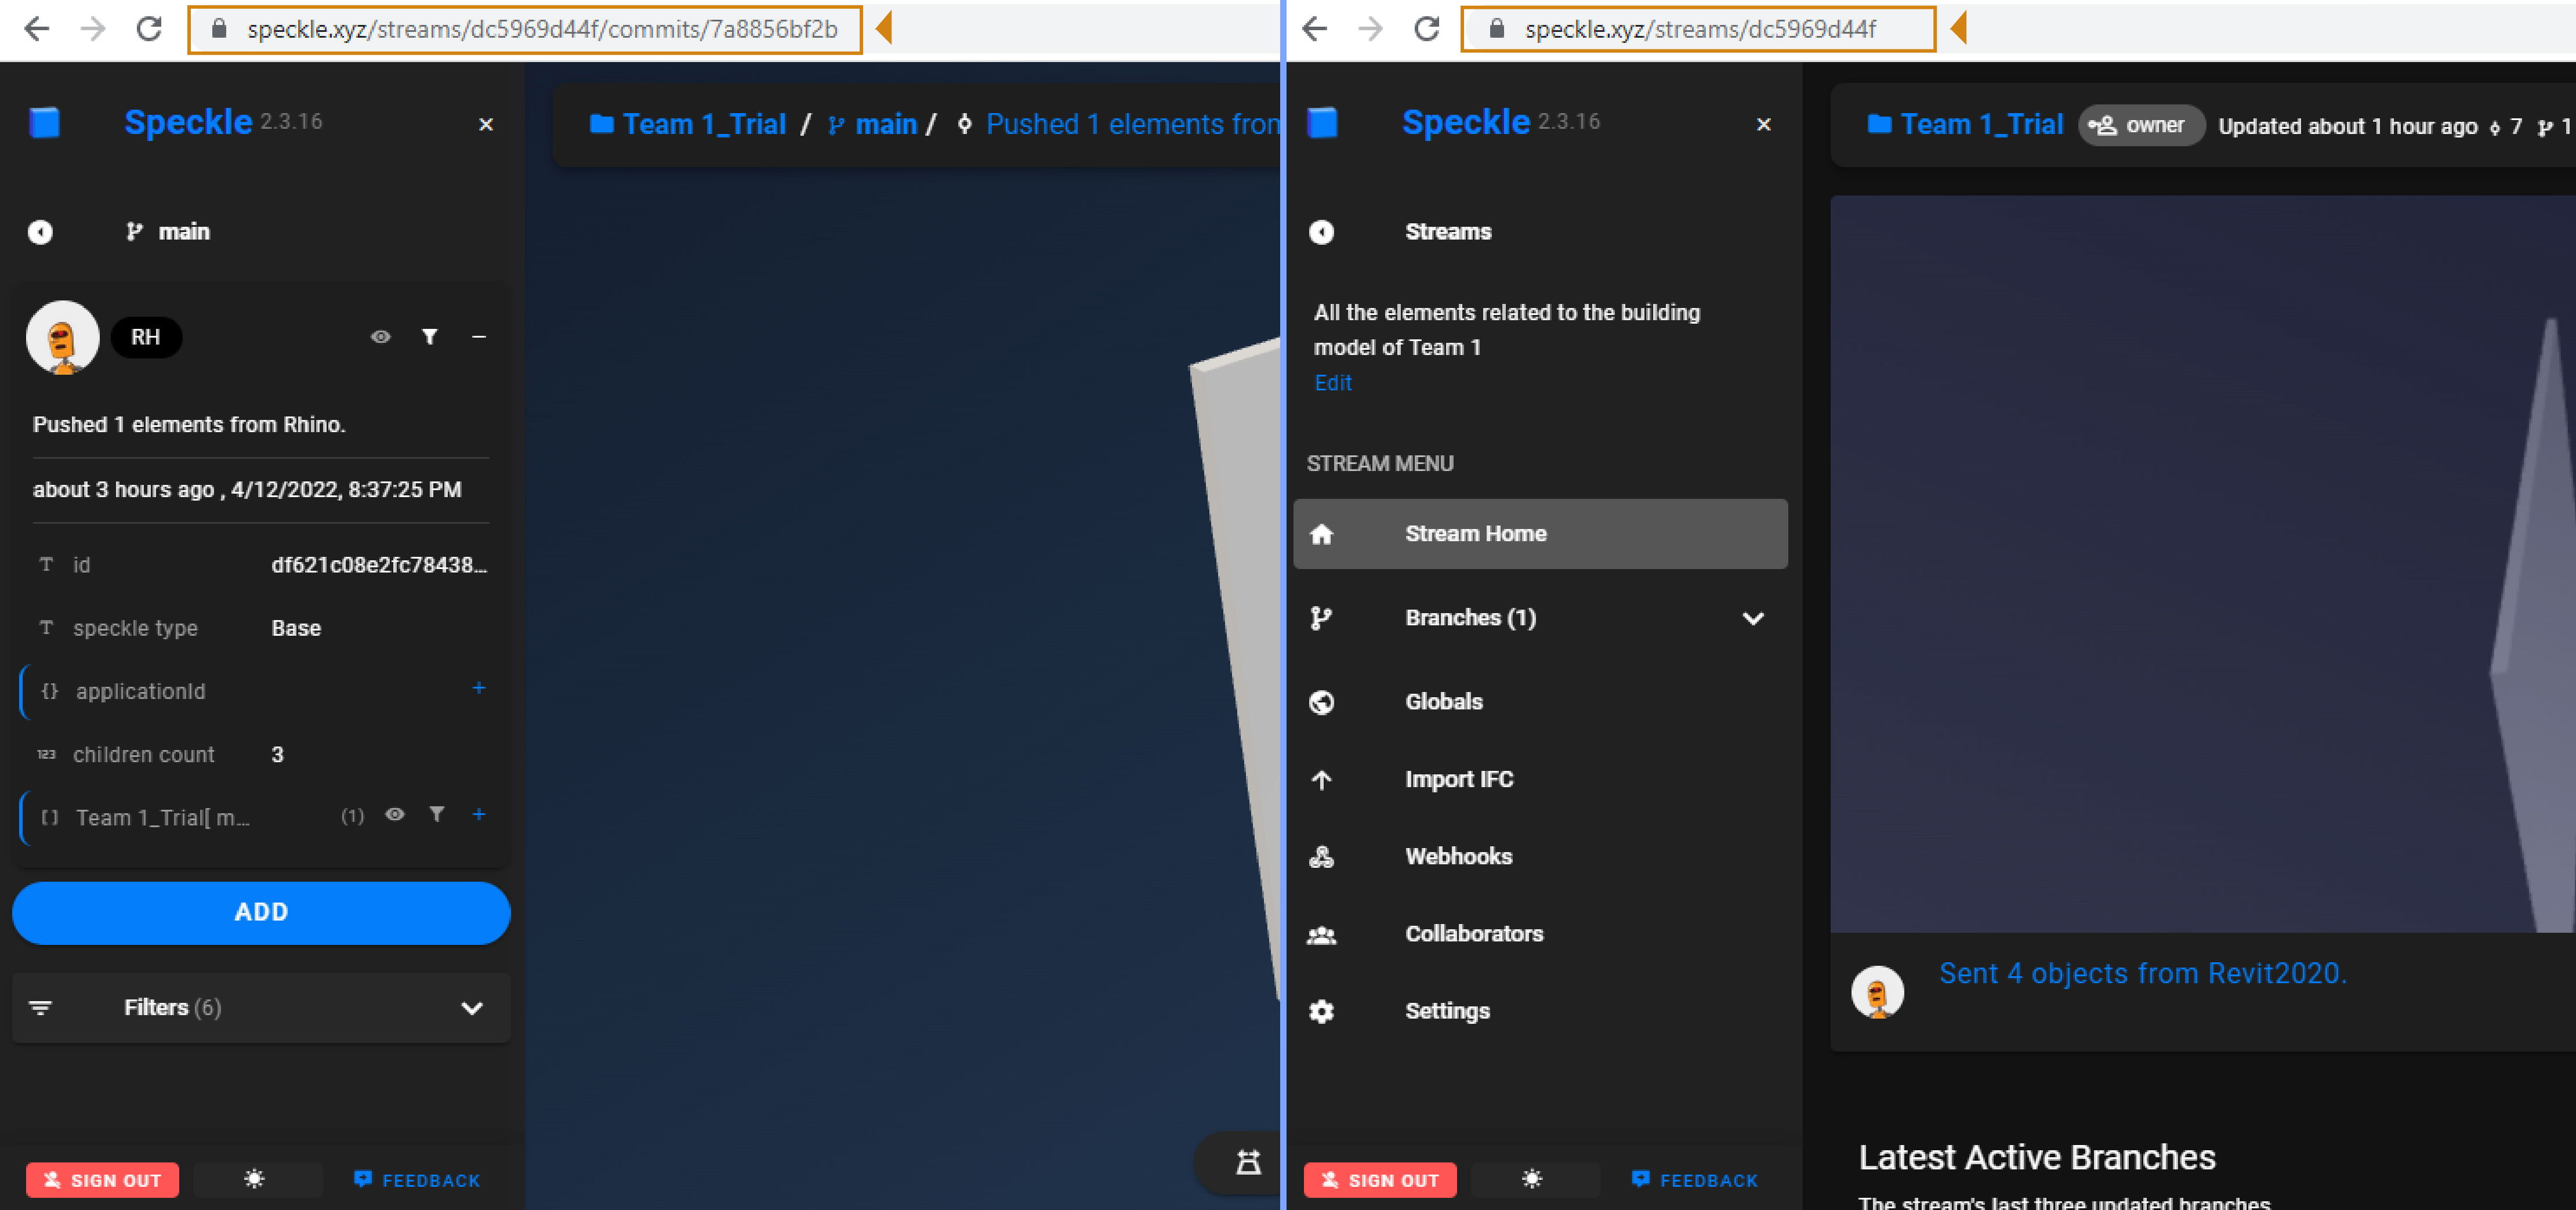
Visit the Speckle Web App and enter with your Speckle account login credentials. Browse in your created Streams and Commits using the tabs in the left column. Click on the stream/commit you want to use for the data exchange and copy the url that appears on top.
You can see more about how to compile a URL for a stream/branch/commit in the Speckle Guide – Grasshopper.
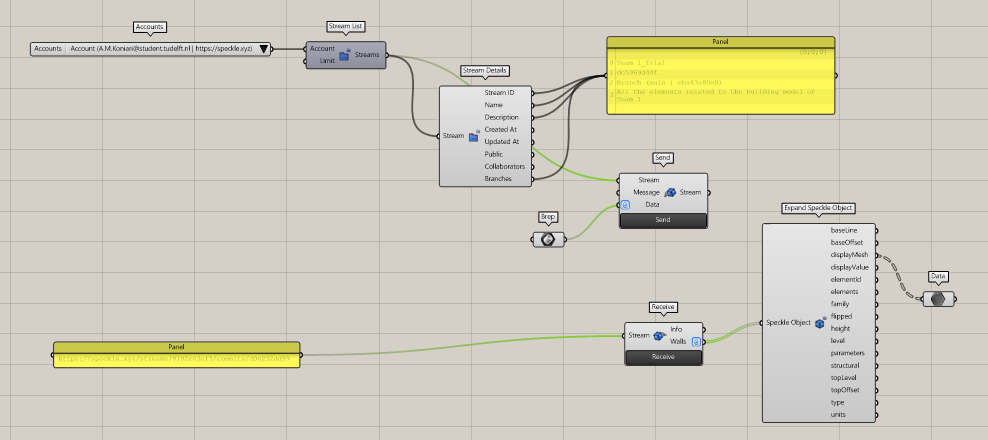
- In the Grasshopper interface, create a panel.
- Double-click on it and paste the URL.
Using the Speckle for Grasshopper nodes
- In the Grasshopper interface, create a accounts component.
- Select your Speckle account from the drop-down menu.
- Create a Stream List component
- Connect the Accounts component as input.
It will give you as output all the stream ids related to this account.
Important to note:
You can use the stream ids directly or connect them to a Stream Details component in order to cross reference it with the stream names, the respective branches and the rest of the stream details.
Use the Receive components to proceed with the data exchange. You should connect as input the URL or stream/branch/commit id extracted in the previous step.
Grasshopper BIM
It is an important feature of Speckle for Grasshopper and you can use it to send data both as simple geometries but also as BIM elements. This feature is similar to RhinoBIM provided from the Speckle for Rhino but has a significant difference since now it is possible, besides the main categories, to provide information related to the specific Revit family where you want to relate your geometry (e.g. specific wall or door type)
You can see a more detailed description on how to use Grasshopper BIM in Speckle Guide – Grasshopper.
Managing data streams in Grasshopper
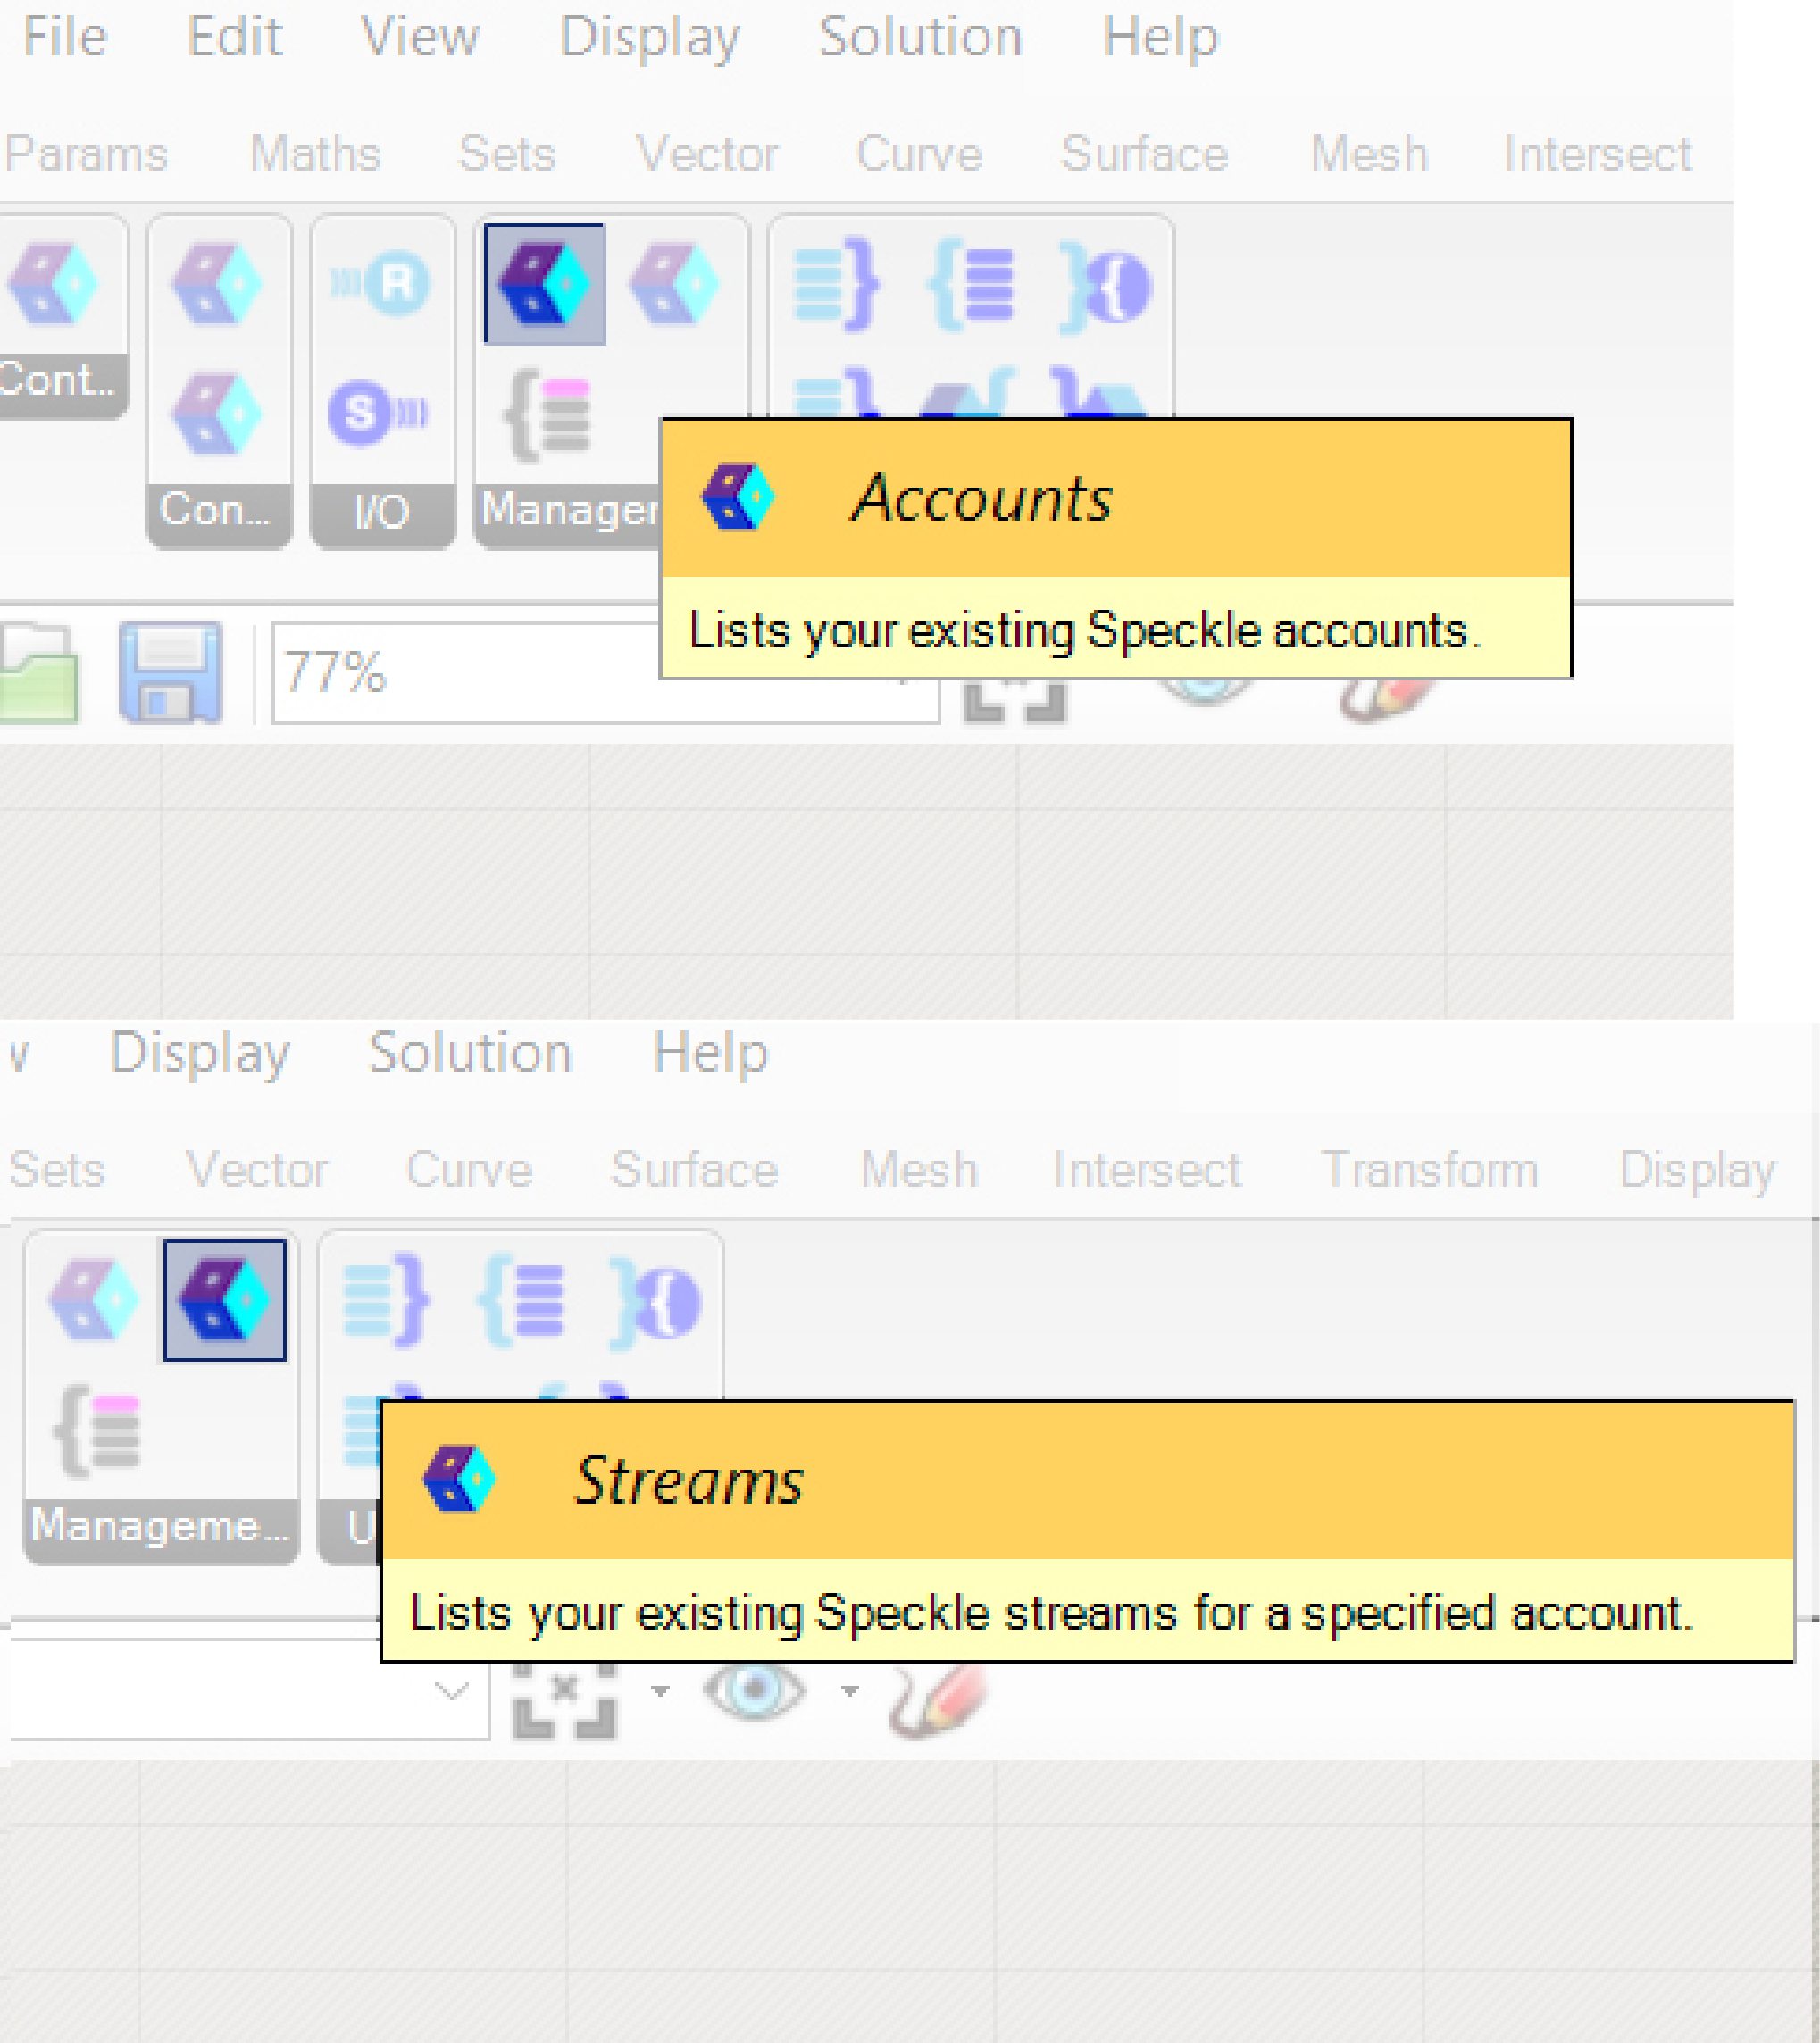
A list of available accounts will be produced with the Account component. A project can have multiple accounts running.
A further refinement is the option of producing a list of streams related to that account.
Speckle in Grasshopper 2/3
Sending & Receiving Datalink copied
Sending Data
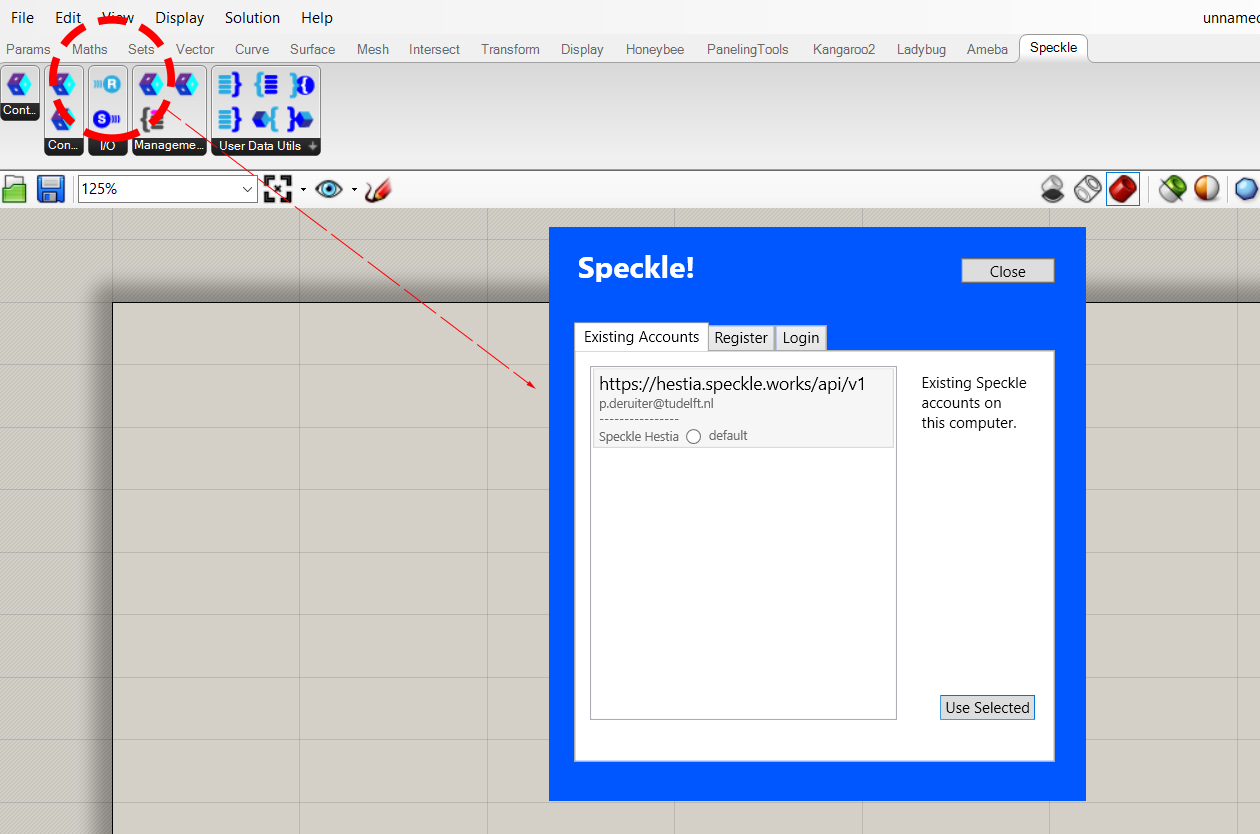
To send data to the Speckle server you need an account. When you click the icon of Send, a menu opens asking for an account or to make a new account. This works similar to the Rhino option for making an account as explained in the text above this segment.
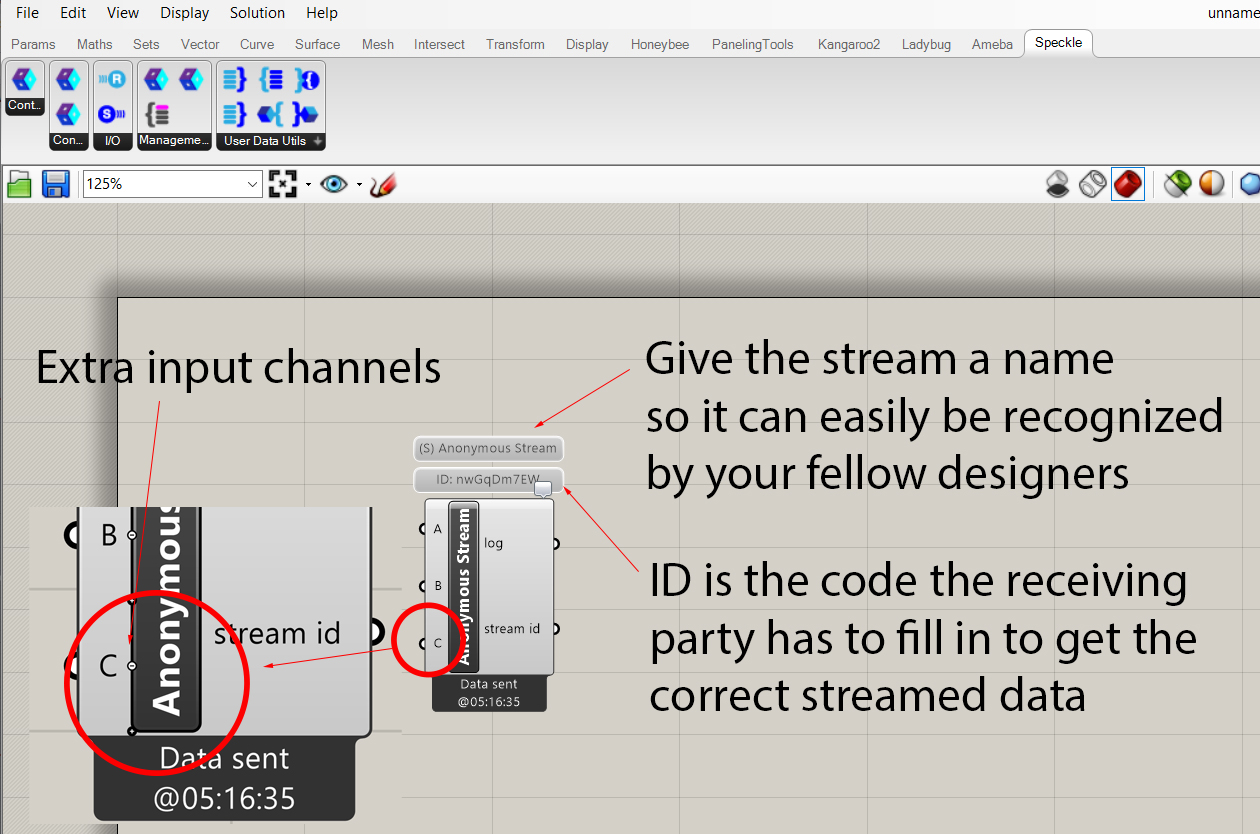
The component has several inputs. These can be extended to more than 3. Each input will be read in the receiving component. Give the stream a relevant name so to make the selection of the streams more easy. The generated ID number is essential for the receiving party to fill in their receiving component. That makes sure the receiving component receives the correct stream.
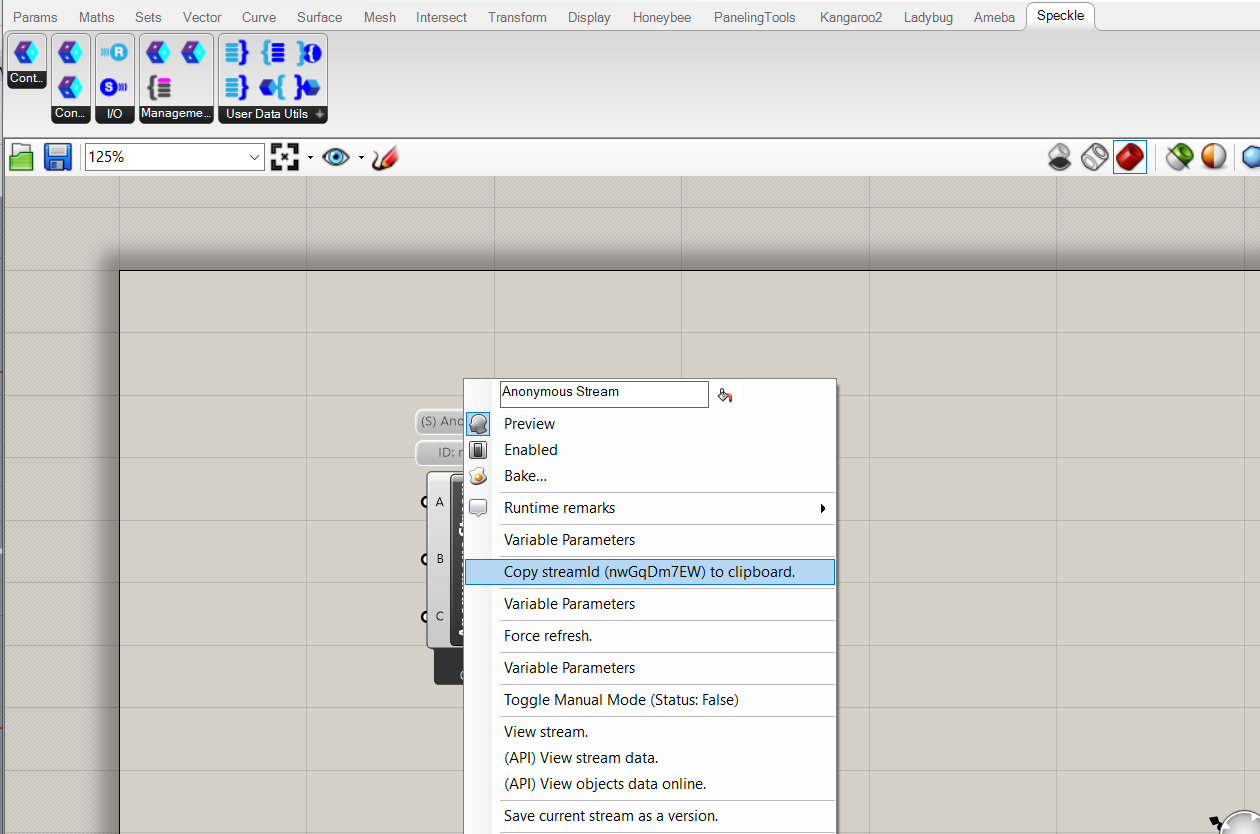
The ID can be copied to the clipboard in the settings of the component.
Receiving data from Grasshopper
Receiving data in grasshopper is similar to receiving data in Rhino. The following steps will have to be taken:
- Select the correct account in the menu which opens when the receiver component is added to the grasshopper work field.
- Copy the ID number from the sender to the receiver.

The receiver will now mirror the input of the sender.
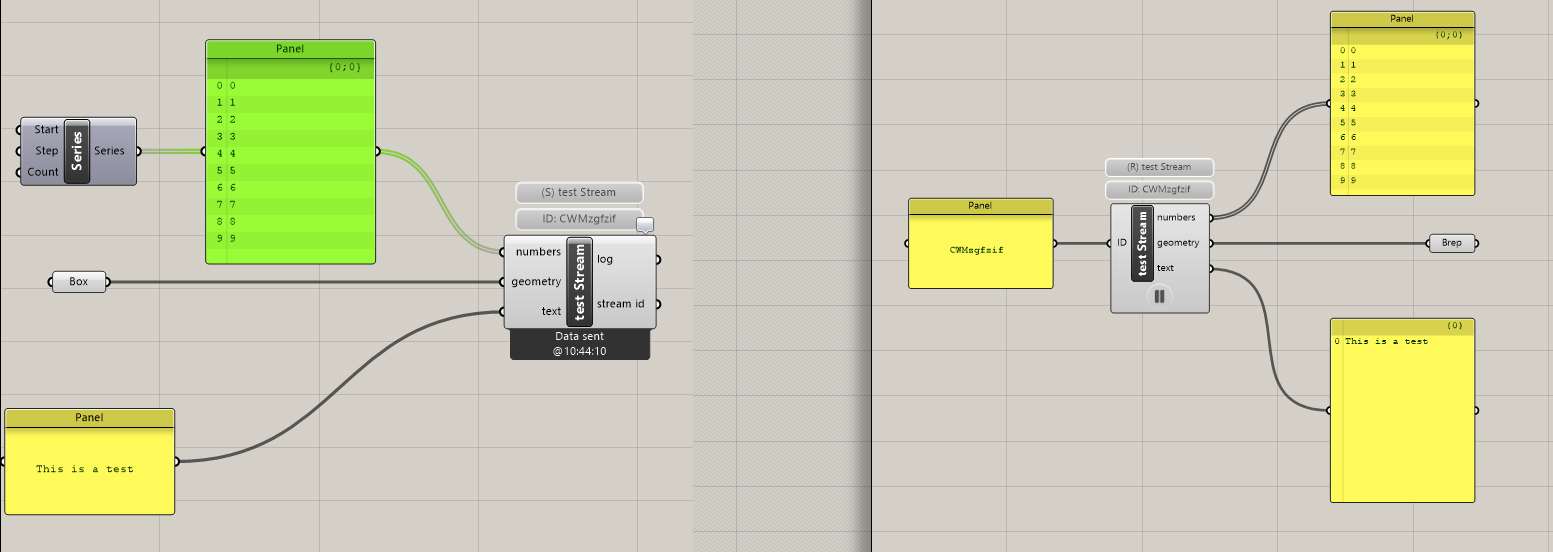
External Links
See a more detailed explanation about the data exchange in:
You can also find detailed explanations on the function of each specific node in
Speckle in Grasshopper 3/3
User Data Utilitylink copied
The User Data Utility options allows you to couple a wide range and amount of data to an object. This functionality is very useful in a BIM environment.
Connecting object with data
There are several options to build this data and extract it. It can be a simple list or a composition of lists in a tree structure.
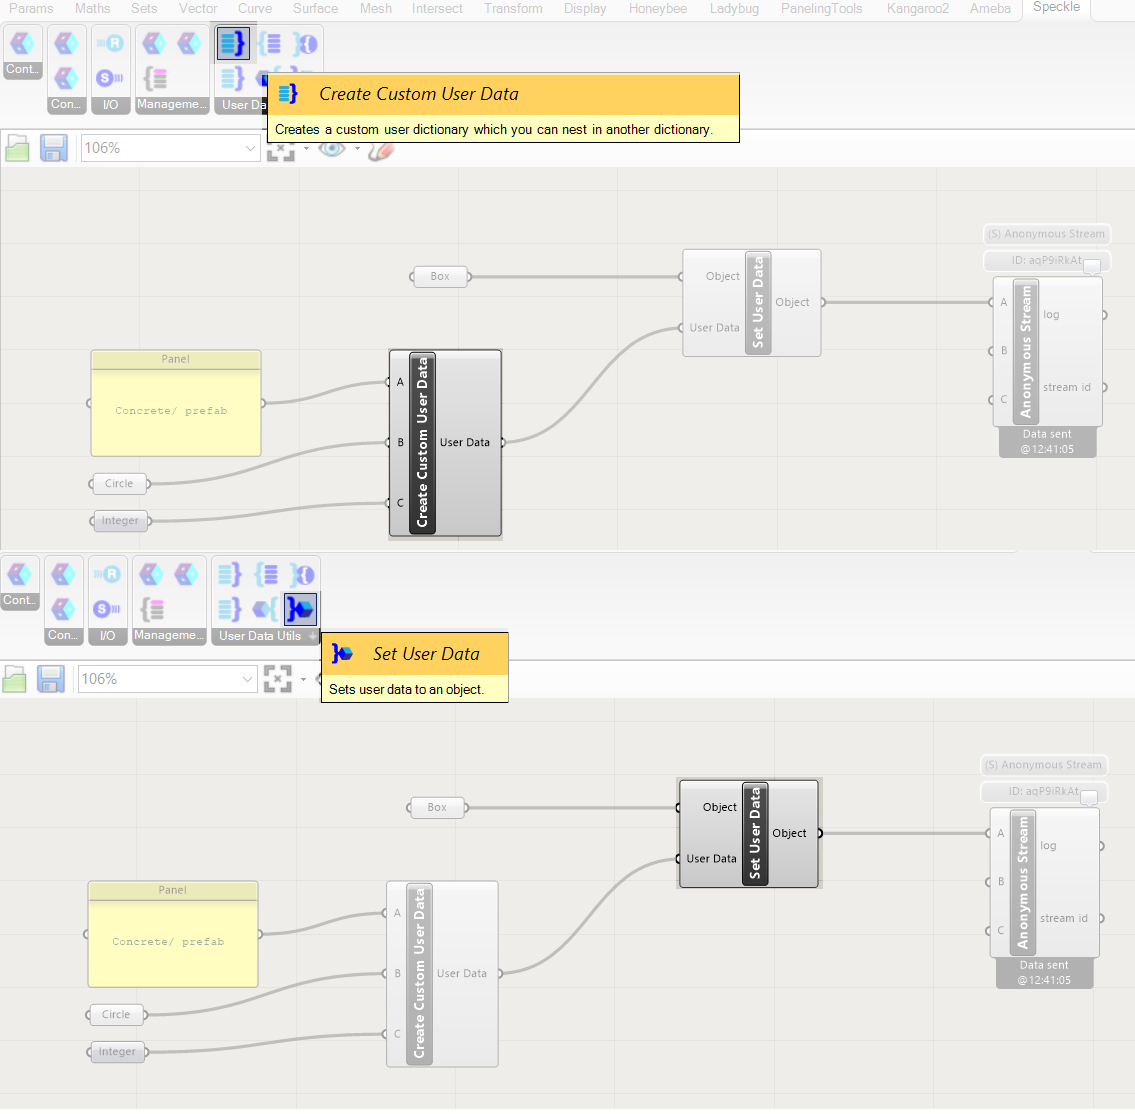
The most straight forward option is to use:
- Create Custom User Data – and add the information which you want to couple to the object
- Use the Set User Data to couple the data to the object.
- Send the object and data
Extracting data from object
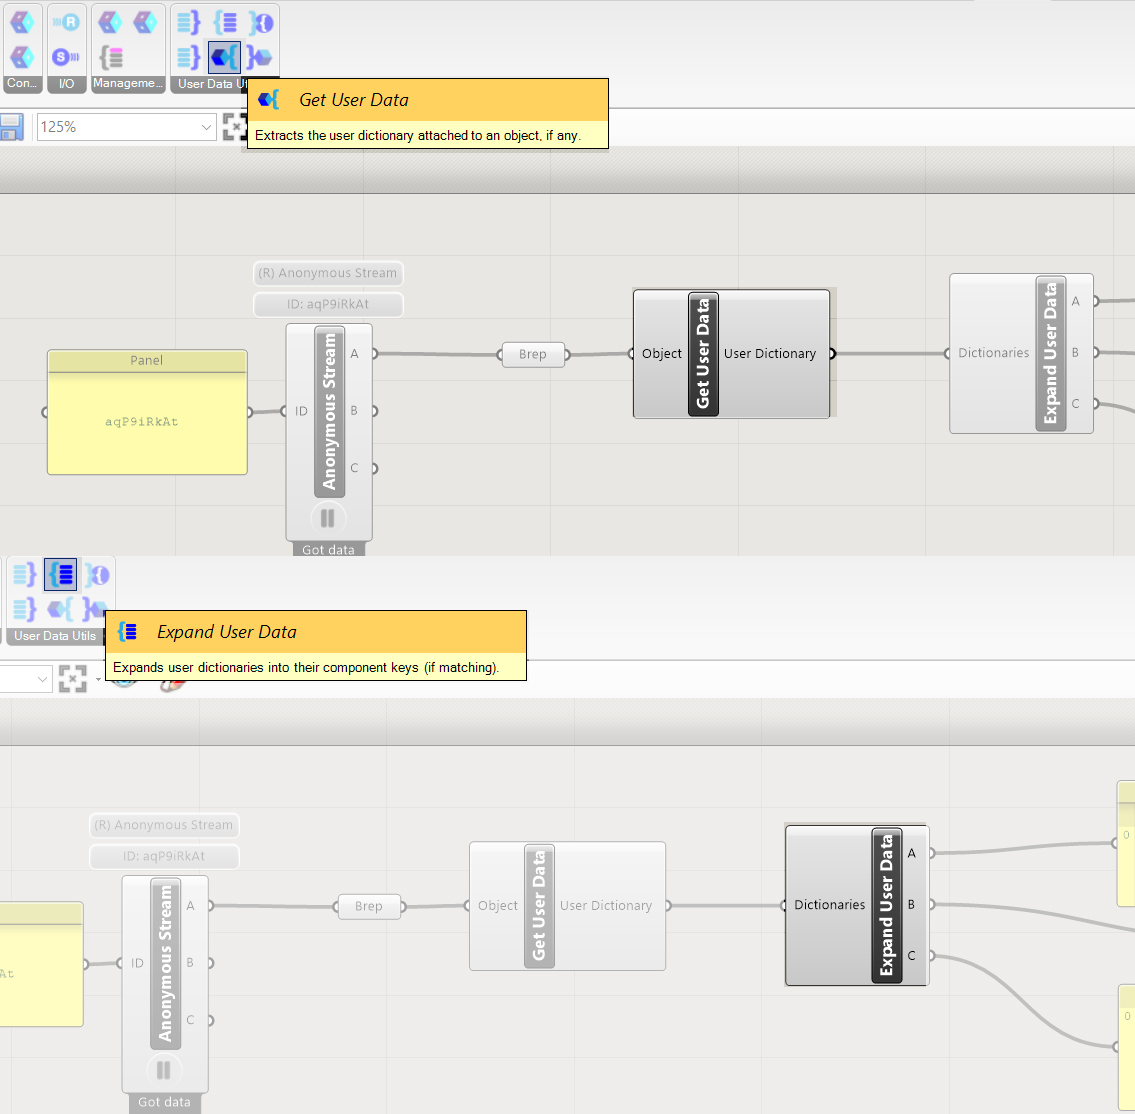
The most straight forward option is to use:
- Use the Get User Data – this will extract the data from the object
- Use the Expand User Data to read the data attached to the object.
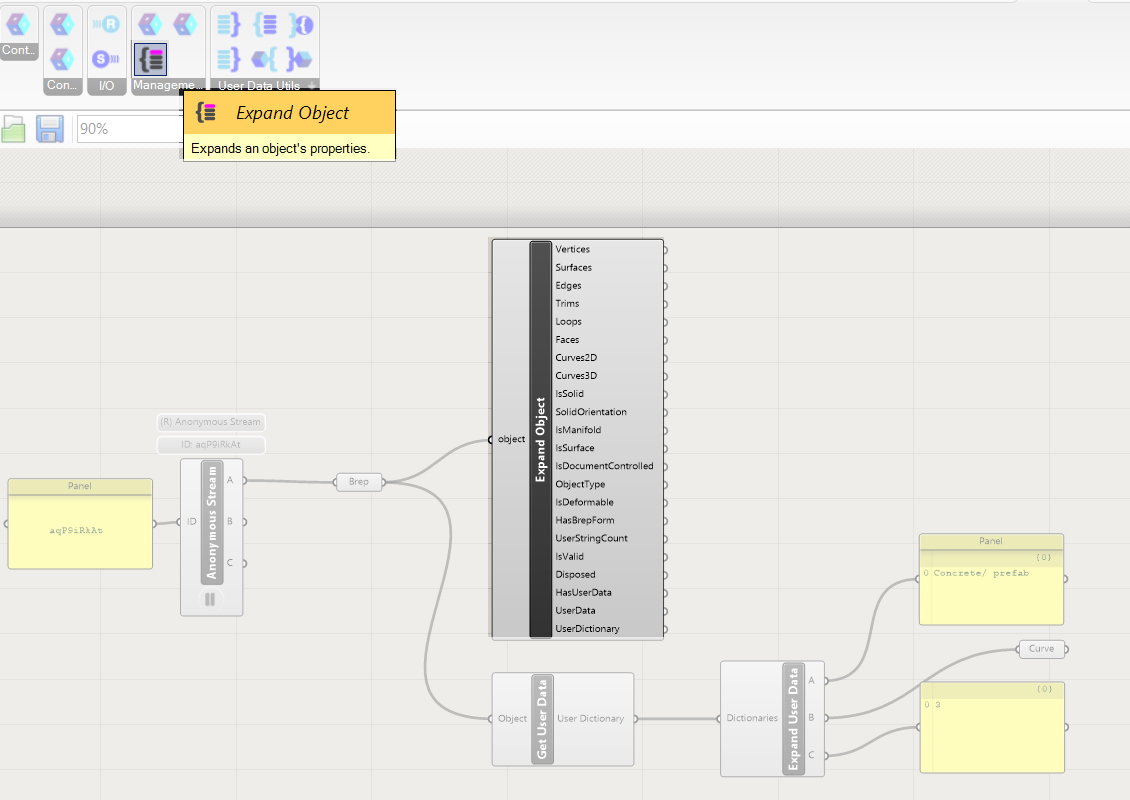
Any description of the geometry can be extracted from the object. This is information about the geometry of the object.
To access the data:
- Use the Expand Object component to extract the data of the geometry.
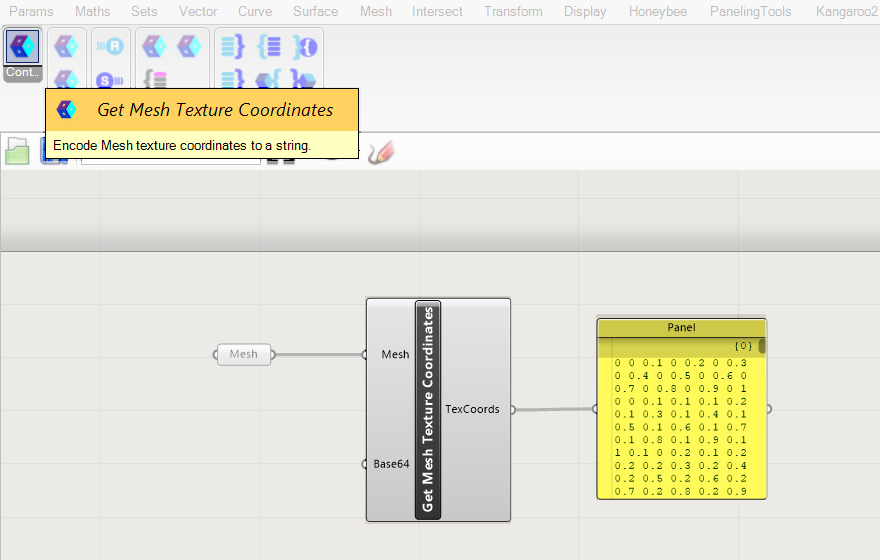
If you want to extract only the texture coordinates of a mesh then you can use the Get Mesh Texture Coordinates. This will generate a set of coordinates based on an U.V.W Object coordinate system.
Serializing an object
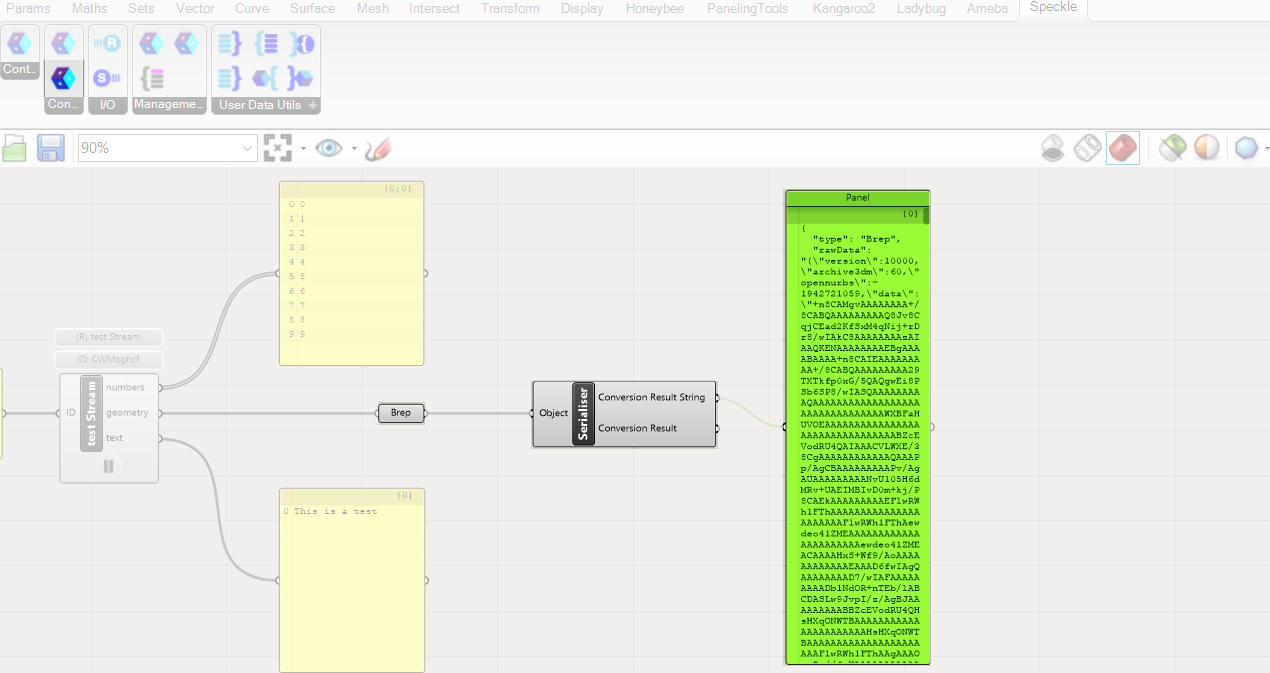
Serializer converts the object in to a string which is suitable for data storage and communication. It also will make a Speckle object of the Rhino geometry. The string data could be for example be imported into Excel.
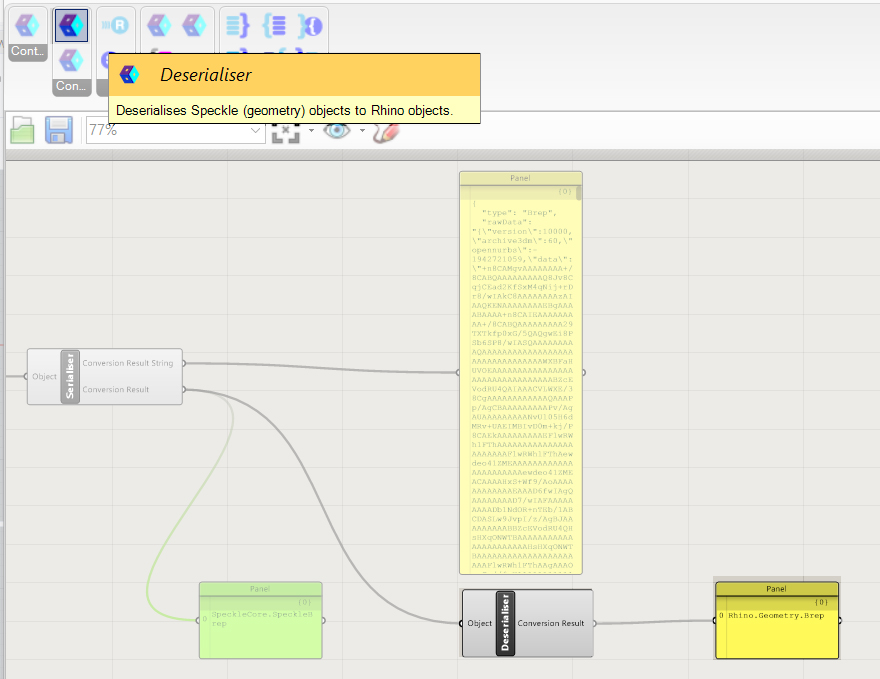
The de-serializer can convert the Speckle geometry back into Rhino geometry.
Write your feedback.
Write your feedback on "Speckle in Grasshopper"".
If you're providing a specific feedback to a part of the chapter, mention which part (text, image, or video) that you have specific feedback for."Thank your for your feedback.
Your feedback has been submitted successfully and is now awaiting review. We appreciate your input and will ensure it aligns with our guidelines before it’s published.
