Simulations Accuracy and Level of Detail (Daylight)
-
Intro
-
Parametric model
-
Effect simulation settings on accuracy
-
Geometry model detail level
-
Relevance of features
-
Conclusion
Information
| Primary software used | Grasshopper |
| Course | BKB3WV4 – Bouwkunde als wetenschap |
| Primary subject | Analysis & simulation |
| Secondary subject | Climate analysis |
| Level | Intermediate |
| Last updated | November 27, 2024 |
| Keywords |
Responsible
| Teachers | |
| Faculty |
Simulations Accuracy and Level of Detail (Daylight) 0/5
Simulations Accuracy and Level of Detail (Daylight)
Explanation on properly selecting the level of detail of a parametric and simulation model to ensure adequate accuracy.
This tutorial is part of a line of tutorials about the use of parametric modelling, simulations and optimisation in research at BSc level. The overall line uses parametric modelling, simulations, and optimisation to generate data to support research investigations (to support answering a research question).
Within this line, this tutorial focuses on performance indicators and simulations. A performance indicator is a measurable value used to assess the performance of something. In performance-based design, we consider a variety of building performance indicators to assess the performance of design options. Performance indicators allow you to check whether a design option meets certain performance requirements. Suppose you are performing a research project to investigate how the form of office rooms impacts the daylight distribution on the office desks. To establish the impact of the form, you need to be able to quantify the daylight on the office desks. Also, in this case, you will most probably use performance indicator intended as measurable values. Once the appropriate performance indicators are identified, simulations can be used to investigate performances.
This tutorial assumes you are already familiar with these concepts. (If you are following this tutorial because you are attending the course BK3WV4, you have already learned about performance indicators and simulations in BK2WV3). Do you want to refresh your knowledge on performance indicators and simulations? Check here their definitions here:
In the context of simulations, this tutorial focuses on how to ensure simulation accuracy.
This tutorial can be followed as stand-alone tutorial or as part of the BK3WV4 course (BSc course). If you are attending the course BK3WV4, please follow this tutorial in preparation to the workshop 2 ‘parametric models in research’.
If you have not yet installed Ladybug, follow the full Installing Ladybug Tools tutorial linked below.
Simulations Accuracy and Level of Detail (Daylight) 1/5
Parametric modellink copied
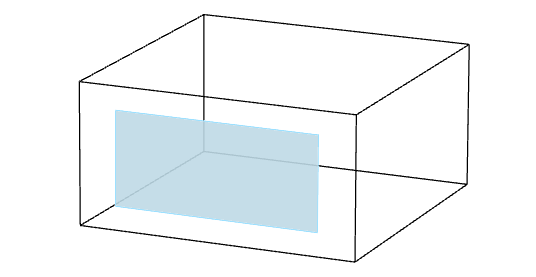
For this tutorial, we will have a model of a 6x6x3 m parametric room that has an initial 4.4 x 2 m parametric window on one façade. There will also be an option to have an interior opening for analysis purposes. The aim of this tutorial is to analyse the differences in detail level in correspondence to the simulation time. The model is already set up with several options for the window detail including:
- Number of windows: 1, 2, or 3
- Height-to-width ratio
- Window distribution: distance between windows
- Window placement: right, centre, left
- Thickness of window frame
- Number of shading devices
Exercise file
In this tutorial, we do not explain how to develop the entire Grasshopper definition of the model. In this tutorial we assume you are already able to work in Grasshopper and we use a Grasshopper definition already made. You can download the exercise file here:
To understand this tutorial you do not need to have experience on running an internal daylight simulation. If you want to learn more about how to prepare the geometry of a model for an indoor daylight simulation parametrically in Grasshopper, or how to prepare a Grasshopper file for an indoor daylight simulation, you can follow these tutorials.
Simulations Accuracy and Level of Detail (Daylight) 2/5
Effect simulation settings on accuracylink copied
One of the crucial parts of performing a Honeybee daylight simulation analysis is setting up the HB Radiance Parameter. The Radiance Parameter in Honeybee allows addressing different detail levels. Its setting helps in adjusting Radiance simulation settings based on the desired simulation type and detail level. (Note: If you are a BSc student following BK3WV4, you do not need to master the HB Radiance Parameter. We are using it to exemplify the impact of simulations settings on time versus what results your research investigation requires.)
In this tutorial we are showing the effects of aspects on the results of a simulation, we are got going over the steps of creating a daylight simulation. For more information on setting up a Honeybee daylight simulation you can check out the following tutorial:
The Detail Level
The basic set-up of the radiance parameter needs two inputs: the recipe type and the detail level. The recipe type defines the type of Radiance simulation you’re running. In this case, the value of 0 corresponds to a daylight factor simulation.
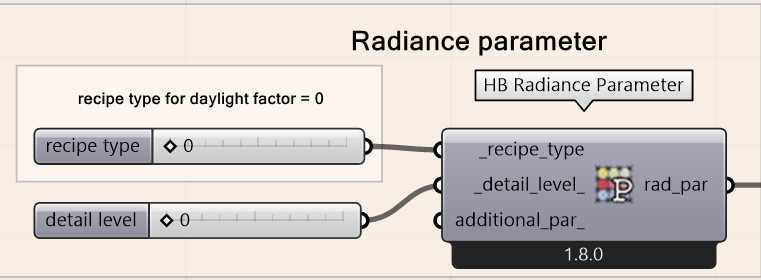
The detail level controls the quality and accuracy of the simulation, ranging from coarse to fine detail. A value of 0 indicates the default or lowest detail setting.
The detail level is a vital part of the simulation performance, it controls the accuracy of the simulation as well as the time it takes for the simulation to take place. There are three main detail levels: 0, 1, and 2. 0 is considered the lowest value and 2 is considered the highest.
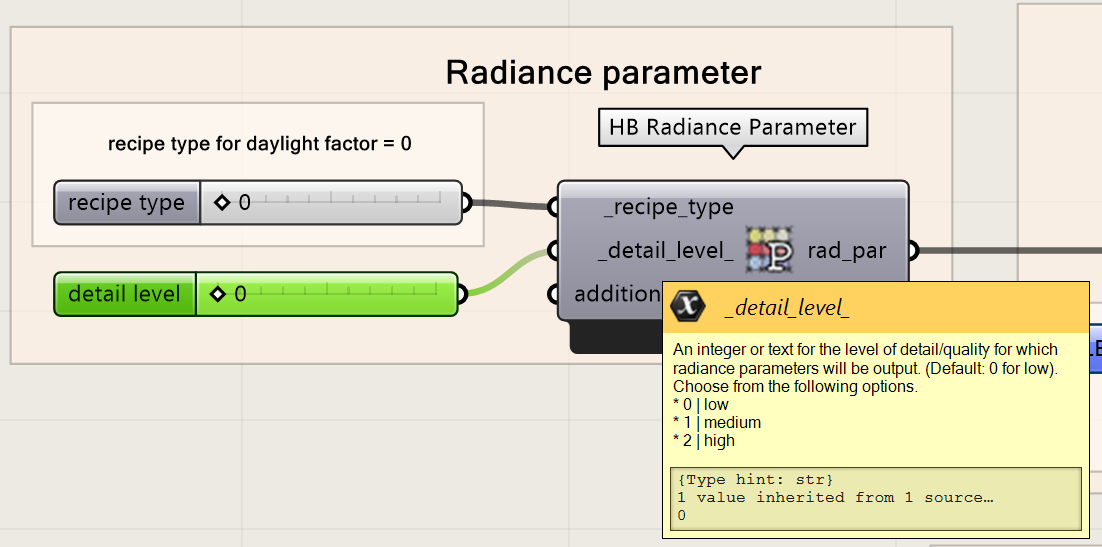
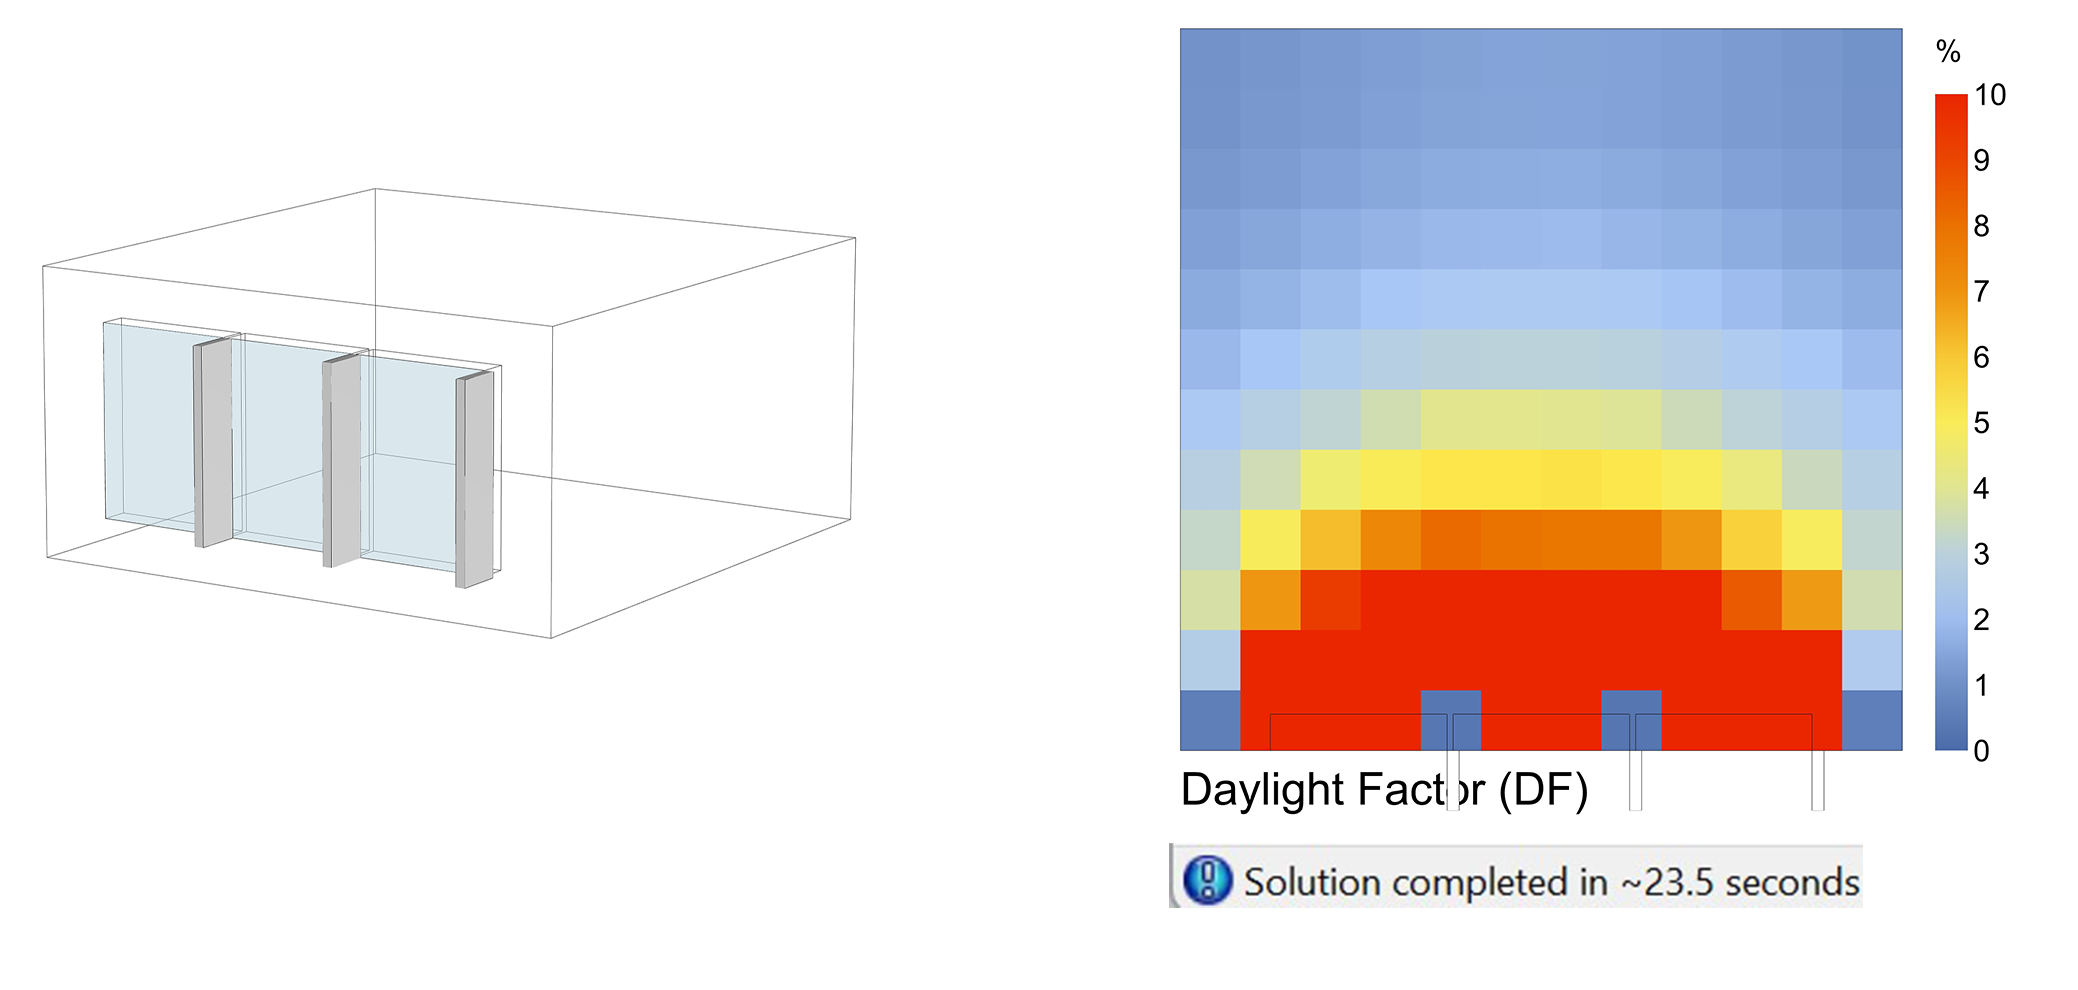
Change the detail level of the radiance parameter and look at the time it takes to run the same simulation on different detail levels
Using a higher detail level might seem beneficial, however it’s often unnecessary. In this example of a simple room with a large window, we tested three different detail levels. As you can see, the results of the mean Daylight Factor (DF) are similar across all levels. The main difference in the simulation results can be found when plotting the results, as shown in the figure below. You see that the results on the grid are more evenly distributed for detail level 2 compared than detail level 0. The distribution of the results on the room grid highly depends on the geometry of your model and the materials. However, you would not want to see inexplicable irregularities on the grid distribution.
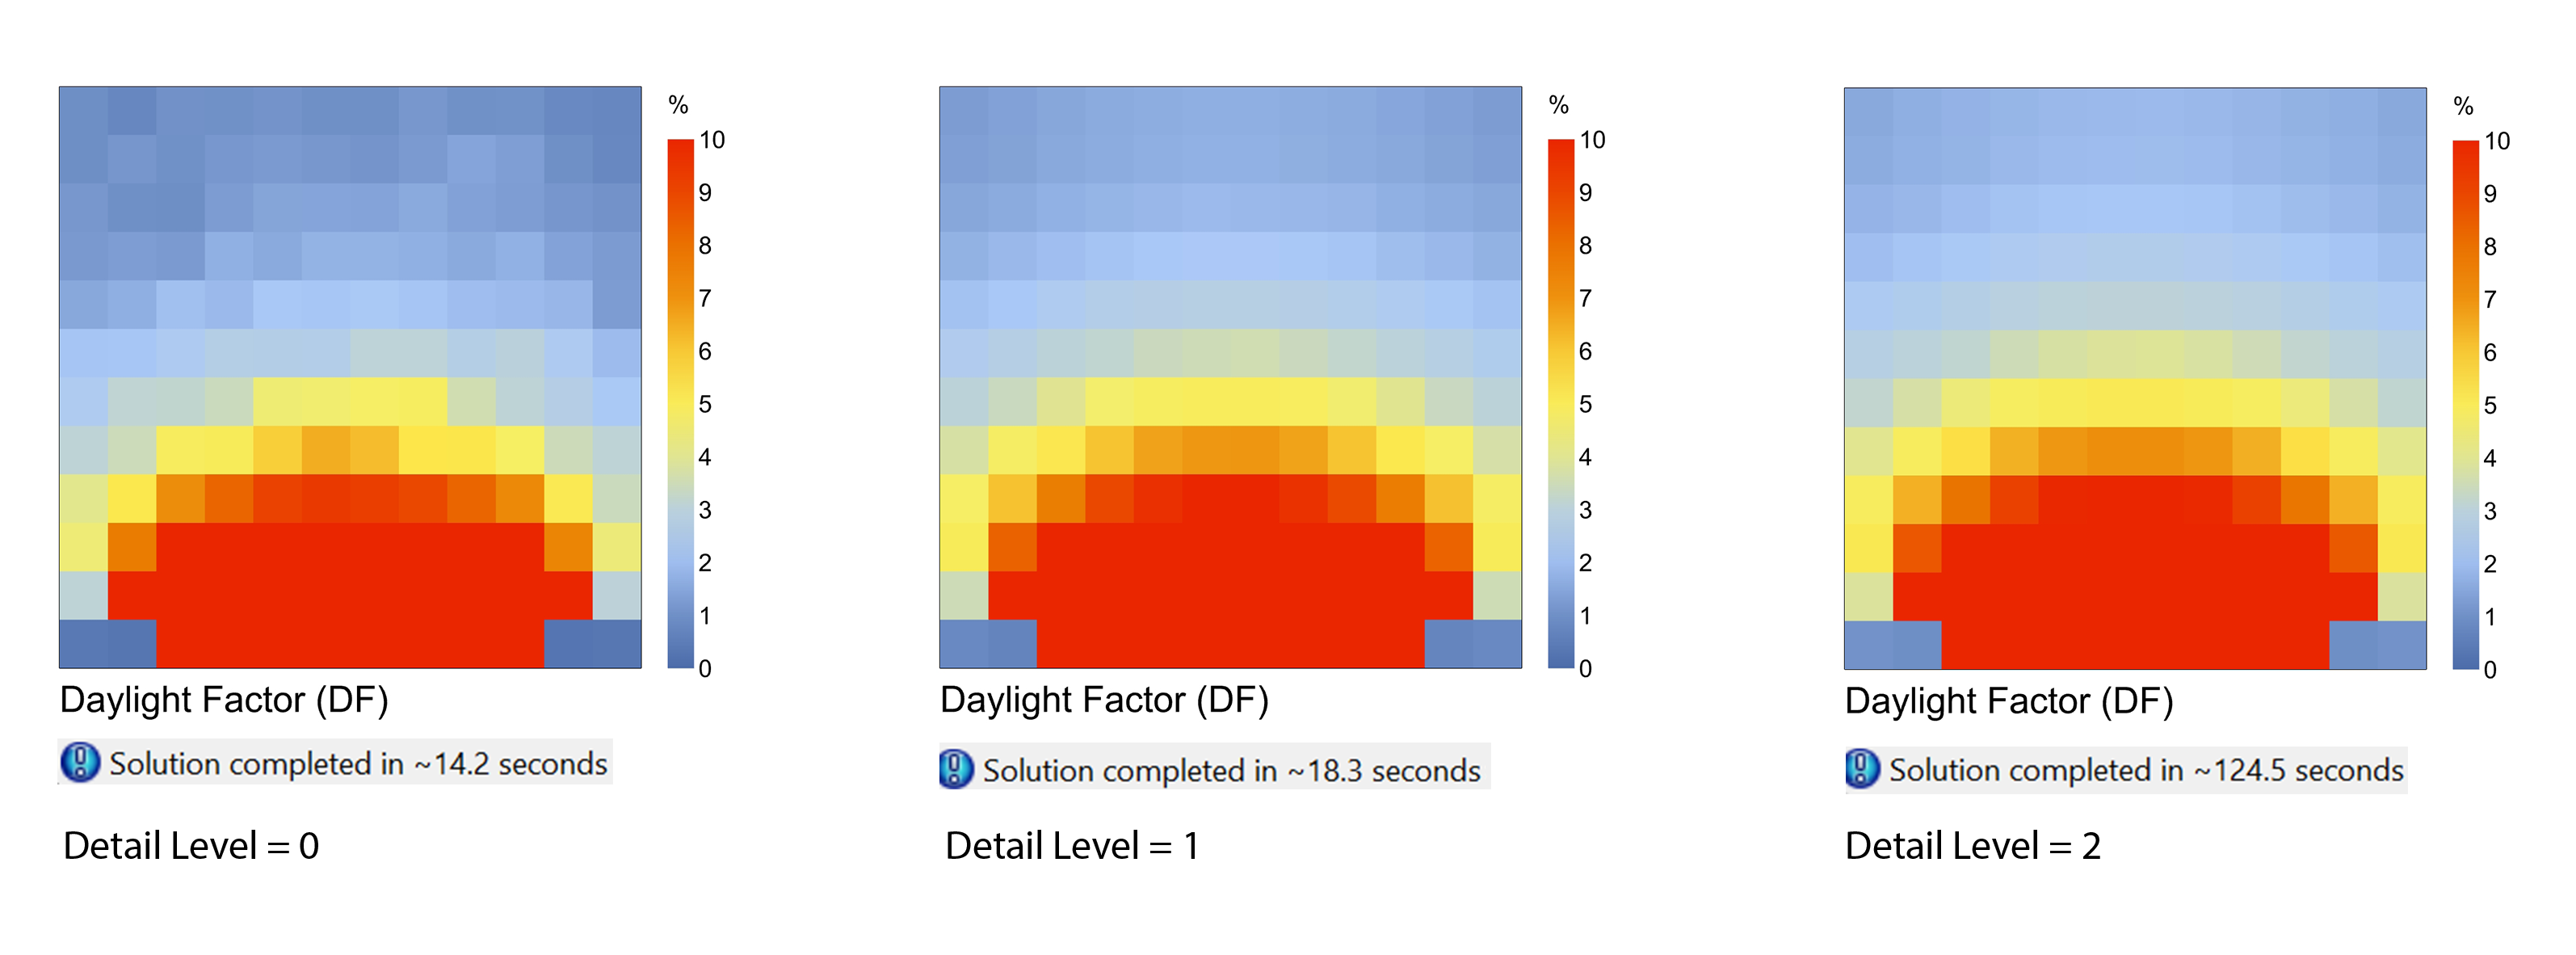
When looking at the computational time it takes to simulate the results, we see large varieties. The difference between detail levels 0 and 1 is just 5 seconds, while the jump from level 1 to 2 adds 11 minutes without significant improvement in accuracy. Therefore it is very important to consider the improvement in results is worth the additional computational time it requires to run the simulation.
|
Detail level |
Mean DF |
Time |
|
0 |
5.77 |
14.2 seconds |
|
1 |
6.34 |
18.3 seconds |
|
2 |
6.59 |
124.5 seconds / 2 minutes |
The jump from detail level 0 to detail level 1 adds only 5 seconds to the process while adding 8% more accuracy. The jump from detail level 0 to detail level 2 adds 11 minutes to the process while adding 12% more accuracy. The answer to the question of which detail level is the right one for your situation depends on what you want to achieve with the results and how many time you would have to run the simulation. You would have to consider the requirements of the outcome, if the distribution of the results on the grid makes sense and if the extra required time is equal to the gained accuracy.
Note: The computational time depends on your laptop and the number of things you have open. The time it takes to run the simulation might differ for your laptop.
Grid size of the Room
The grid size in the Honeybee Sensor Grid from Rooms component determines how detailed the analysis will be. It sets the spacing between points where daylight or energy data is collected. A smaller grid gives more accurate results but takes longer to calculate, while a larger grid is faster but may miss some details.

Let’s try the simulation again, maintaining the detail level at 1, but changing the grid size. This image demonstrates how different grid sizes affect daylight factor calculations. The grid sizes used are 0.1, 0.25, 0.5, 1, and 2 meters.
You see the difference between the results clearly on the distribution of the results on the grid. The smaller the grid size the more the results ‘flow’ over from one to another.
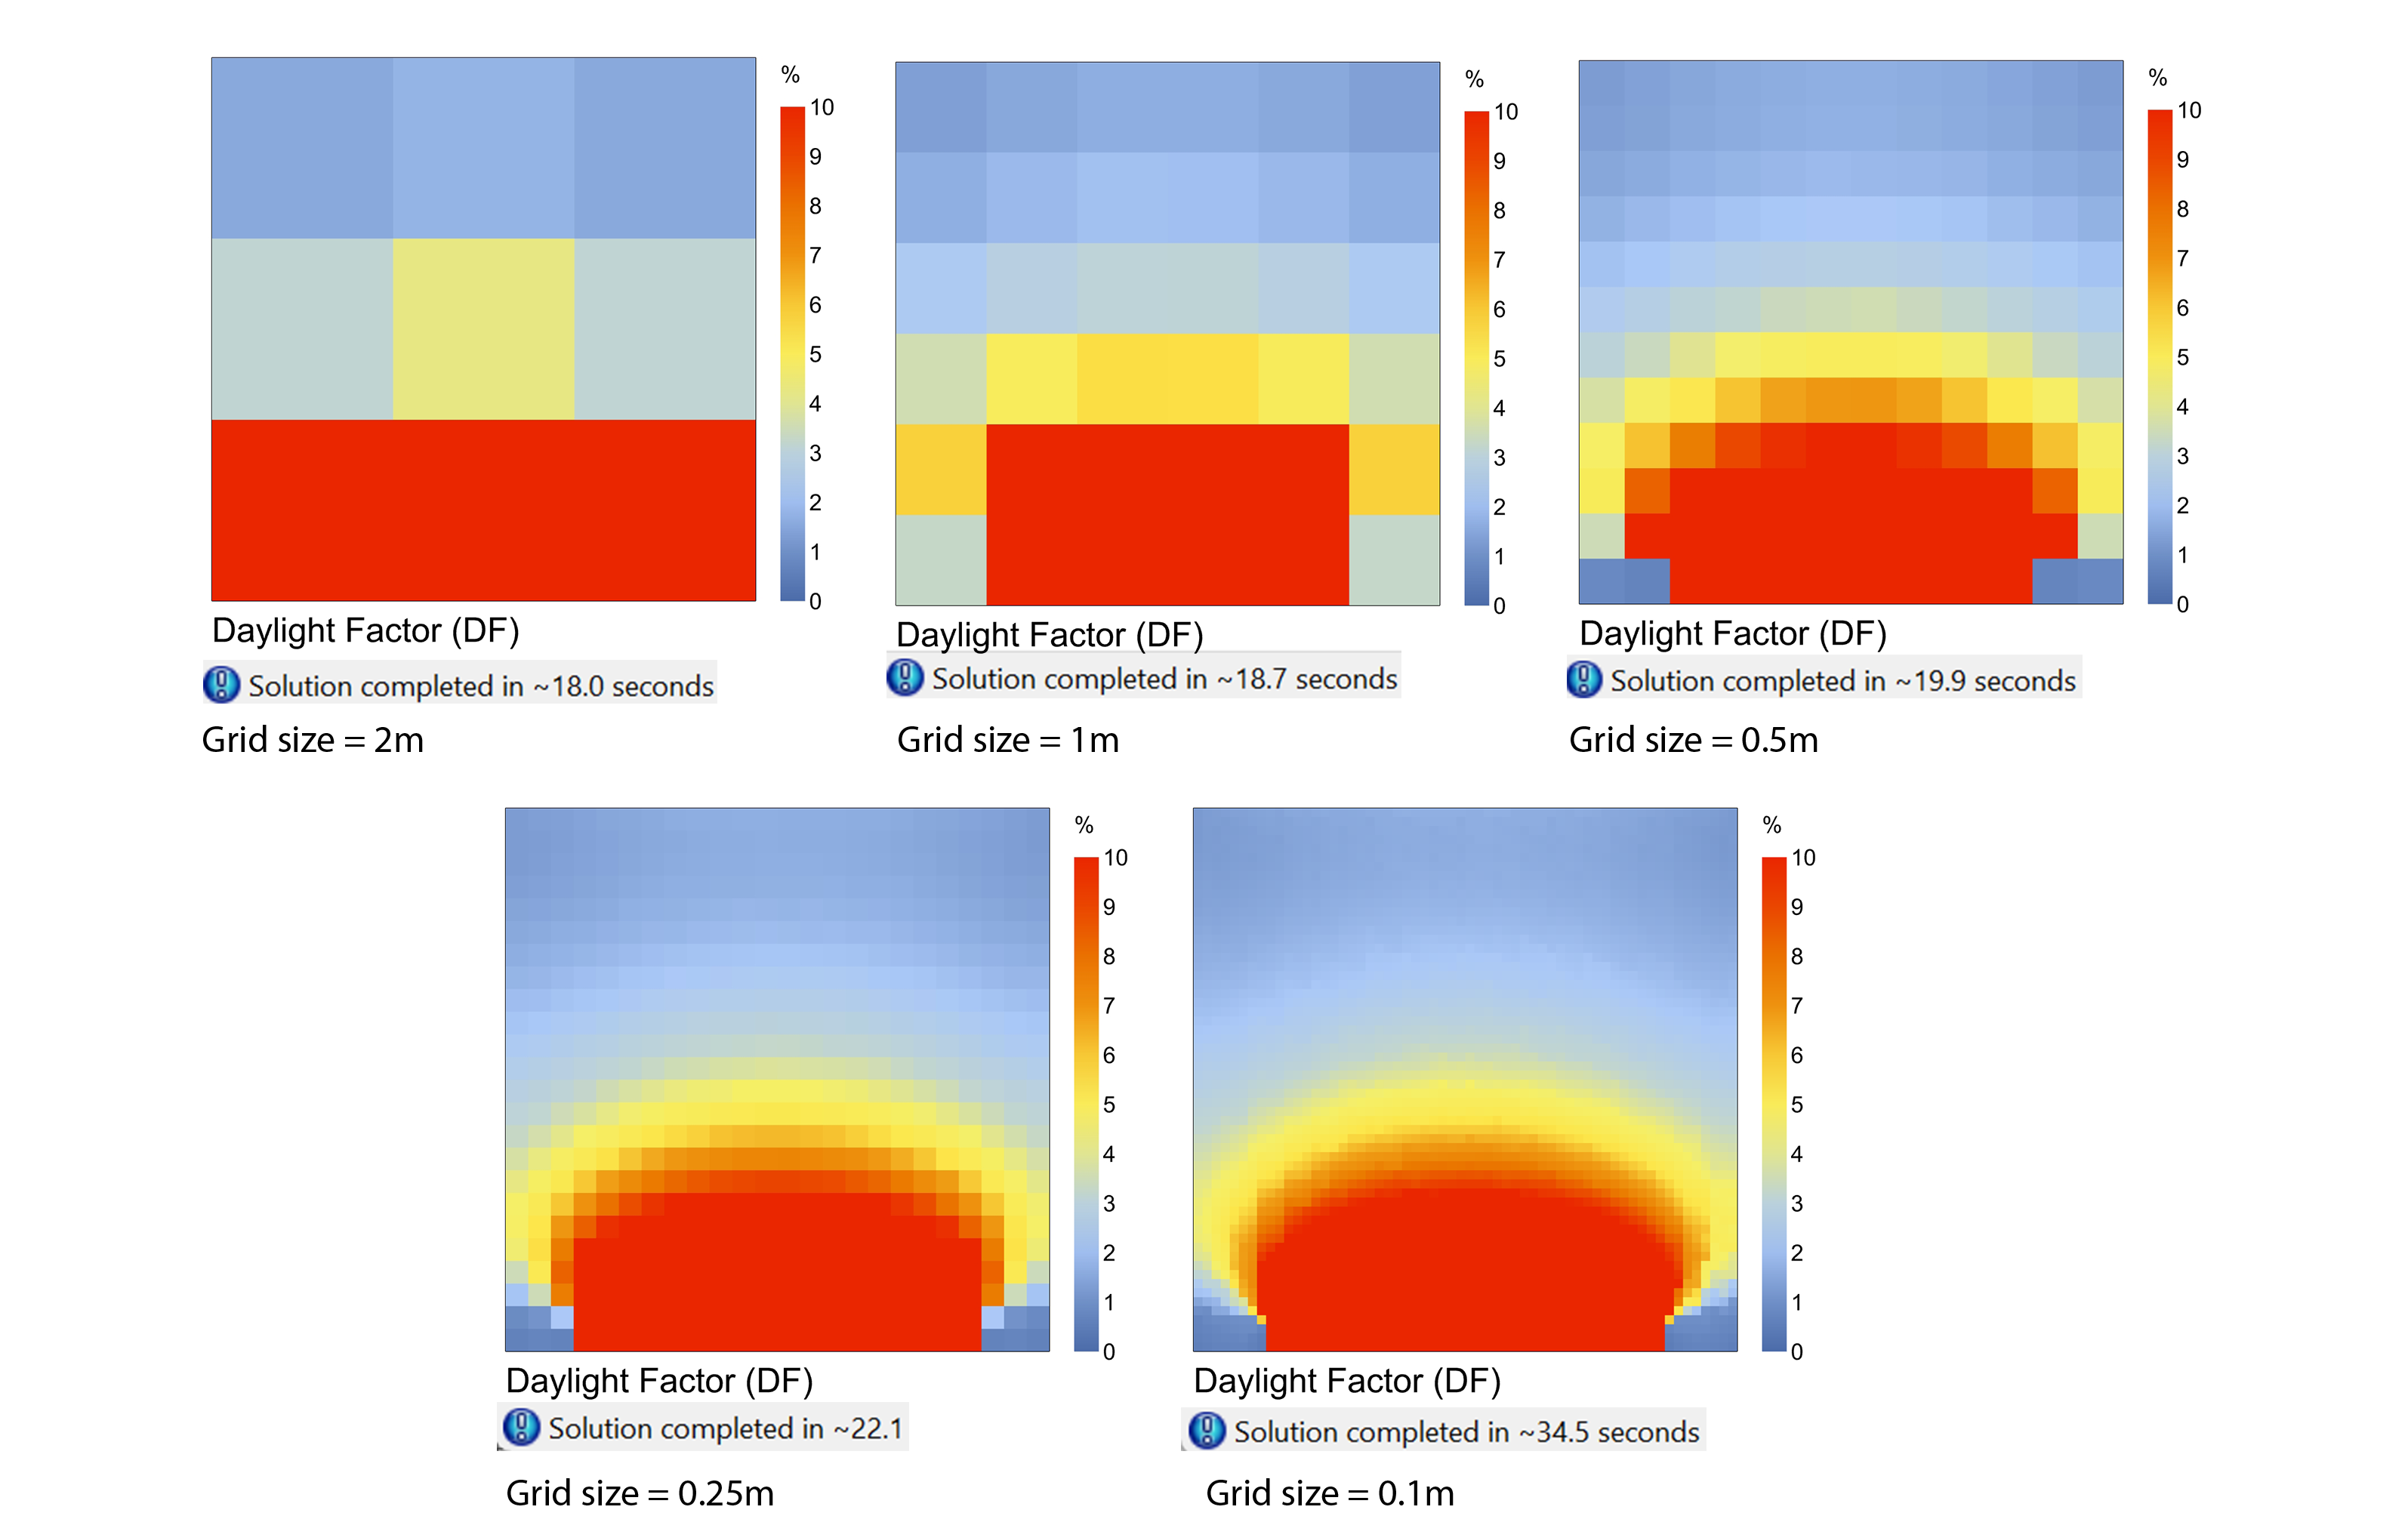
With smaller grid sizes (like 0.1m), you get more detailed results, but it takes longer to calculate (about 34.5 seconds). As the grid size gets larger, the simulation time decreases significantly. For example, with a grid size of 2 meter, the calculation only took 18 seconds, but the results are less detailed and blocky.
For most cases, you’ll need to balance the level of detail you want with how much time you have for the simulation.
|
Grid size |
Mean DF |
Time |
|
2 m |
6.33 |
18 seconds |
|
1 m |
6.28 |
18.7 seconds |
|
0.5 m |
6.34 |
19.9 seconds |
|
0.25 m |
6.51 |
22.1 seconds |
|
0.1 m |
6.48 |
34.5 seconds |
Simulations Accuracy and Level of Detail (Daylight) 3/5
Geometry model detail levellink copied
When working on daylight simulations, you might think it’s necessary to model every detail, like splitting windows into sections or adding shading devices, but that’s not always the case. For daylight performance, adding too much detail doesn’t make a big difference in results, it just makes your simulation slower.
Splitting the same window area
When designing a large window, you might eventually divide it into 2, 3, or more sections during the detailing phase. However, for daylight analysis, it’s not necessary to model this split. Simulating a single large window will give you the same result, and it will save you time in the simulation process.
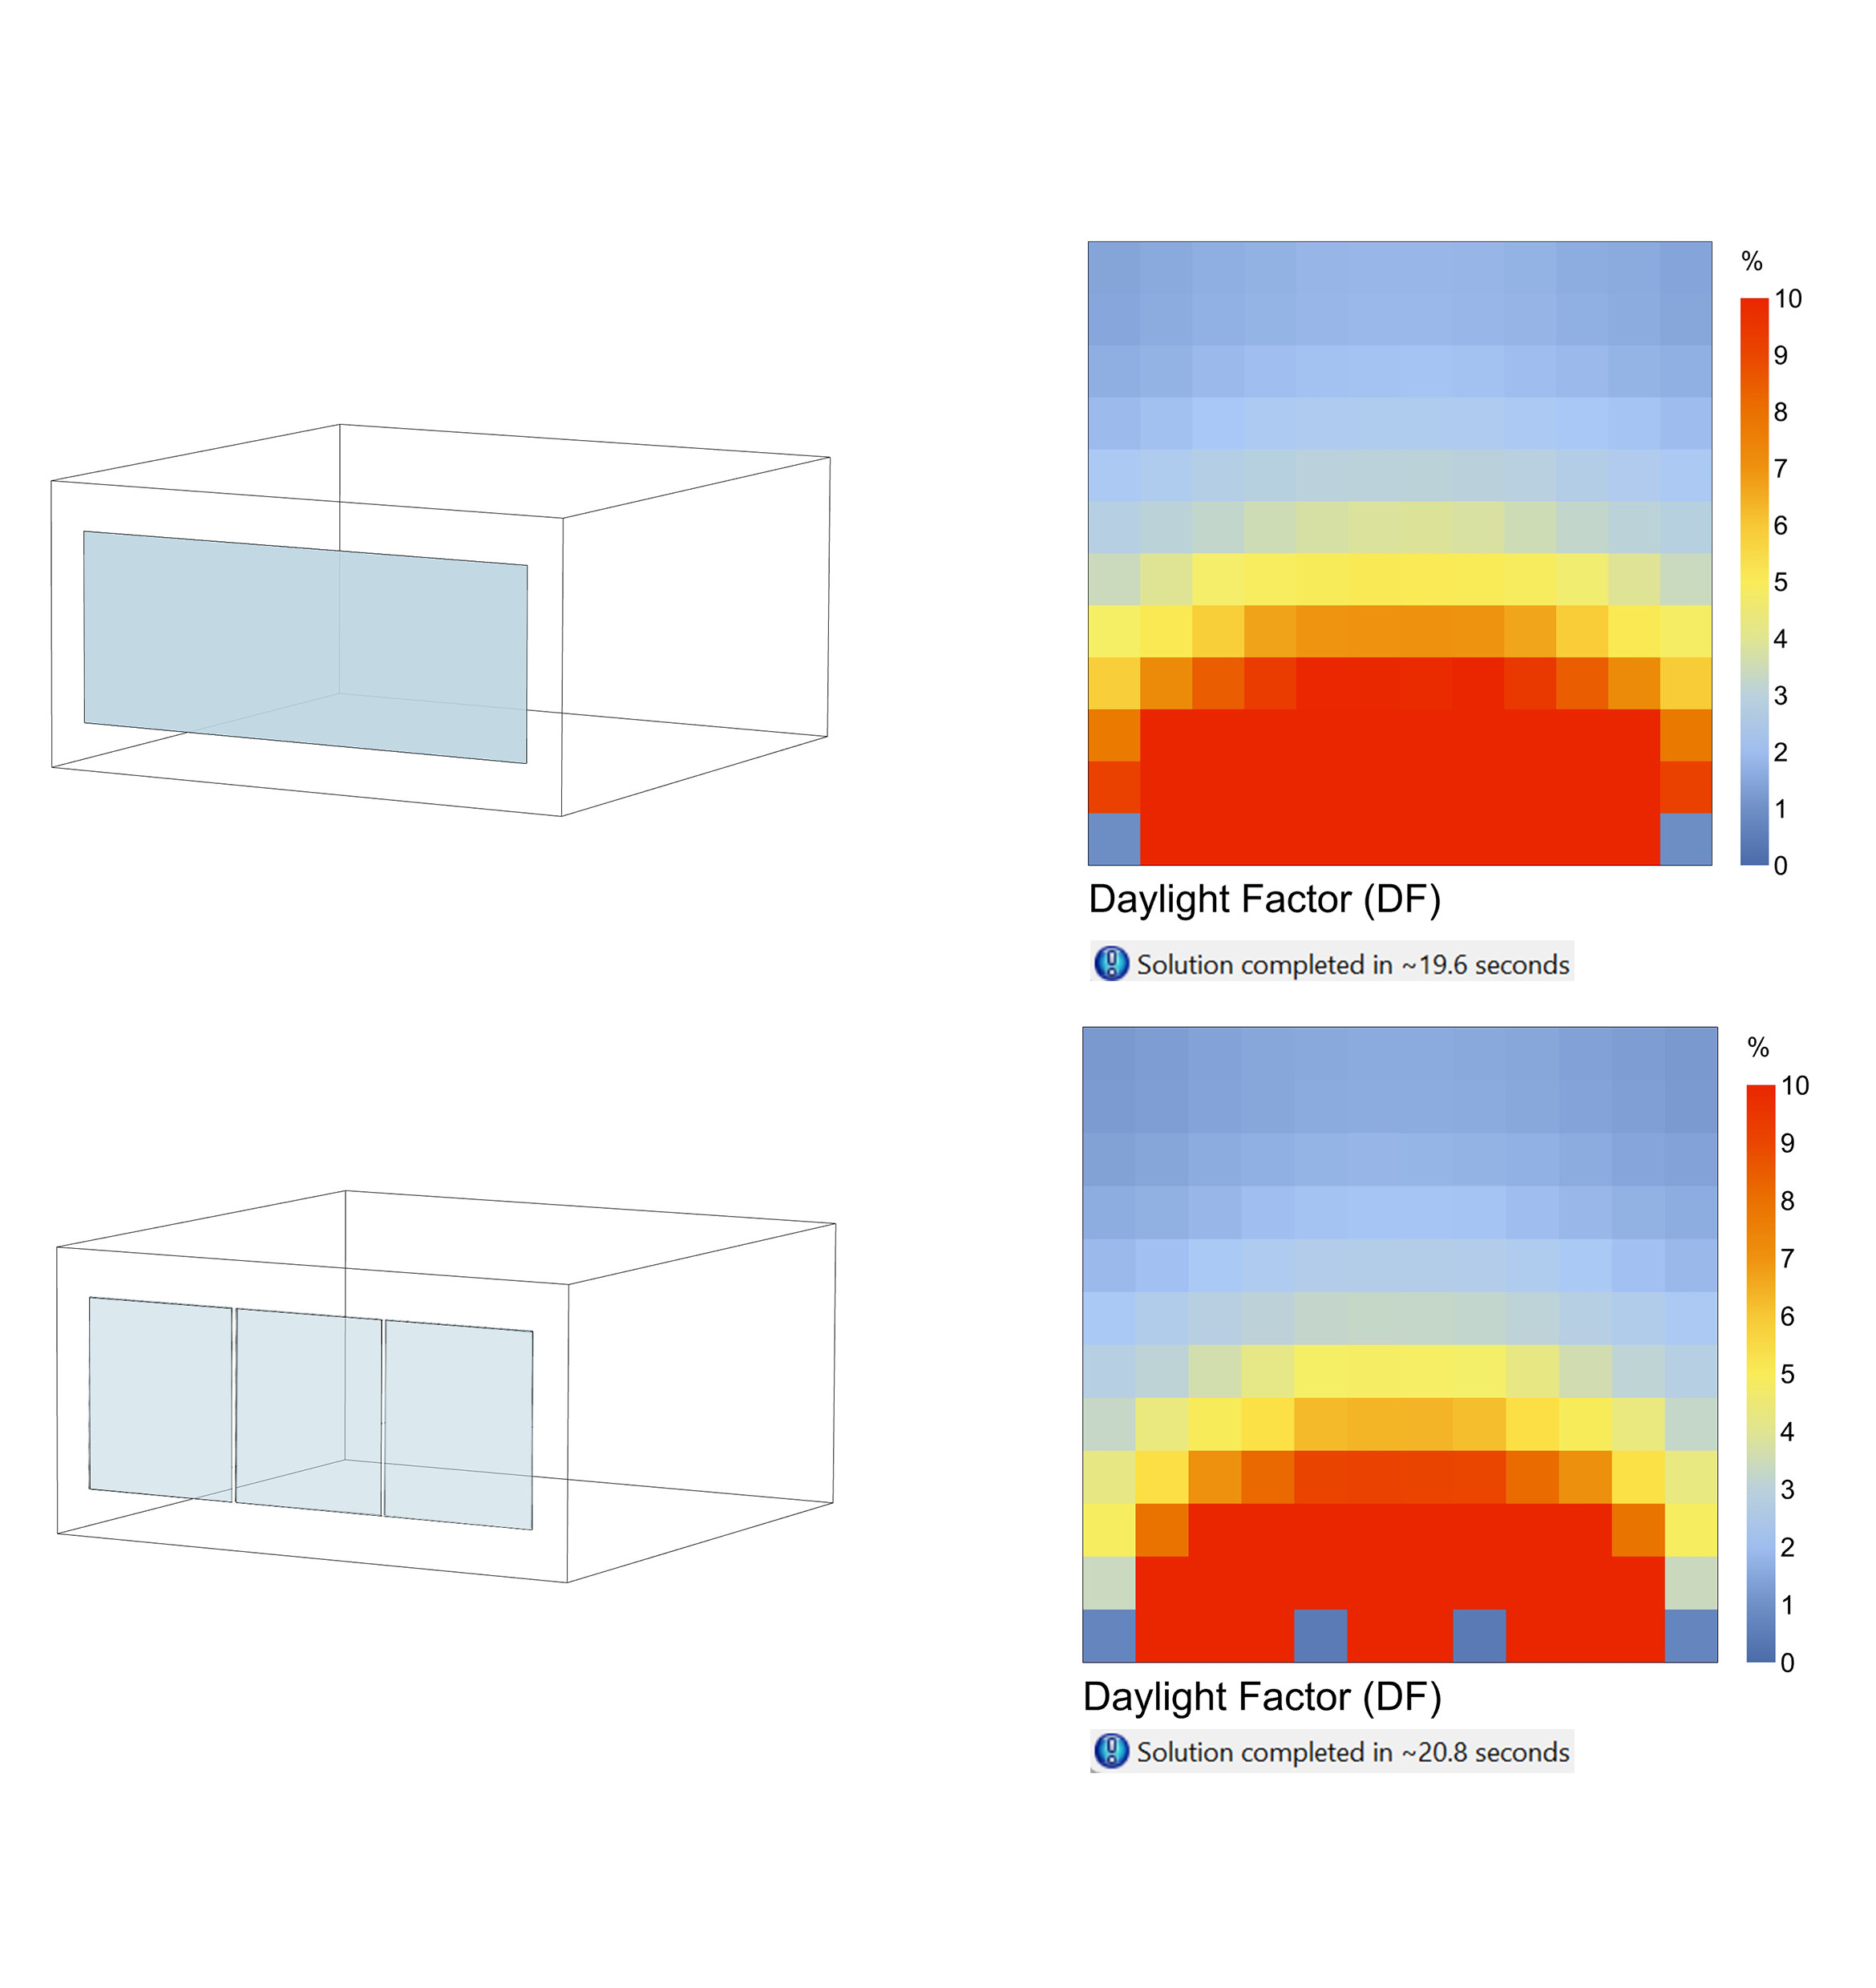
In this example, we ran two daylight simulations: one with a large window split into smaller sections and one with the window left as a single big piece. The results were identical in terms of daylight performance, but the simulation time for the split windows took around 21 seconds, while the single large window took only 19 seconds. This shows that going through the effort of detailing the window into smaller sections doesn’t make a significant difference in the results, but it can slow down the simulation slightly. So, it’s better to avoid unnecessary detailing during daylight analysis.
|
Window |
Mean DF |
Time |
|
Single plane |
6.531819 |
19.6 |
|
3 Divisions |
5.878403 |
20.8 seconds |
Shading (3D geometry vs. HB louver shades)
When conducting daylight simulations, you might think that adding more detail, like giving shading devices thickness, will improve your results. However, this extra complexity often doesn’t change the outcome—it just increases the simulation time.
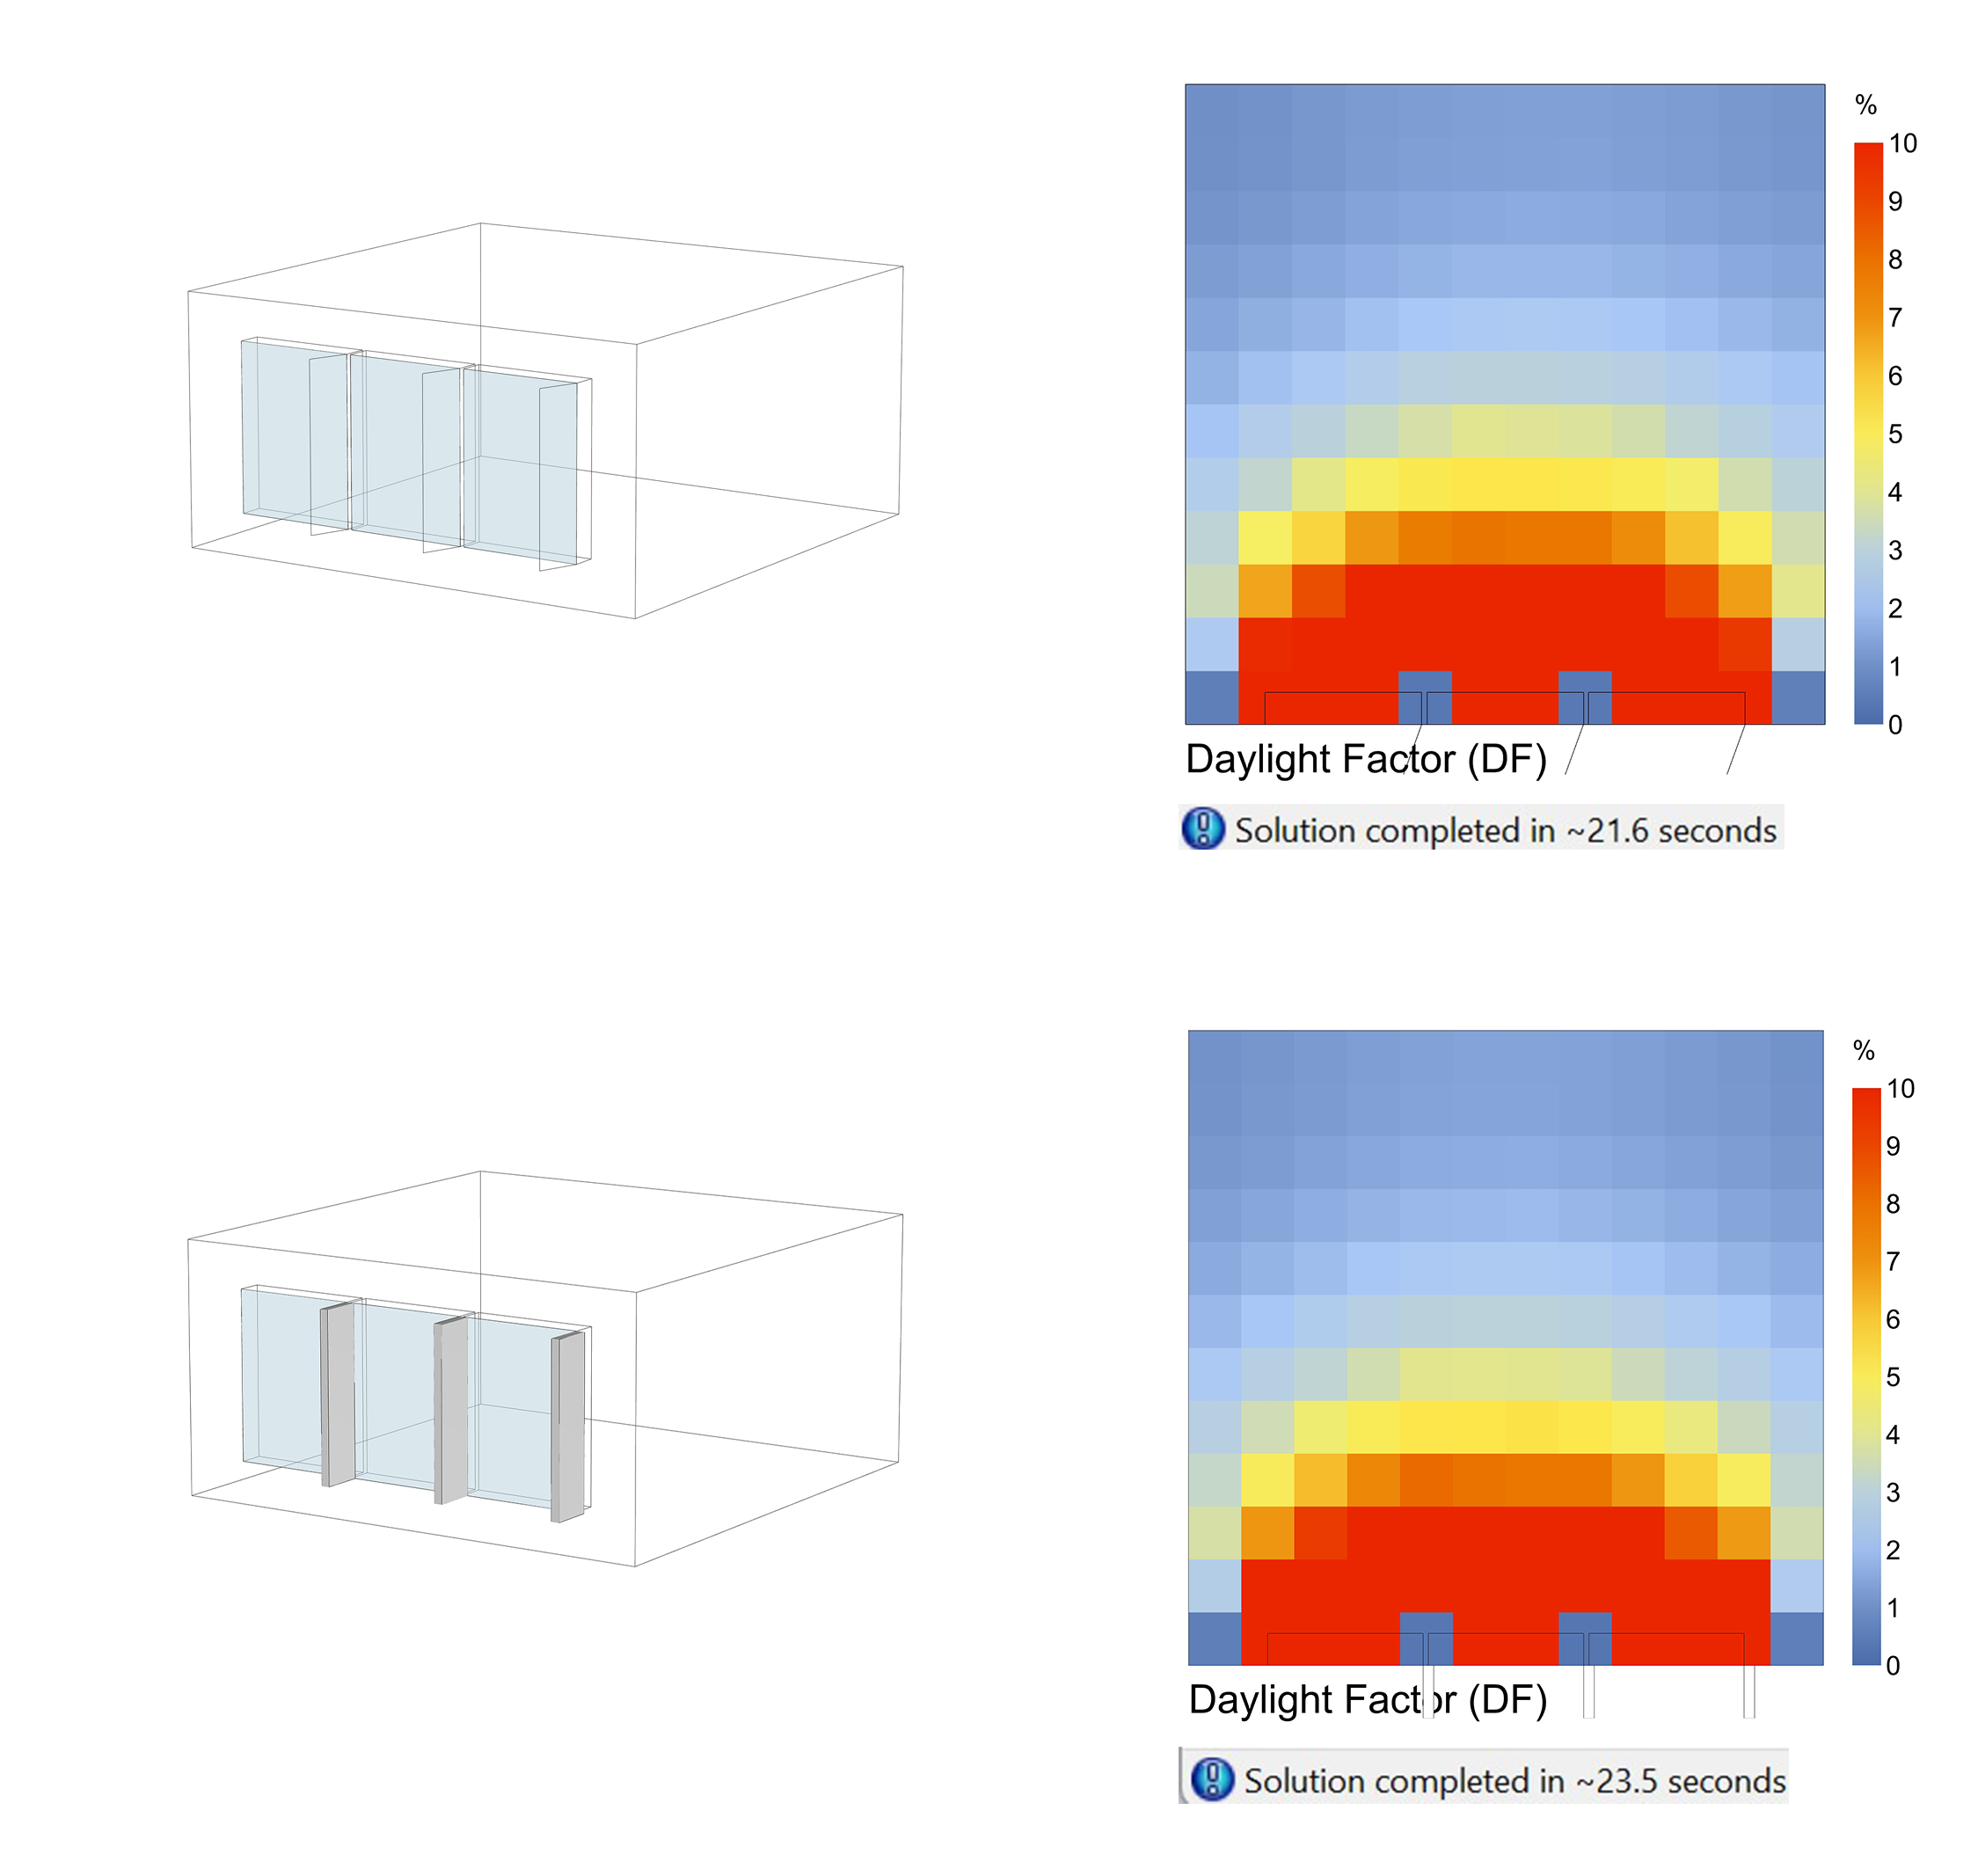
In this example, we ran two simulations. The first one used Honeybee to model the shading devices without any thickness, keeping it simple. The second one, created in Grasshopper/Rhino, added more detail by giving the shading devices thickness. Even though the Grasshopper version was more detailed, the daylight performance between the two simulations was almost identical. Despite having nearly the same daylight results, the Grasshopper model took 23.5 seconds to simulate, while the Honeybee model finished in just 21.6 seconds.
|
Shades |
Mean DF |
Time |
|
Honeybee shades |
4.900395 |
21.6 seconds |
|
Grasshopper shades |
4.961978 |
23.5 seconds |
Simulations Accuracy and Level of Detail (Daylight) 4/5
Relevance of featureslink copied
When using parametric models and simulations to perform research, it’s common to think that we need to include as many buildings features as possible in our models, to achieve the most accurate simulation results. (Similarly, when designing, it’s common to think that we need to include all details of our design to achieve the most accurate simulation results). However, this isn’t necessarily true! To run a successful simulation, it’s important to understand what outcome we need and which building features will affect the outcome. For example, let’s explore how adding a door to an interior wall in our model can impact our daylight simulation results.
Having an indoor door/opening
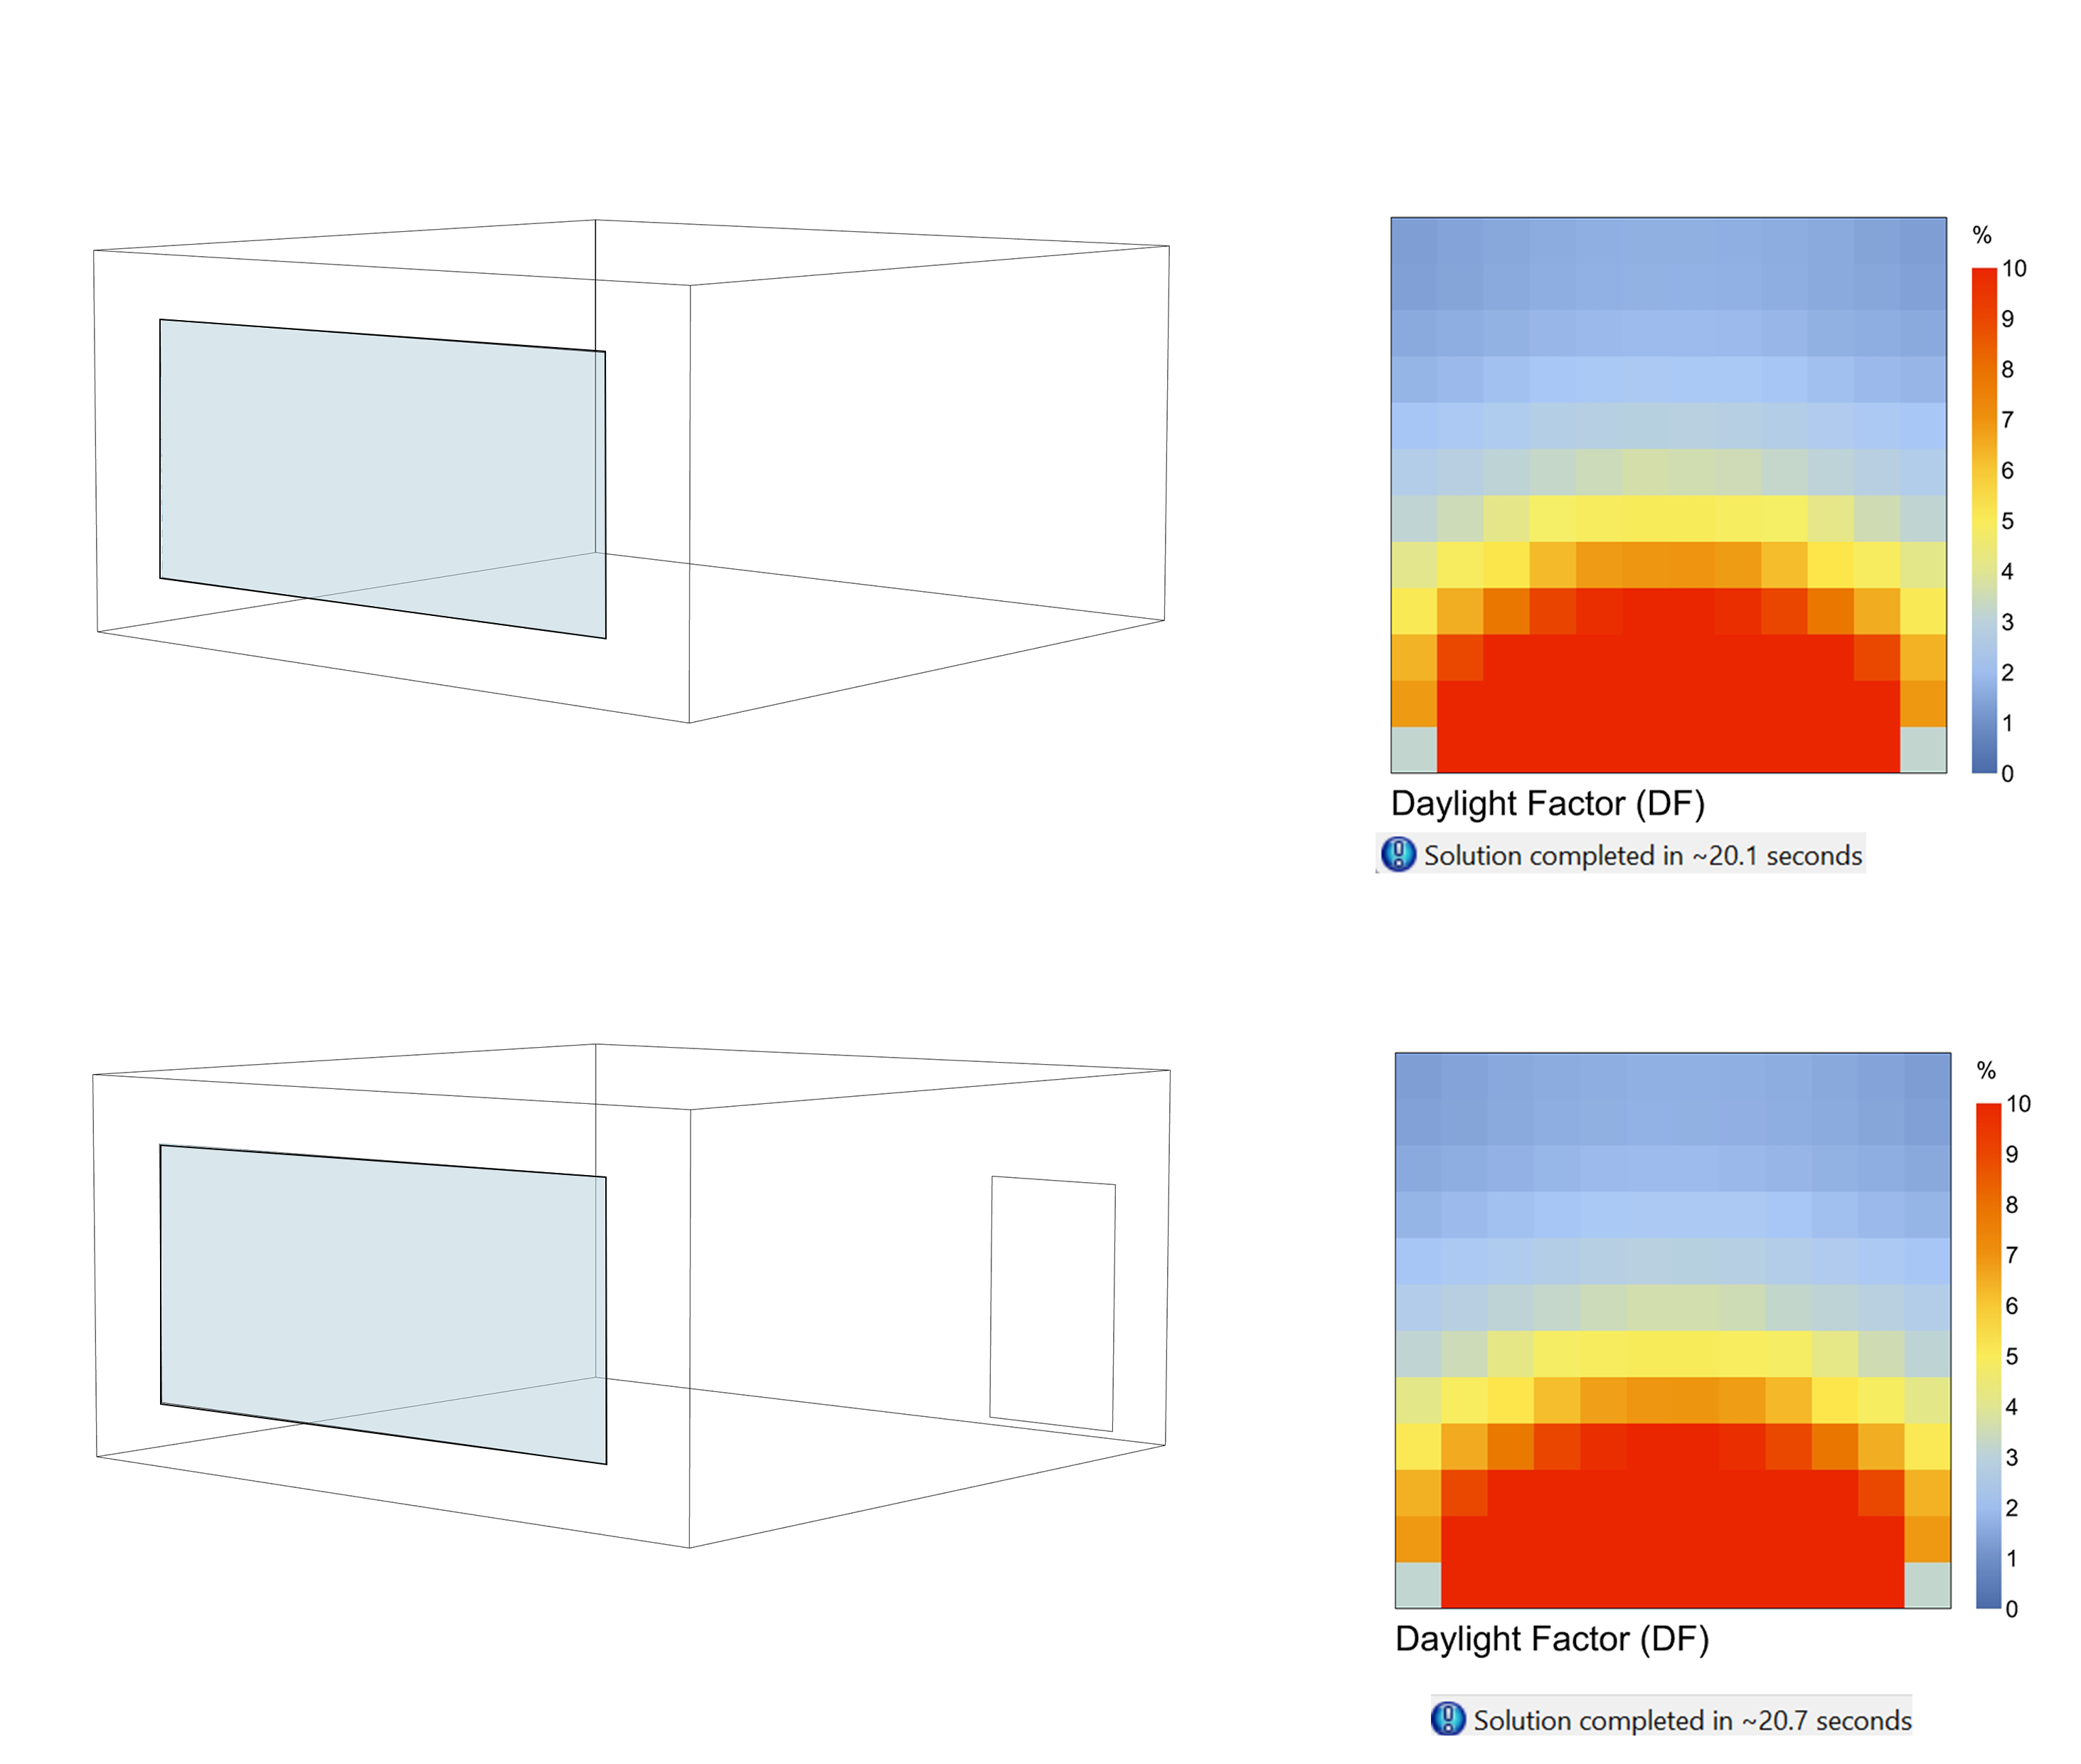
When using parametric models and simulations to perform research, it’s common to think that we need to include as many buildings features as possible in our models, to achieve the most accurate simulation results. (Similarly, when designing, it’s common to think that we need to include all details of our design to achieve the most accurate simulation results). However, this isn’t necessarily true! To run a successful simulation, it’s important to understand what outcome we need and which building features will affect the outcome. For example, let’s explore how adding a door to an interior wall in our model can impact our daylight simulation results.
|
Indoor Door |
Mean DF |
Time |
|
Doesn’t exist |
6.907589 |
20.1 seconds |
|
Exists |
6.912179 |
20.7 seconds |
Simulations Accuracy and Level of Detail (Daylight) 5/5
Conclusionlink copied
Congratulations on completing this tutorial! You’ve learned that a fully detailed building model isn’t necessary for conducting an effective daylight simulation—in fact, too much detail can slow you down. Now, you should be able to identify the specific parameters and variables that matter most.
This tutorial has provided you with essential insights regarding shading devices, window divisions, and indoor elements, but there are many other components you can add or modify to see how they impact your simulation. Remember, simplicity often leads to greater efficiency.
Now, it’s your turn to put this knowledge into practice!
Write your feedback.
Write your feedback on "Simulations Accuracy and Level of Detail (Daylight)"".
If you're providing a specific feedback to a part of the chapter, mention which part (text, image, or video) that you have specific feedback for."Thank your for your feedback.
Your feedback has been submitted successfully and is now awaiting review. We appreciate your input and will ensure it aligns with our guidelines before it’s published.
