Grasshopper Move a Cube
-
Intro
-
Introduction
-
Create a Cube
-
Move setup in Grasshopper
-
Conclusion
Information
| Primary software used | Grasshopper |
| Course | Grasshopper Move a Cube |
| Primary subject | Parametric Modeling |
| Secondary subject | General |
| Level | Beginner |
| Last updated | November 11, 2024 |
| Keywords |
Responsible
| Teacher | |
| Faculty |
Grasshopper Move a Cube 0/4
Grasshopper Move a Cube
Your first steps in manipulating geometry in Grasshopper.
Grasshopper Move a Cube 1/4
Introductionlink copied
In this tutorial you will learn how to place an object in Grasshopper and move it. Generally speaking, this can be done in two ways: using an object from Rhino or creating an object in Grasshopper. First you will learn how to use objects from Rhino. If you would like to know more about the different types of data Grasshopper can use, take a look at the Introduction Grasshopper page.
Grasshopper Move a Cube 2/4
Create a Cubelink copied
Model a Simple Cube
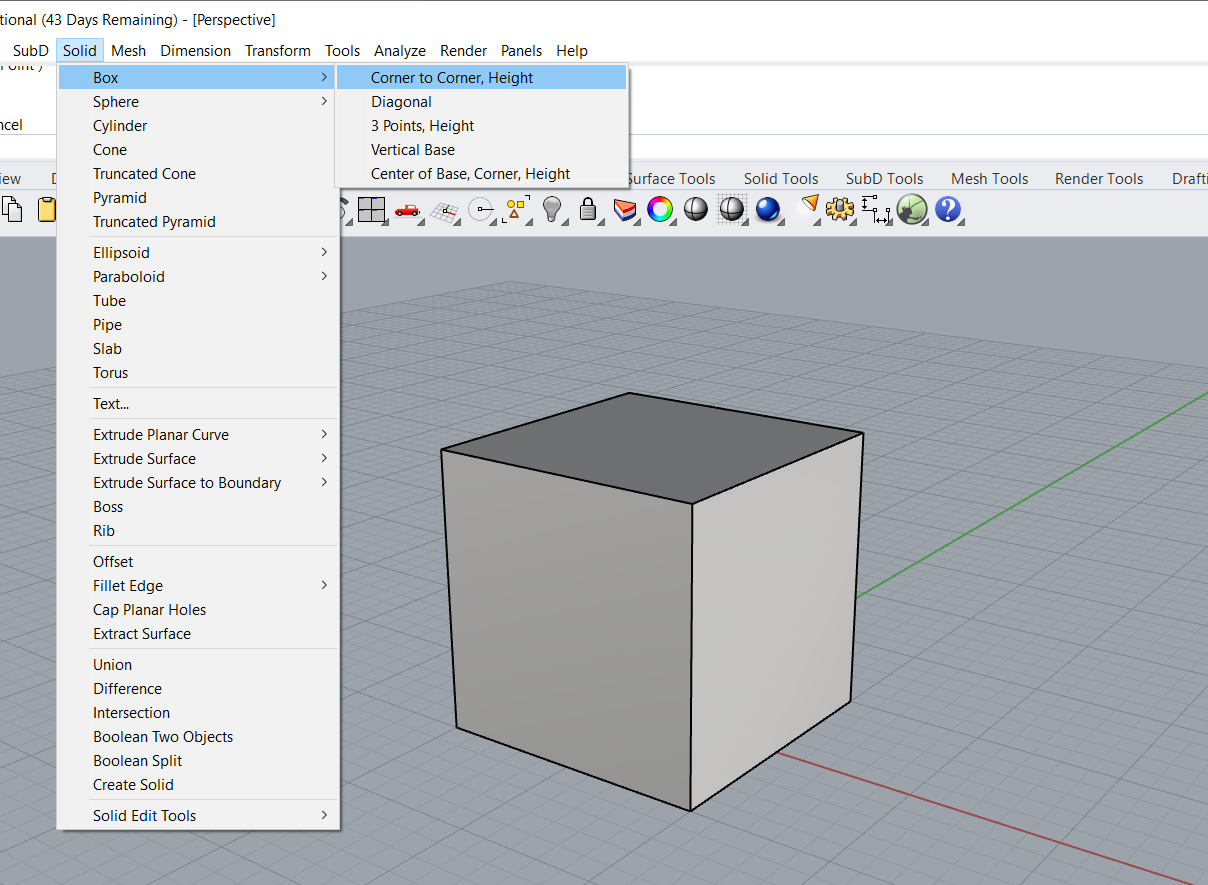
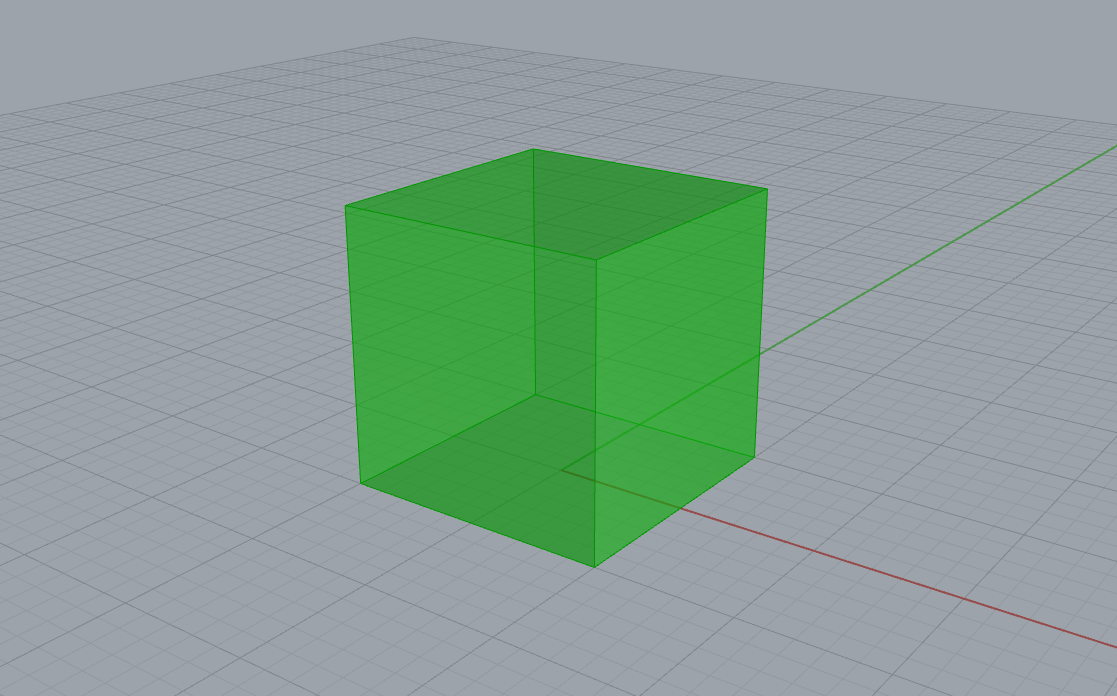
If you want to move a cube, we will first need to make an original cube. This cube can be generated in Grasshopper, or just be drawn in Rhino. In this example, we will draw a cube in Rhino.
- Draw a cube in Rhino:

Reference Cube geometry to Grasshopper
To move an object in Grasshopper we first need to select an object to move in Grasshopper. If you use existing geometry from Rhino, the geometry is already defined. That means that you can define that geometry as a Parameter. It might be necessary to cut a part of the design if the part which you want to move is connected to another object. You can connect it again once the final design is established.
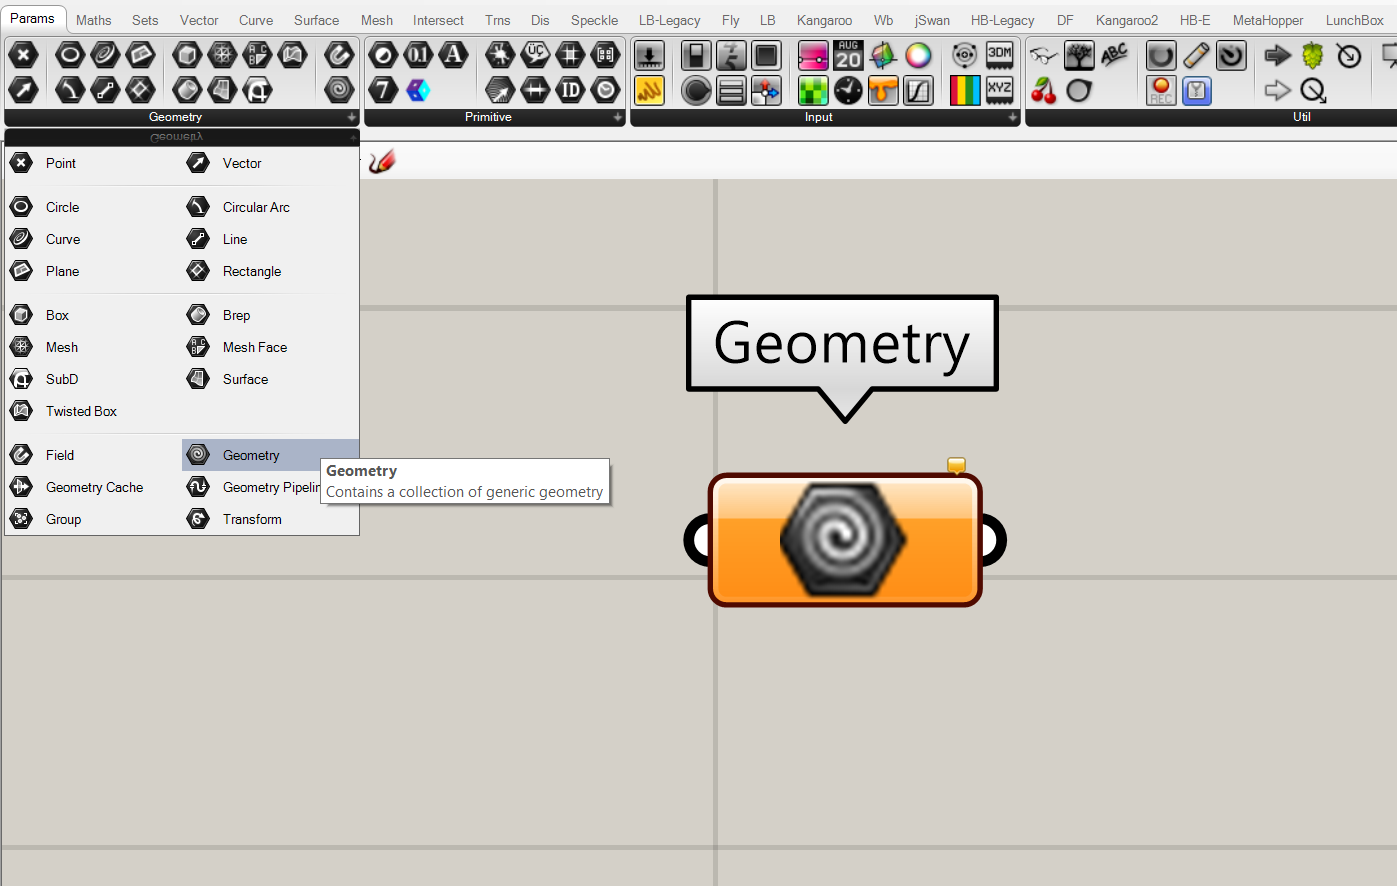
Add a Geometry Parameter to the canvas:
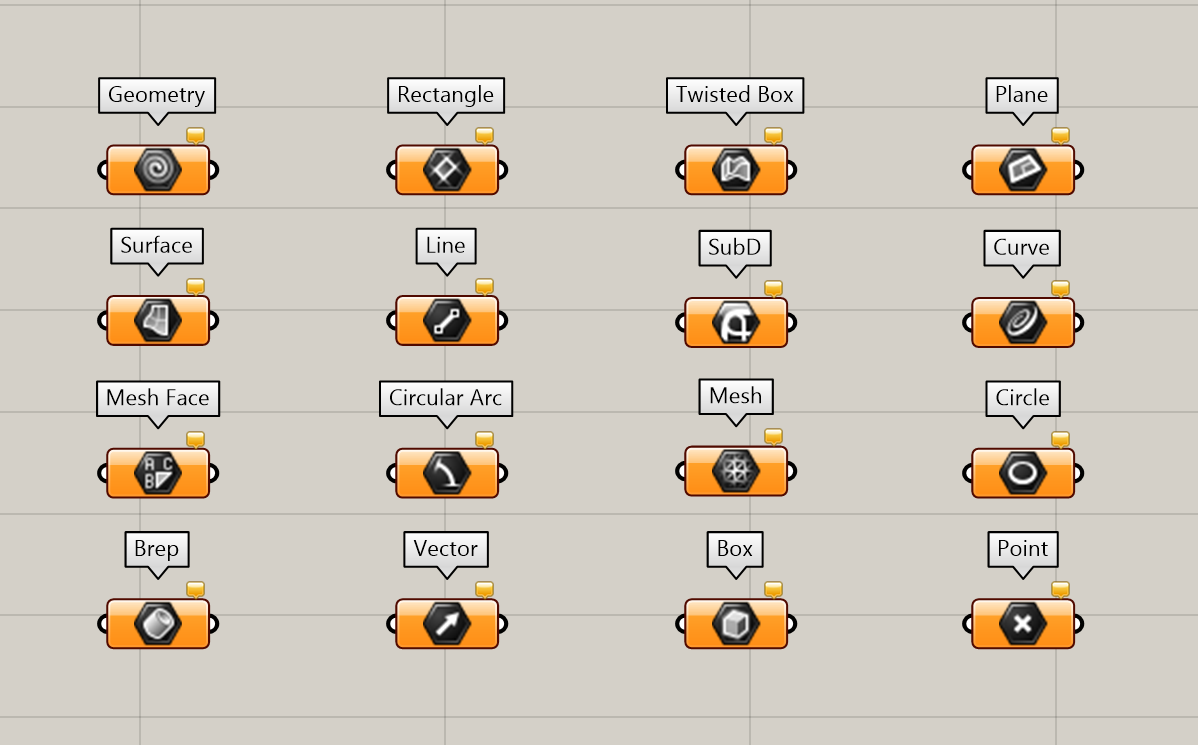
Although we just selected a geometry parameter type, there are several other parameters available. If you would like to move a point for example, it is recommended to use the point parameter. When you are outputting data, you should use the data parameter.
Next, we need to connect our box from Rhino to the geometry parameter in Grasshopper. Right click on the geometry parameter and click on Select one Object. The Rhino viewport will now open. By selecting the box, you will see it is highlighted green or red. This indicates that the geometry is connected to Grasshopper. After connecting the geometry to the Grasshopper parameter, you can hide the Rhino box.
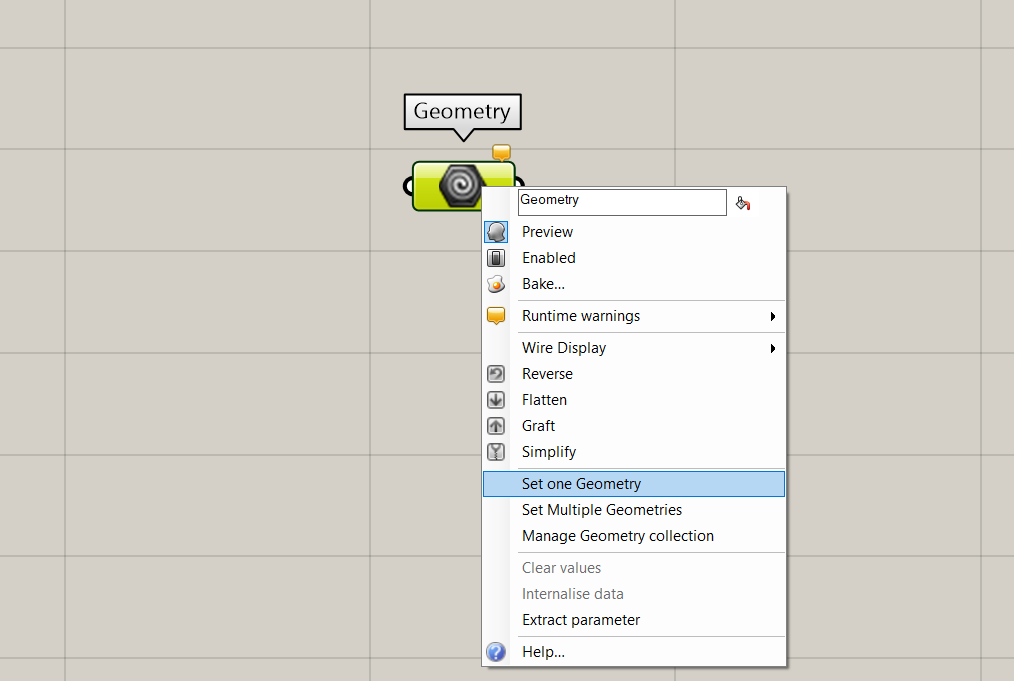
Connect the box to the Grasshopper parameter
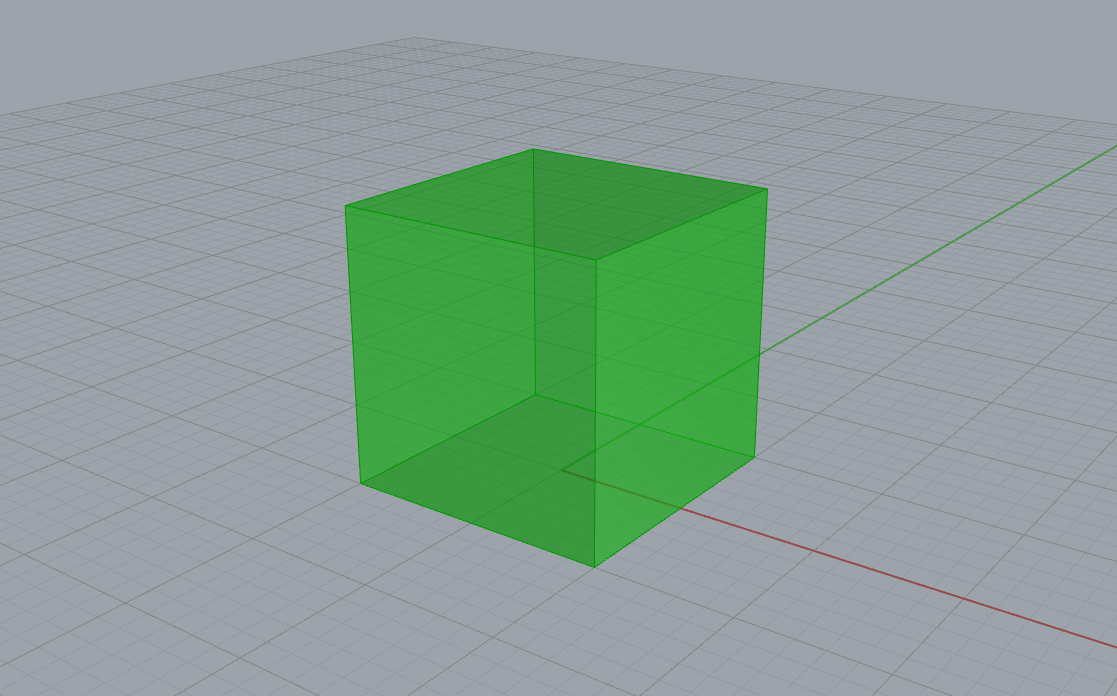
Hide the Rhino box
Grasshopper Move a Cube 3/4
Move setup in Grasshopperlink copied
Move
Now we will move the box. Connect a move component to the geometry parameter. First add the move component to the canvas, and then draw a wire between the parameter output and the Geometry input.
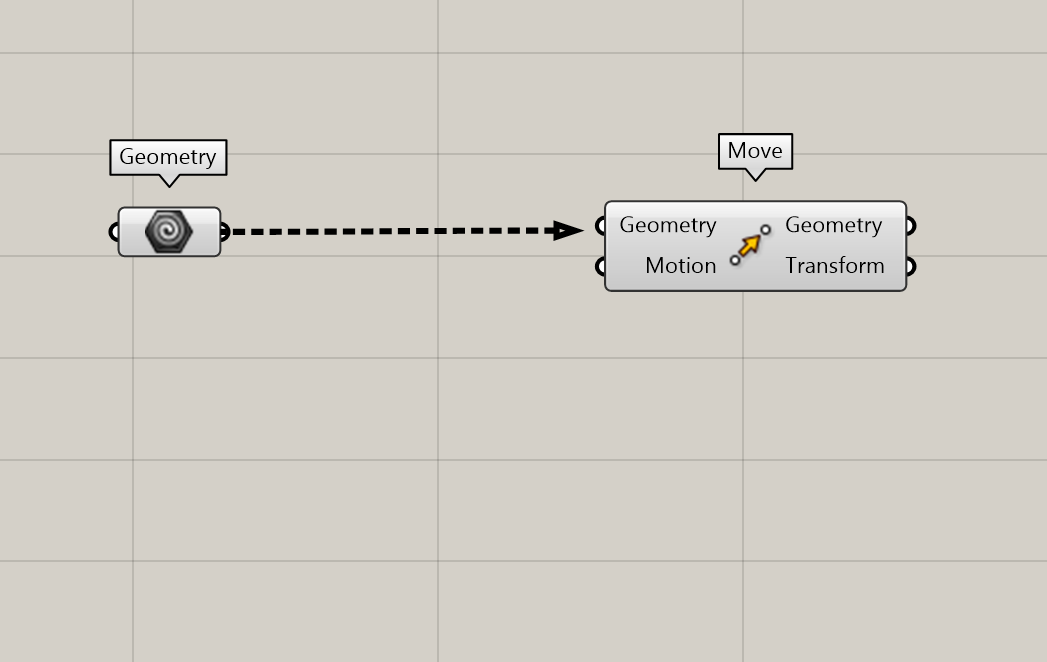
Move the Geometry
Connect the Geometry to the input Geomtry of the Move component.

Vector
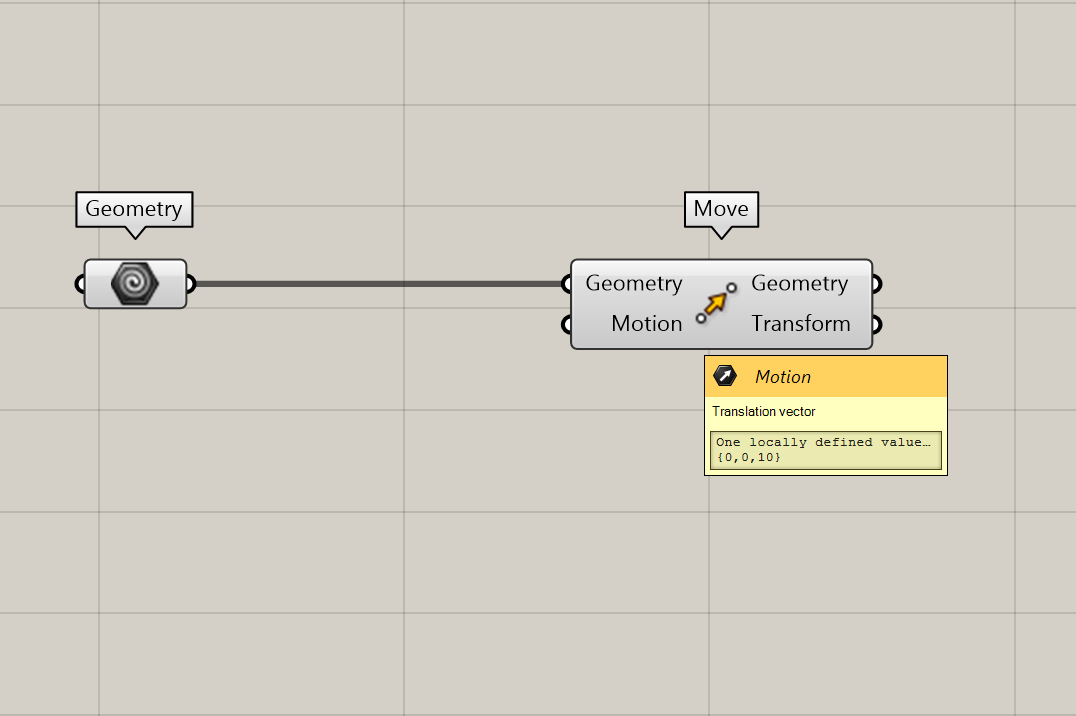
Next to a geometry input, the move component also has a motion input. If we hold our mouse on the motion input, we can see that it requires a translation vector. Currently, the motion is set to {0, 0, 10} which leads to a movement of 10 units in the z-direction.
A Vector describes direction and distance. Vectors are widely used in Grasshopper and form often the basis for complex transformations. The vector can be defined in four ways.
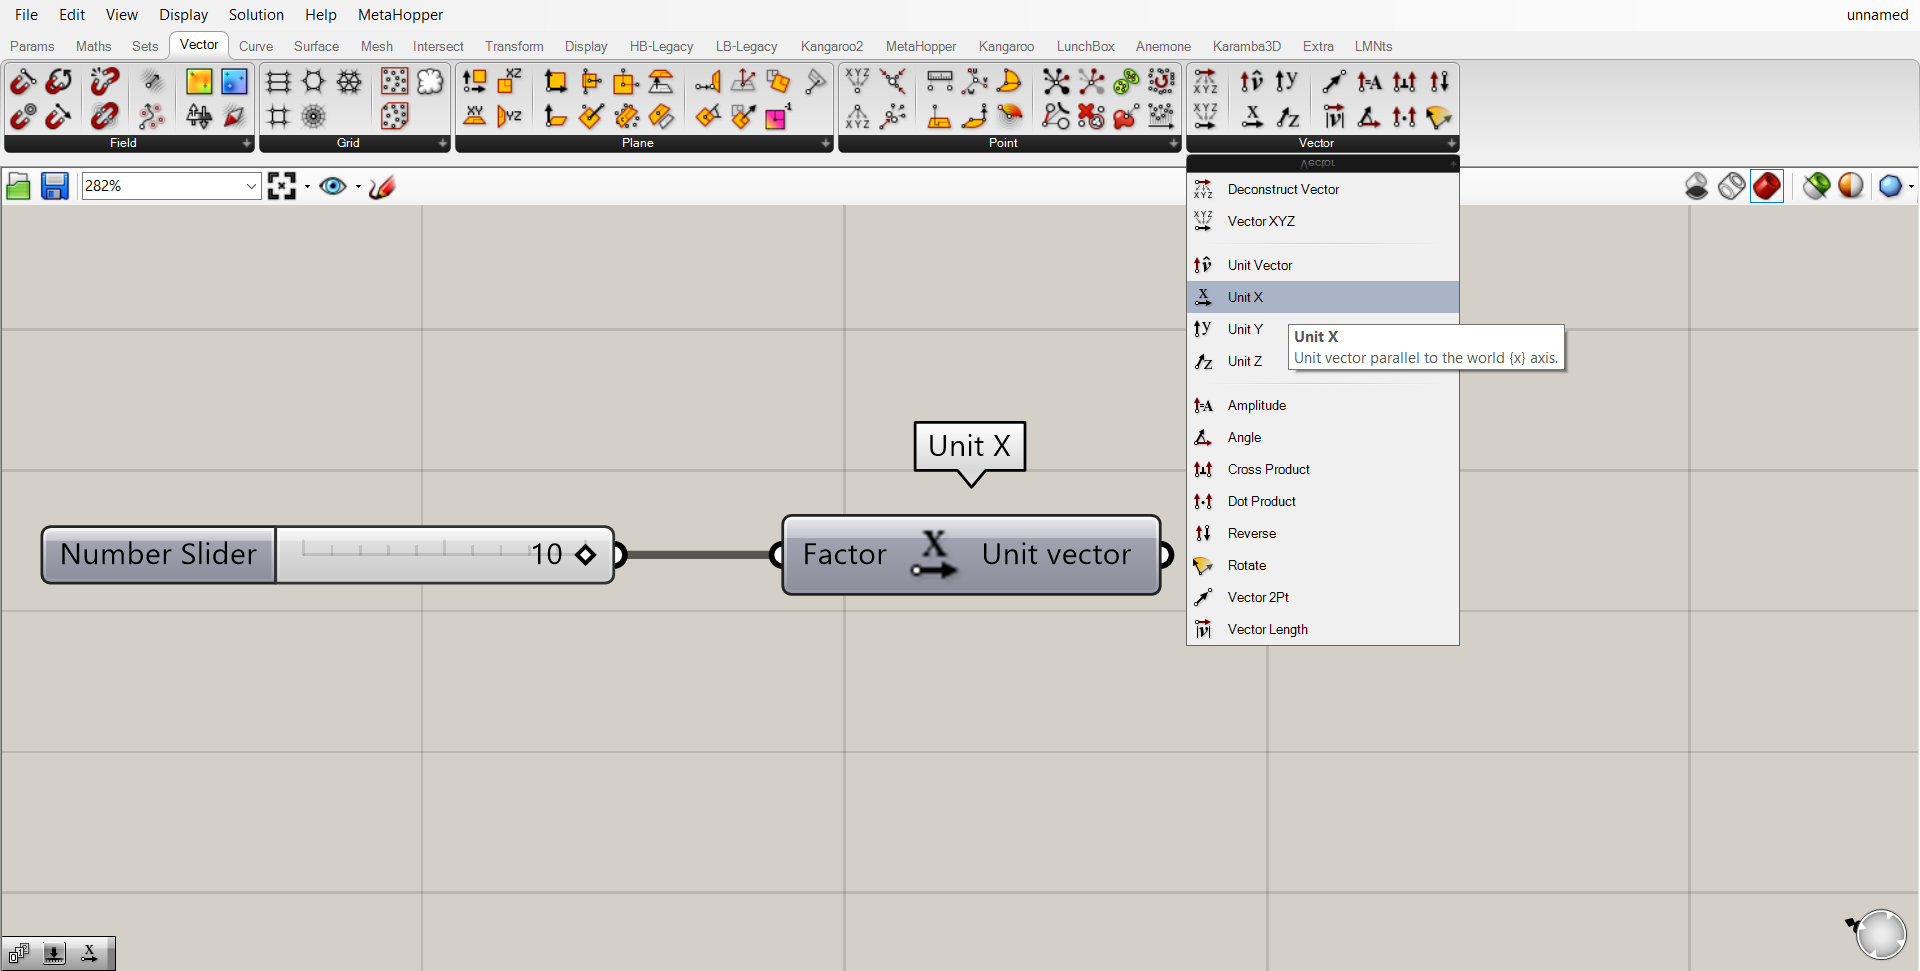
1. Create Vector with Unit component:
The easiest vector to create is a Unit-X, Unit-Y or Unit-Z. By adding a number slider, you can define the length of the vector in the specified direction.

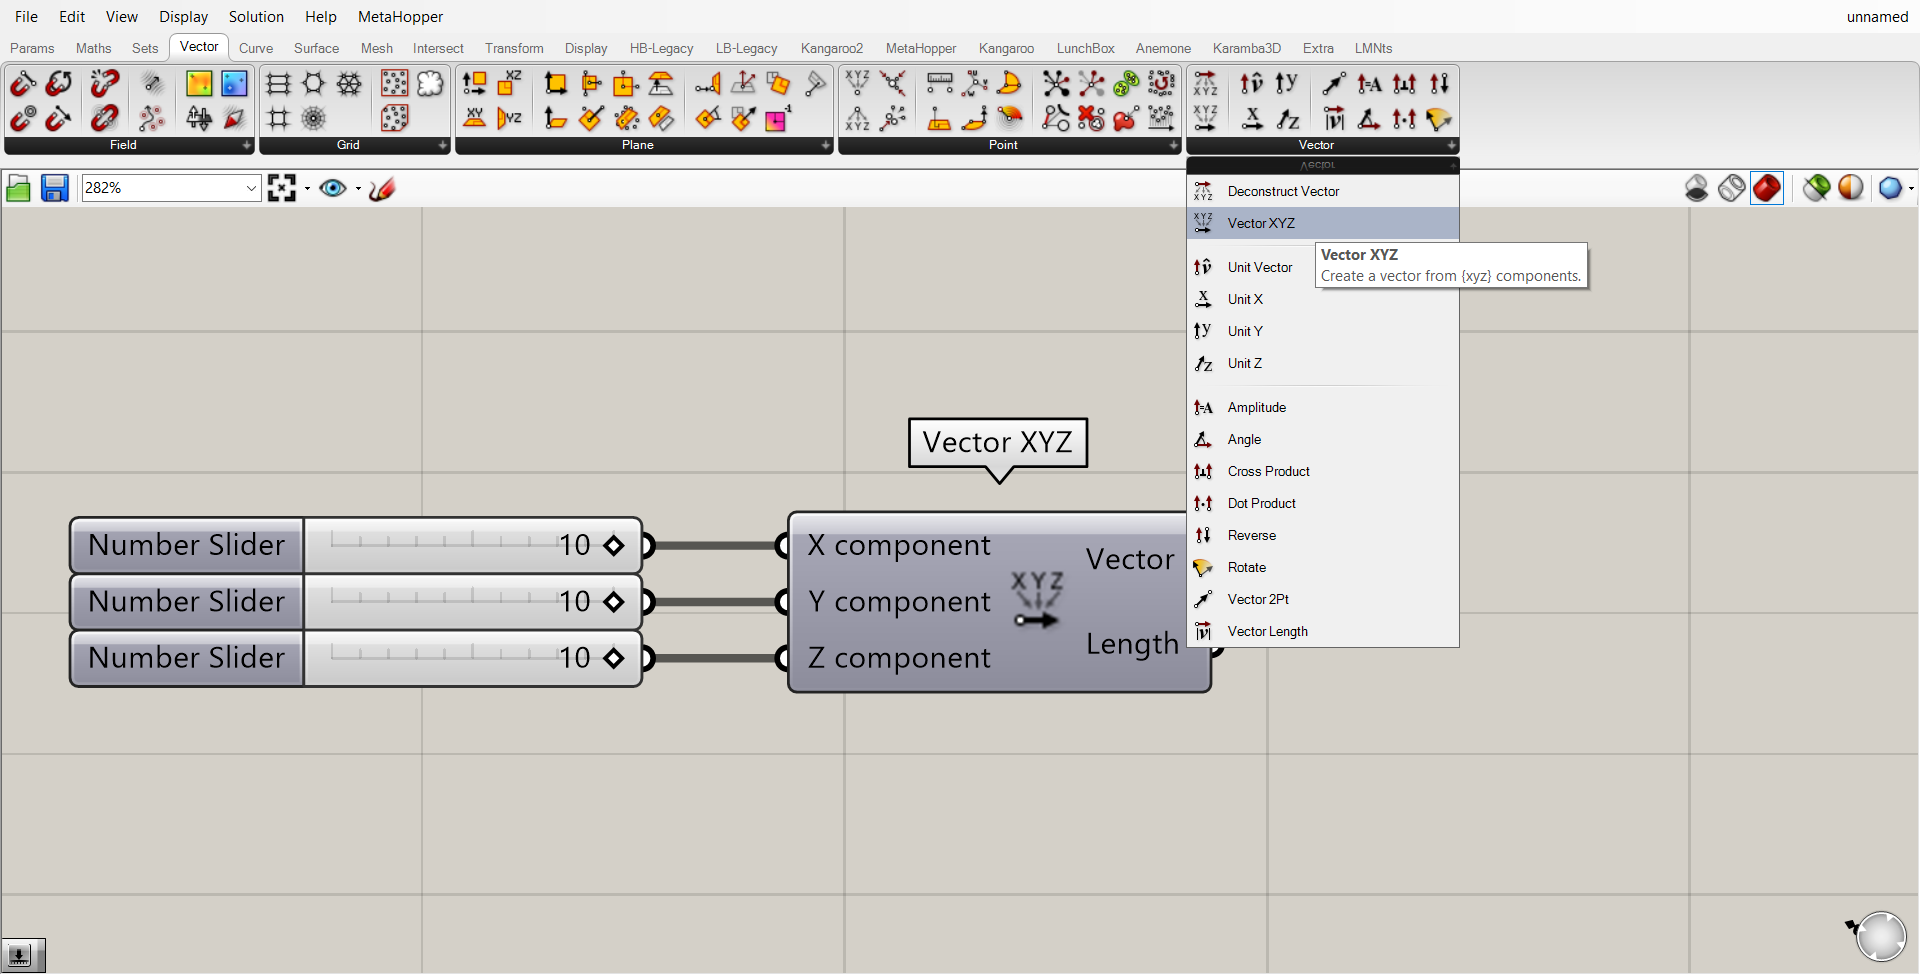
2. Create Vector with XYZ Vector:
A XYZ vector. This is a vector in the X, Y or Z direction. The distance of the vector is based on the X, Y and Z values you input with a number slider or a value.
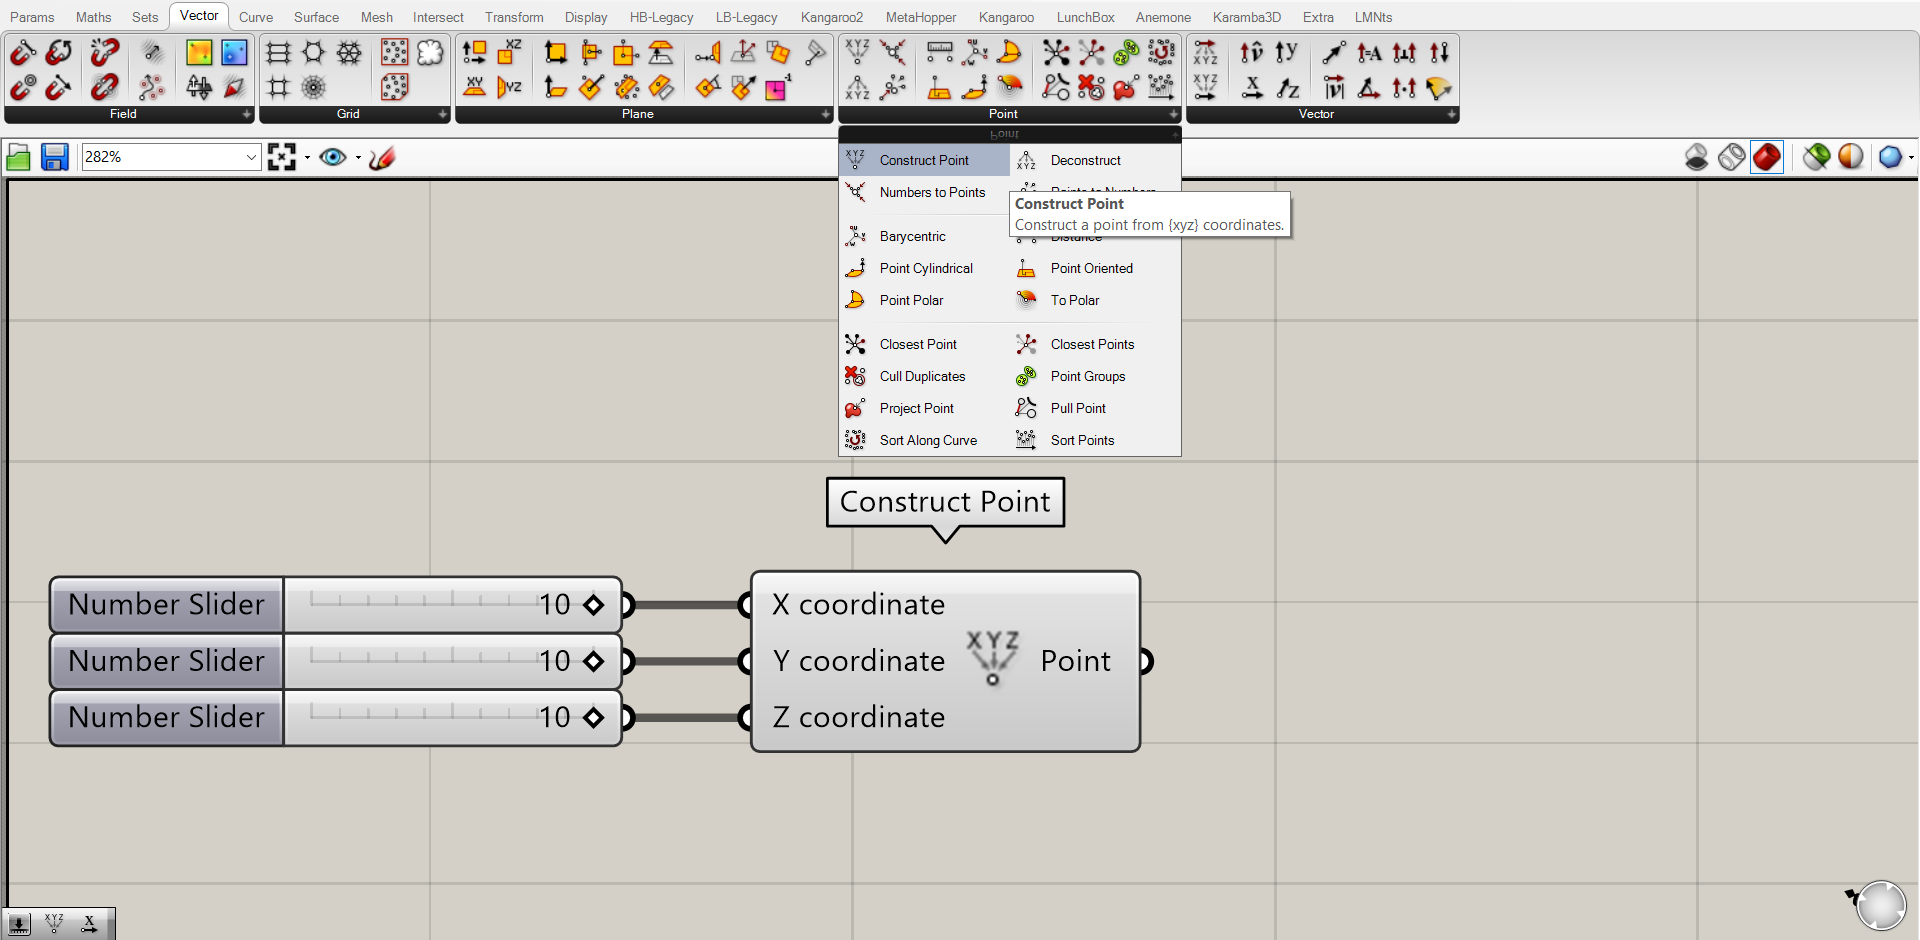
3. Create Vector with one Point:
A point can also work as a transformation vector. This point can be created or an existing point can be used. If the point has the coordinates of X=2, Y=4 and Z=6 and it is used as a move vector the object will move 2 units in X direction, 4 units in Y direction and 6 units in Z direction.
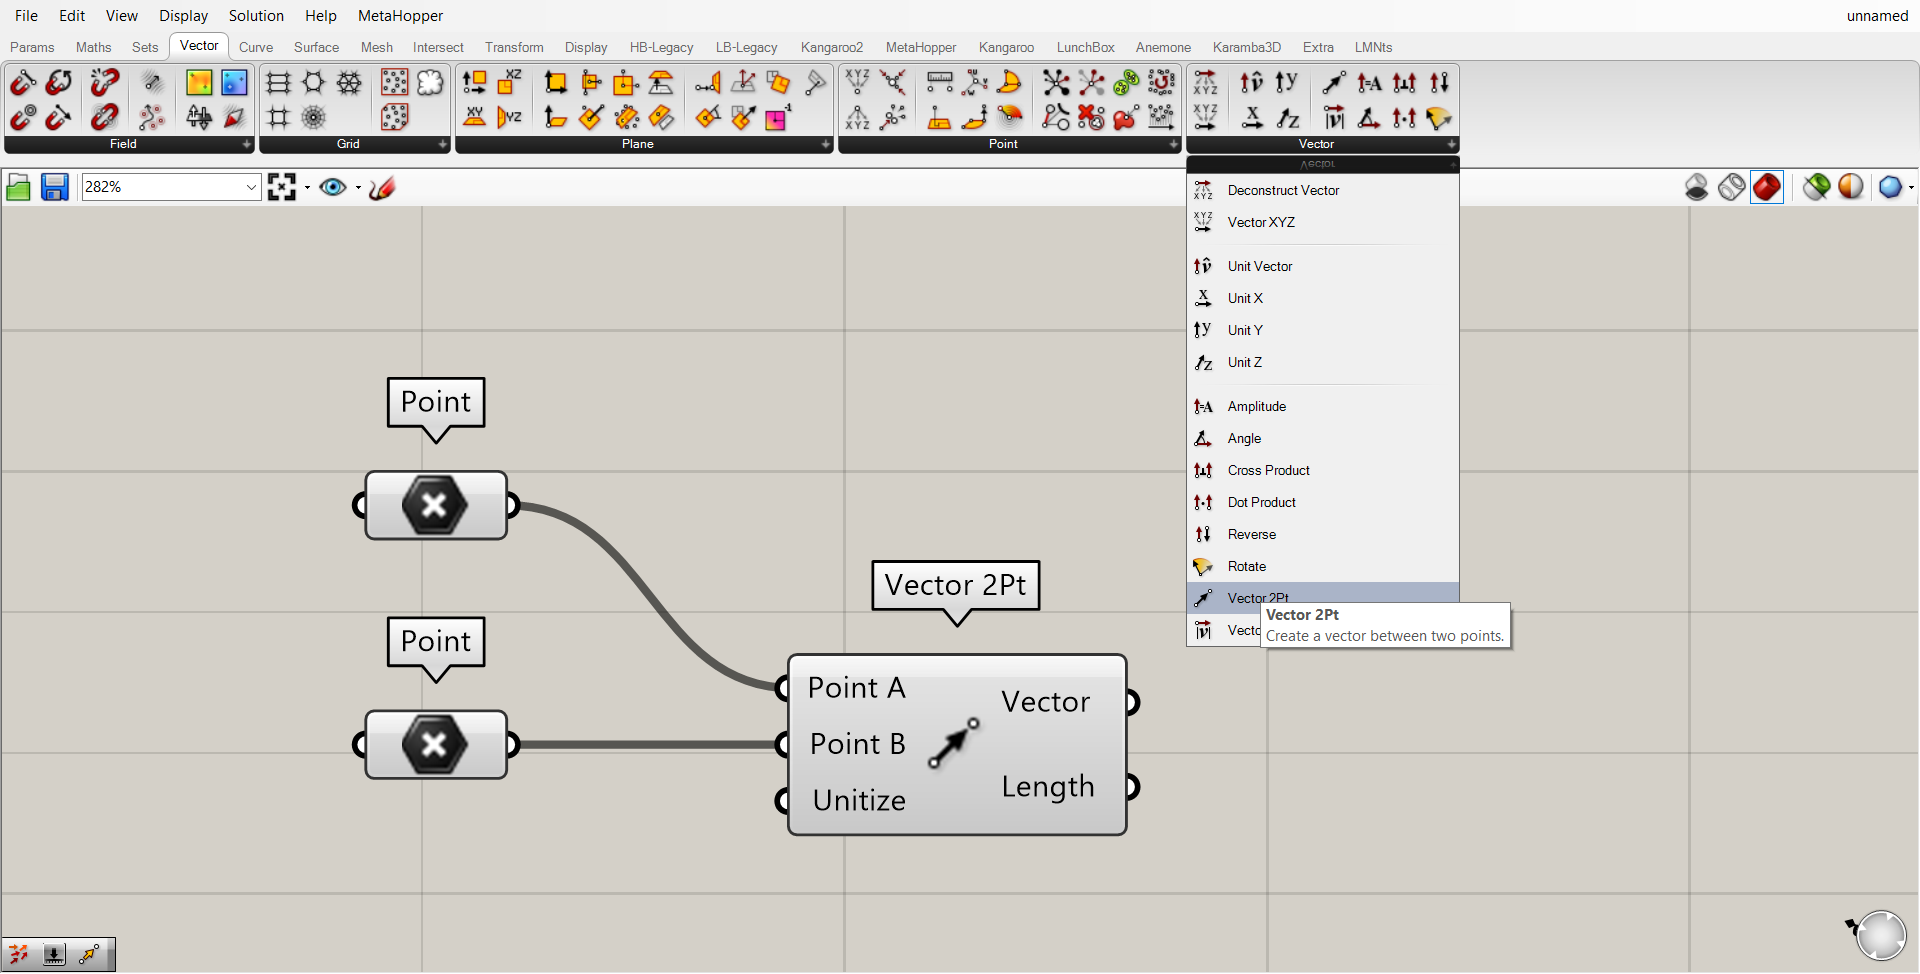
4. Create Vector with two points:
If you have two points then you can use these points to define a vector
Combine Vector and Move
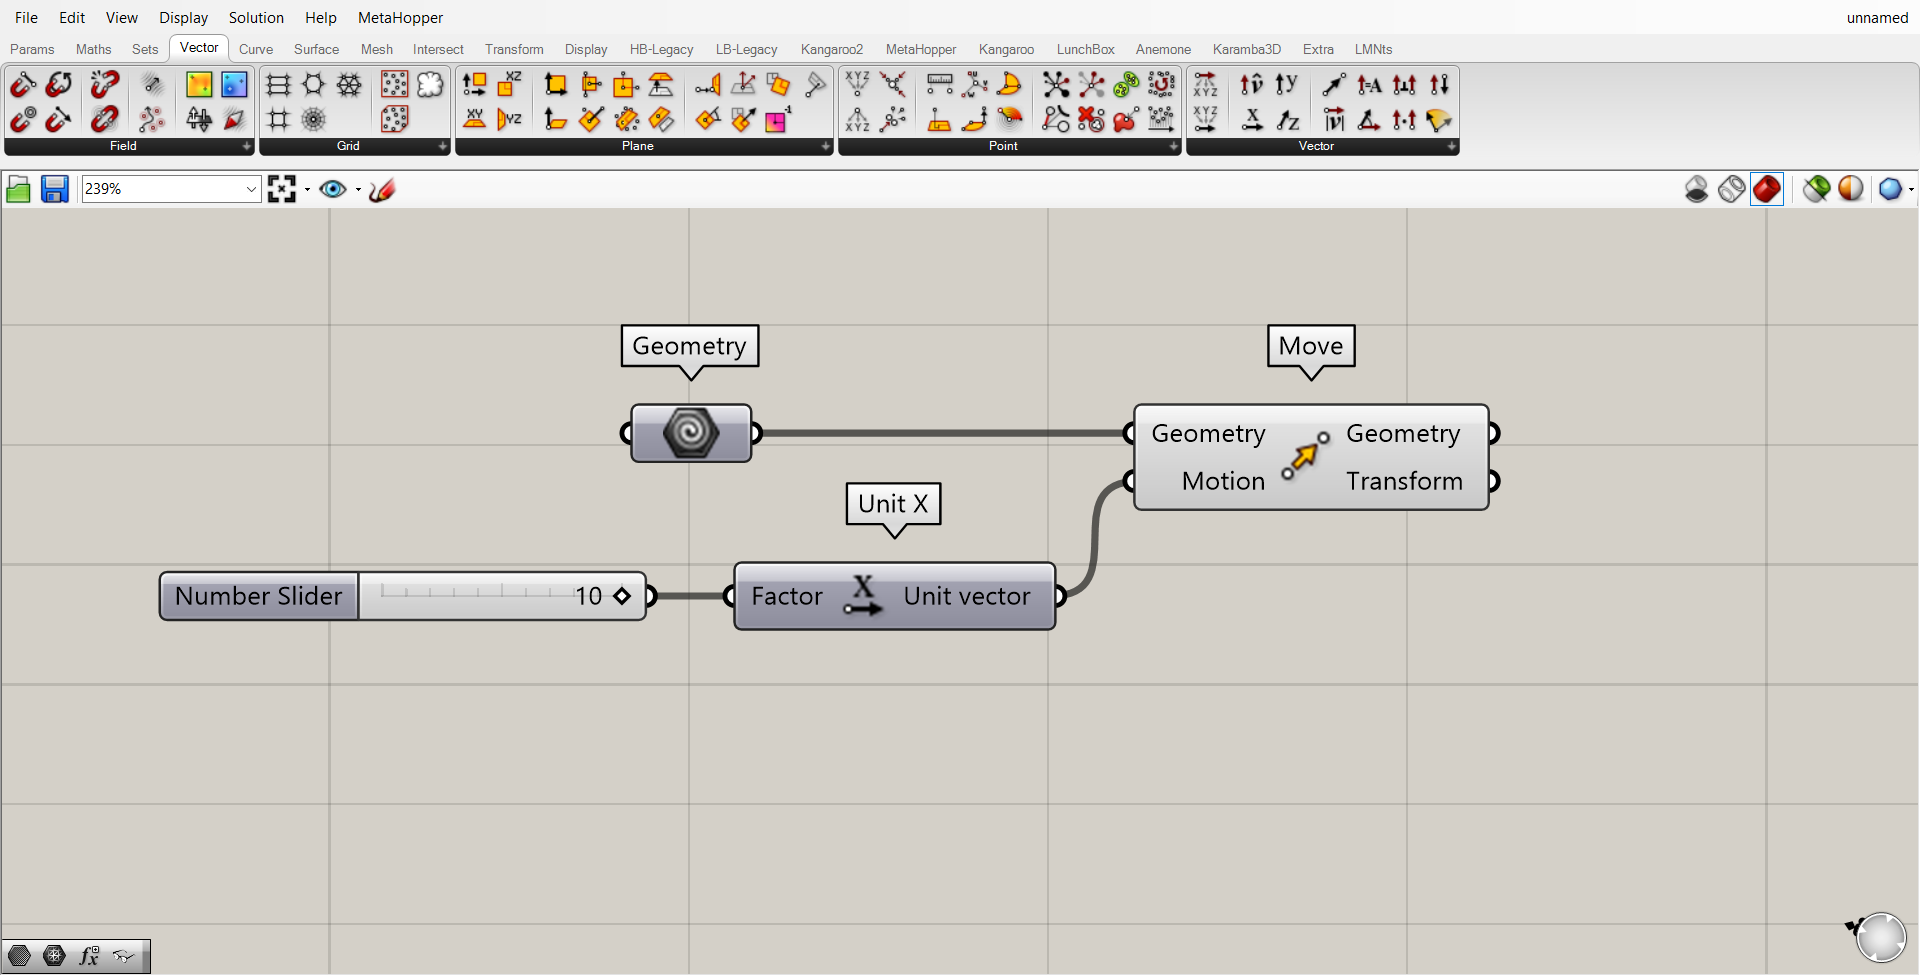
Now we are able to combine the vector and move node. In this example, we used a Unit-X vector. By right-clicking on the original object and selecting preview, we only see the translated object.
By changing the value of the Number Slider, you can see that the box moves in the Rhino viewport.
Grasshopper Move a Cube 4/4
Conclusionlink copied
Now you know how to perform one of the most basic operations in grasshopper – moving an object with a specified vector. In following tutorials, you will start seeing how powerful just a couple of additional operations can be.
Write your feedback.
Write your feedback on "Grasshopper Move a Cube"".
If you're providing a specific feedback to a part of the chapter, mention which part (text, image, or video) that you have specific feedback for."Thank your for your feedback.
Your feedback has been submitted successfully and is now awaiting review. We appreciate your input and will ensure it aligns with our guidelines before it’s published.
