Rhino – Solid Modelling
-
Intro
-
What is Solid modelling?
-
Generating Solid Primitives
-
Boolean Operations
-
Editing Solids
-
Using curves to add to solid geometry
-
Conclusion
Information
| Primary software used | Rhino |
| Course | Rhino – Solid Modelling |
| Primary subject | 3D Modelling |
| Secondary subject | 3D modelling |
| Level | Beginner |
| Last updated | November 11, 2024 |
| Keywords |
Responsible
| Teacher | |
| Faculty |
Rhino – Solid Modelling 0/6
Rhino – Solid Modelling
Solids in Rhino are multiple NURBS surfaces joined into one primitive or a combination of solid primitives. Primitives are basic geometric shapes like a cube, cone, sphere, cylinder and pyramid.
Many industries where accurate 3D models have to be generated use Solids. Solids are widely used in the car, aircraft, mechanical and building industry. A solid is an accurate mathematical description of a volume. This accuracy is crucial for some industries where the tolerances in size are very important or volume information is essential.
Rhino – Solid Modelling 1/6
What is Solid modelling?link copied
Rhino has two options of defining a Solid. One is to combine a set of separate surfaces describing a volume into a solid. These surfaces have no thickness and only when combined they define a single, closed volume. These solids are called Poly-surfaces (multiple surfaces). The mathematical description of this geometry is completely different than solid primitives.
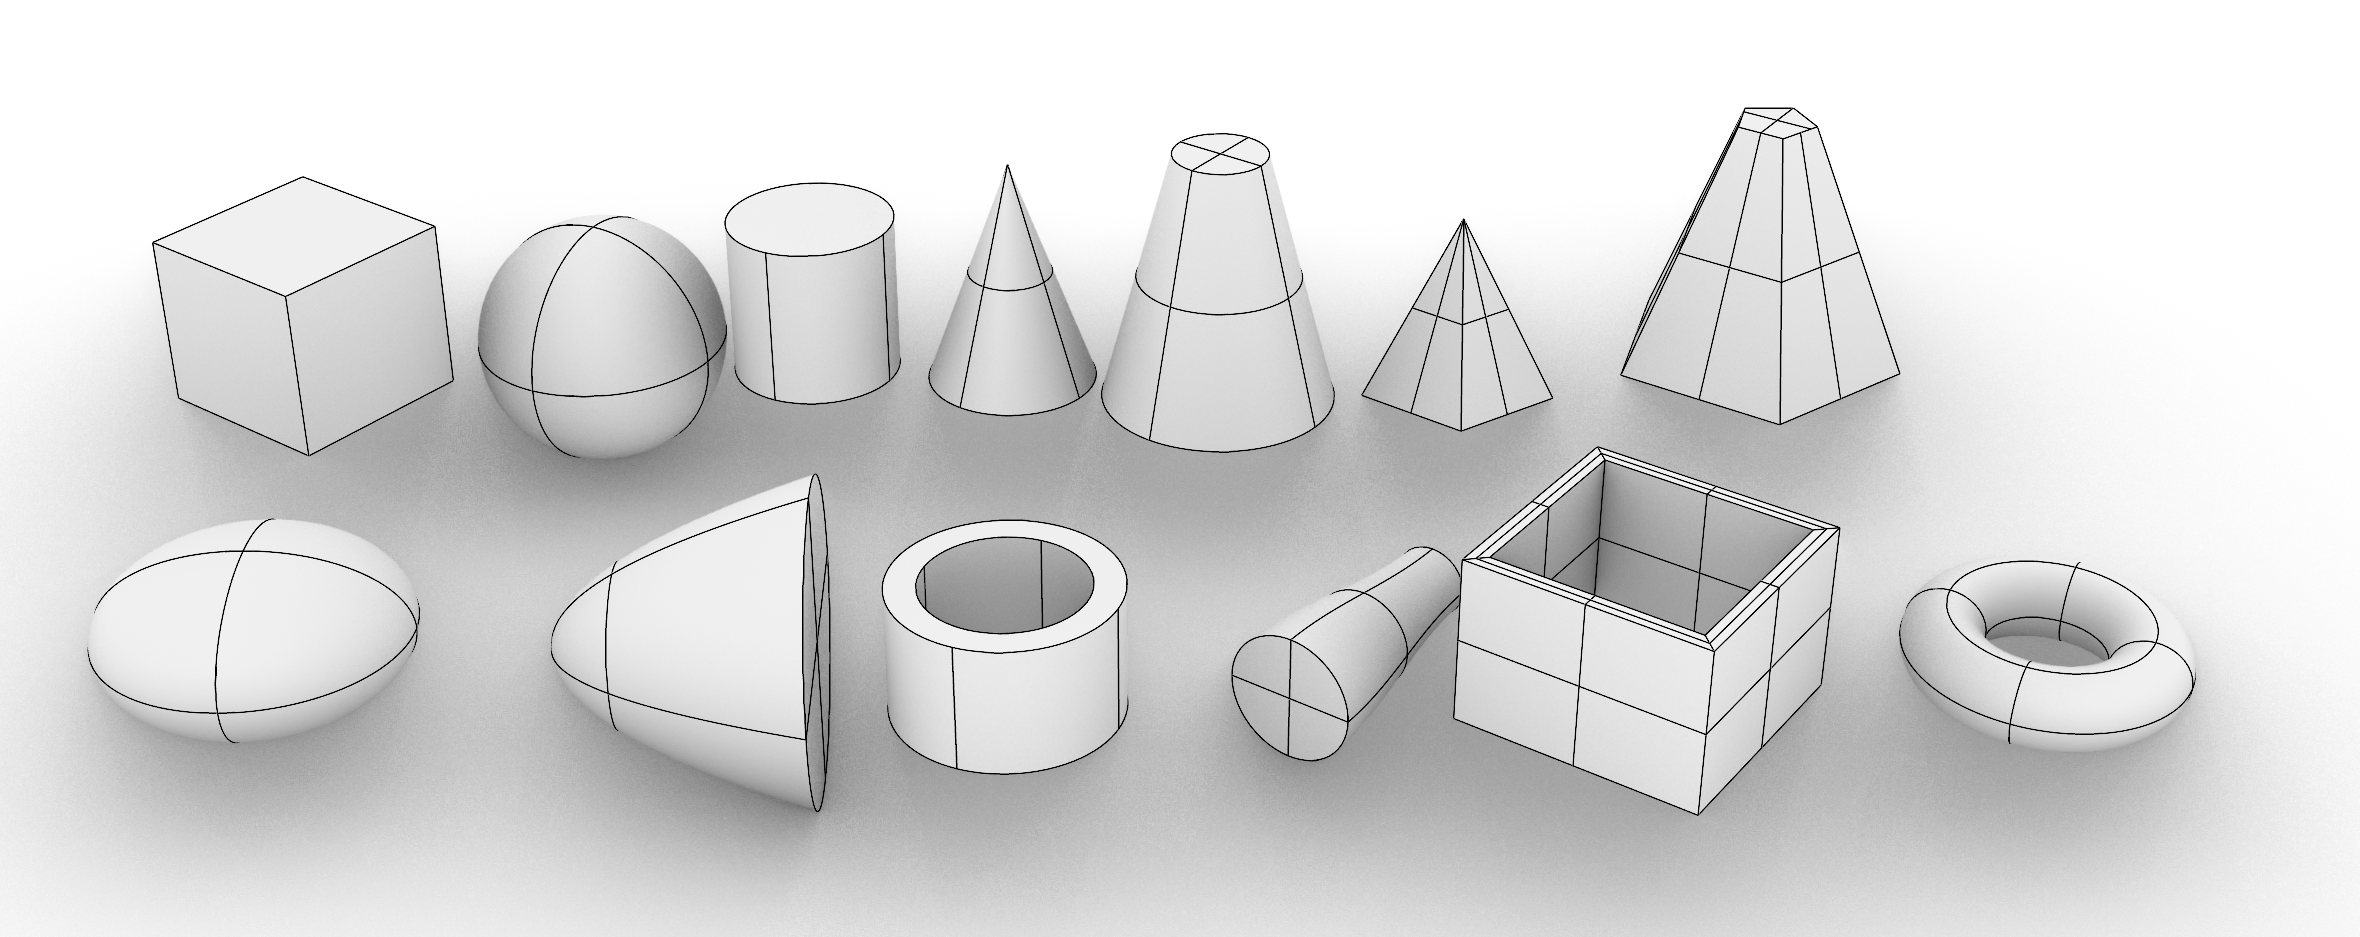
The other option is based on the use of an accurate mathematical defined primitives. Primitives are basic geometric shapes like a cube, cone, sphere, cylinder and pyramid. Several different primitives are available which can be combined into new shapes. The starting point however is always a primitive. This makes it one the one hand easy to use, because the basic building blocks are given, but on the other hand is limits the freedom of designing.
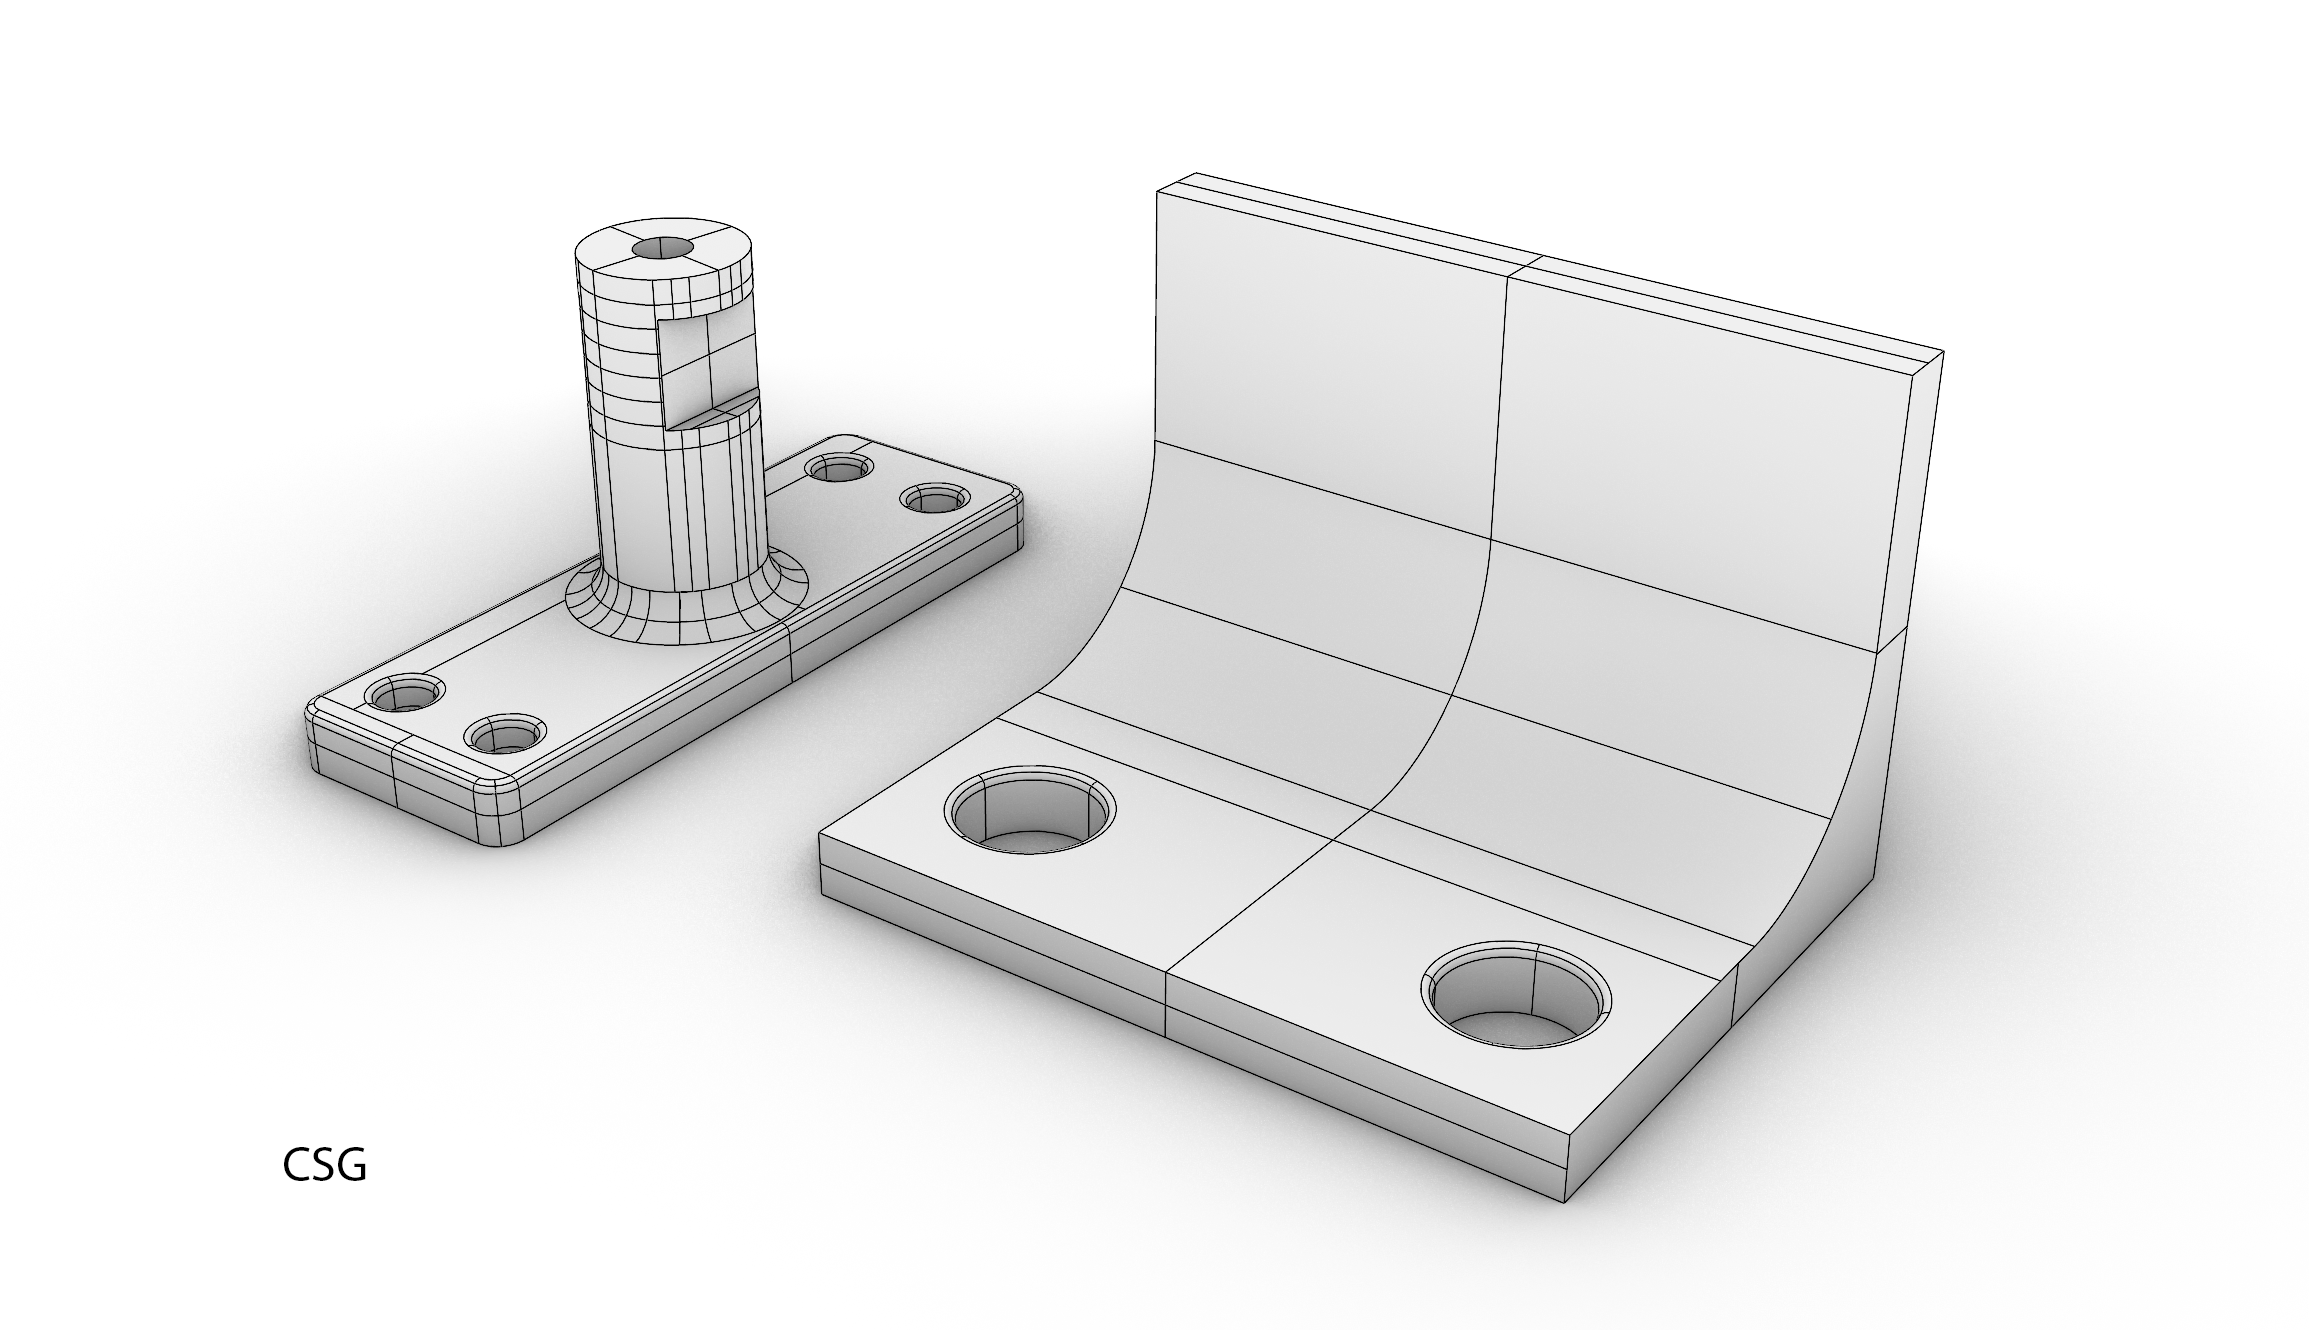
Solids based on the use of primitives are called Constructive Solid Geometry or CSG. These solids are easy to make and demonstrates the influence of the mathematical description of the geometry, defining the geometry type, on the design process. An influence which should be understand to make the correct choice in geometry type when designing in the computer.
A few elements which are influenced by the mathematical description are:
- Accuracy of the geometry ( important for manufacturing)
- The shapes it can generate
- The ability to adjust the shape
- The workflow of generating the shapes.
The name of CSG becomes self-explanatory if you look on how the solids can be used to generate geometry. The whole process of generating geometry with CSG is quite straight forward and consists of 3 steps.
- Generating the primitives.
- Let the primitives interact with each other (Boolean operations) by:
- subtracting one volume from another
- adding one volume to another
- or define the intersection of two volumes into new geometry
- Editing the resulting volume means moving corner points, edges or surfaces of the volume.
Rhino – Solid Modelling 2/6
Generating Solid Primitiveslink copied
Solid Menu
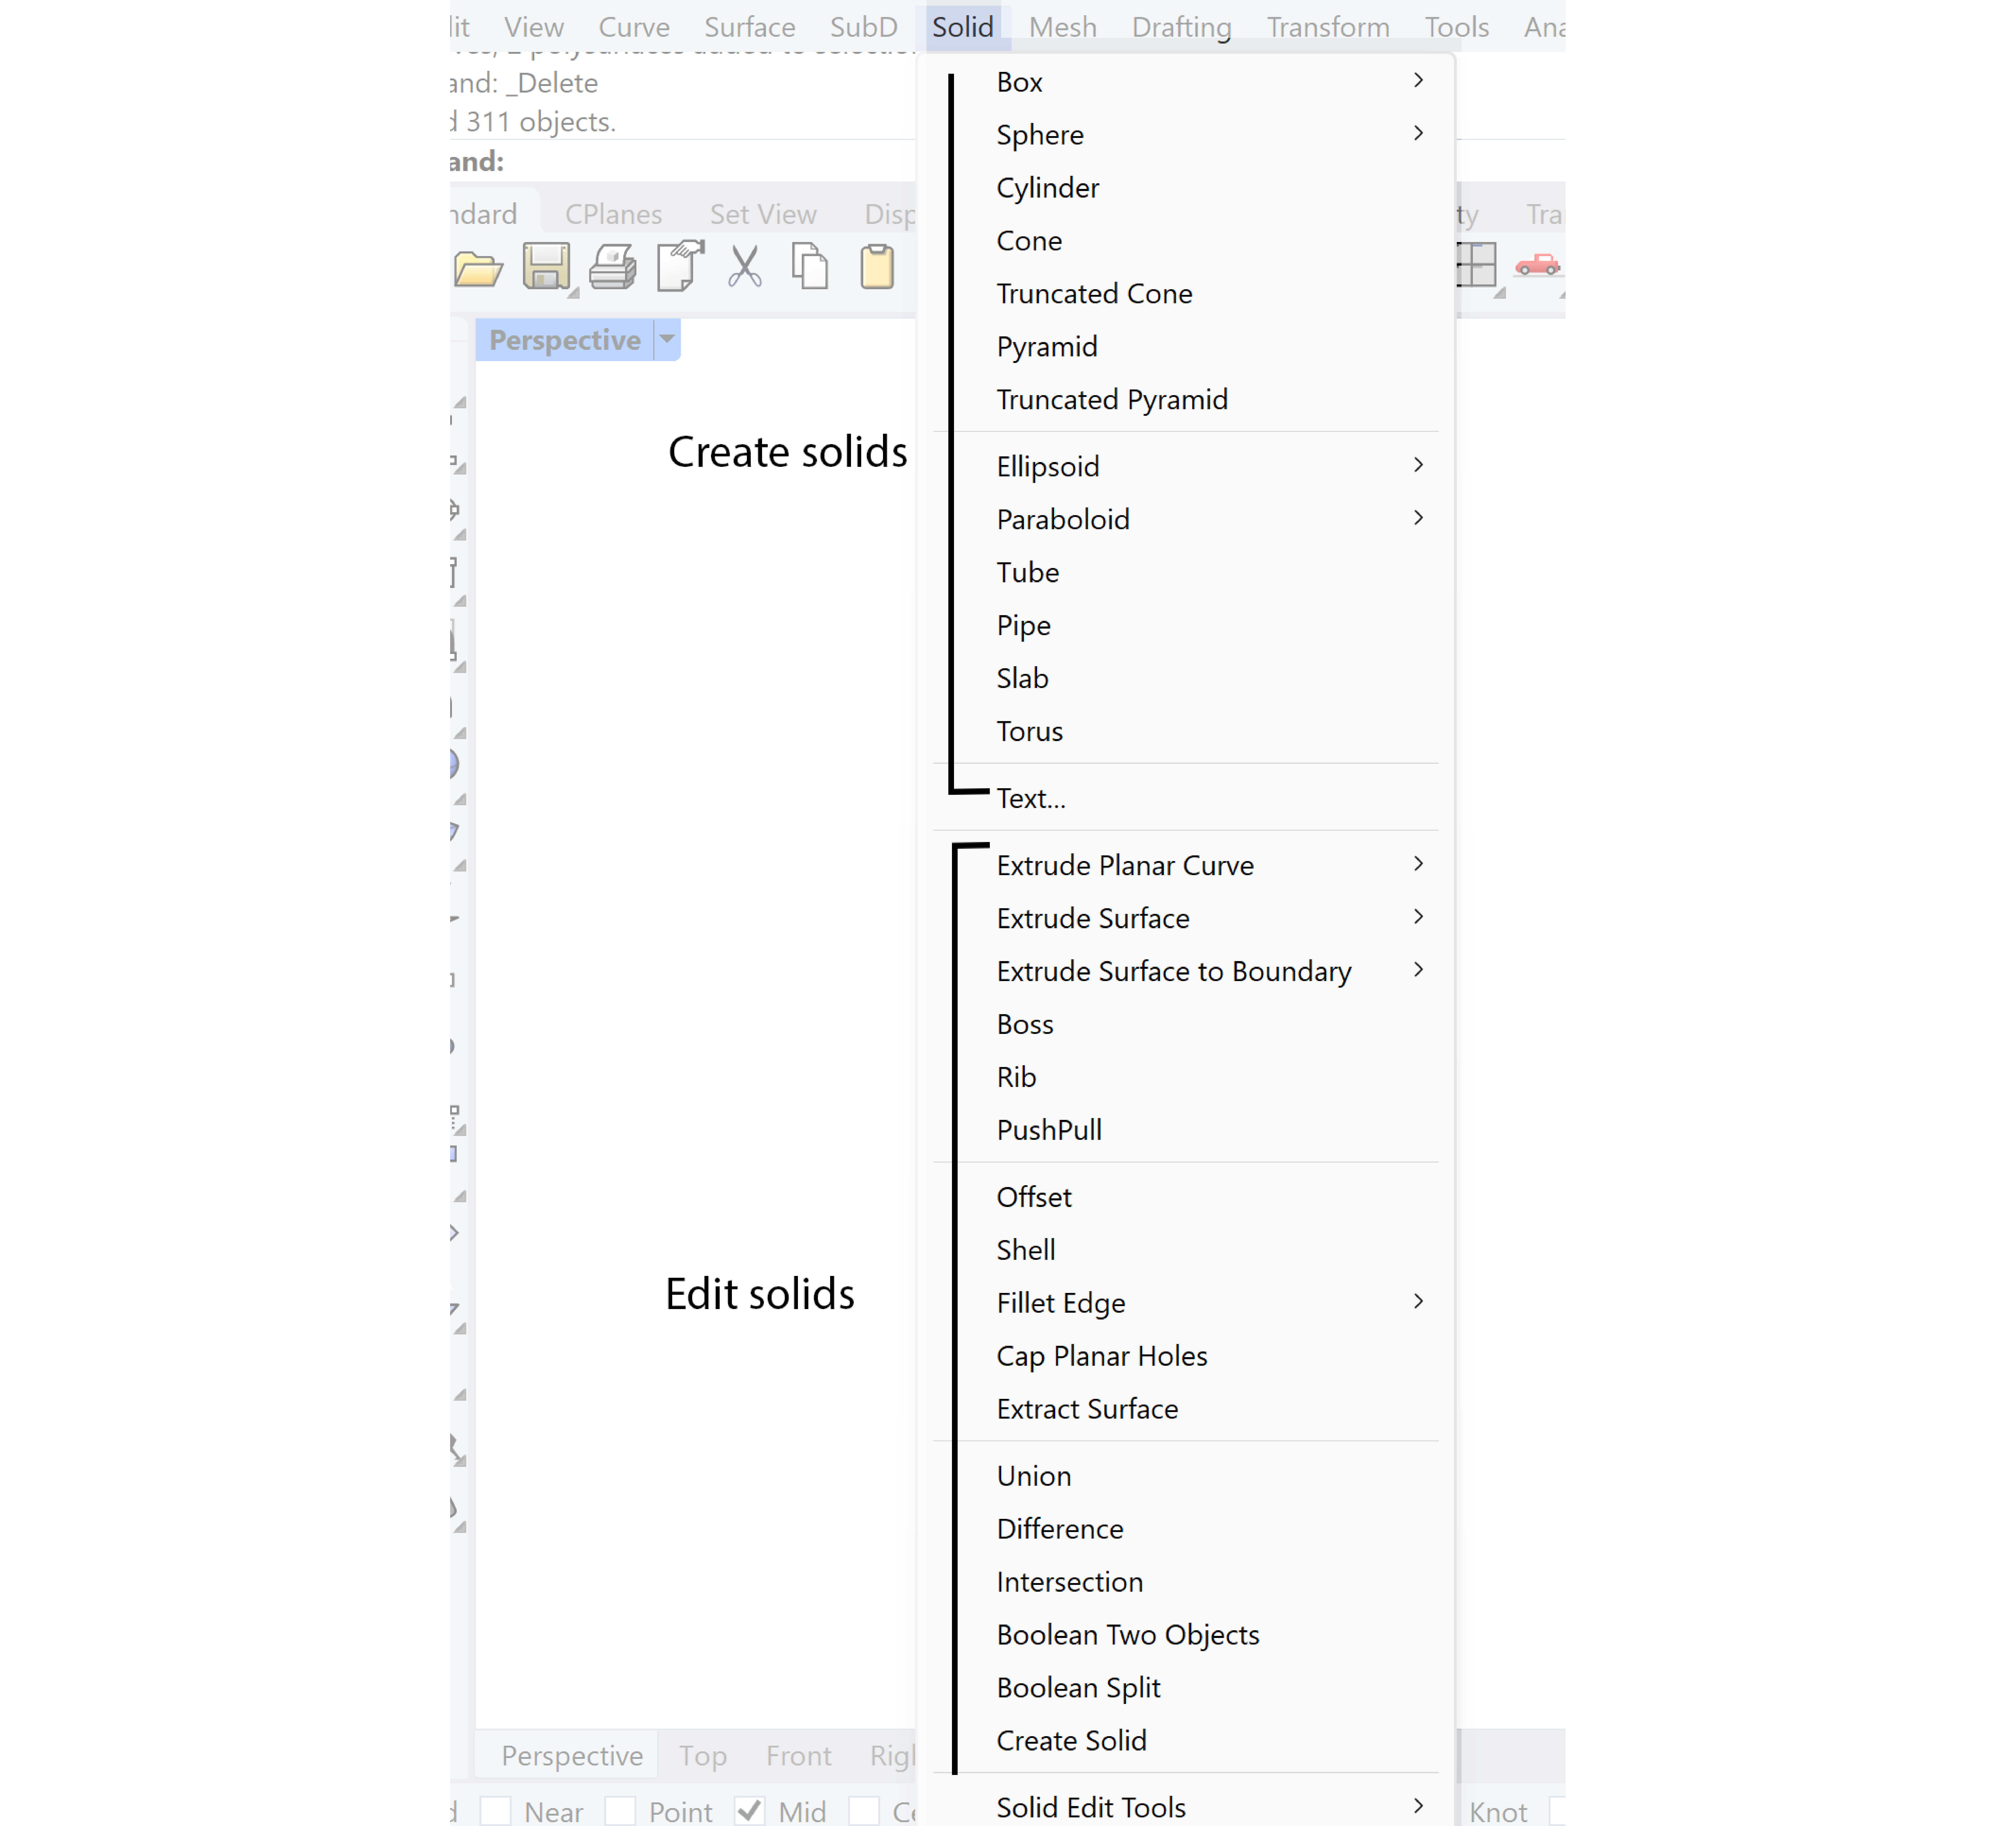
Most operations concerning creating and editing solids can be found in the menu Solid.
The first step in designing with CSG is the generation of primitives. Rhino has the option of defining several different primitives. Although the typology of the primitive is predefined, additional settings are available which can be changed. If the object is created it will be placed on the grid unless you used the object snap options to align the primitive to another object. The solids can be created by selecting in the pull down menu Solid. The rollout menu gives access to a range of different primitives. Check the command line for additional options once you activated the command.
Rhino – Solid Modelling 3/6
Boolean Operationslink copied

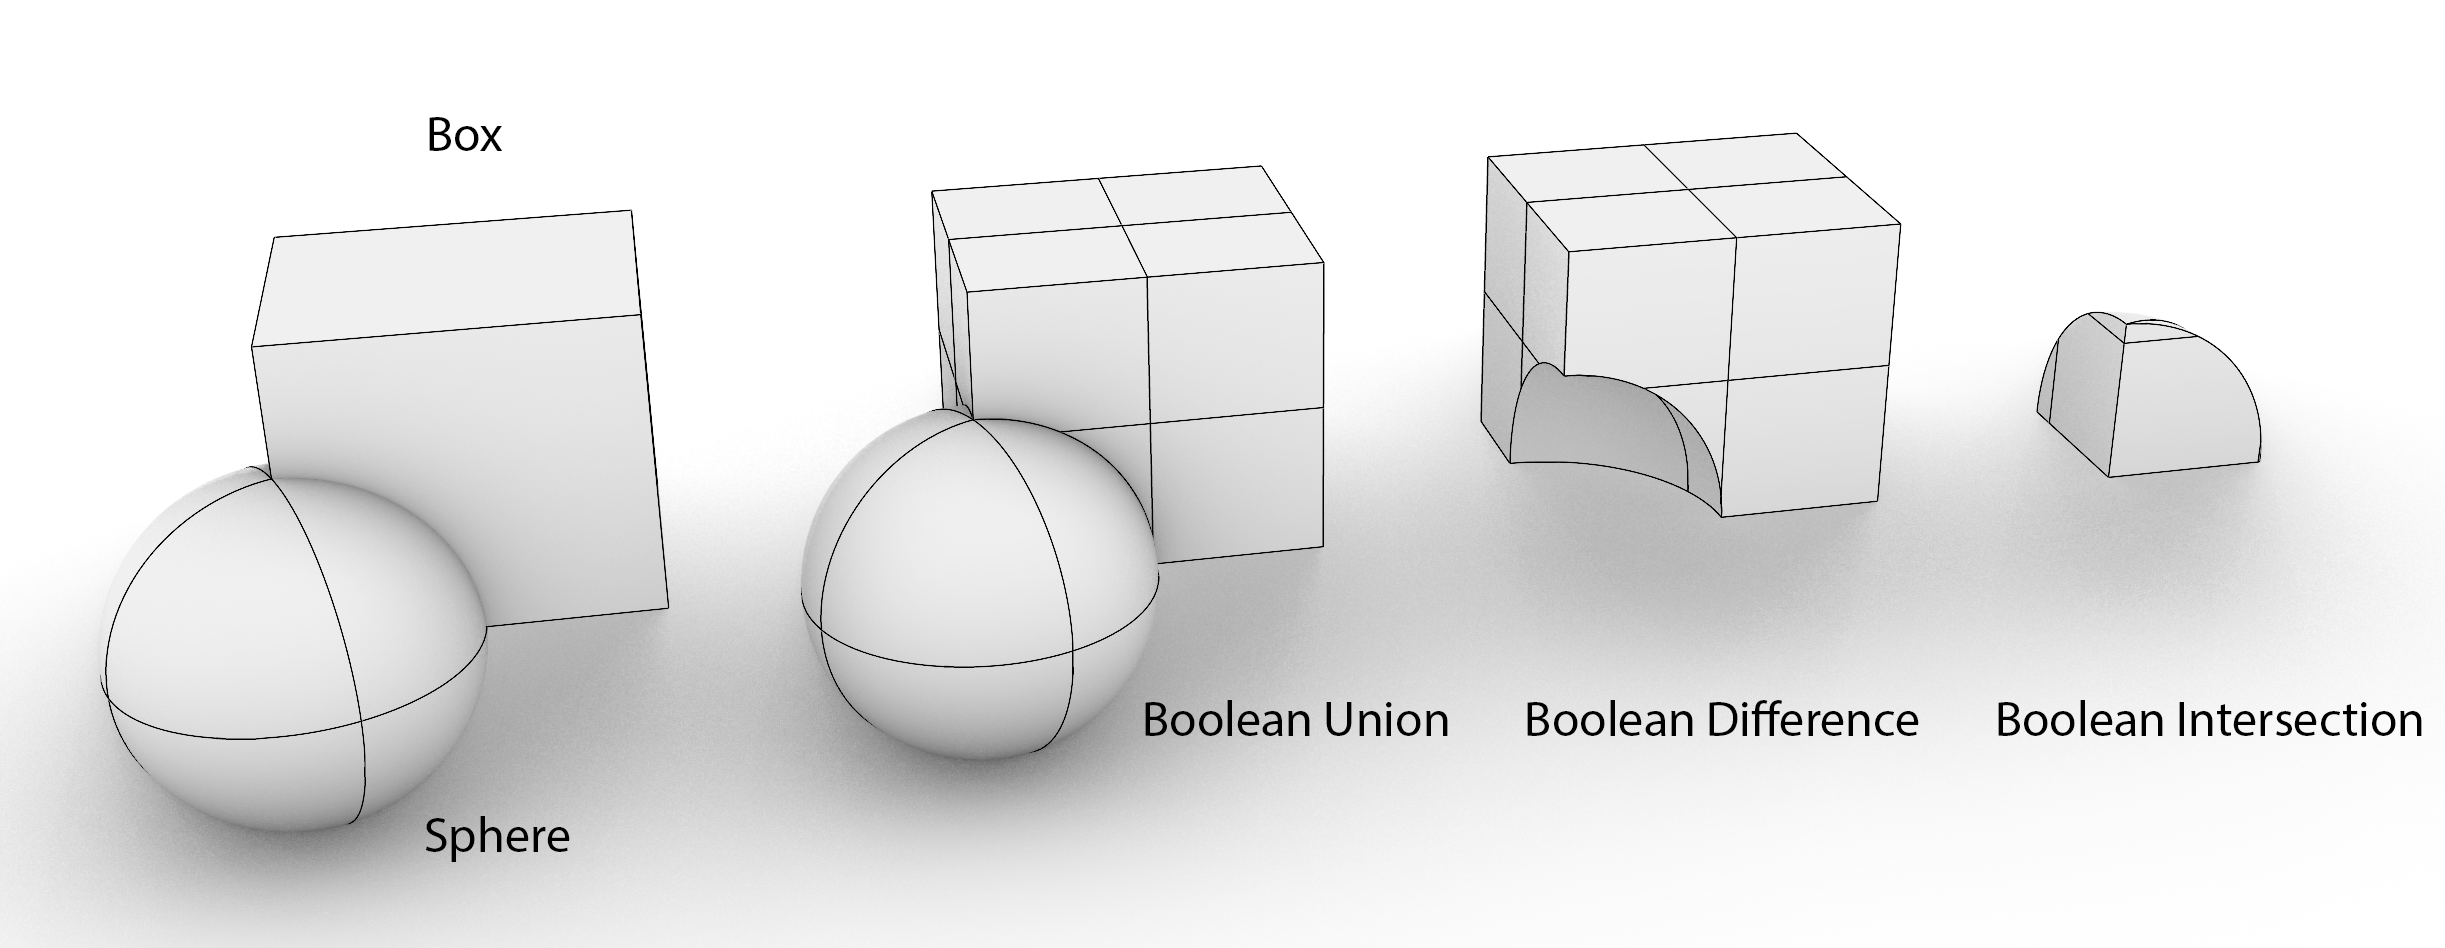
You can use the primitives as a kind of building blocks similar to a wooden block set used by kids everywhere. In that case you start out with a ground plane and build for example walls and ceilings from cubes and columns from cylinders. Because they can intersect without colliding and there is no gravity in this virtual space they can be moved around freely.
However there are additional tools to support the generation of more complex geometry. These options are called Boolean operations.
Union
Shapes that intersect can be combined into a single new object. The command for this is Solid » Union. Check the command line for additional options.
Difference
If you want to make a hole in an object, you can subtract an object the size of the hole from another object (that remains). The command for this is Solid » Difference. Check the command line for additional options.
Intersect
The last option is de definition of the common geometry of two objects. The command for this is Solid » Intersect. Check the command line for additional options.
The command Solid » Boolean Two Objects lets you scroll through the different Boolean operation options which can be useful for exploring the different effects of the different Boolean operations. Although the options of volume interaction ( Boolean operations) and the amount of different primitives are limited the final complexity of the geometry can be quite substantial.
Rhino – Solid Modelling 4/6
Editing Solidslink copied
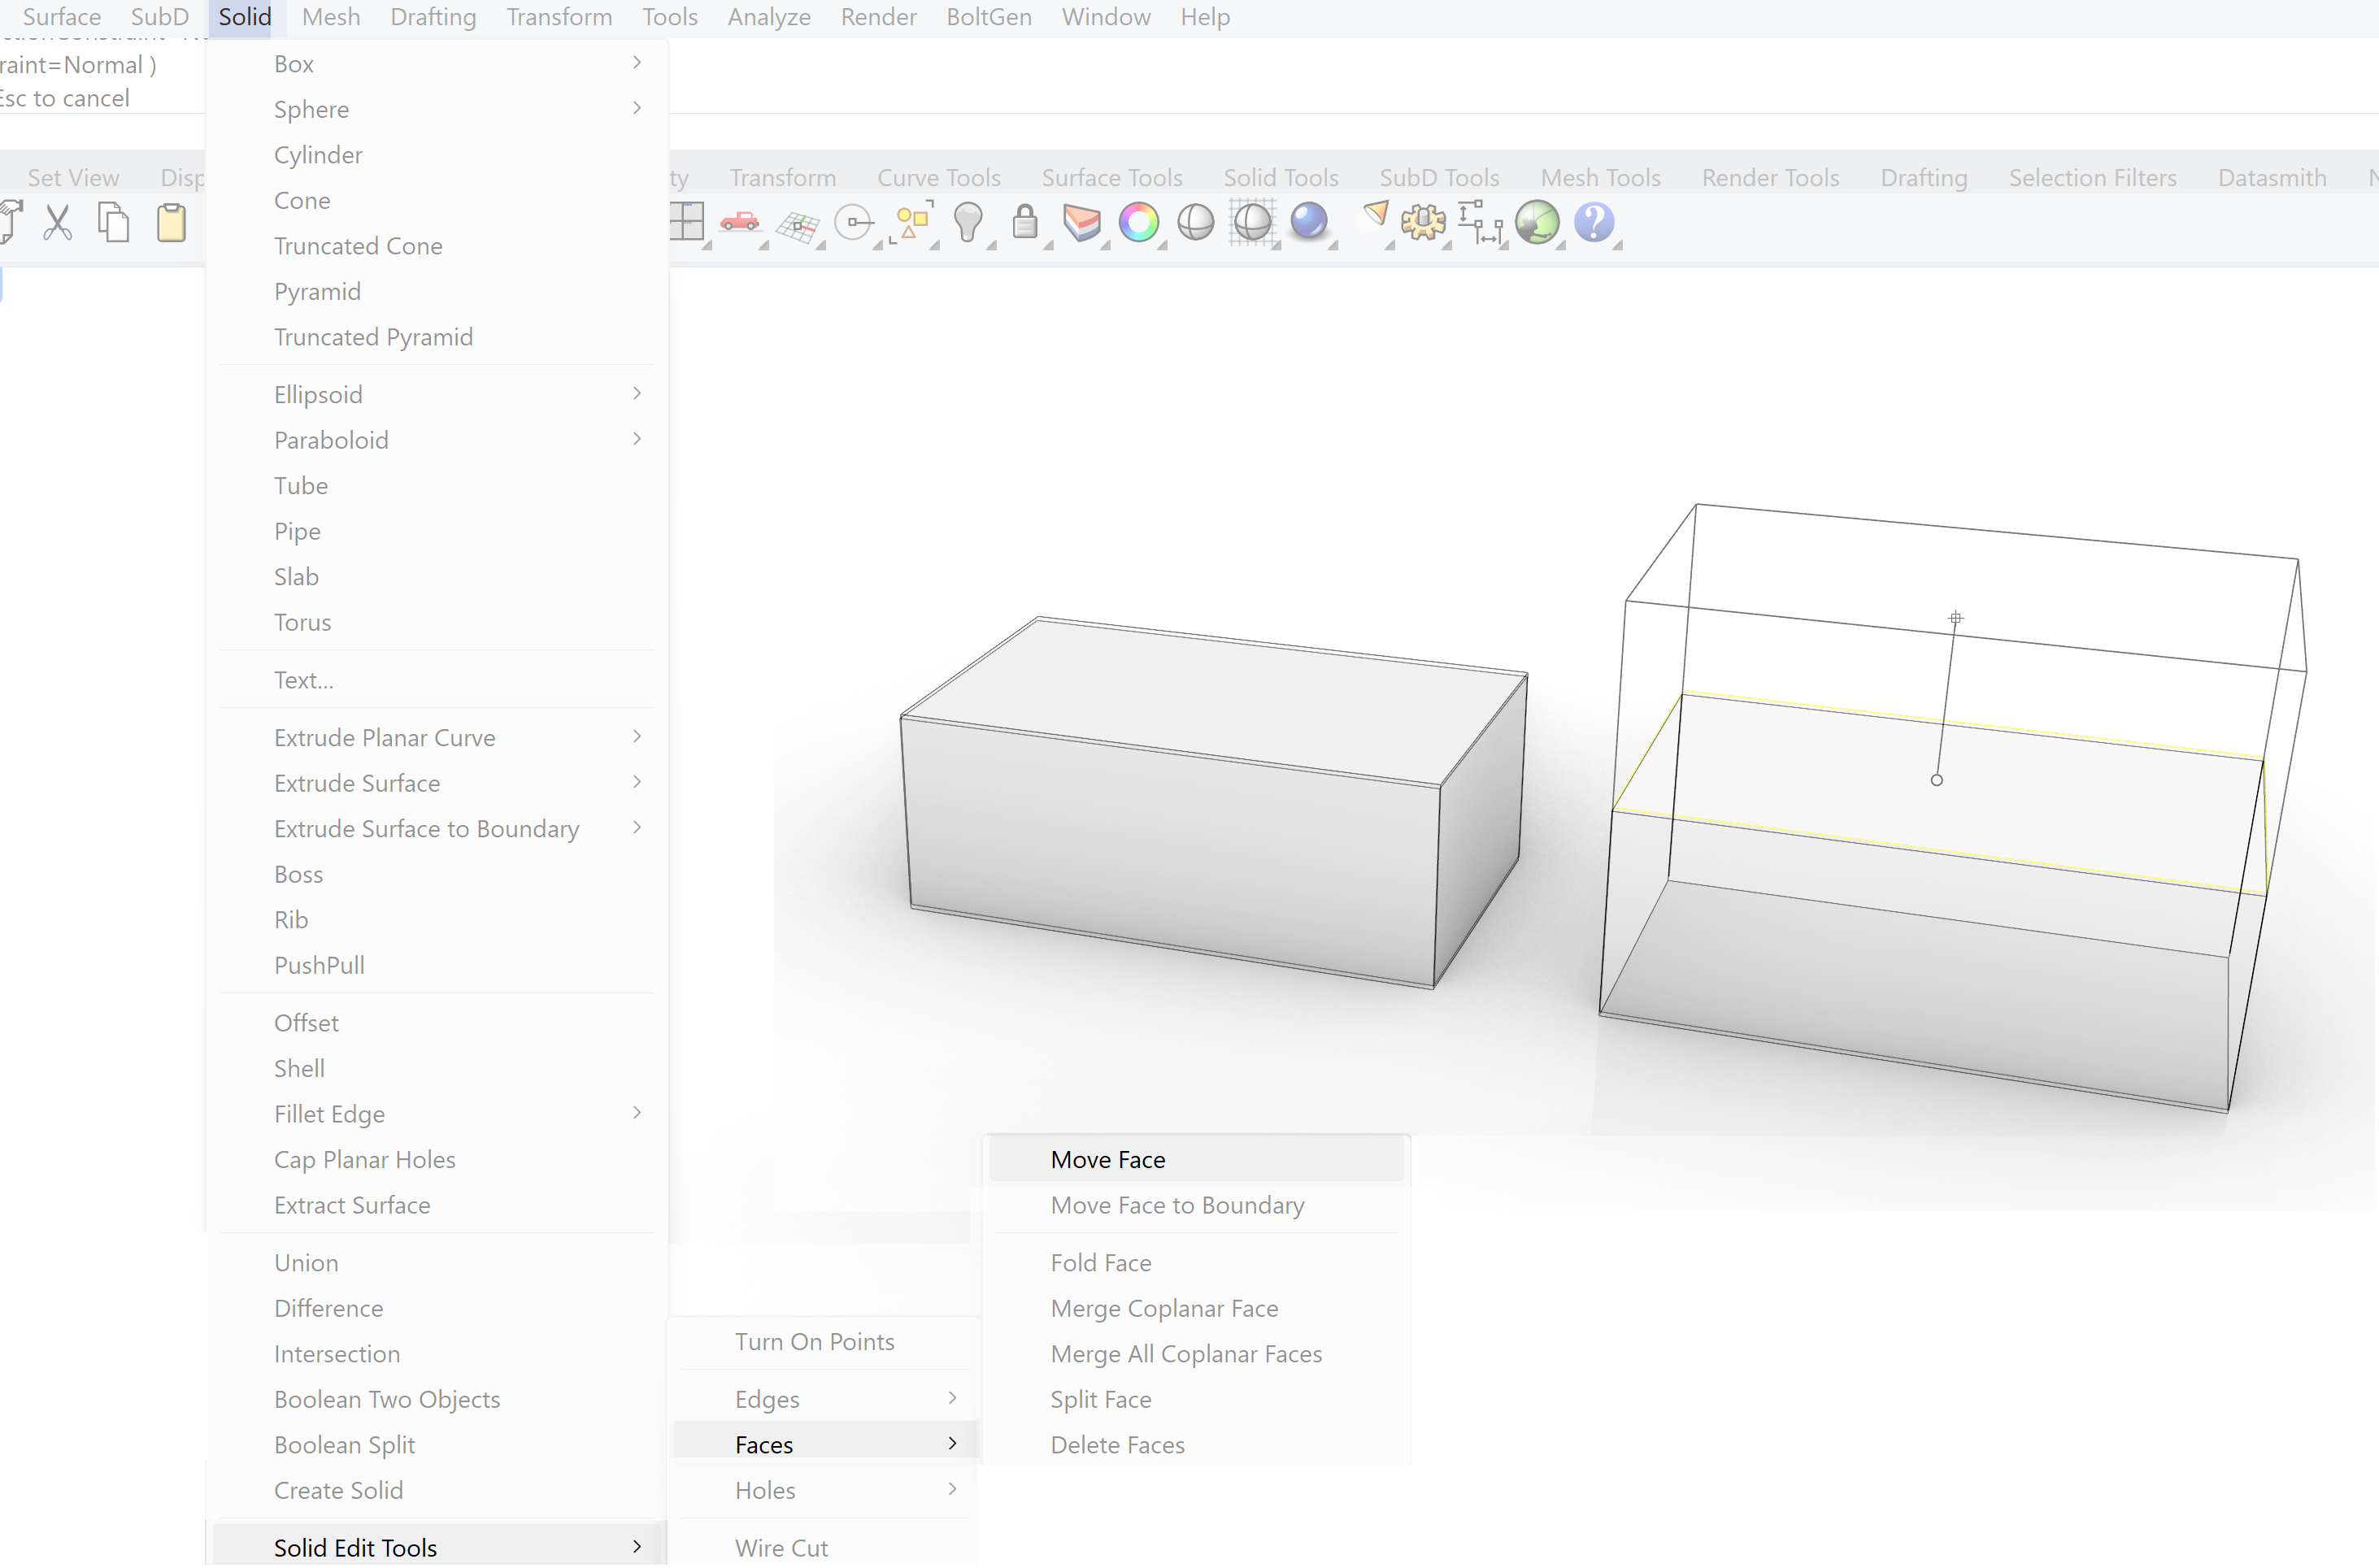
The editing of solids is quite straight forward because there are not that many options for editing a solid. The main options are to move one of the surfaces or edges of the solid or to move the corner points. So, three components of the solid can be moved.
The corner points
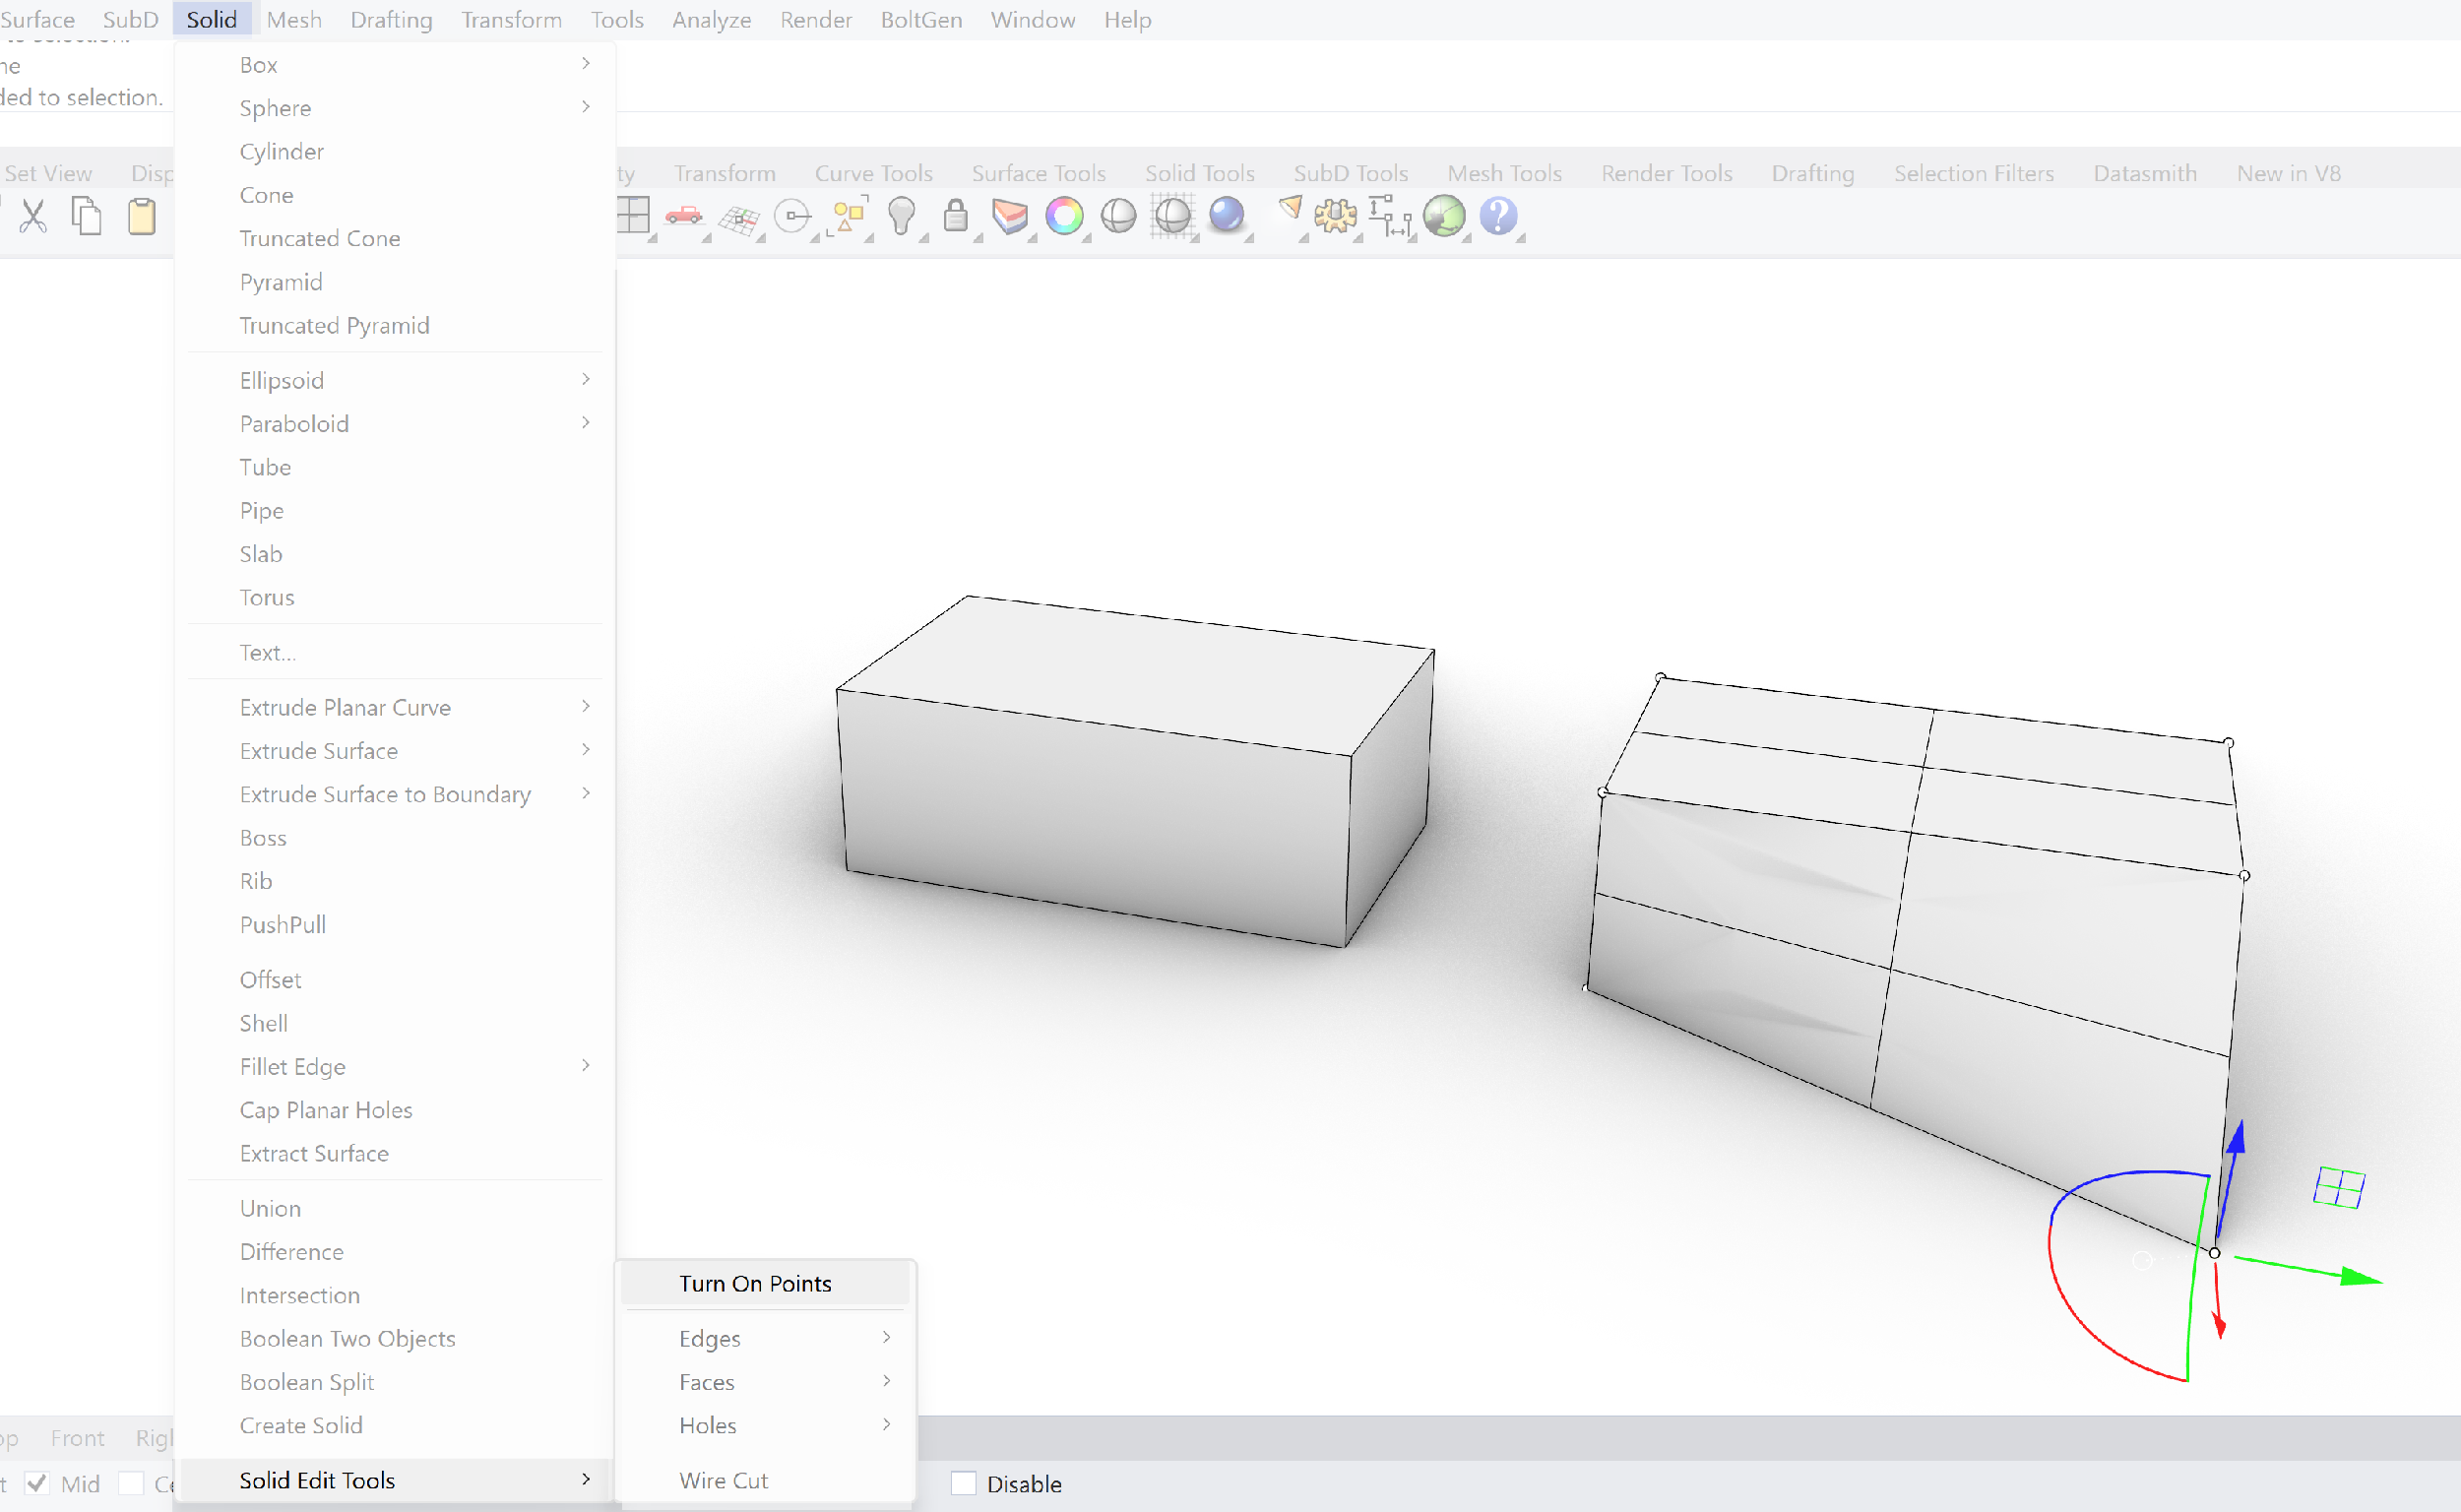
You can select the corner point of the solid and then adjust them. However there is a limit on how far you can move them before the geometry starts to distort. This is a limitation of editing a solid.
The Edge of the solid
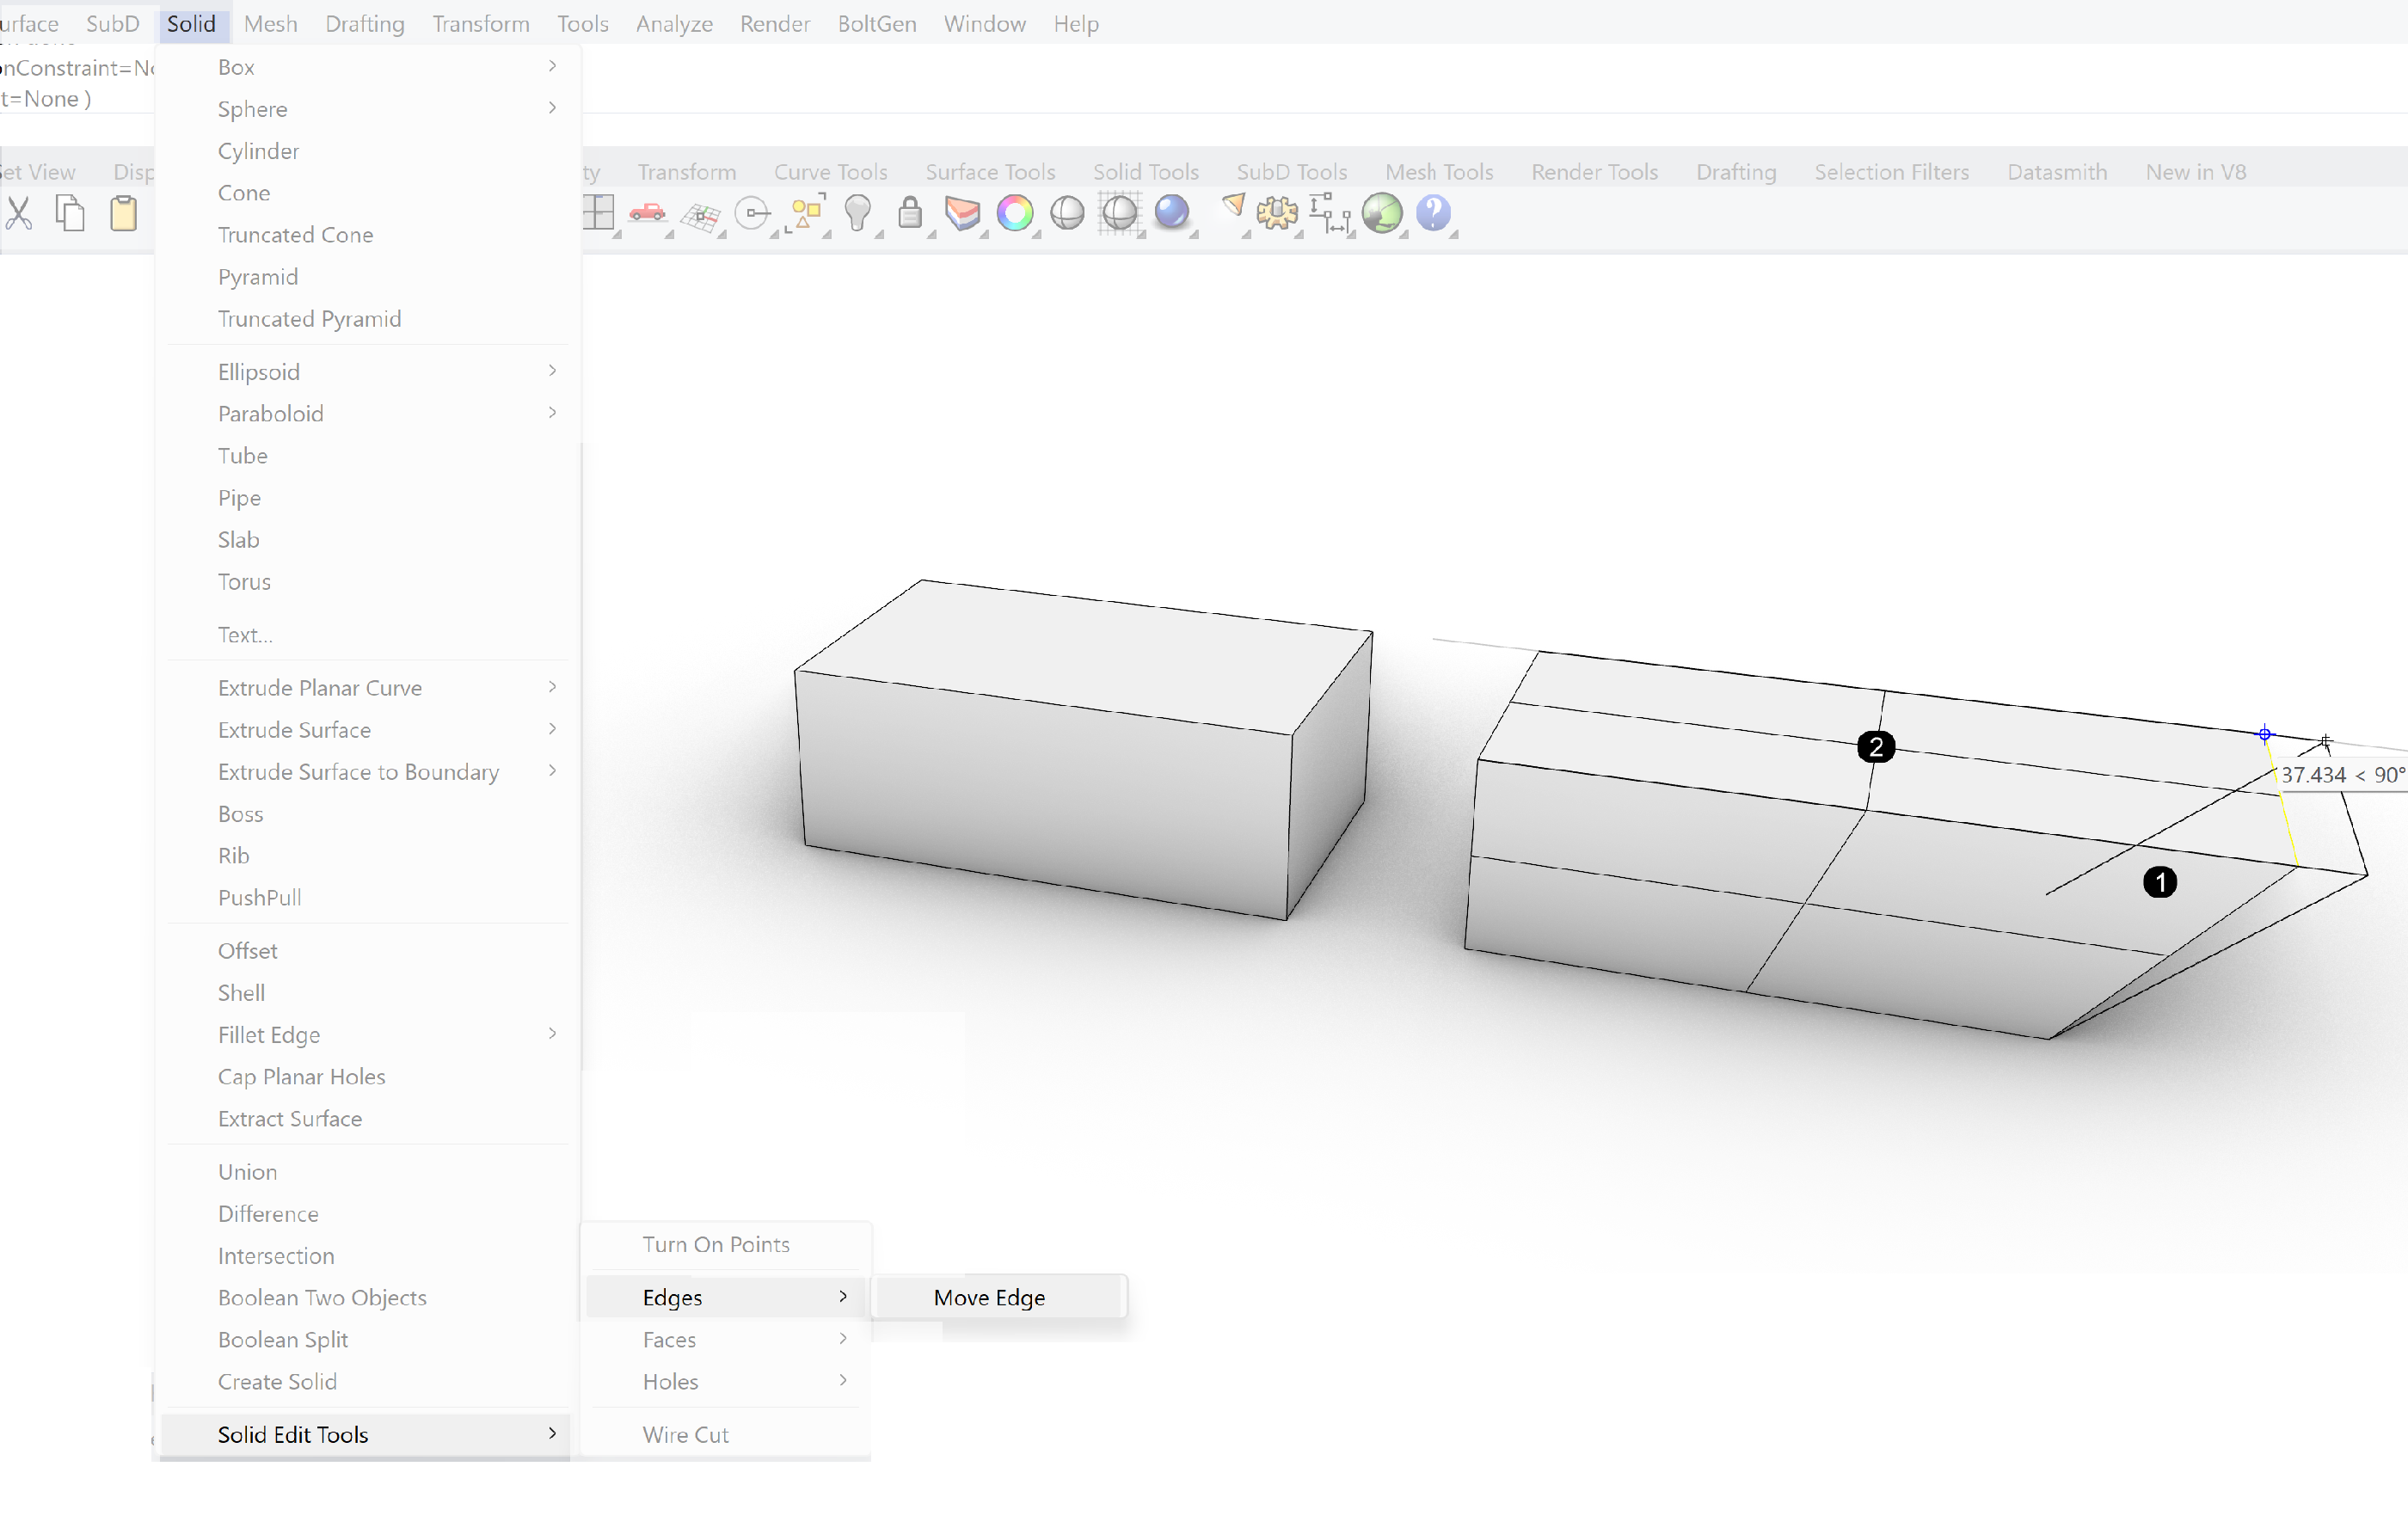
Changing the edge of a solid is an effective way of altering the geometry of the solid. It is less prone to distortion like the point edit option.
The face of the solid
Also with the movement of the face there is a chance for distortion of the geometry. Especially when it is not moved perpendicular to the face.
So all-in all the options for generating and editing CSG can be quite straight forward.
Fillet edges
One option of editing a solid is not discussed yet. This option is called Fillet Edge. This option is widely used in mechanical engineering. It rounds off edges. This is primarily not done for aesthetics but for avoiding extreme stresses at the edges of the object and metal fatigue. However you can use it also as an aesthetic option for smoother edges.
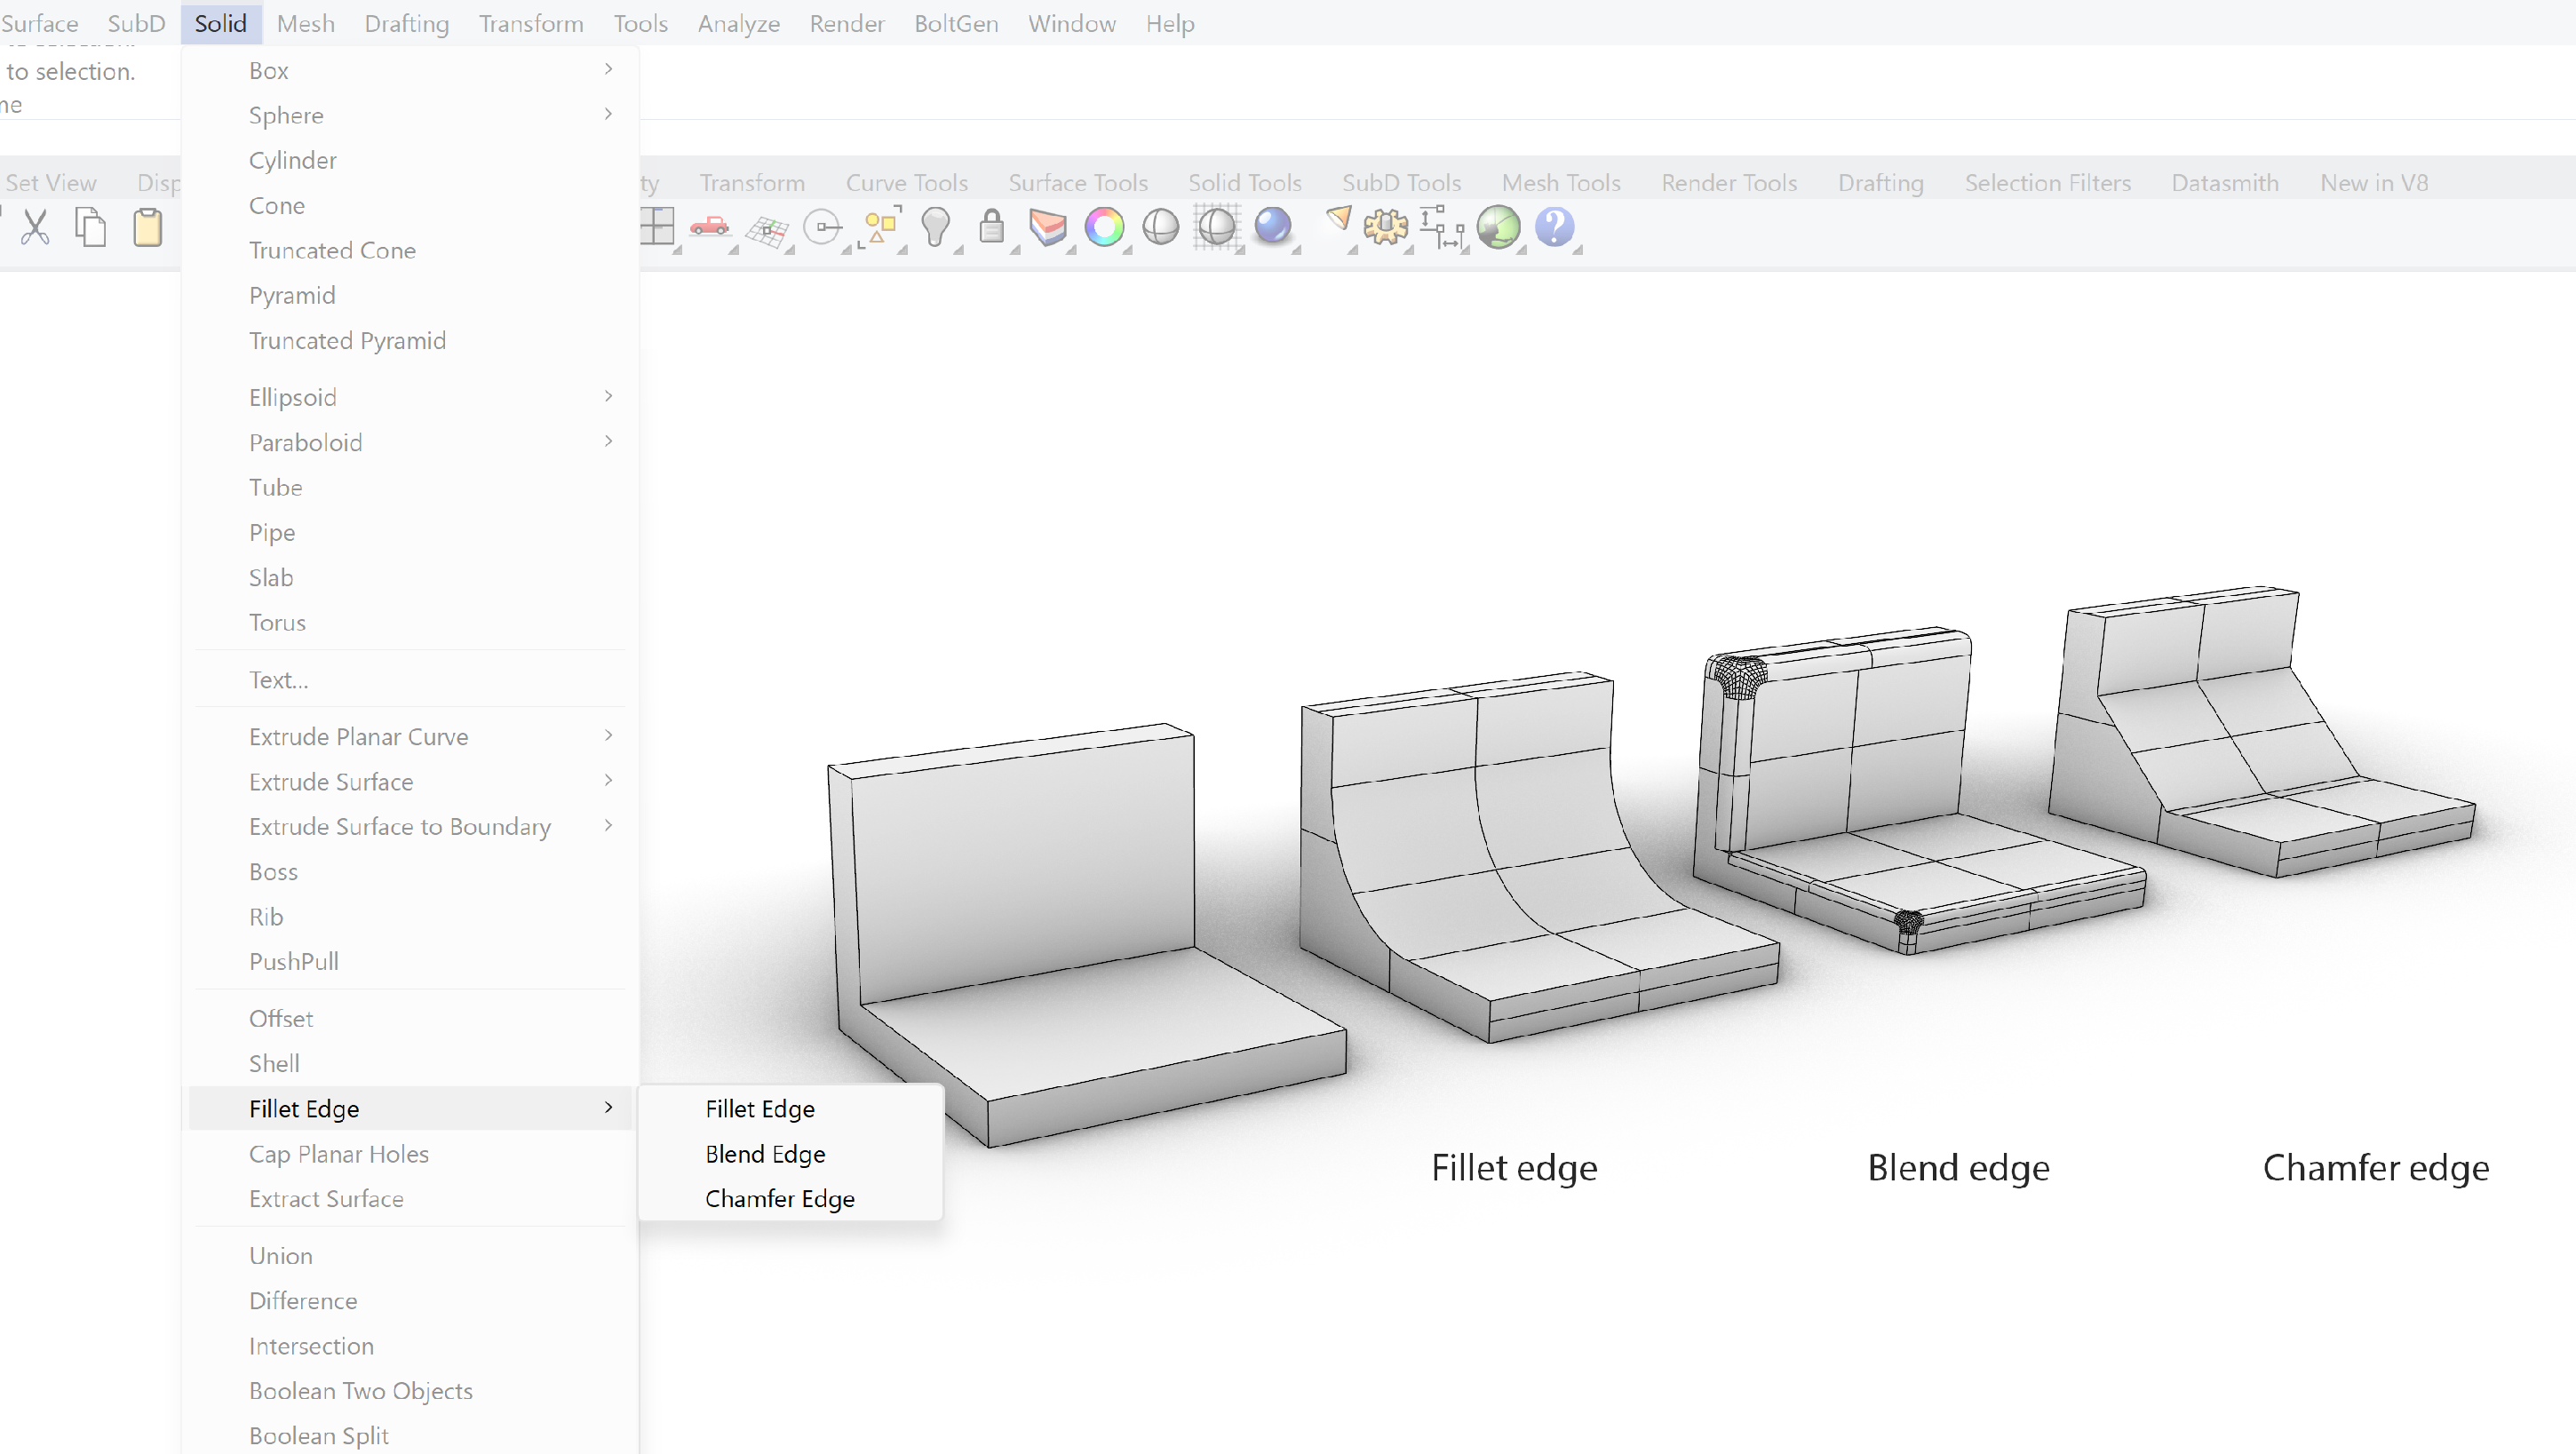
Fillet Edge creates round edges
Blend Edge almost similar to Fillet Edge, but has more control points
Chamfer Edge creates cornered edges

Cap planar holes
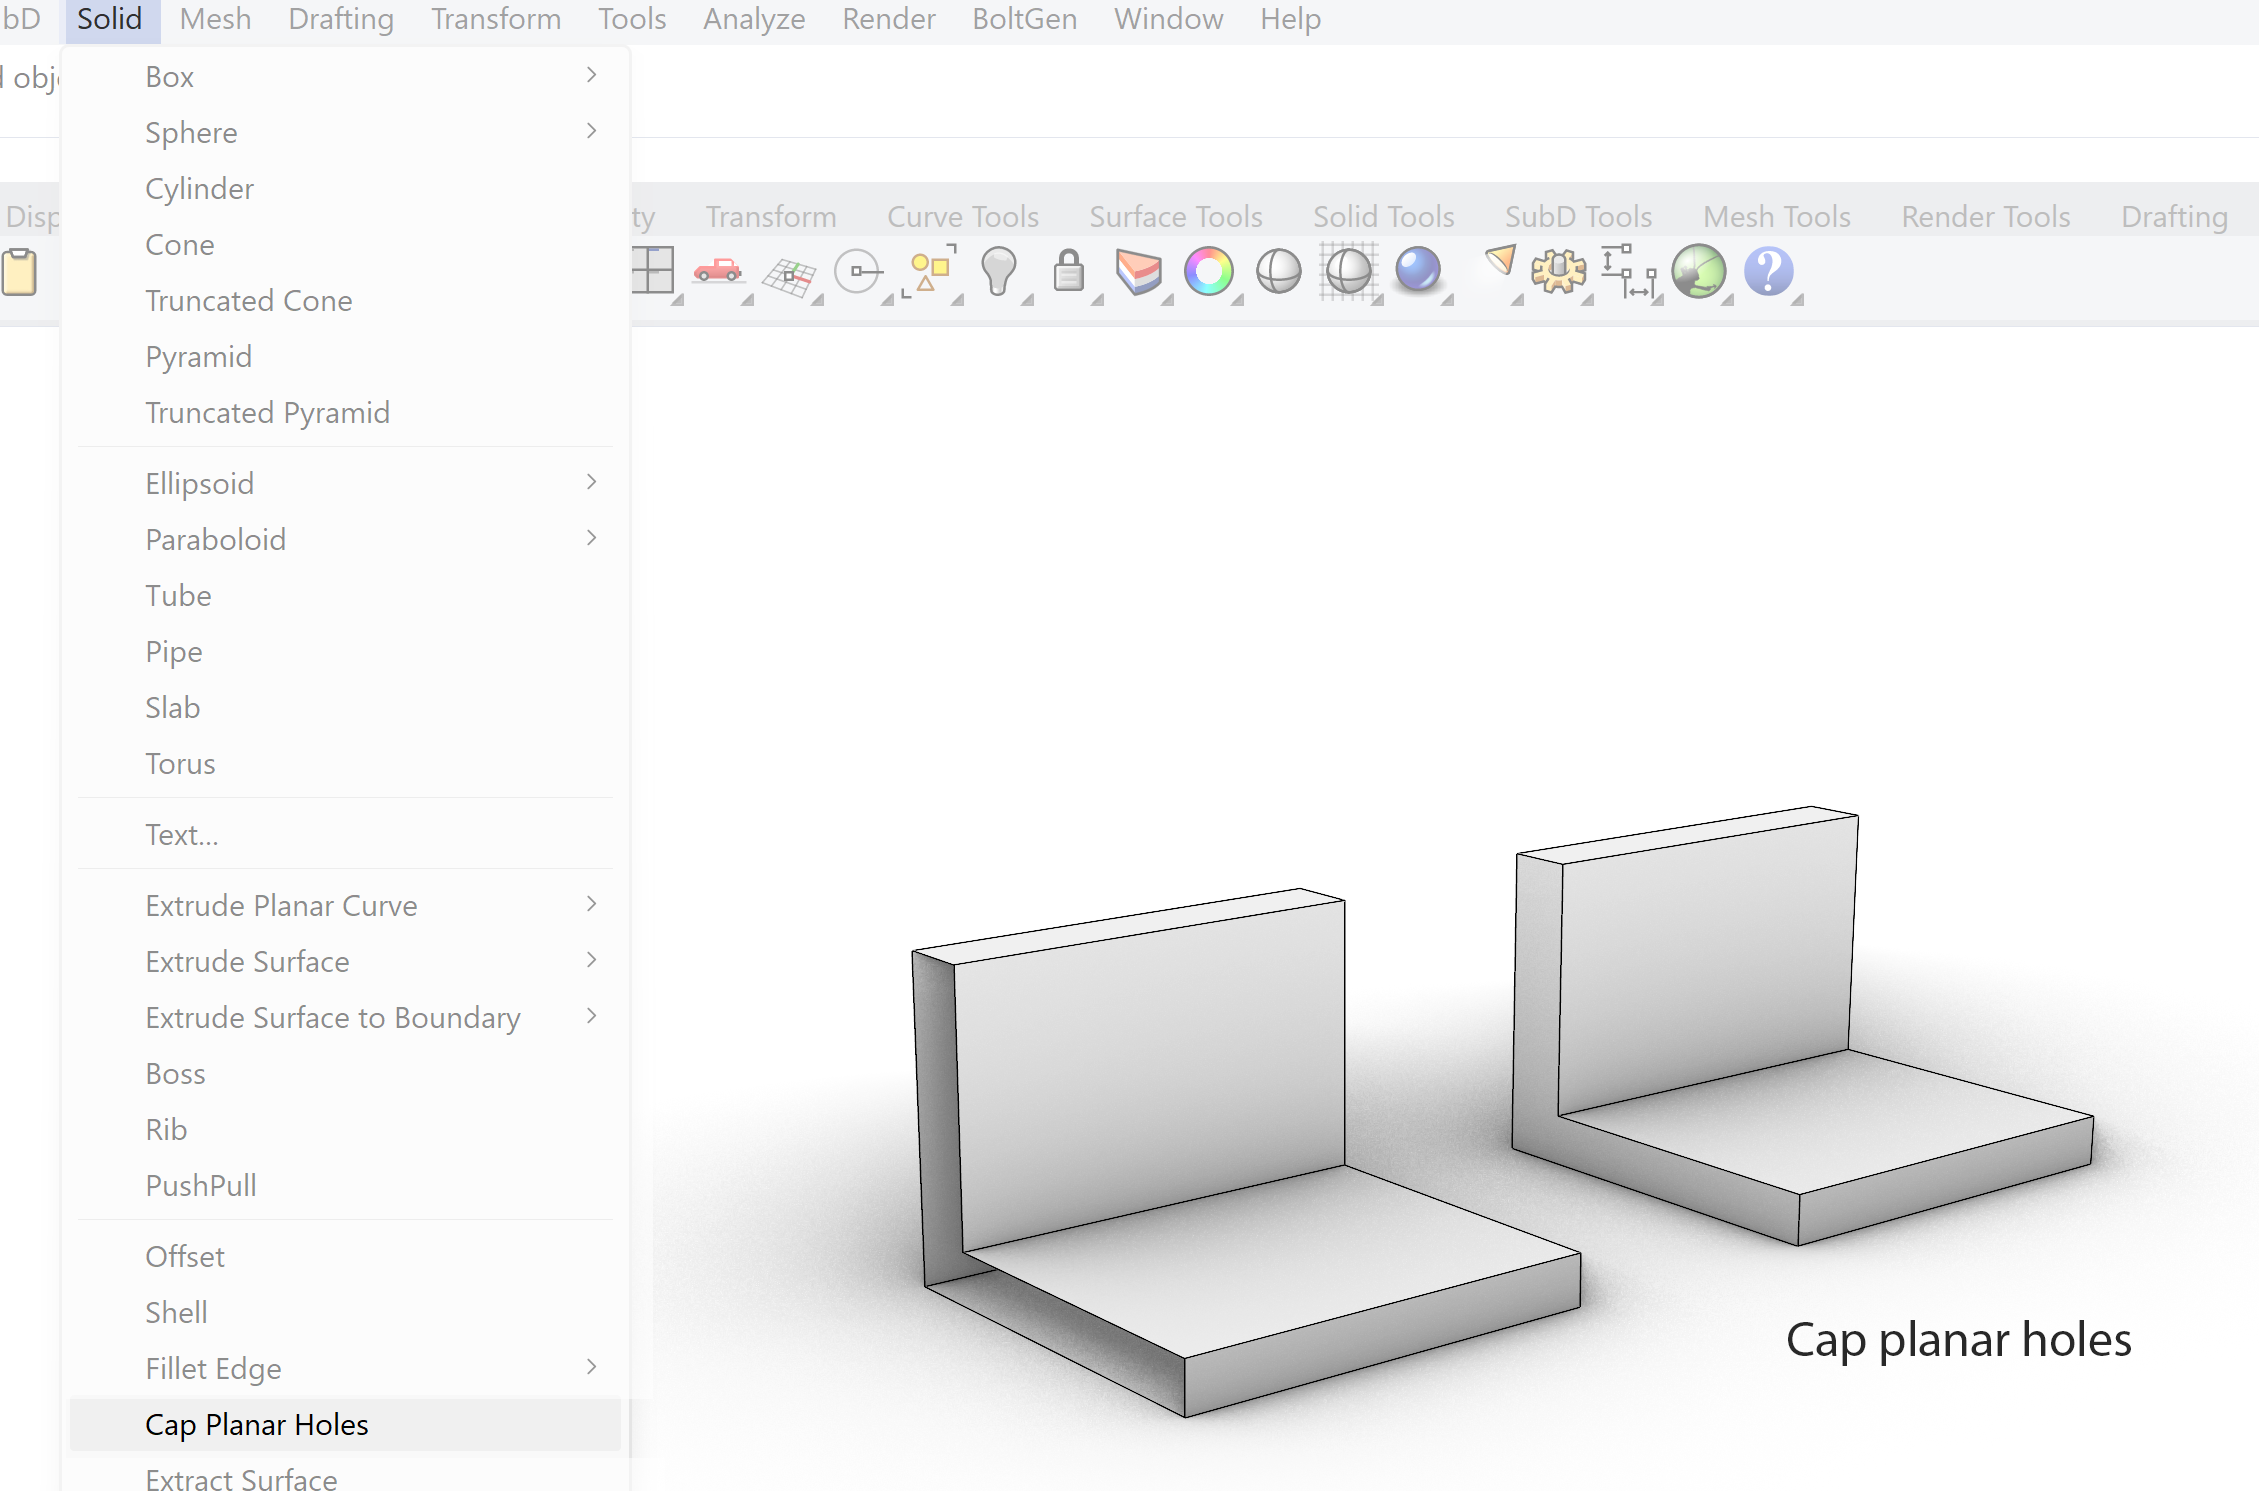
Sometimes when you fillet edges, holes can appear on faces. To close these holes use: Solid » Cap Planar Holes
Offset
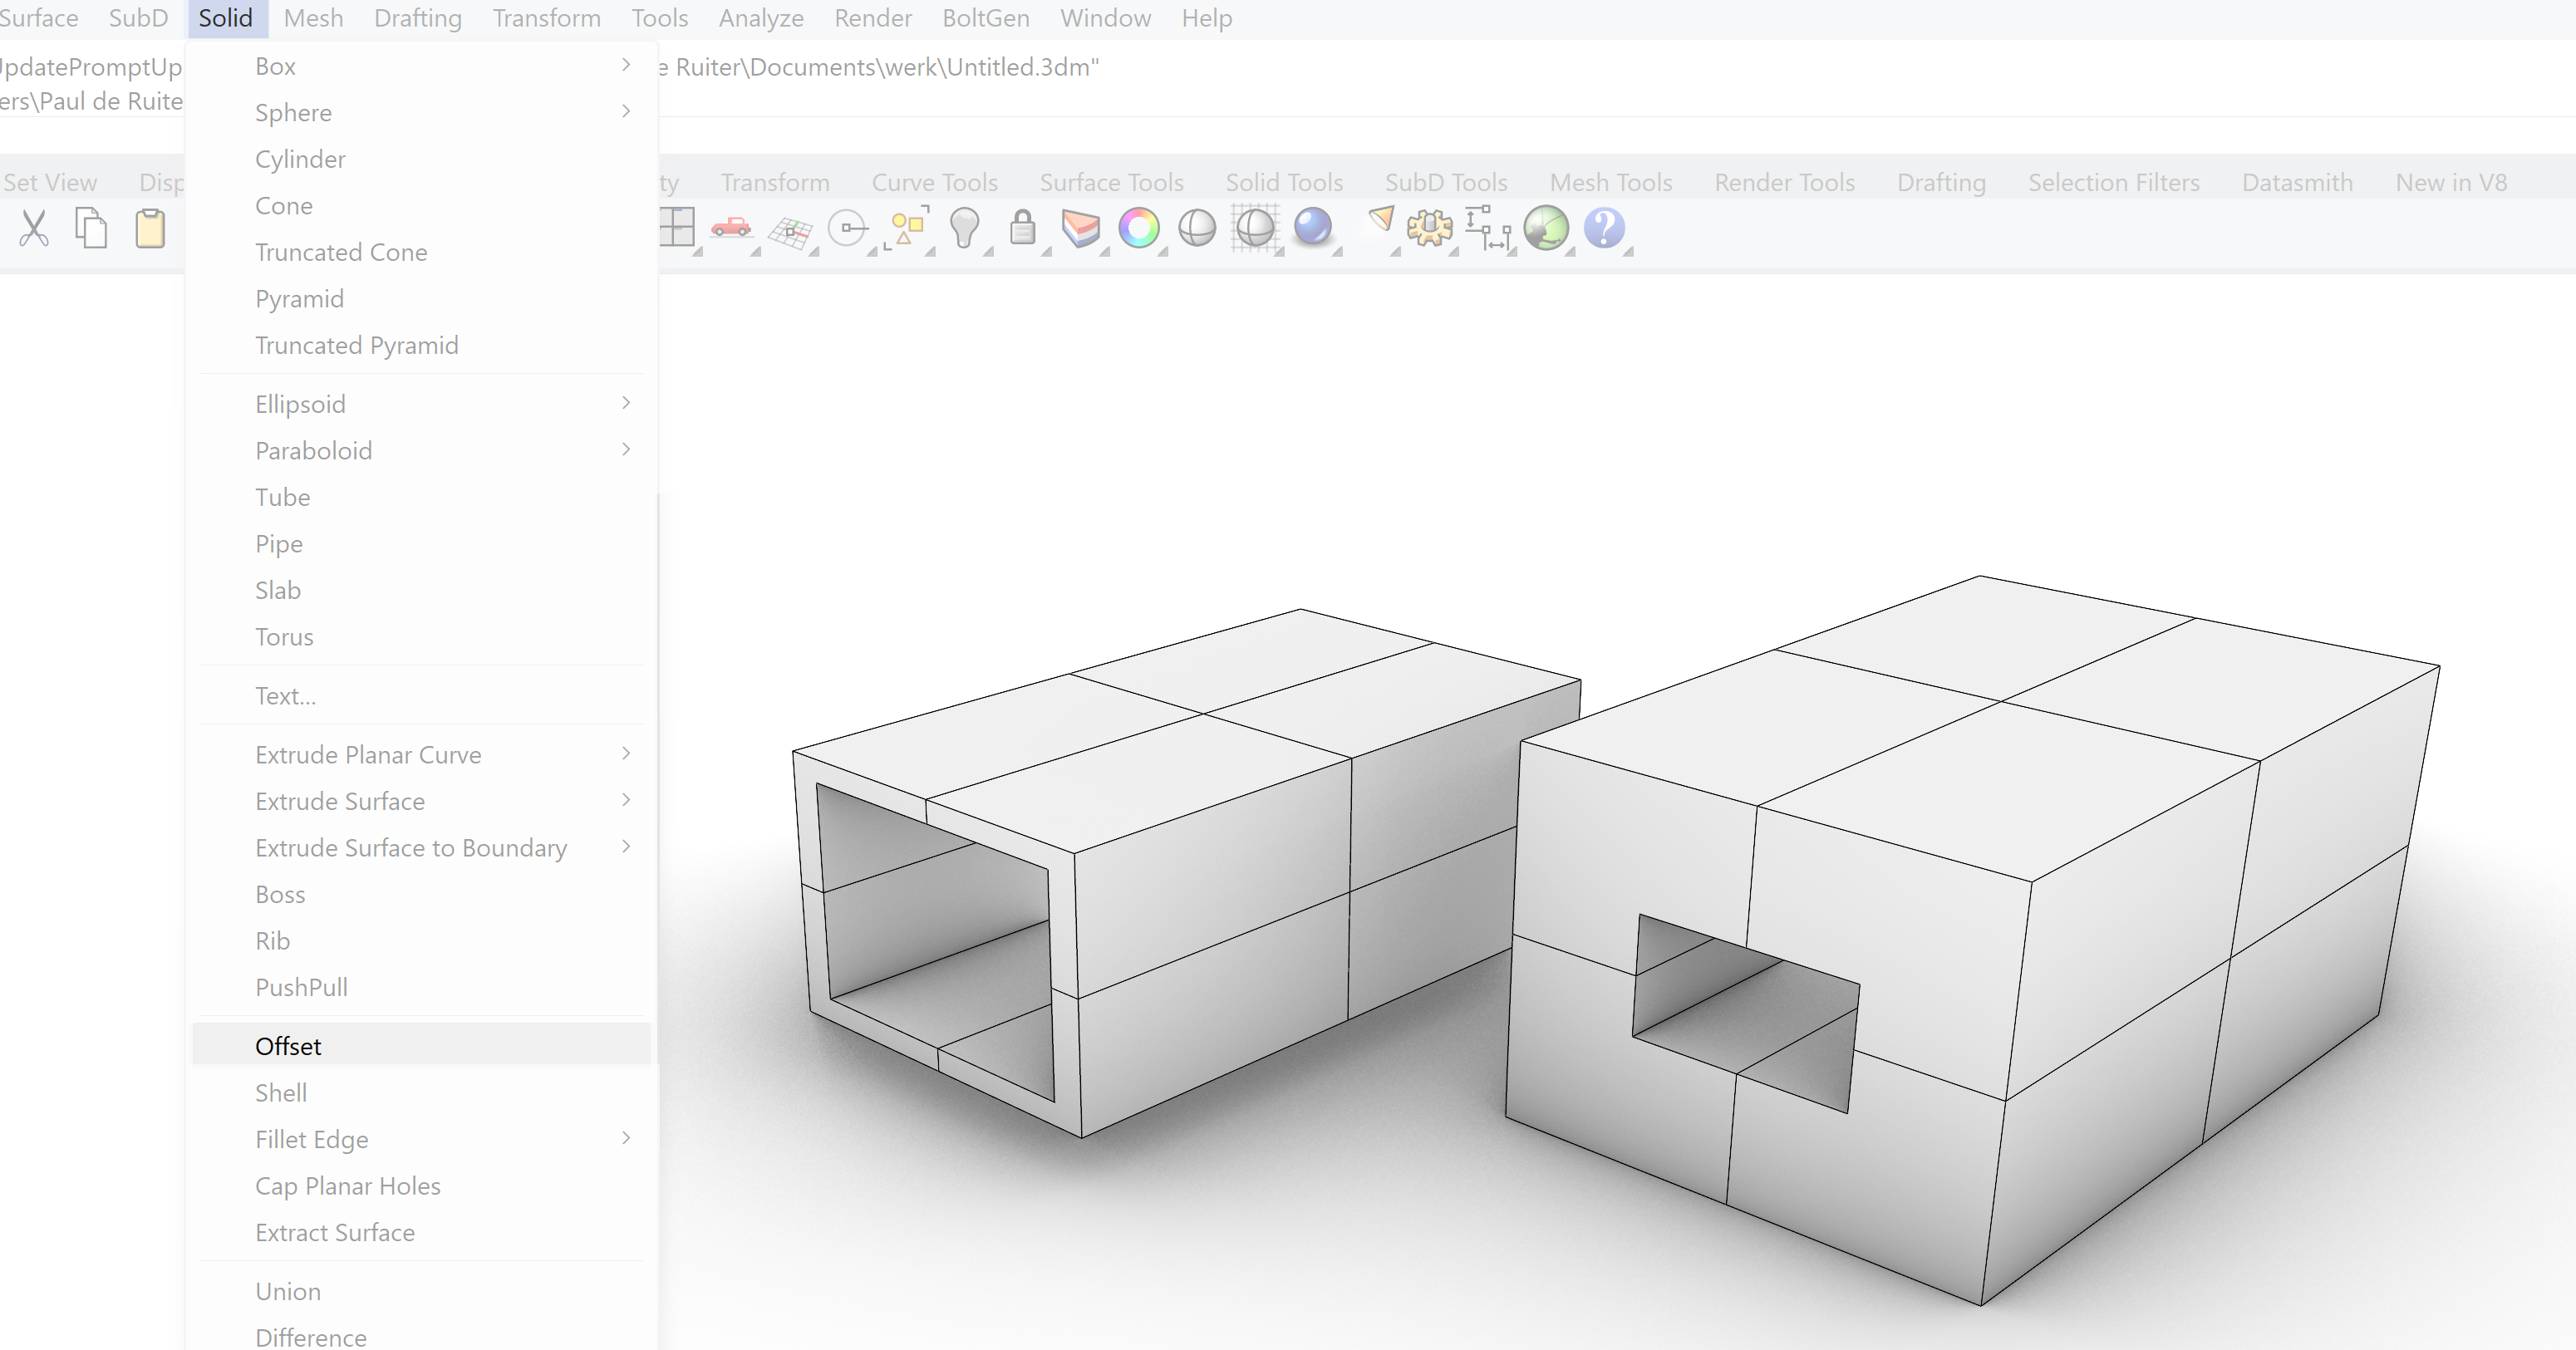
Offsetting an object will make a copy of the object with a certain offset to the surfaces of the original object. It can be a quick way of giving a shape a thickness. Be aware though that a solid only will recognize a void in an object if it is open to the outside. Otherwise the object will consist of two objects, one inside of the other.

Shell
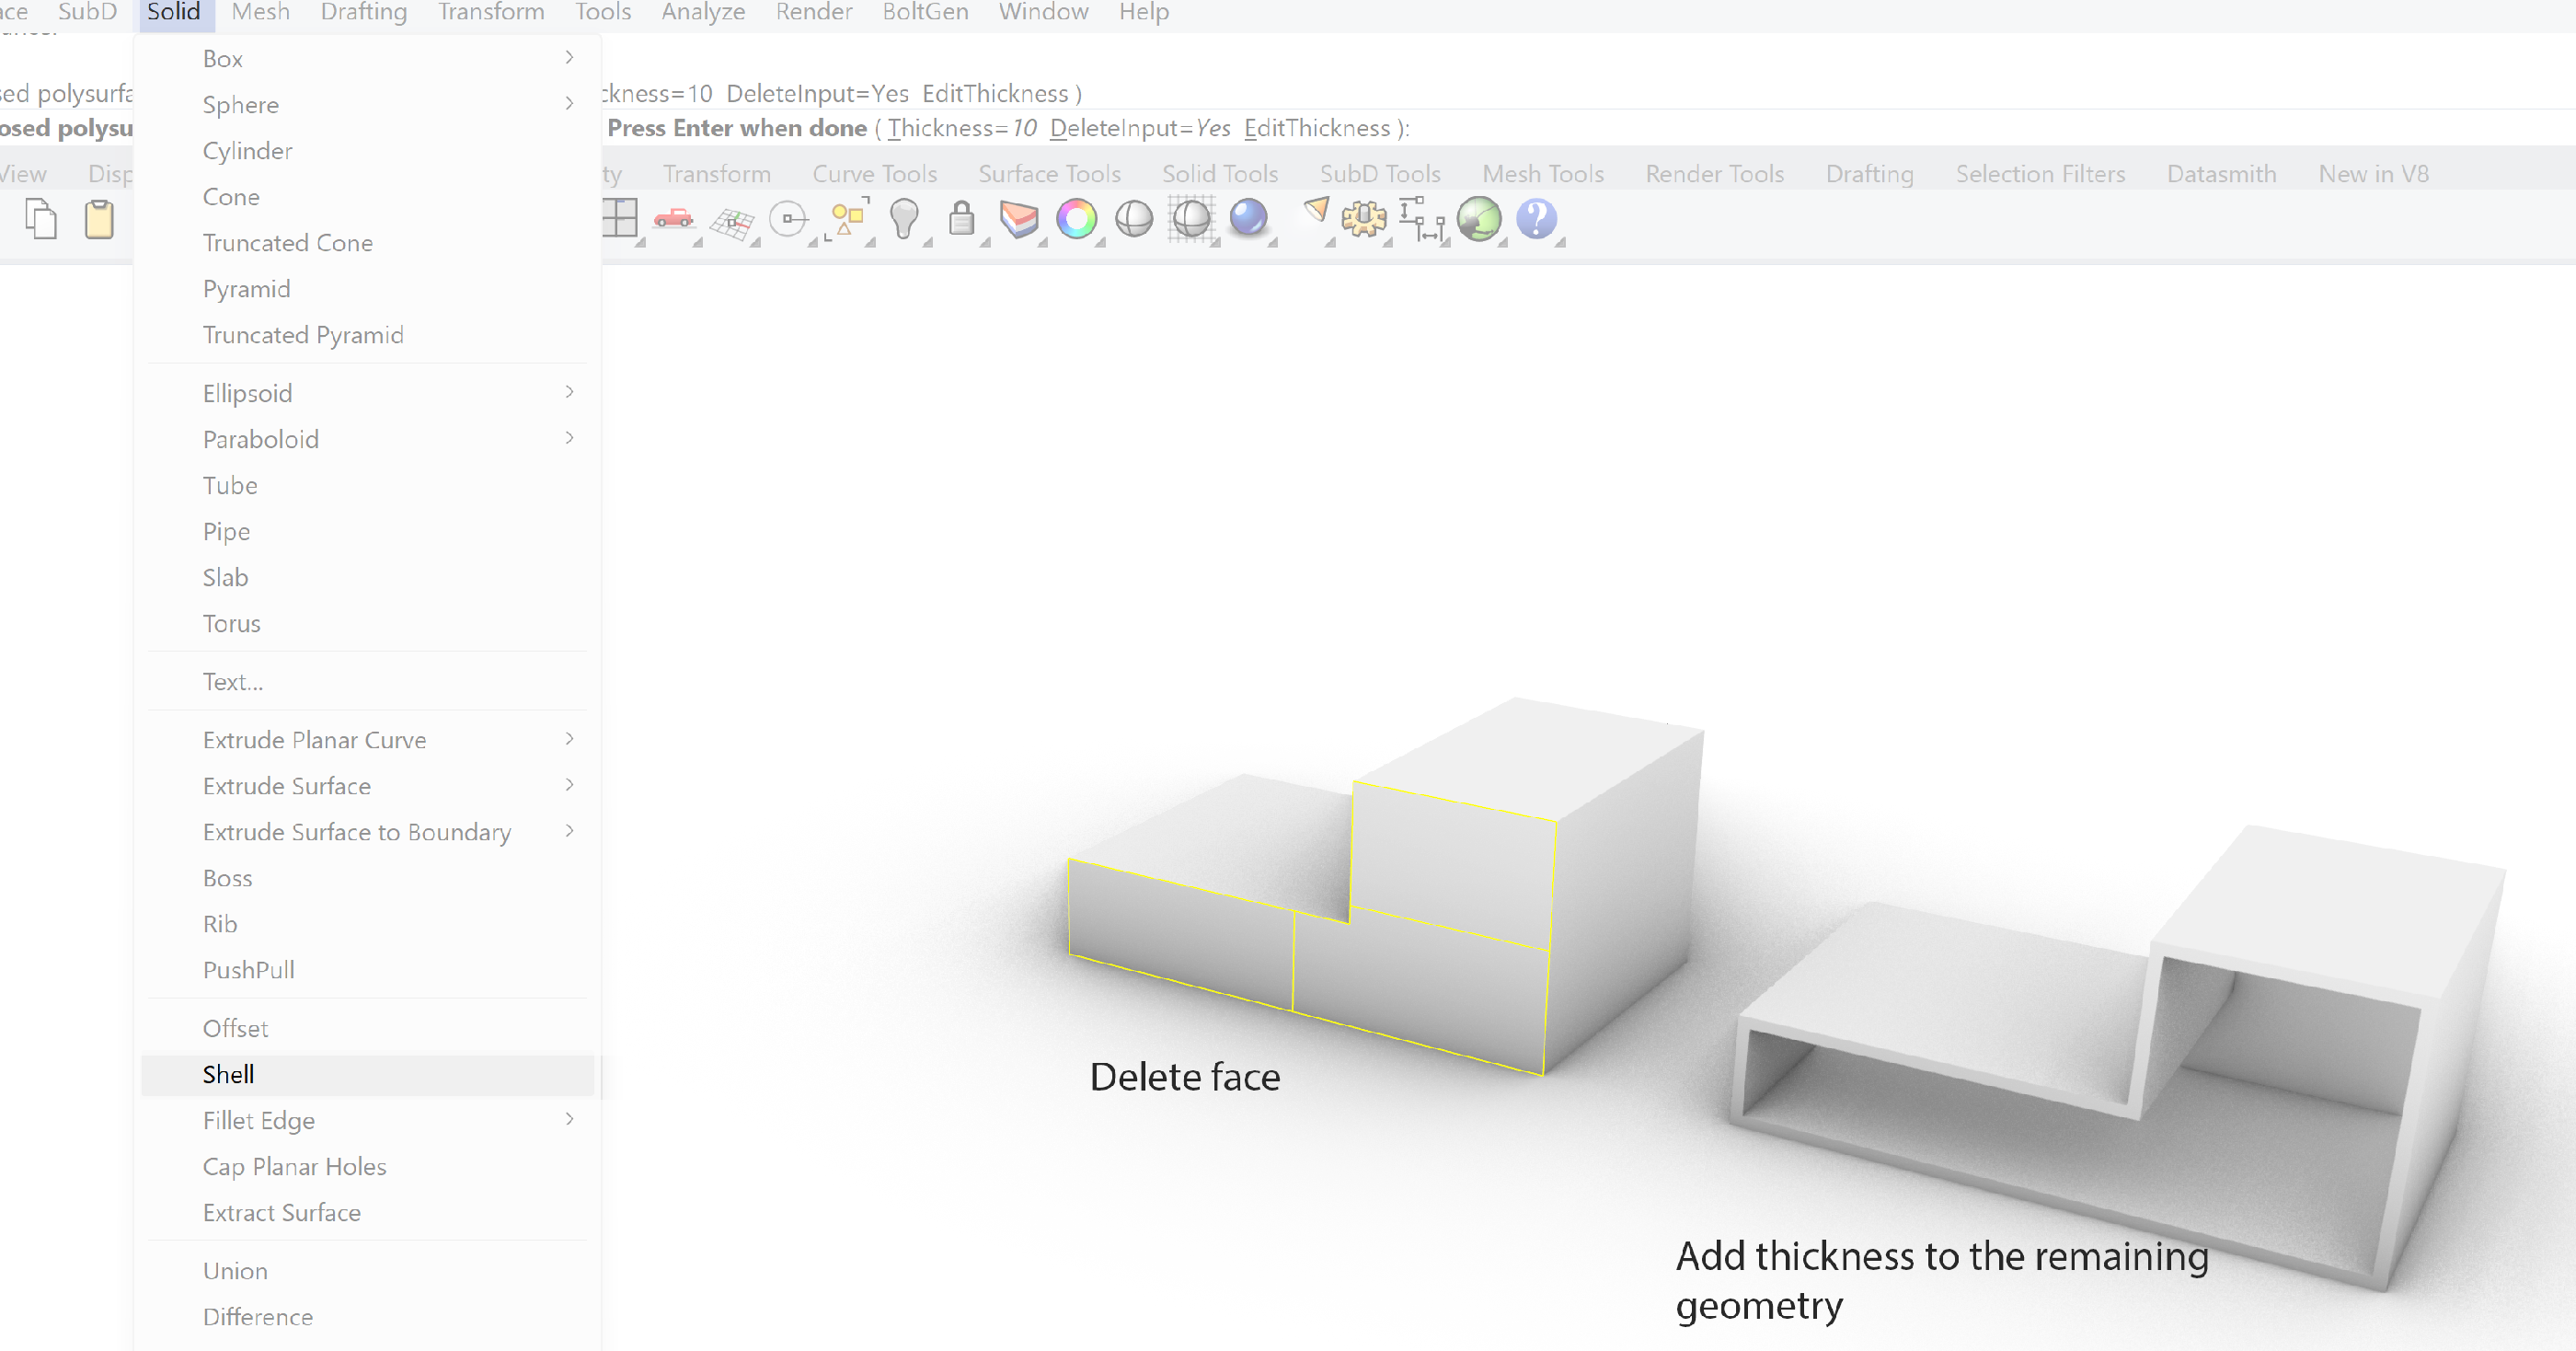
With the offset command you will create an offset of all the surfaces of the solid. The shell command will delete a selected face or faces, creating an opening in the solid, and give the remaining surfaces an offset

Rhino – Solid Modelling 5/6
Using curves to add to solid geometrylink copied
Curves can help to further build a solid geometry. Although most of the functions can be also modelled with other solids the advantage is that with curves it can be done faster.
Boss
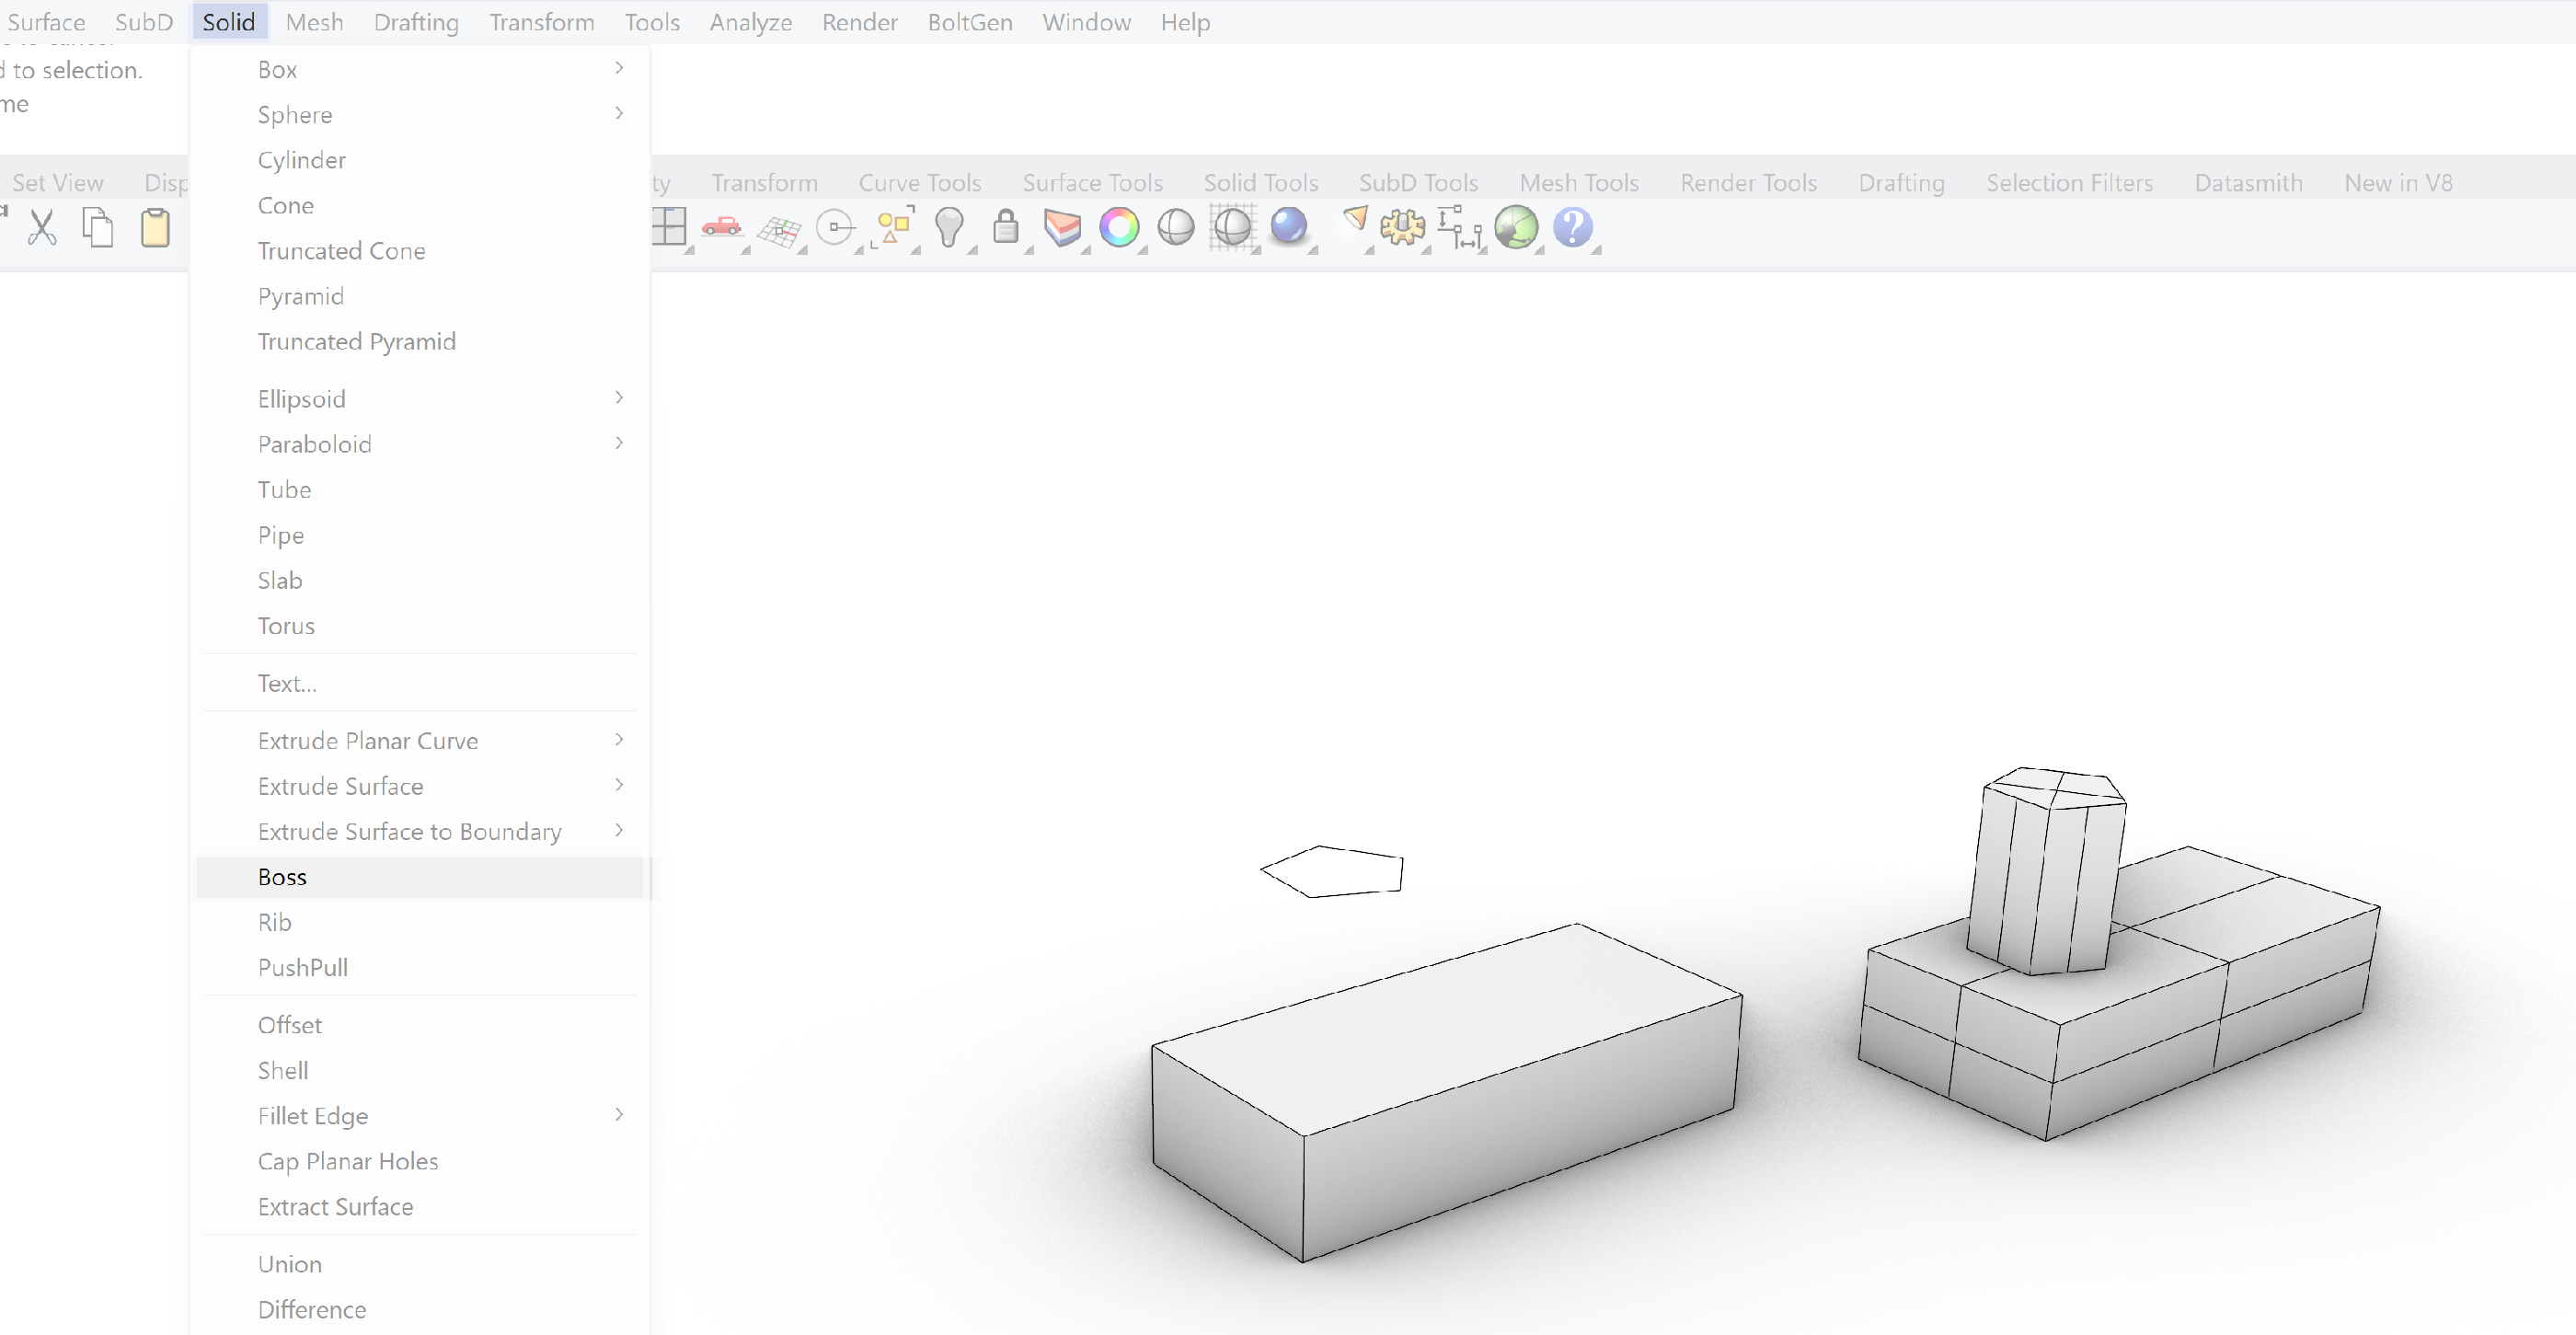
With the Boss option we use a closed planar (flat) curve to extrude the curve towards the surface of a solid. The extrusion automatically connects to the surface of the solid avoiding any Boolean operations.

Rib
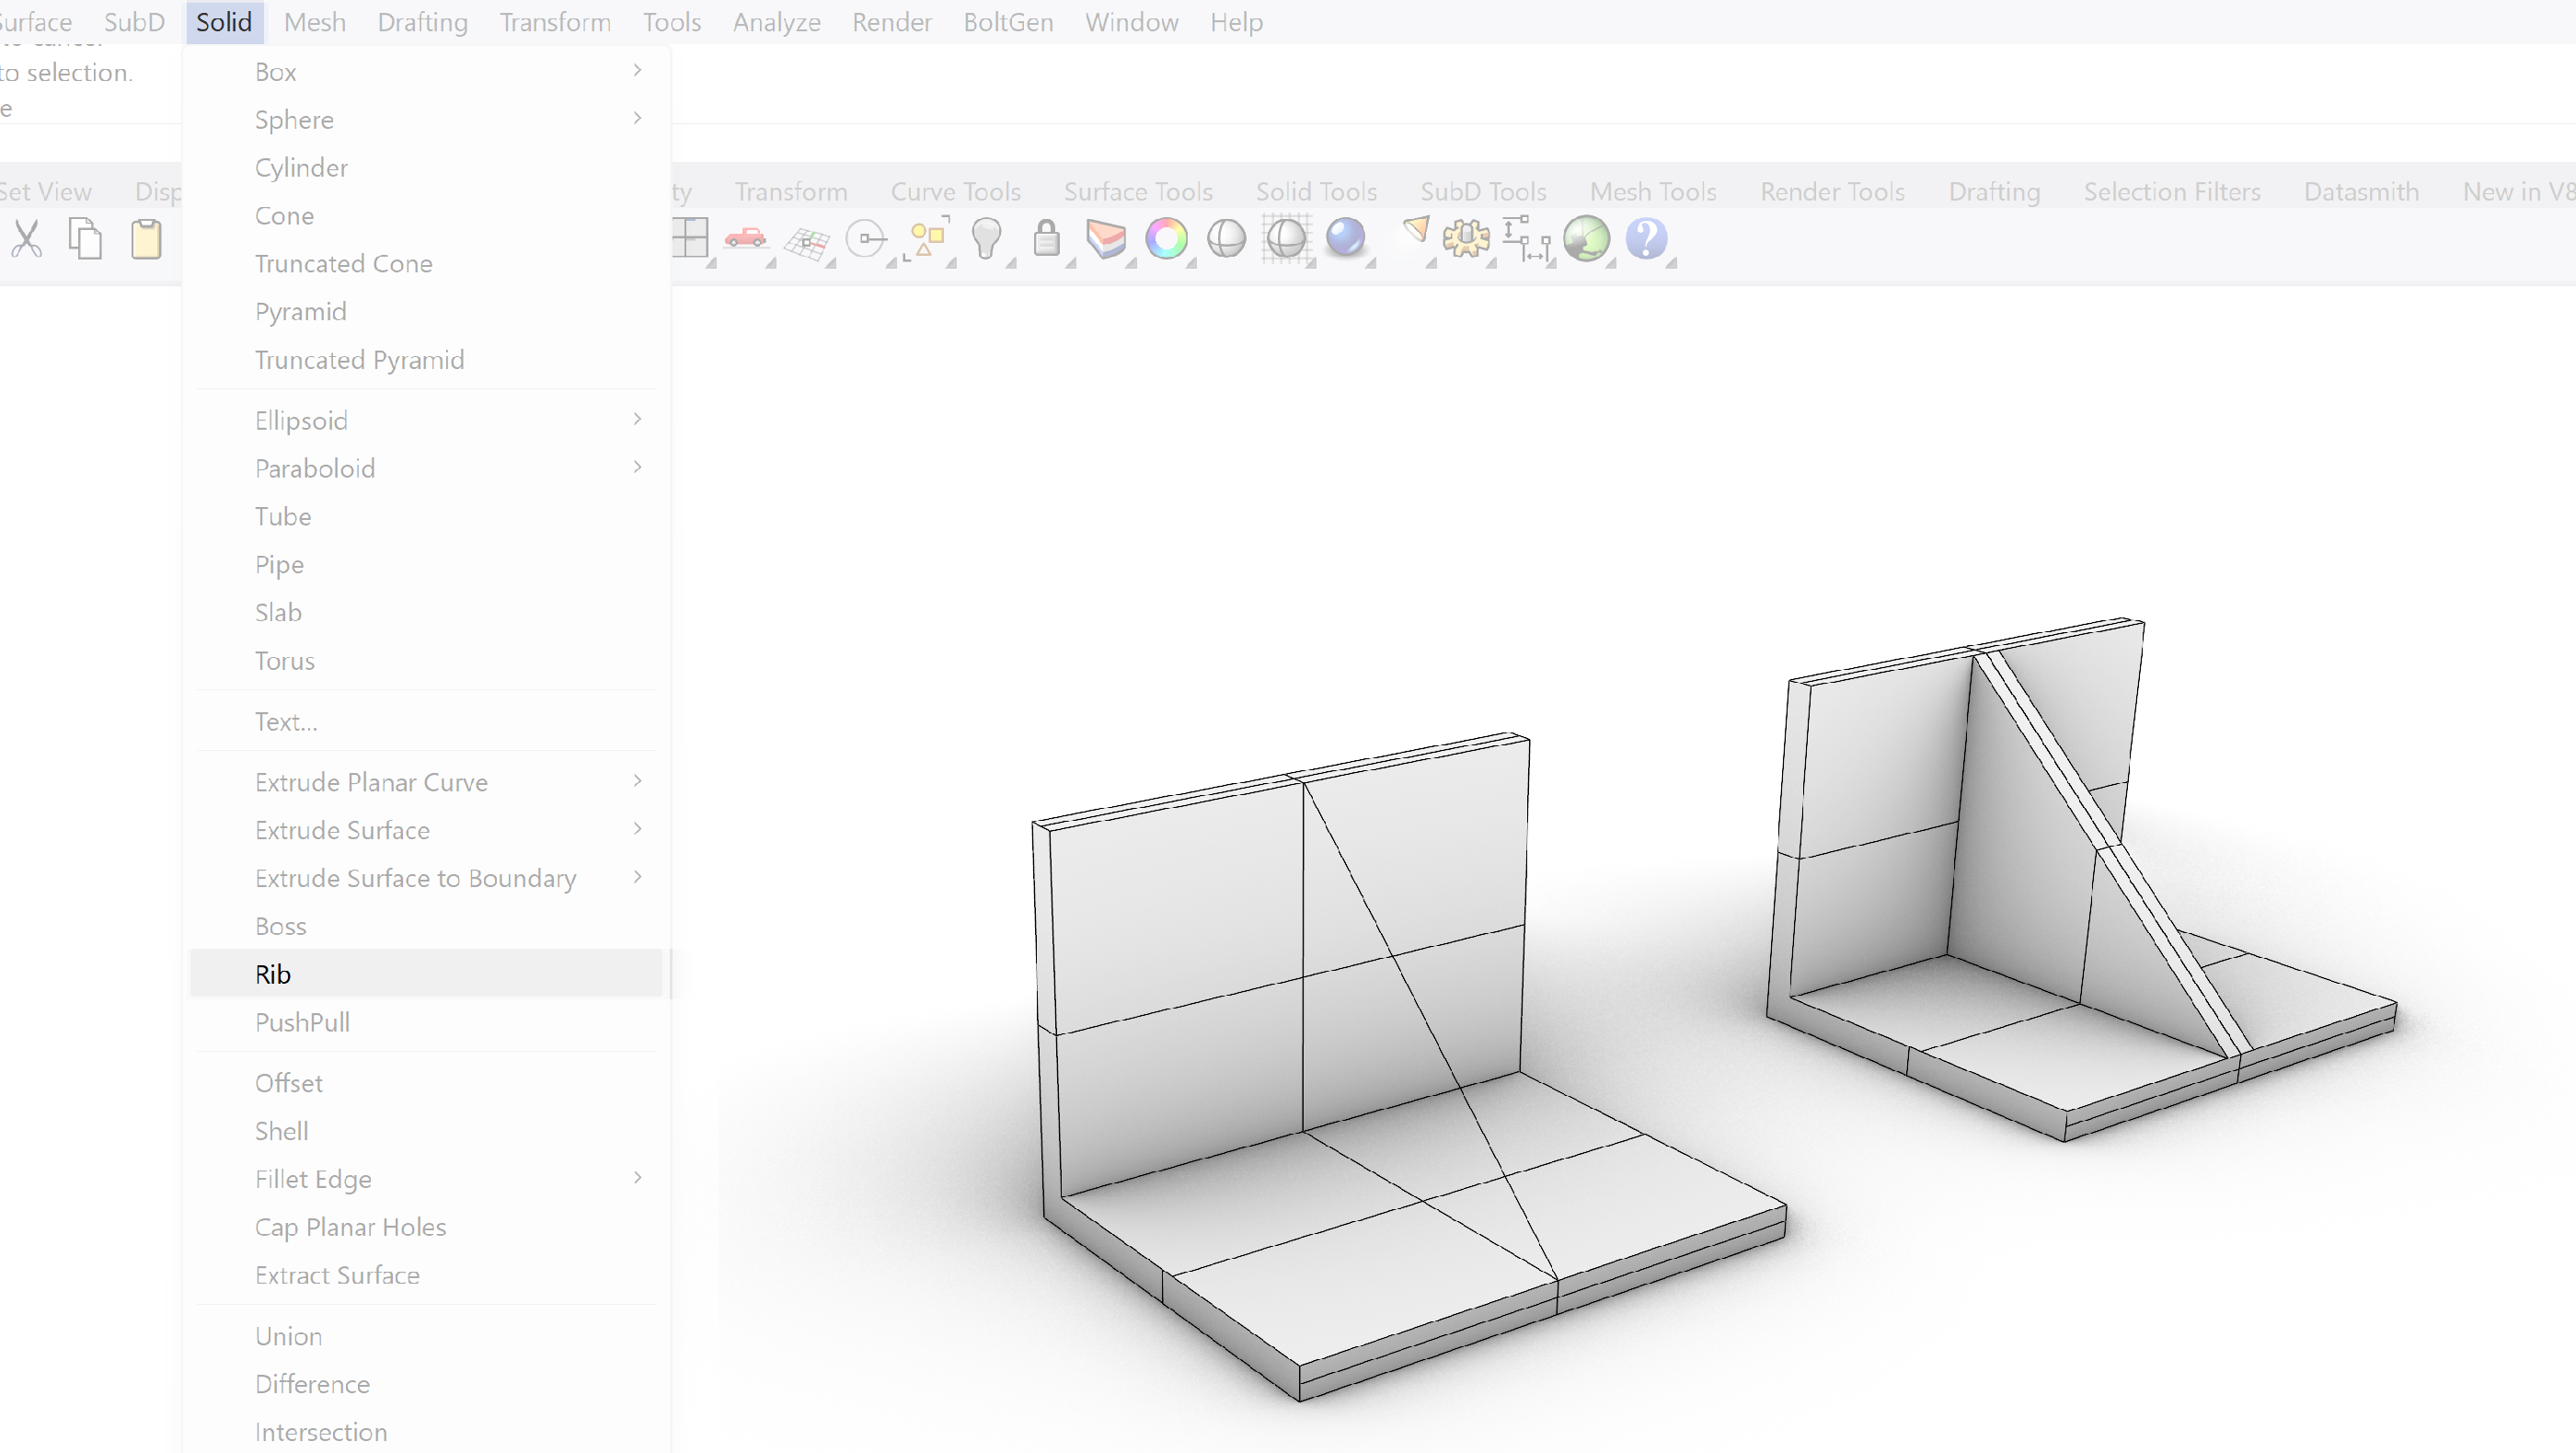
The word already points in the direction of its function. It allows you to fast generate ribs on your geometry. The rib will be generated by a curve connecting the solid surface. The curve will be given an offset, defining the thickness of the rib and then the space between the selected surface of the solid and the offset curve will be filled in. Thereby creating the rib.

PushPull
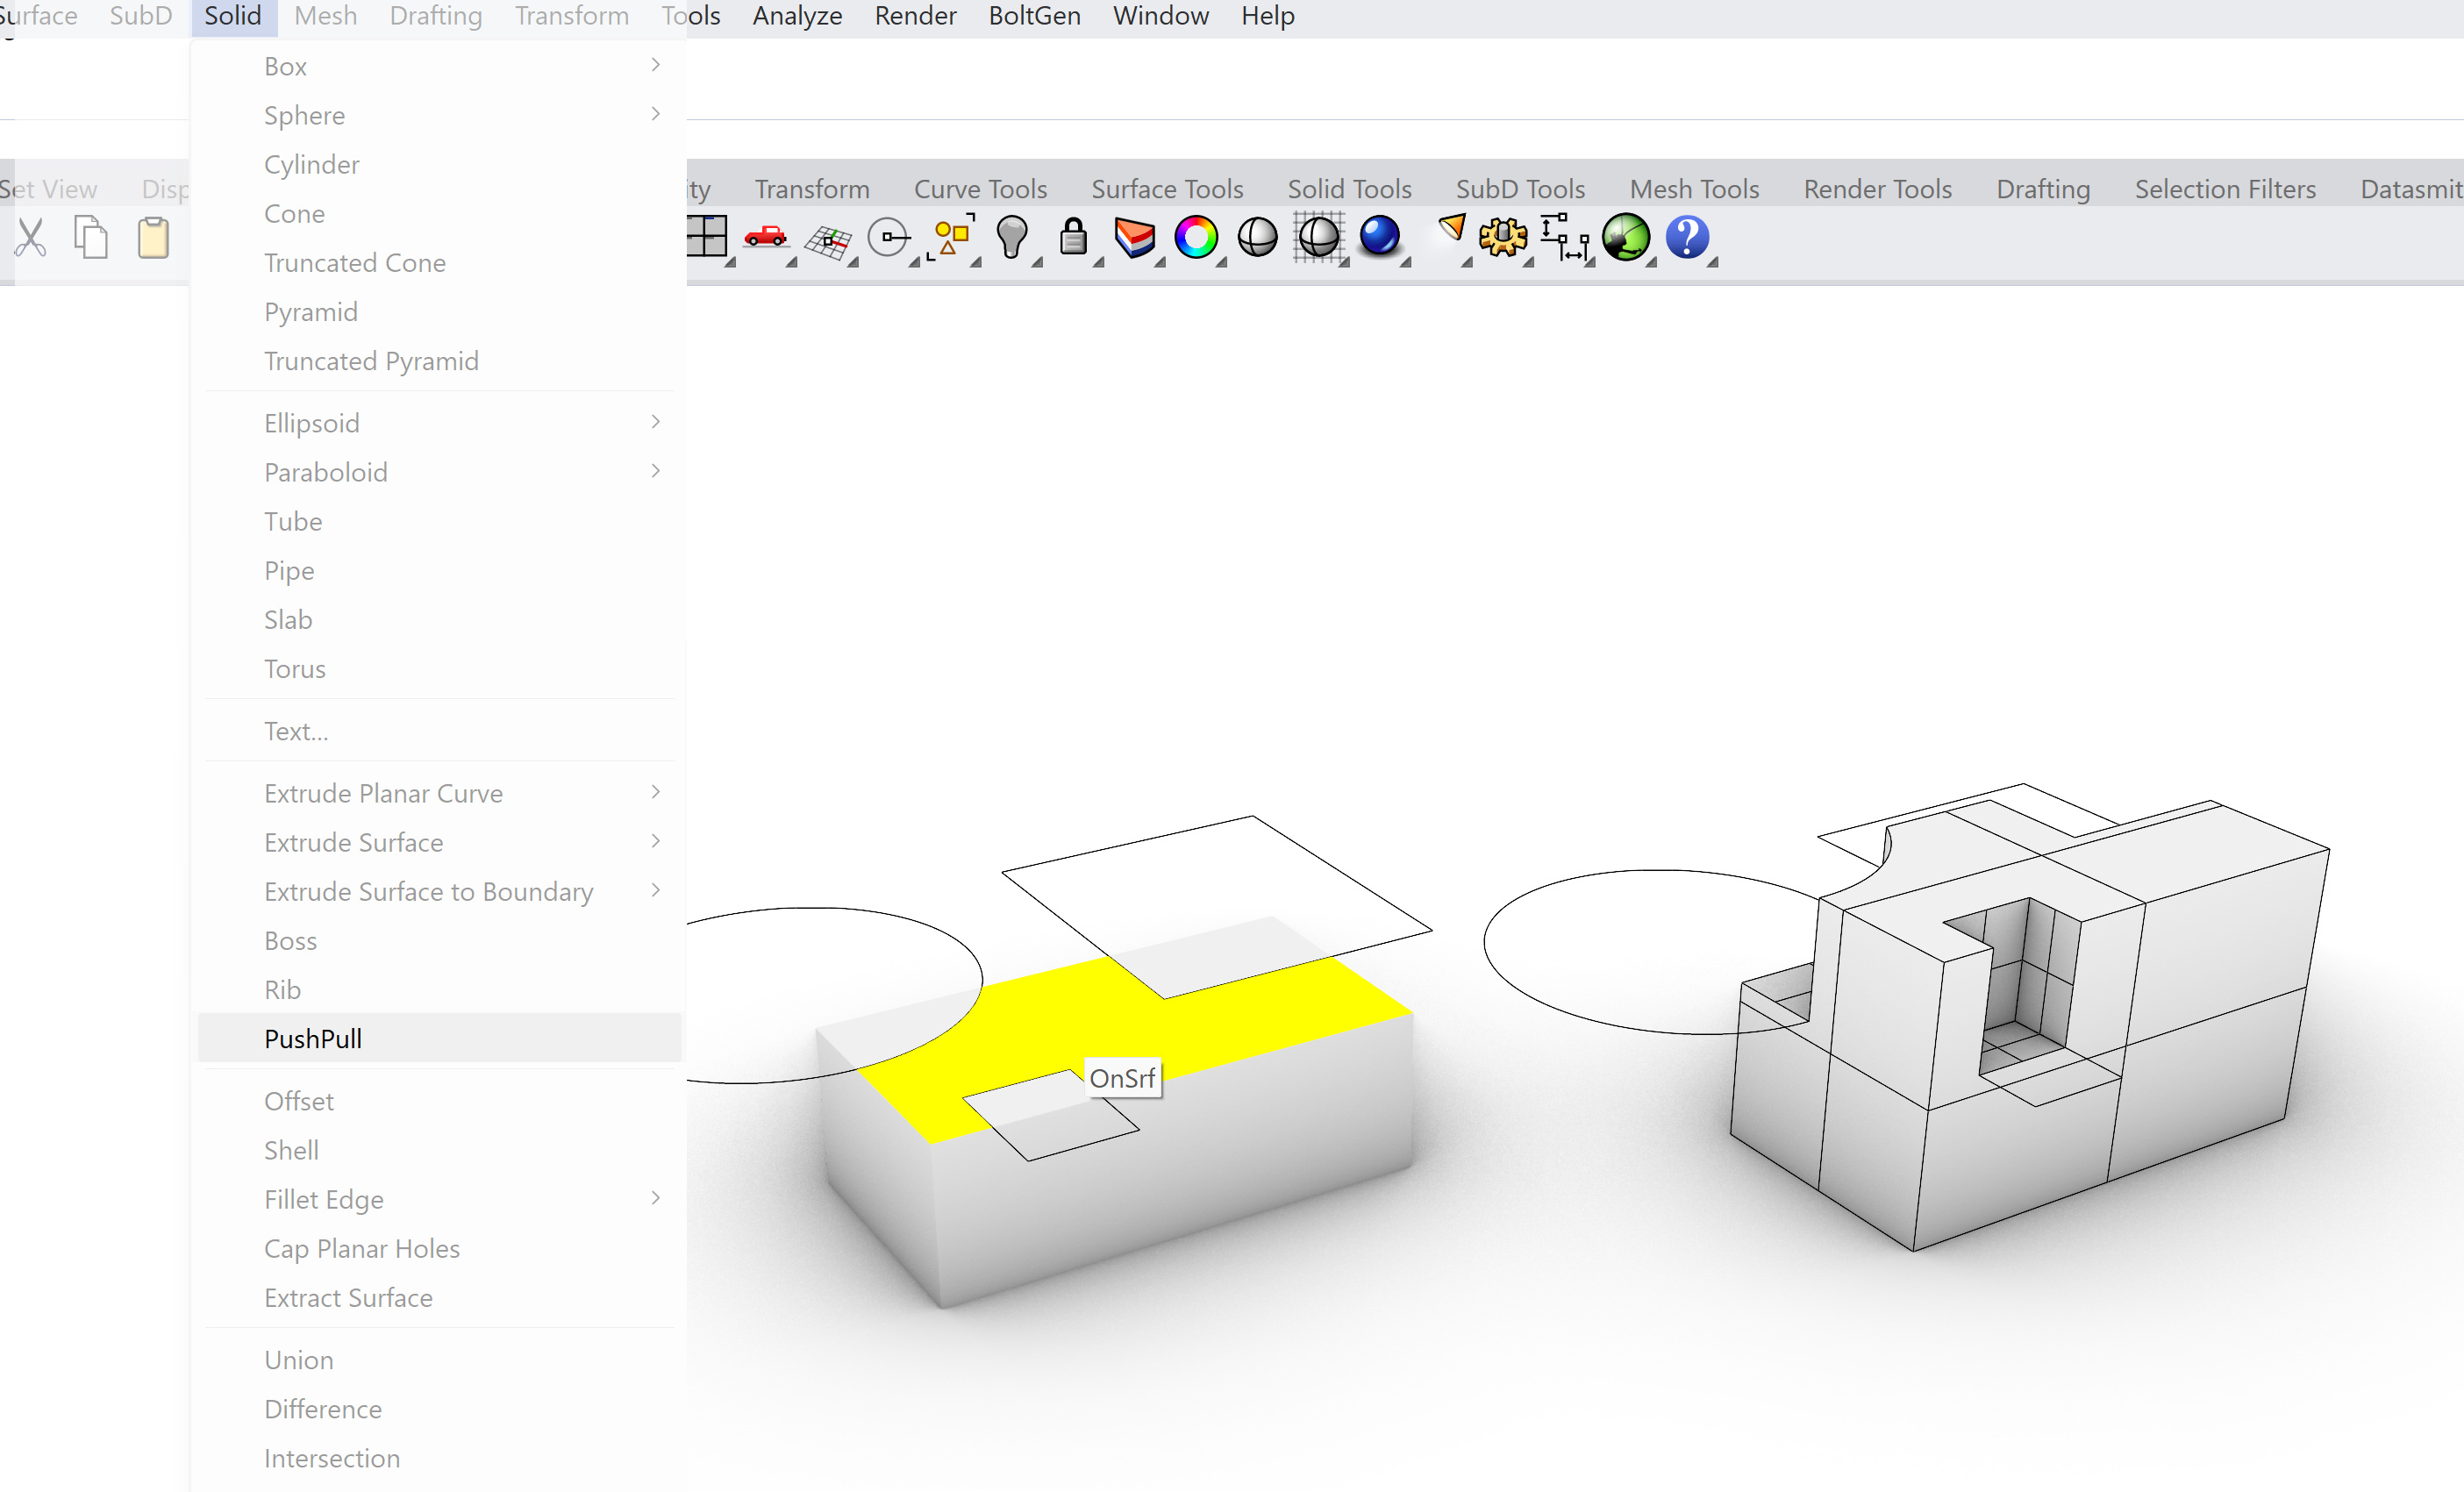
An more advanced tool similar to the option of editing the face of a solid is the PushPull option. It allows you to quicky move a face of a solid based on the region defined by a curve or a set of closed curves.

Rhino – Solid Modelling 6/6
Conclusionlink copied
In this tutorial you learned all the basics about Solid geometry in Rhino. How to create them, modify, and perform various operations to arrive with a closed geometry that you like.
This, as a basis, will help you further along the way to learn more.
Good luck with further tutorials!
Write your feedback.
Write your feedback on "Rhino – Solid Modelling"".
If you're providing a specific feedback to a part of the chapter, mention which part (text, image, or video) that you have specific feedback for."Thank your for your feedback.
Your feedback has been submitted successfully and is now awaiting review. We appreciate your input and will ensure it aligns with our guidelines before it’s published.
