Speckle Introduction
-
Intro
-
Main Principles
-
How to get started
-
How to organize
-
Organize Streams & Branches
-
Useful Links
Information
| Primary software used | Speckle |
| Course | Speckle Introduction |
| Primary subject | Collaboration |
| Secondary subject | Collaboration |
| Level | Beginner |
| Last updated | November 27, 2024 |
| Keywords |
Responsible
| Teacher | |
| Faculty |
Speckle Introduction 0/5
Speckle Introduction
This is an introduction to Speckle, a data exchange software.
What is Speckle?
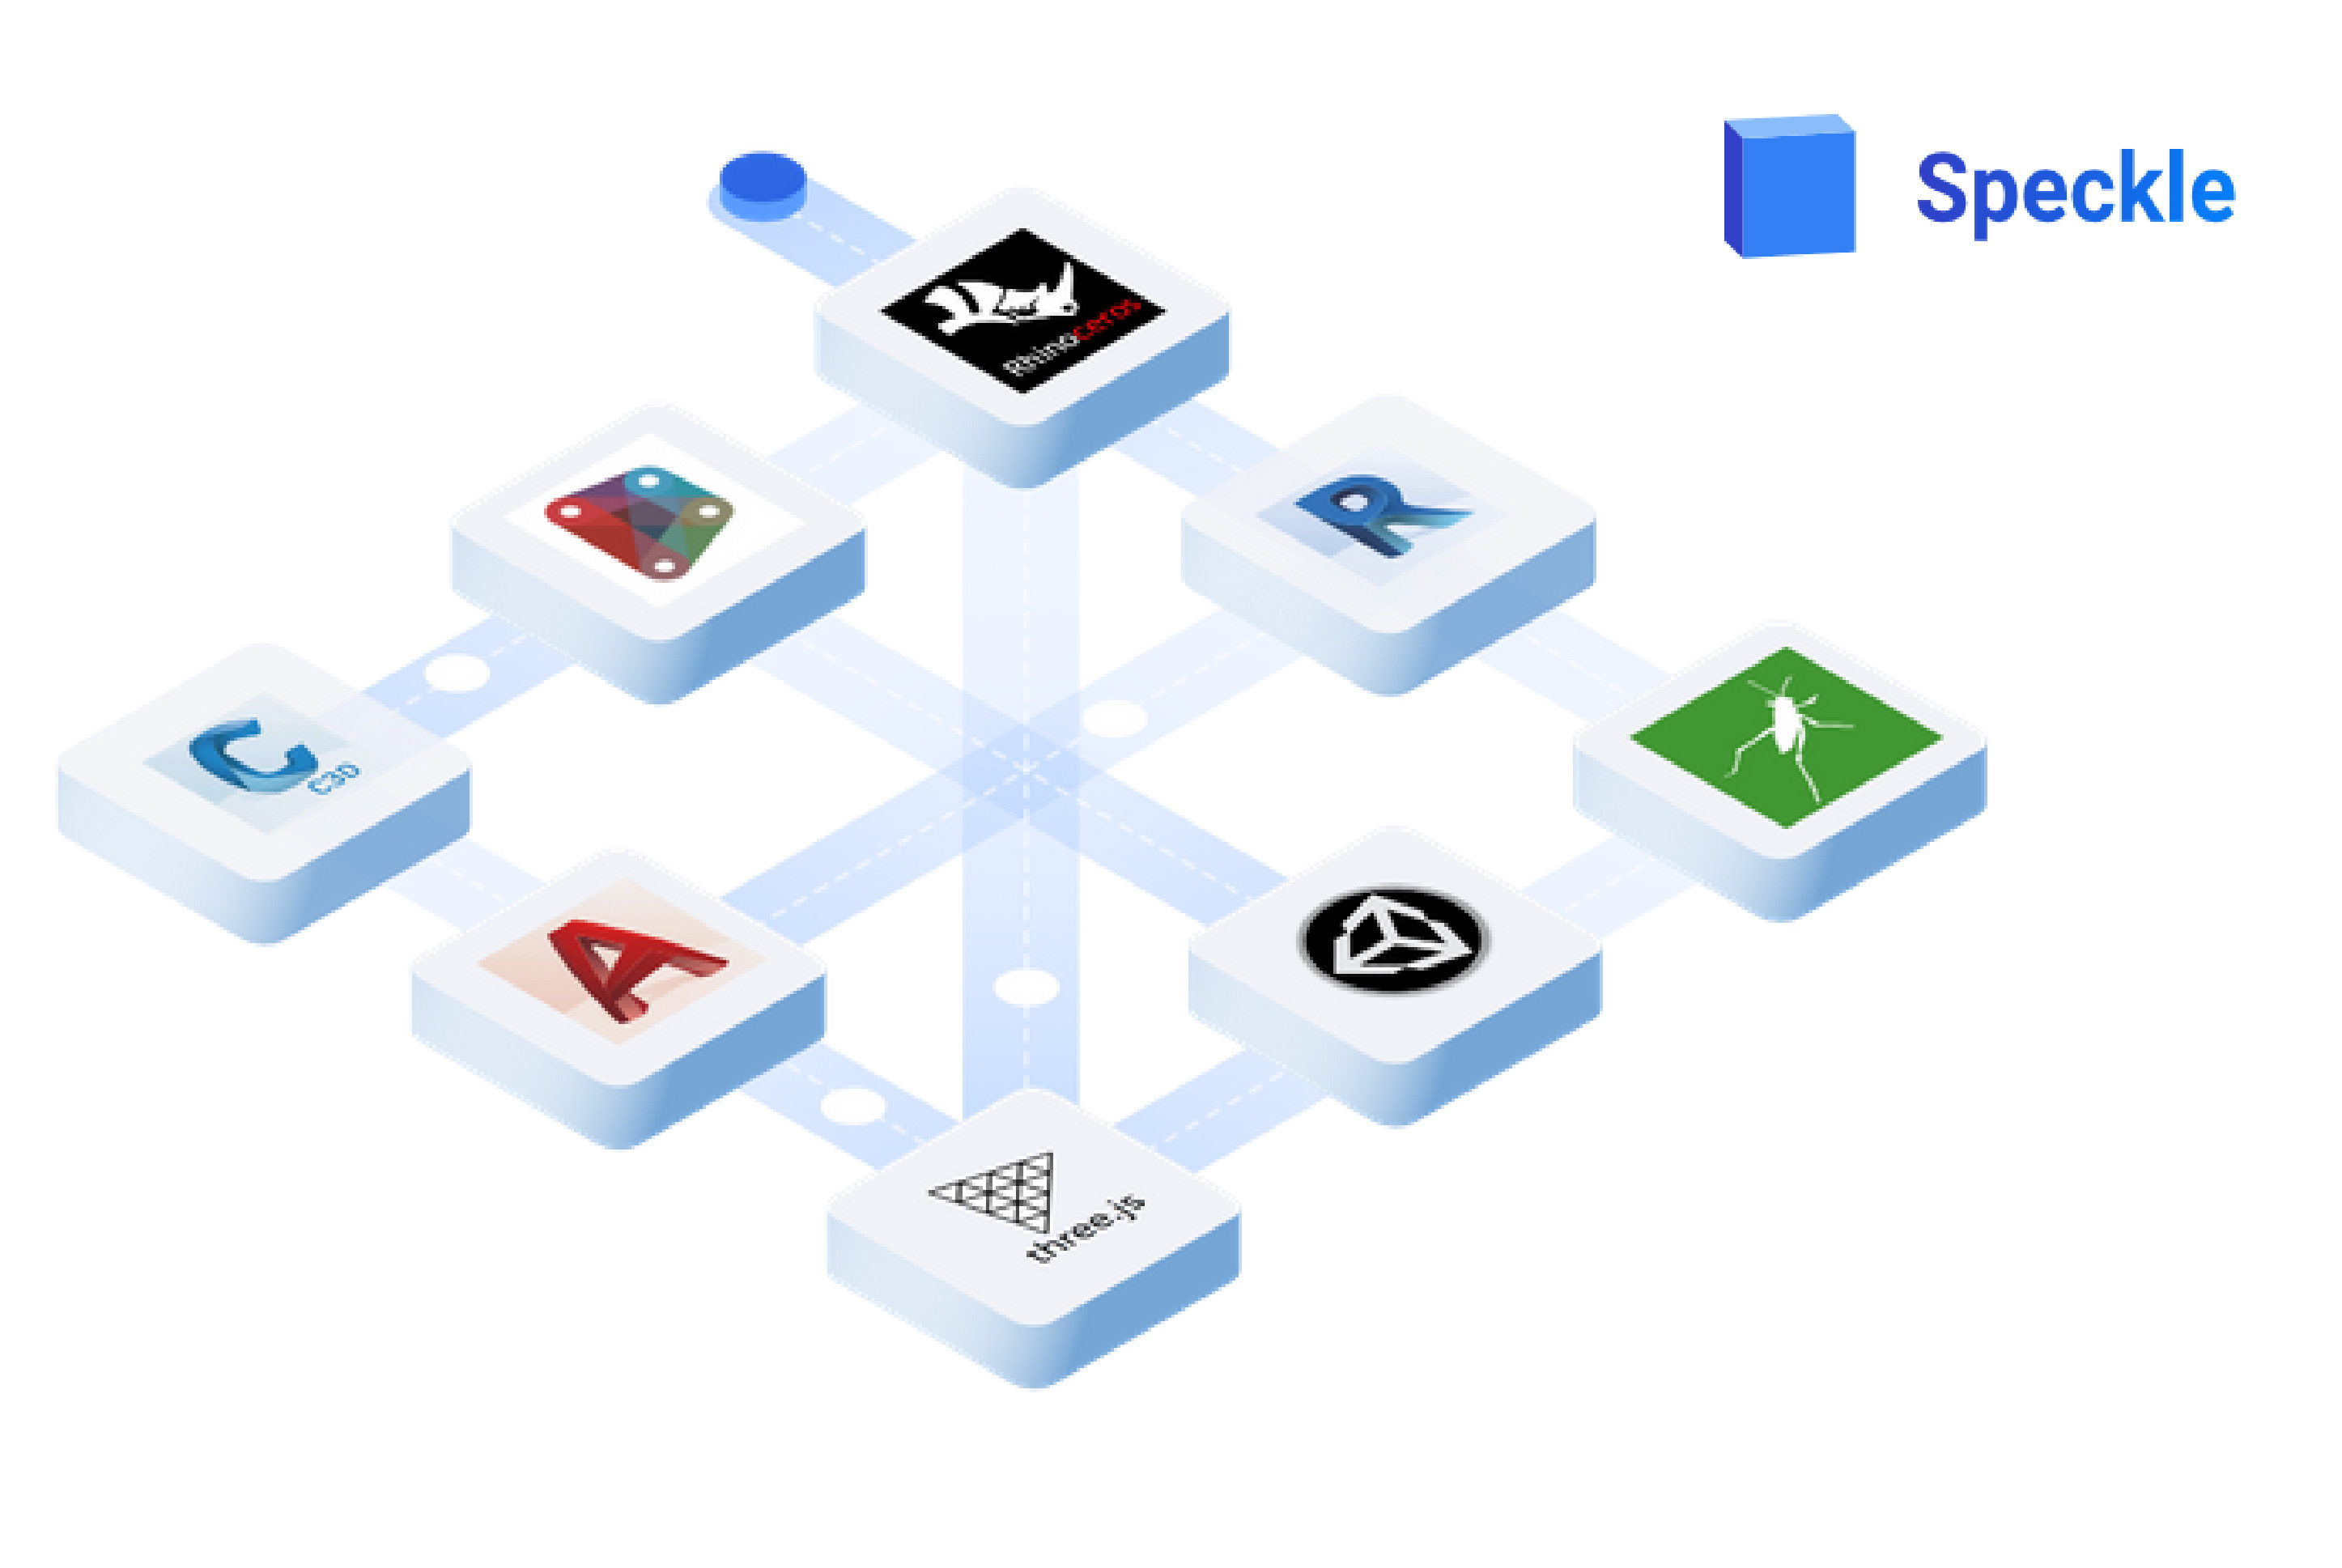
Speckle is a platform that enables the exchange of data between different team members and different software in the base of objects and not of files. This means that there is no need to exchange and import large files containing all the details of one project each time, but only the relevant data can be sent and directly be placed in alignment to the overall model.
In this regard, Speckle can easily serve the needs of a collaborative workflow inside a large team. Not only the exchange of data becomes faster and easily accessible to all the team members, but also the compatibility between the different software is facilitated. This derives from the fact that Speckle can be linked with various software, related to design (such as Rhino, Grasshopper, Revit or Dynamo), structural (such as TEKLA structures), 3D graphics (such as Blender or Unreal Engine) and software for geographic & infrastructure data (such as QGIS & Bentley).
Speckle Introduction 1/5
Main Principleslink copied
Exchanging data
In general, the flow of data exchange in Speckle is divided in sending and receiving data.
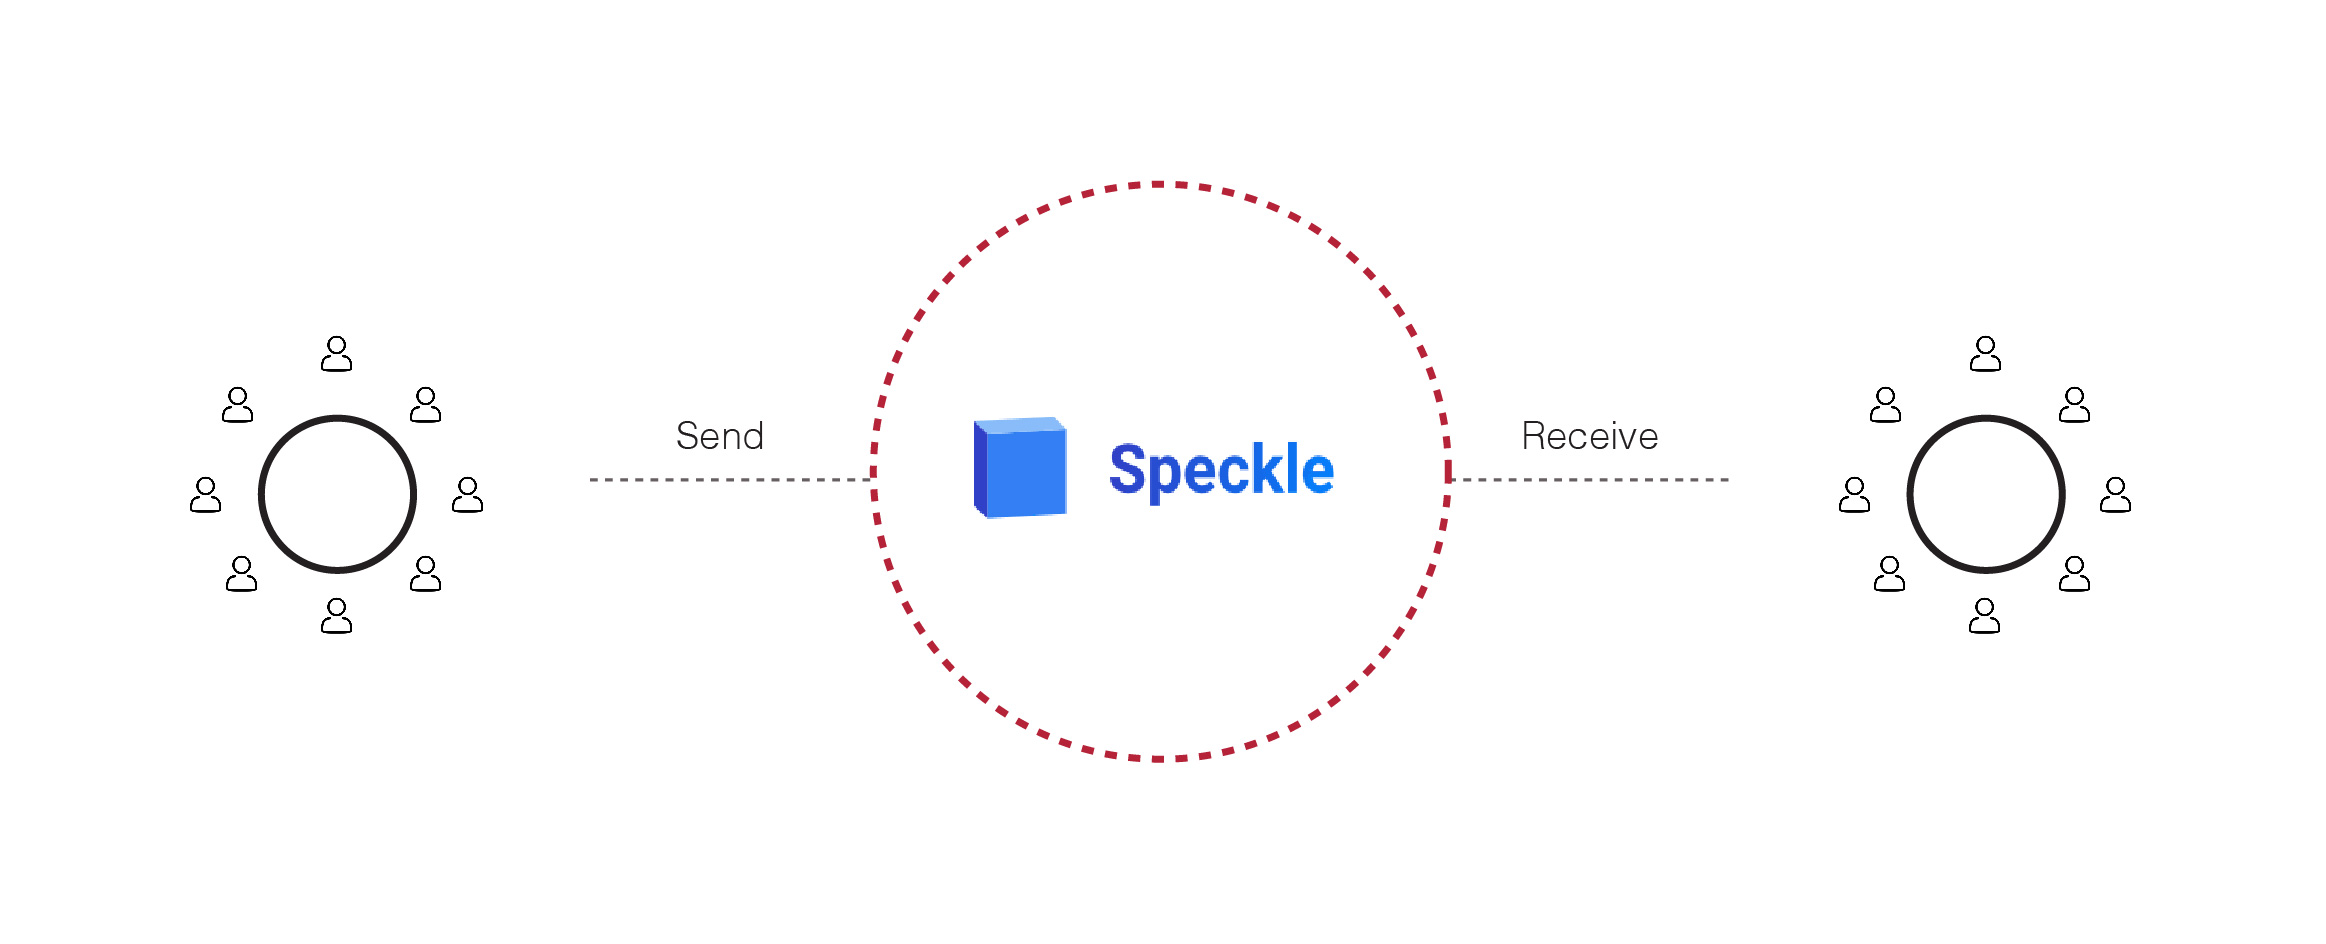
Sending data
After modifying the model, each user sends the changed geometries through the Speckle platform making it accessible to the rest of the team members. A new commit is created automatically and can be viewed in 3D through the Speckle Web App.
Important to note: it is useful to add a message that describes the change that is included in the commit every time.
Receiving data
After the data has become available in the Speckle platform, the rest of the team members can receive it and update their model respectively.
Important to note:
- In Speckle – although the principle is to centralize the data in one cloud model – each team member is responsible for maintaining a local copy of the overall model on his/her computer and every time updates the changes on it. In order to be able to efficiently send and receive the data from the main model in the right position, it is important that all the team members use local copies that have the same reference starting point.
- In case that data is transferred between files that use different metric units, Speckle will convert its size so that the element overall dimensions are always kept the same. However, the conversions that can be done automatically refer only to numeric parameters. Thus, it still needs to be taken into consideration that object features related to a specific program may create clashes when received from another software, e.g. if you send meshes from Rhino, you will not be able to receive it in Revit.
Structure
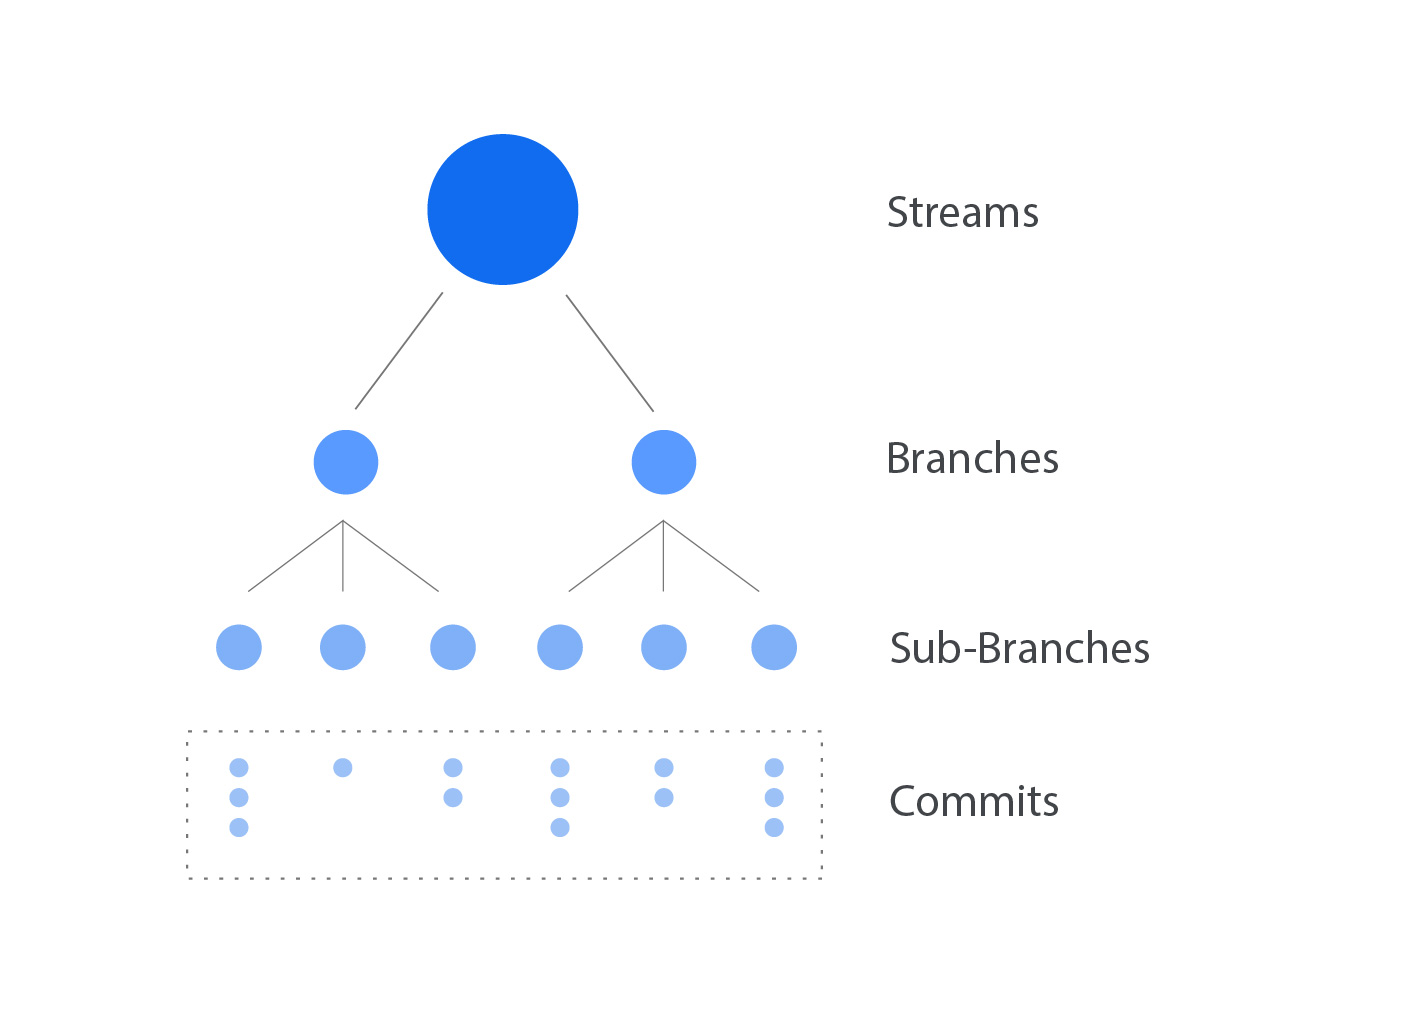
Data exchange inside Speckle is based on the use of some main features: streams, branches, and commits.
Streams: It is the main structure in Speckle. It contains a selection of data (objects or whole model) which are shared among the team members. Each stream is assigned a unique ID upon its creation in order to be easily tracked down and can be accompanied with a small description in order to understand quickly what it contains.
Branches: They are substructures inside a stream and, thus, they serve to analyze the main group of geometries into smaller element lists. Each stream can contain several branches and each branch can also be further analyzed into sub-branches.
In this regard, the file organization and the data exchange are facilitated since the specific parts of the model which have undergone changes each time can easily be detected.
Commits: They store all the versions of data exchange that have been held through each stream or branch, serving, thus, as a repository of all the phases in the 3D model. In this regard, it saves in terms of storage space since it prevents from keeping in the computer a large track of files for each project alteration.
Important to note: Commits are automatically created upon sending data through a branch, sub-branch or a stream.
Speckle Introduction 2/5
How to get startedlink copied
In order to access Speckle, each team member needs to create an account on the Speckle platform.
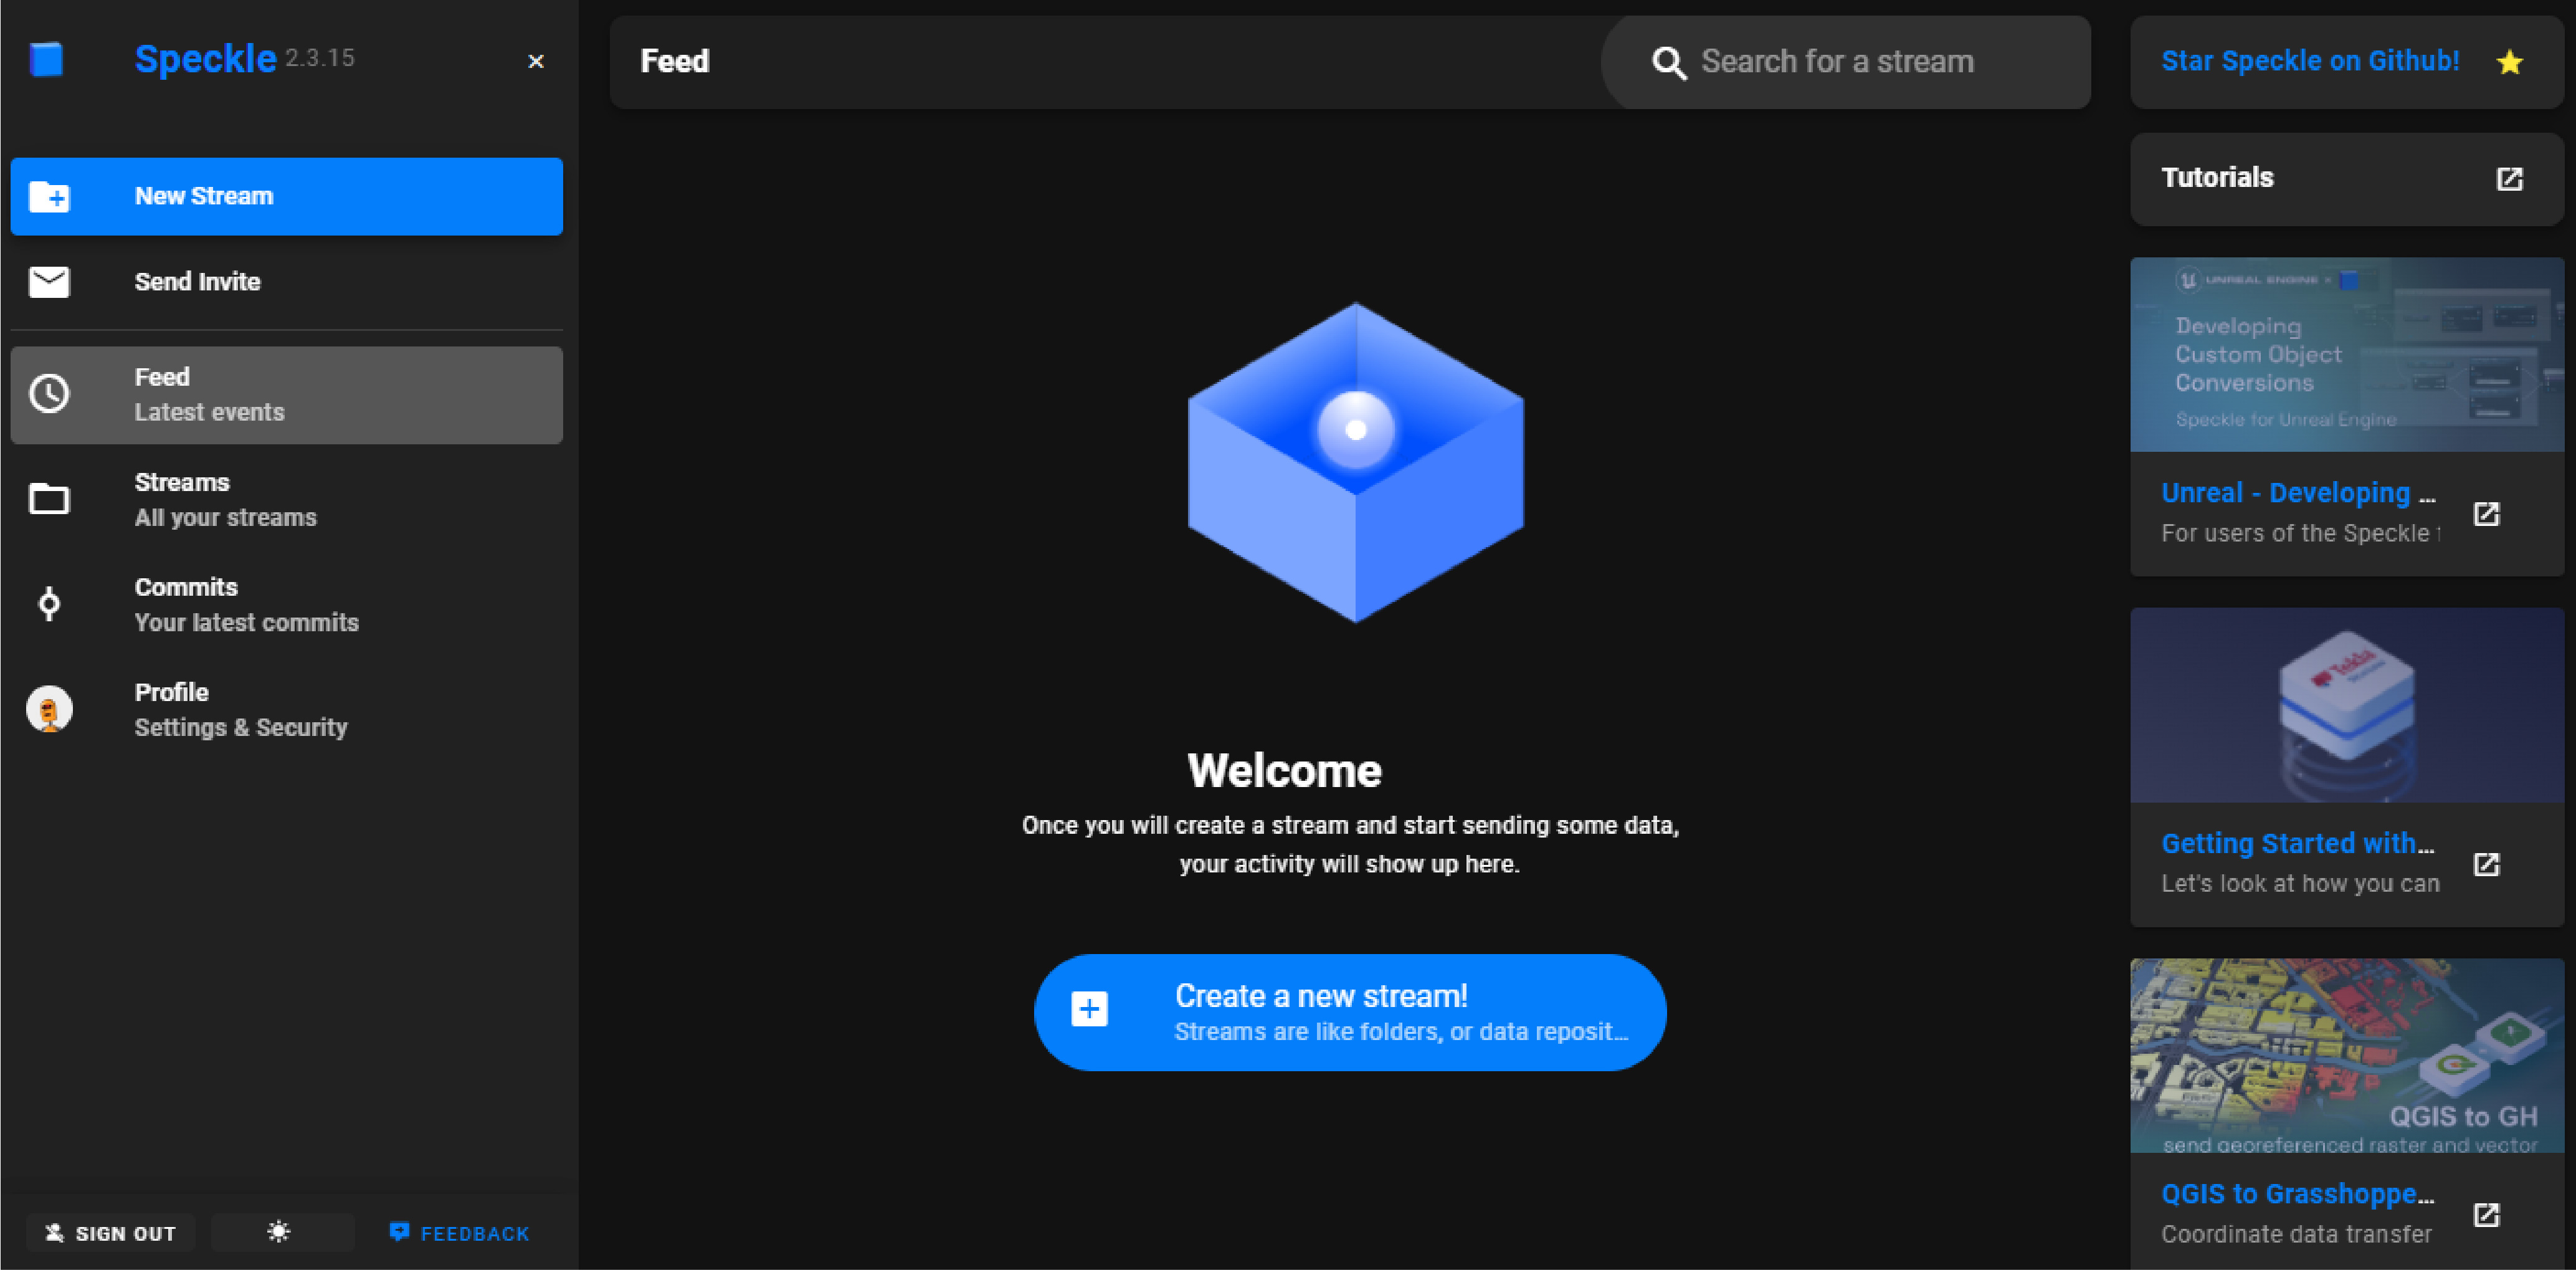
You can use the same link every time you want to be directed to the Speckle web app. From there, you can have an overview of your streams branches and respective commits, and view the data that each one contains in a 3D viewer. Moreover, you can get access to the full list of tutorials, documentation and the community forum where you can place your questions.
Download the Speckle Connectors
In order to be able to send & receive data from each software, you should download its relevant Speckle connector(plugin). It is recommended to, firstly, download the Speckle Desktop Manager where you can connect your account and have an overview of all the connectors available and links to directly download and install them.
You can download the installation file for Speckle Desktop manager.
Important to note: In the same link, you can also directly download the different connectors for each software (Manual installation). However, in the case of Grasshopper, Dynamo, Blender, PowerBI & QGIS connectors, it is necessary that the Speckle Desktop Manager is installed in your device so that you are logged in to your Speckle account.
You can find more detailed information about installing/uninstalling, using the Speckle Desktop Manager & downloading the different connectors in the Speckle Guide – Connectors.
You can find a more detailed explanation about how to use Speckle connectors for the main design software in:
Speckle can also be linked with a wide range of different programs, such as structural BIM software -TEKLA structures-, 3D graphics -blender, unreal engine- or software for geographic & infrastructure data -QGIS & Bentley. Here you can find the full list of available connectors.
Speckle Introduction 3/5
How to organizelink copied
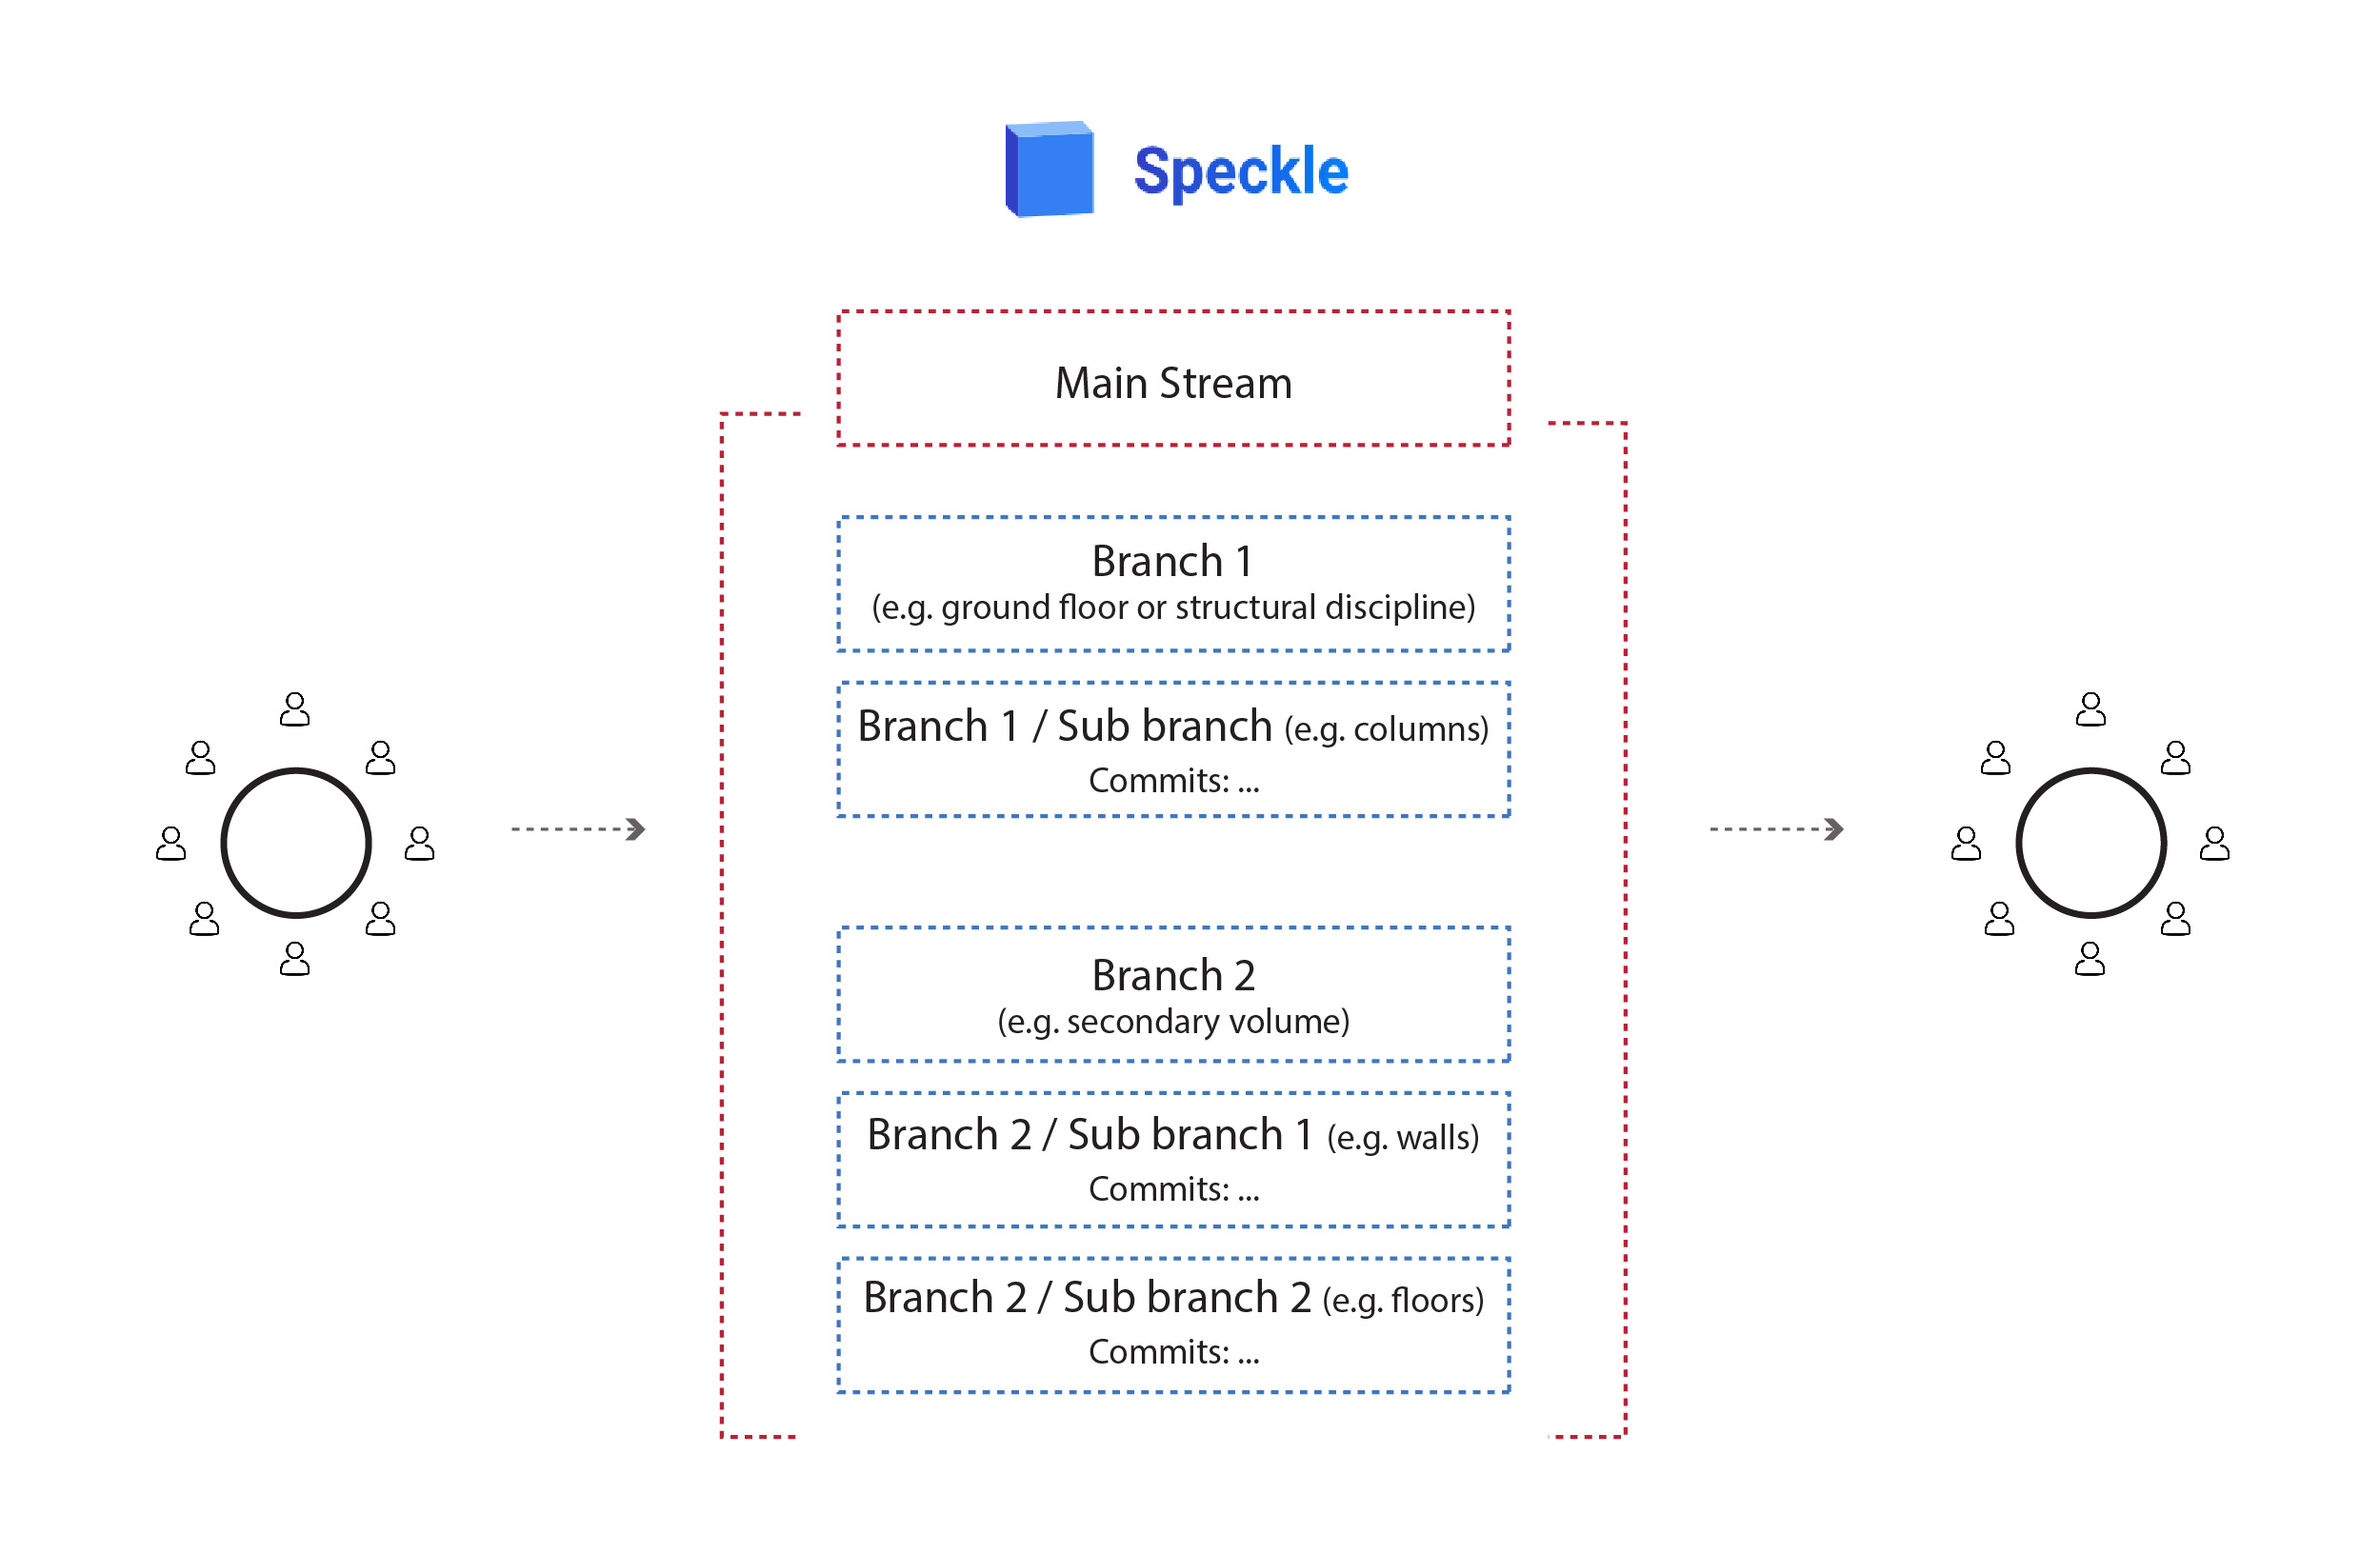
Collaborative workflow platforms are particularly useful in the case of large projects when different disciplines are involved. The way of organizing the structure of this workflow is a crucial factor that will define the ease or difficulty in the data exchange.
Regarding Speckle, it is recommended to use one general stream per team so that every time the model is stored as a whole in one place. Inside this stream, you can create different branches and sub branches in order to analyse the general collection of data into smaller element lists. In this regard, the changes in the model would be easily tracked down in the respective commits.
Important to note:
- In general, it is useful to structure the streams & branches in a way that reflects the structuring of the layers (Rhino) or worksets (Revit) in the main model file. This will allow for easier browsing, sending/receiving of data and updating the model.
- There is no limit in the number of branches and sub branches that you can create. The overall structure should follow the needs of each different project, e.g. the branches can be related to the different parts of the model, such as the volumes and the floors or they can be referring to each different discipline, such as architecture or structural.
- Make sure that you include a small description every time you send data, since it will enable you to easily identify the commit which you want to refer to every time. You can also quickly check the data that is included in each commit using the 3d viewer of the Speckle Web app.
- In Speckle, the data is shared in the cloud. This means that there is not one common central model where everybody is working, but, on the contrary, every team member is responsible to preserve a local copy of the model in his/her computer and update the changes on it each time. Thus, it is highly important that all the team members have the same axis origin as a reference in their files, since any divergence can cause errors in the alignment while sending & receiving the objects.
Speckle Introduction 4/5
Organize Streams & Brancheslink copied
The first part in setting up the Speckle workflow is to create the streams along with their respective branches. This can be done through the Speckle Web App. You can access it with your login credentials in the Speckle Web App.
Create a new Stream
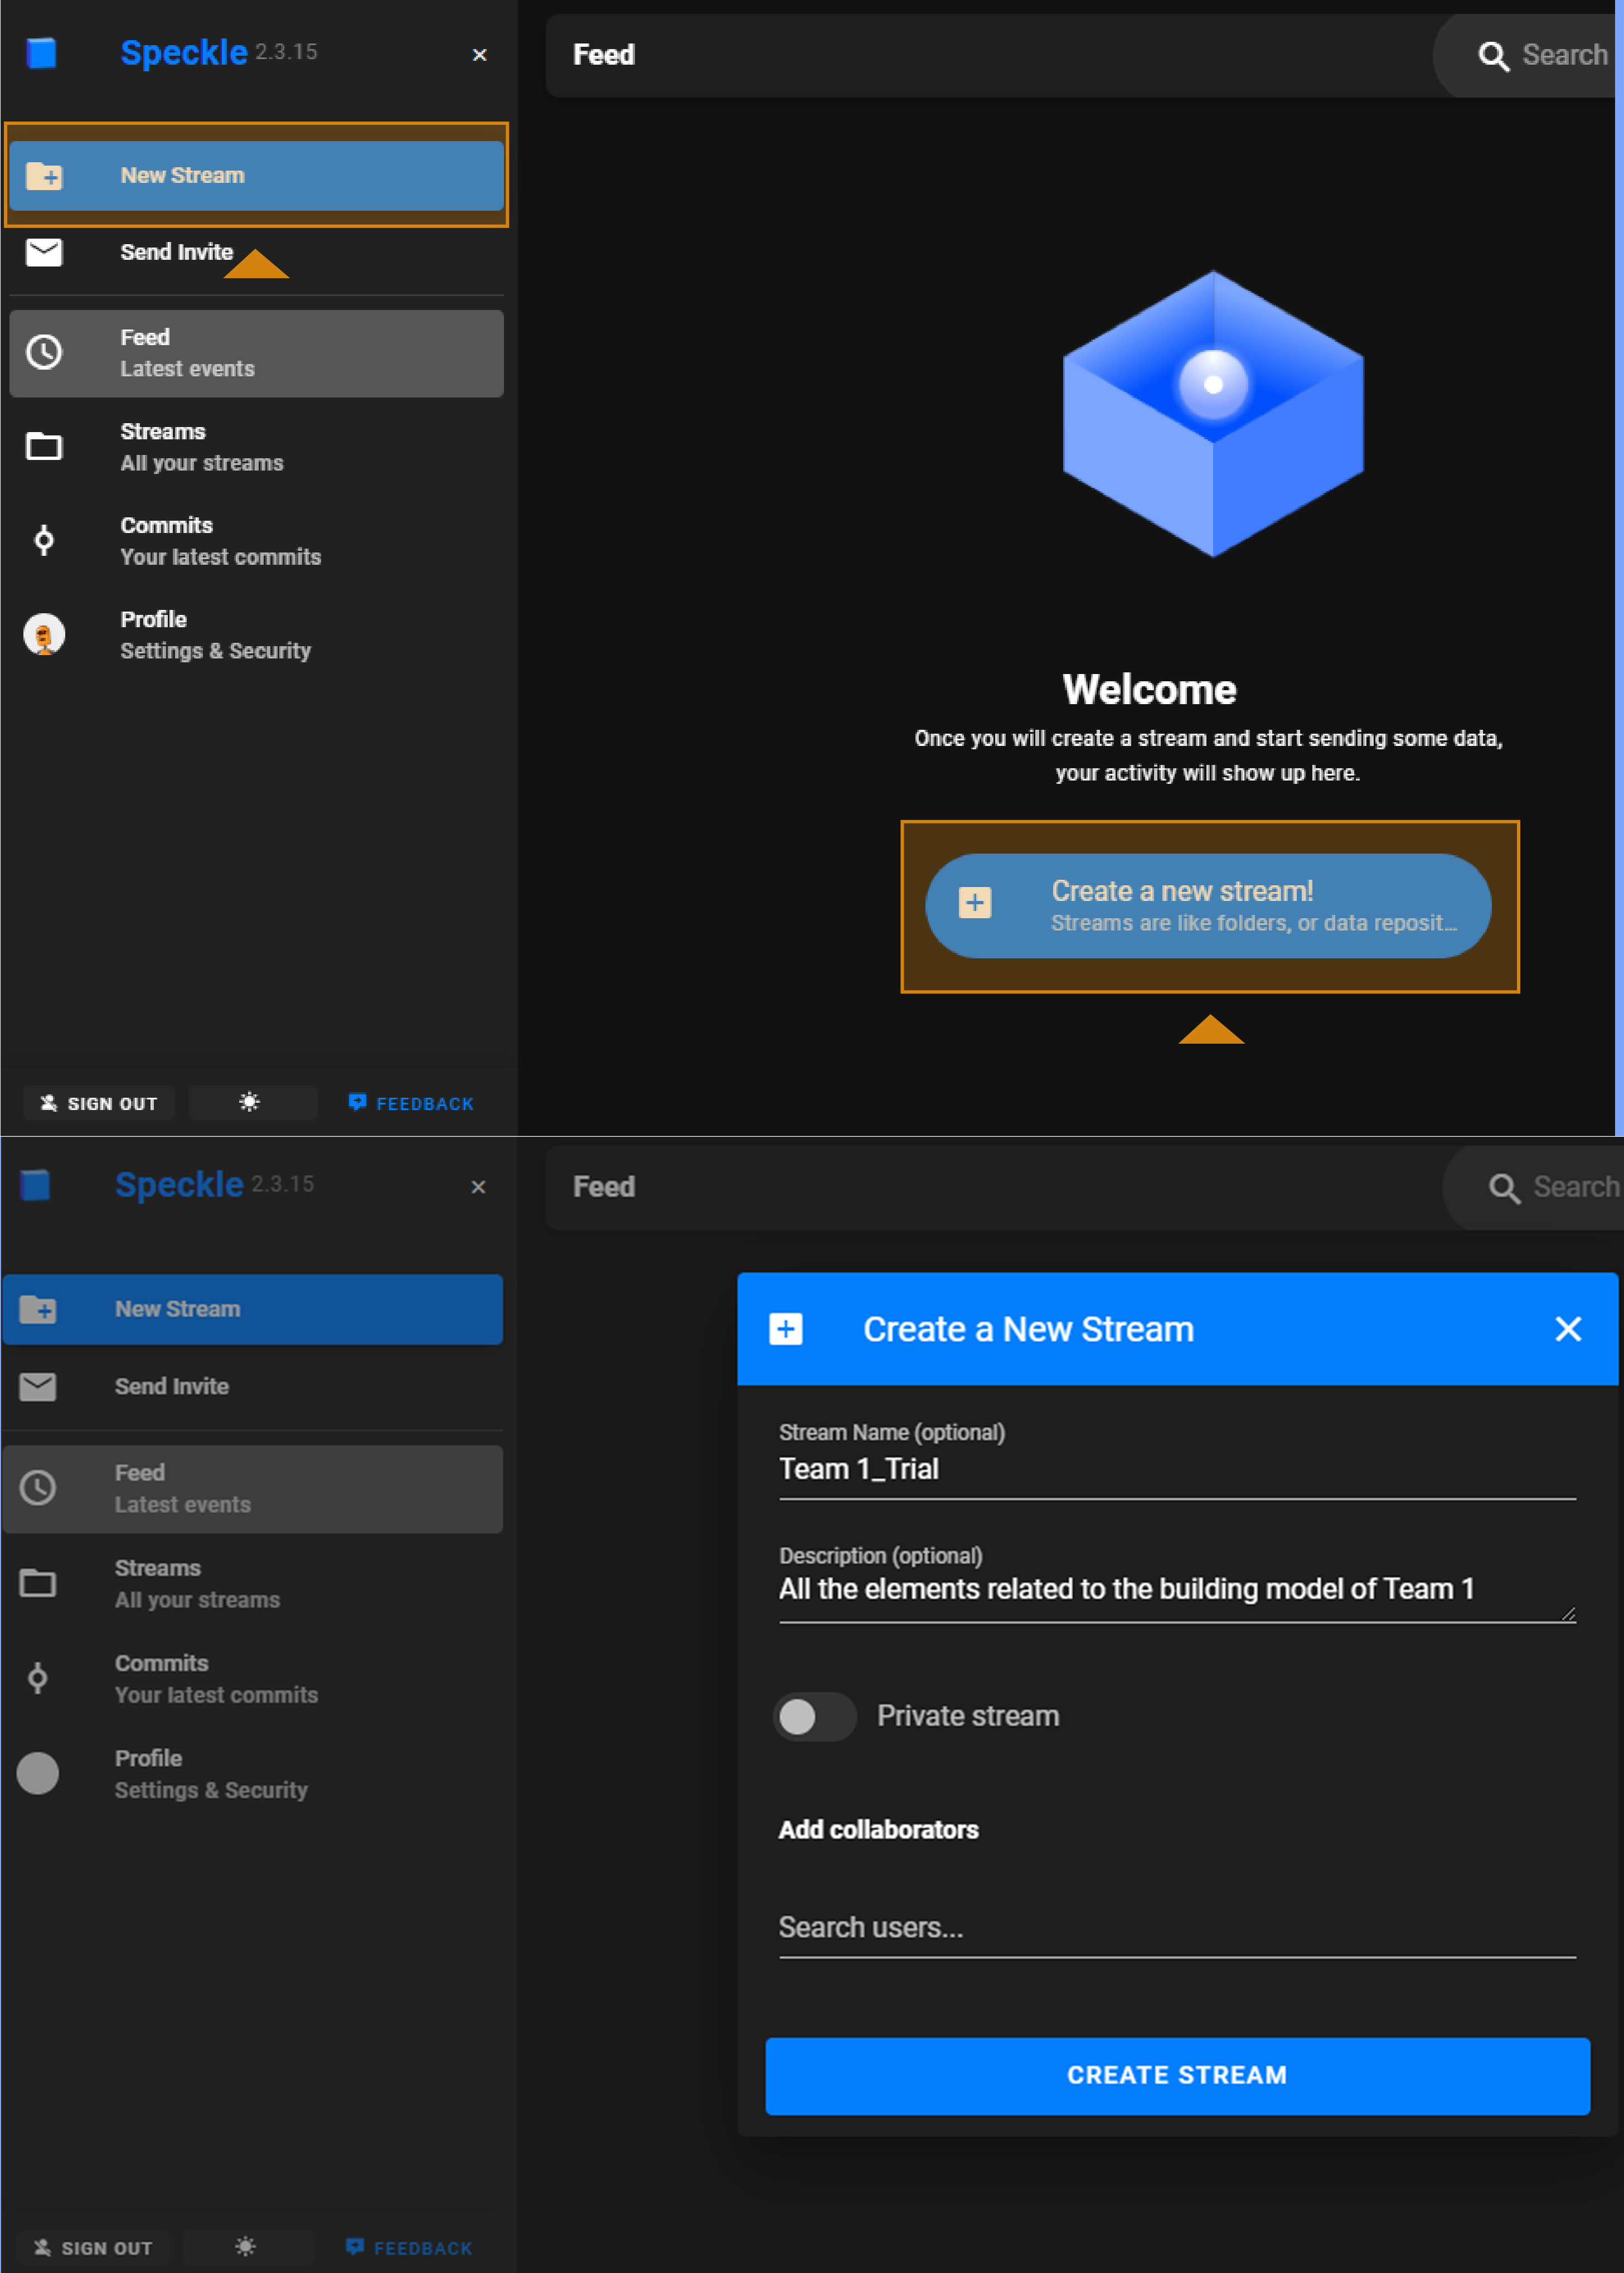
Click on the Create New Stream/New Stream buttons in the main interface.
In the pop-up panel, add a name and a small description of the stream in order to be easily recognized.
You can select between a public and a private stream; a public stream can be accessed by anyone who has its unique stream ID, whereas in a private stream personal permissions are assigned to each team member.
These are:
- Owner: Full access.
- Contributor: Can edit the stream’s contents but cannot edit stream details or manage permissions.
- Reviewer: View-only access to a stream
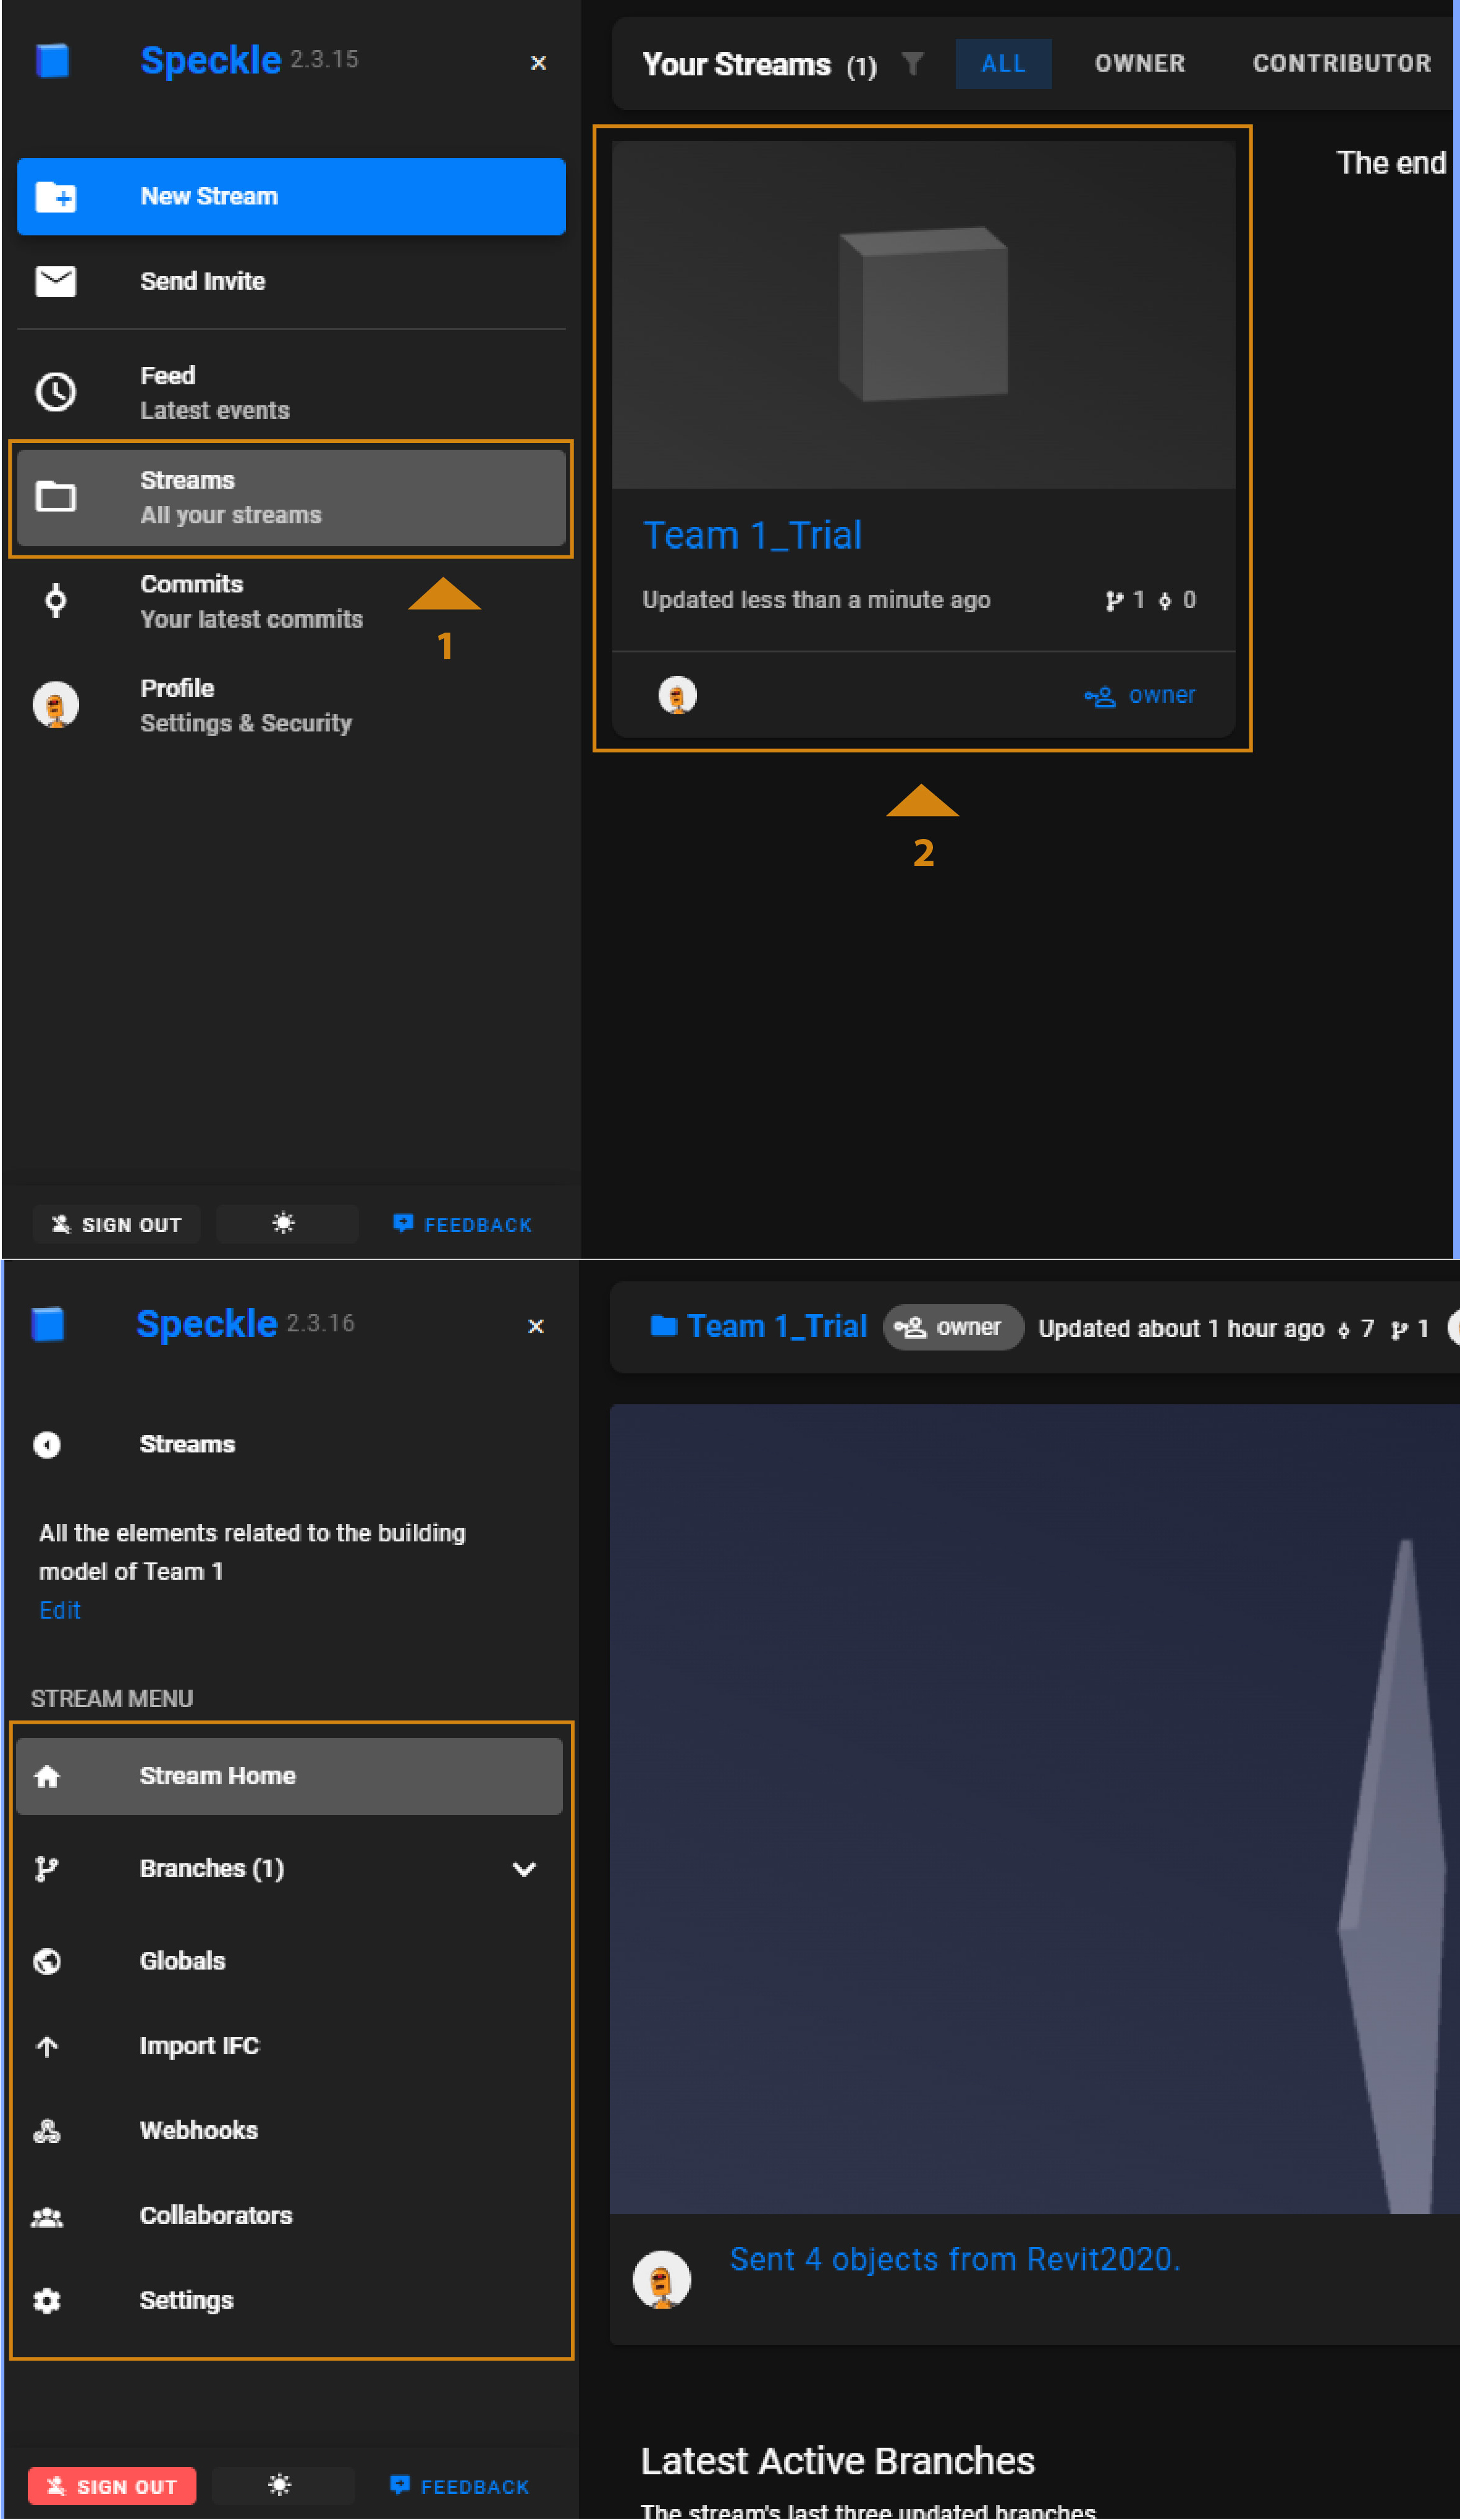
After creating your stream, you can still access and modify its properties using the tabs on the left side. In the ‘Streams’ overview, click on the corresponding stream and browse its properties:
- Stream home: View the latest version of the data in the stream and the respective commits.
- Collaborators: Assign more members to the stream or change the permissions of the existing ones. Remember that, in order to assign a permission to somebody, they should already have created a Speckle account using their email.
- Settings: Change the name and description of the stream, its public/private mode or permanently delete it (click on the ‘Danger Zone’).
Branches
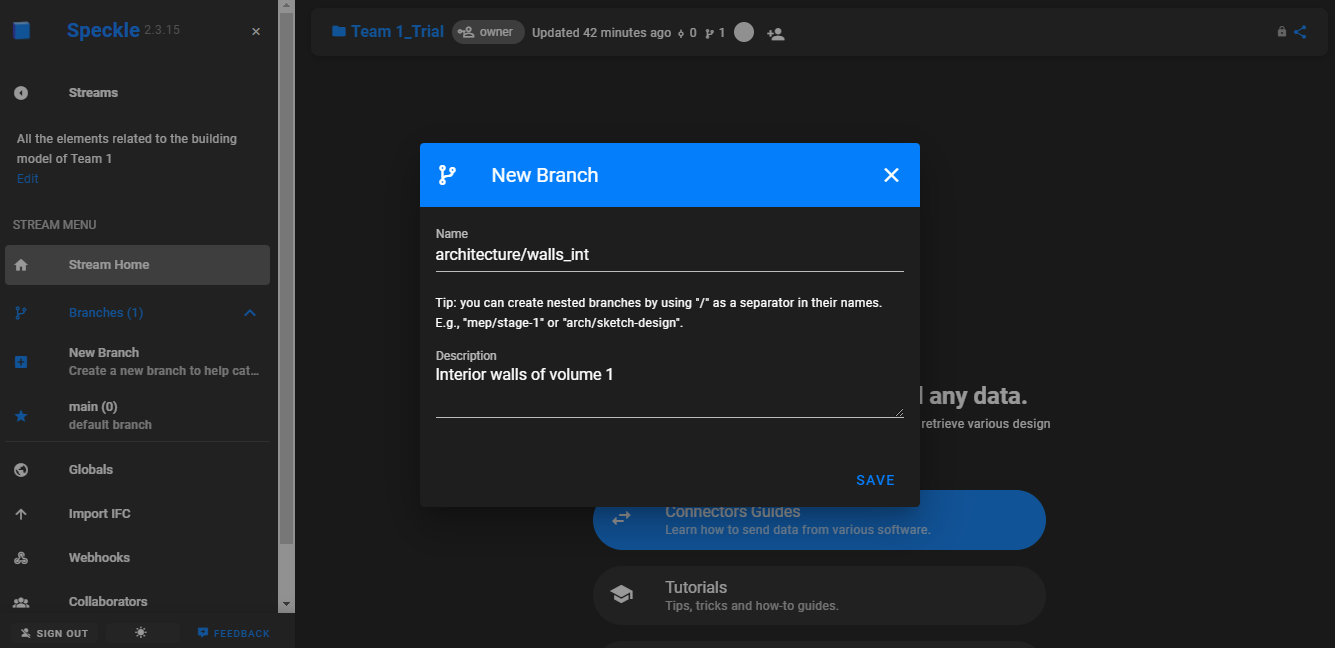
Upon the creation of each stream, a default branch is created which is called ‘main’. Afterwards, you can add several branches and sub-branches without limitation on their overall number.
Important to note:
- You can create at the same time both a family branch and a nested sub-branch by adding a “/” in order to separate the two names. Add a message to explain what you include on it every time.
- Streams and branches can also be created from the connectors inside the different software. However, creating them through the Speckle Web App serves to give a clearer overview of the setup. You can find more detailed information about the use of the Speckle Web App.
Speckle Introduction 5/5
Useful Linkslink copied
Follow up tutorials
You can now start using Speckle for Rhino, Grasshopper, Revit or Dynamo. To learn how to use Speckle in specific software, follow these tutorials:
Other useful links
Usefull links:
If you have any questions, you can visit:
- Speckle 2: Frequently Asked Questions
- Speckle 2: Community Forum
External tutorials
For more tutorials regarding the Speckle connectors, you can also check:
Write your feedback.
Write your feedback on "Speckle Introduction"".
If you're providing a specific feedback to a part of the chapter, mention which part (text, image, or video) that you have specific feedback for."Thank your for your feedback.
Your feedback has been submitted successfully and is now awaiting review. We appreciate your input and will ensure it aligns with our guidelines before it’s published.
