Rendering with Arnold for Maya on the BK Renderfarm
-
Intro
-
Preparing a Maya project before rendering
-
Running a render with Maya for Arnold
-
Usefull links
Information
| Primary software used | Maya |
| Software version | 2026 |
| Course | Rendering with Arnold for Maya on the BK Renderfarm |
| Primary subject | 3D Modelling |
| Secondary subject | 3D modelling |
| Level | Intermediate |
| Last updated | April 8, 2026 |
| Keywords |
Responsible
| Teacher | |
| Faculty |
Rendering with Arnold for Maya on the BK Renderfarm 0/3
Rendering with Arnold for Maya on the BK Renderfarm
This tutorial explains how to prepare your Maya project for rendering with Arnold for Maya on the render farm. This way you do not use the resources on your own computer for rendering.
- Before transferring your Maya project files to the render farm you will check if your project has been set properly in Maya.
- After transferring your files you will submit a render job using the web interface of the BK Renderfarm.
Rendering with Arnold for Maya on the BK Renderfarm 1/3
Preparing a Maya project before renderinglink copied
Before you start a render job on the BK Renderfarm you need to check if all your do some checks of settings in Maya.
Checking Maya project files
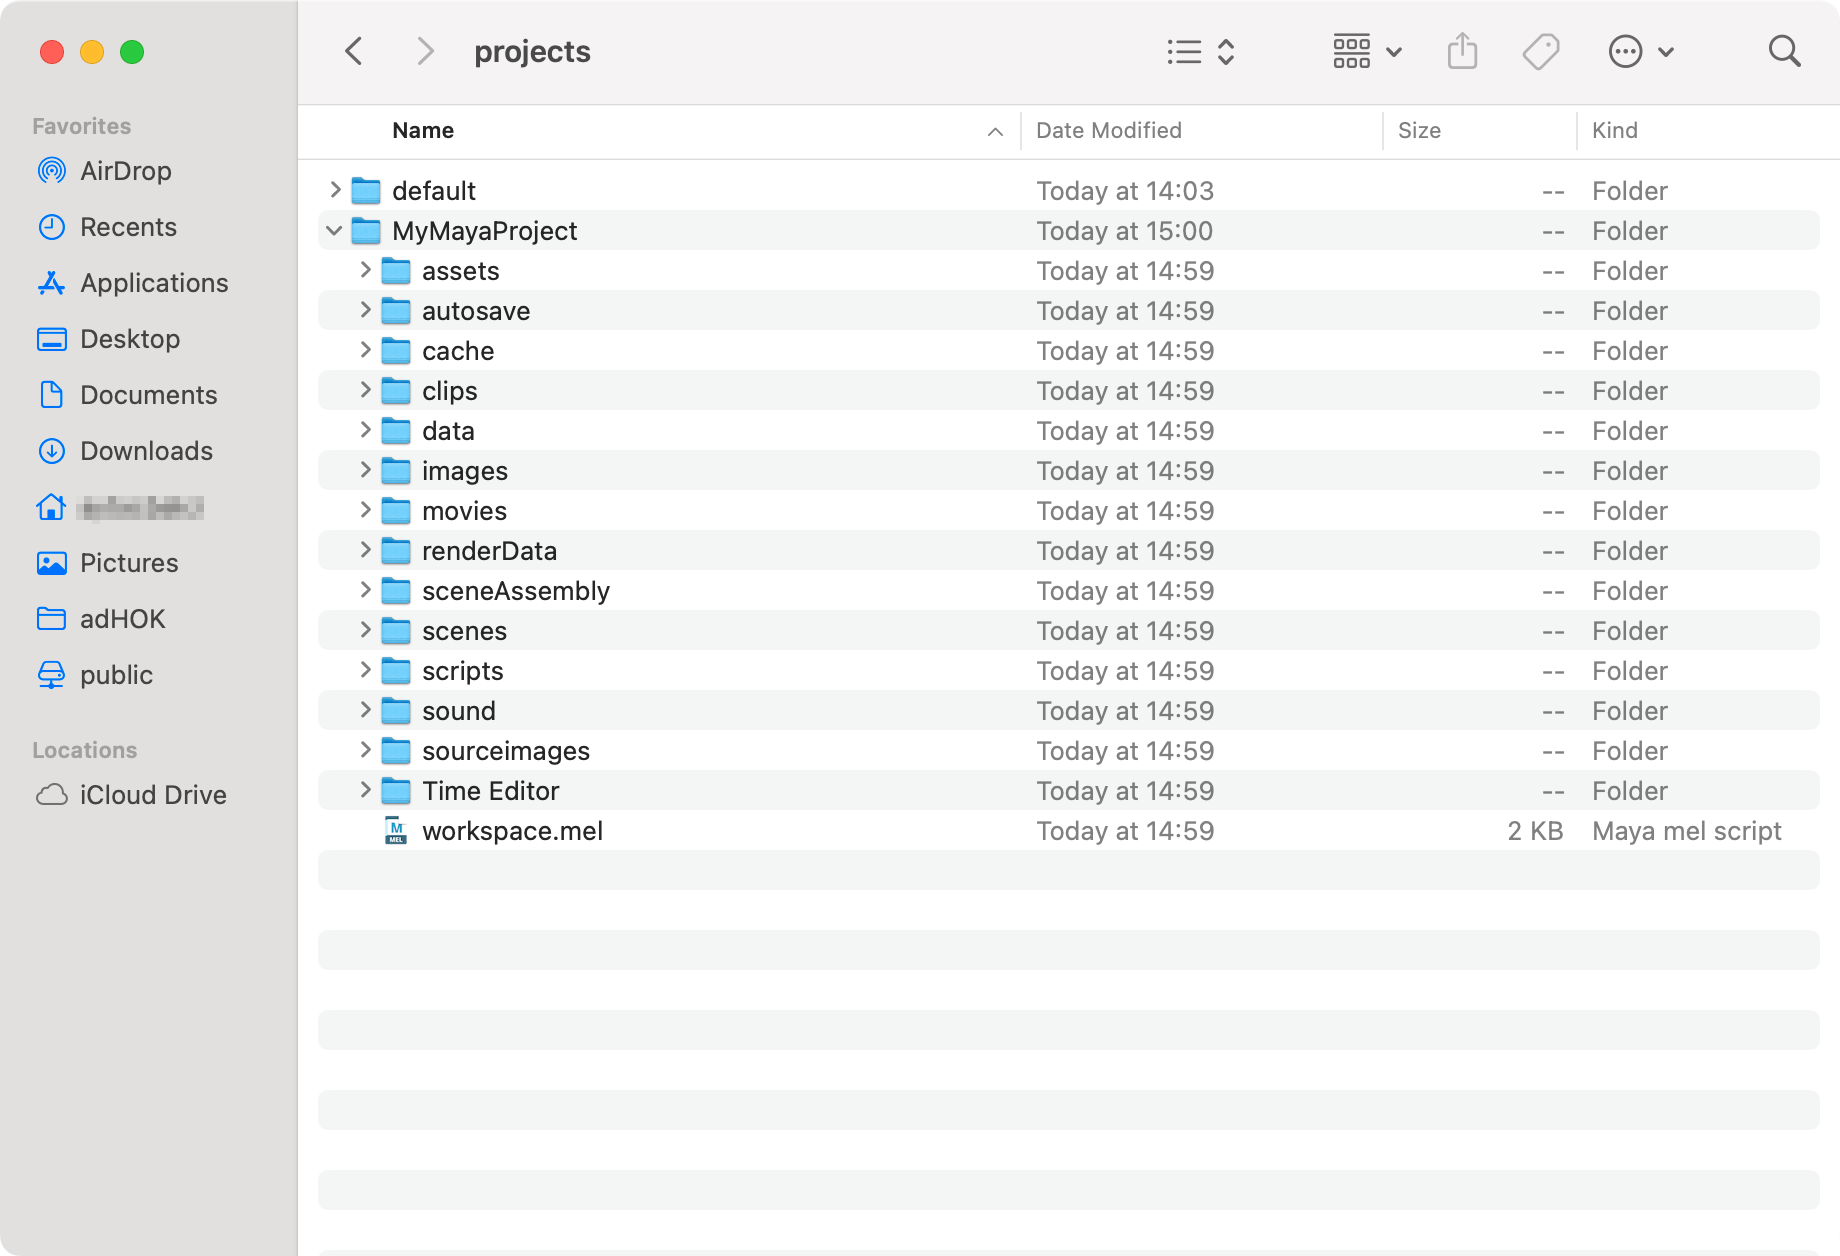
Before transferring any Maya project files to the shared file storage on the BK Renderfarm make sure your project is set in Maya and that the scene file and texture files reside in the correct folders (resp. scenes and sourceimages) under the project folder.
Review Project Window
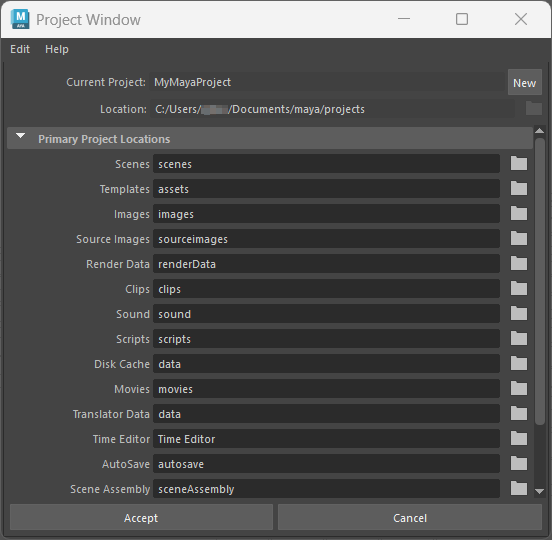
Check in Maya if the current project has been set to the folder you expect. Open the Project Window.
In this example the name of the project folder is MyMayaProject and this will be the folder with its contents that you will copy to the shared file storage of the BK Renderfarm.
Note that files (e.g. textures) outside the project folder cannot be ‘seen’ by the BK Renderfarm and therefore will not be rendered.
Review file paths in Hypershade
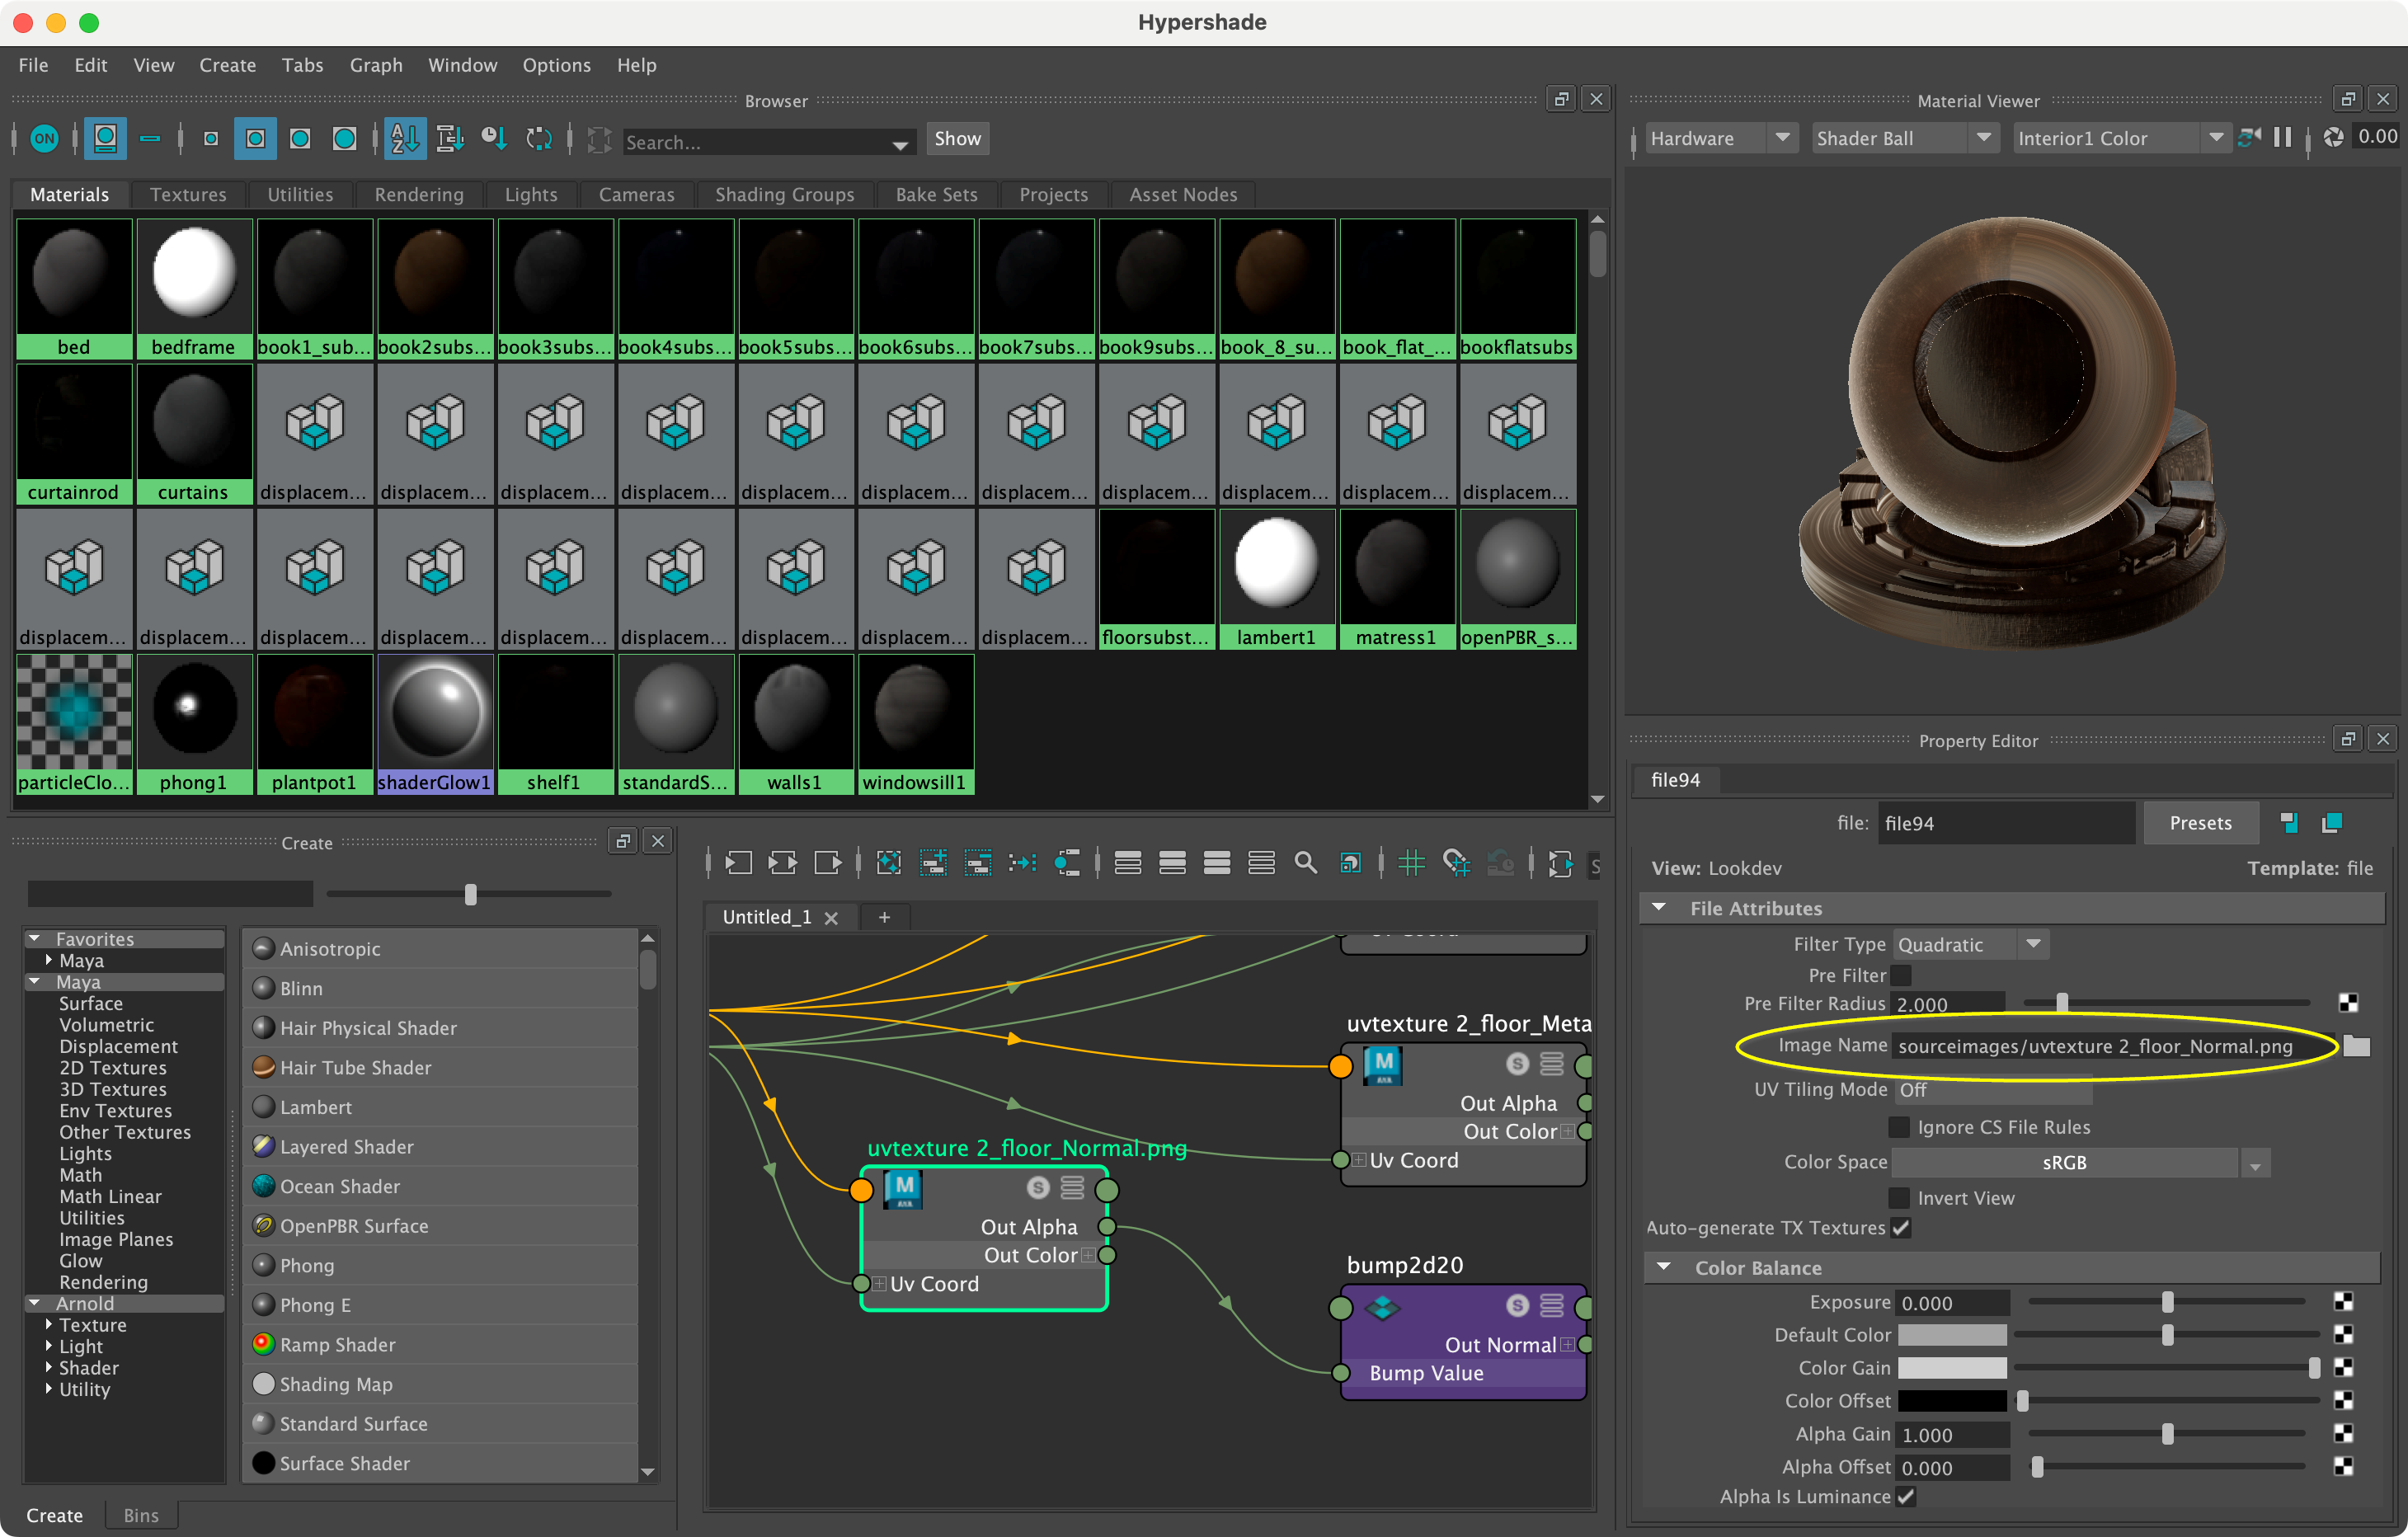
To be sure that your texture files do reside in the sourceimages folder within the set project folder, you will check in the Hypershade if the path to the texture files is relative to the project folder (e.g. sourceimages/bricks.png) and does not point to a location outside the Maya project folder or has a absolute path like C:\Users\username\Documents\maya\projects\MyMayaProject\sourceimages\bricks.png.
If the path to the texture files is not relative, you need to fix those before copying the Maya project folder to the shared file storage of the BK Renderfarm. As mentioned earlier the BK Renderfarm is not able to access files outside the shared file storage.
Save before copying to the BK Renderfarm
After you have done your checks and everything is fine, you can save your project.
Quit Maya.
Connect to the shared file storage
Windows computer users follow chapter Windows – Connecting to the shared file storage and Mac users follow chapter macOS – Connecting to the shared file storage of the tutorial below to connect to the shared file storage of the BK Renderfarm.
Transfer Maya project files
If you have followed previous tutorial Transferring files to the BK Renderfarm correctly you have created a folder named after your NetID. For this tutorial we will use R:\mynetid as an example.
You will copy your Maya project folder from your computer into the folder named after your NetID on the shared file storage of the BK Renderfarm. On a Windows computer you would be copying your Maya project folder C:\Users\username\Documents\maya\projects\MyMayaProject to folder R:\mynetid. On a MacBook you would be copying from /Users/username/Documents/projects/MyMayaProject to smb://renderfarm.bk.tudelft.nl/public/mynetid.
Depending on your project size and connection speed to the shared file storage it can take a while before your project files are copied to the your folder on the shared file storage
Save time! If you have changed something afterwards in your Maya project on your computer, copy only the files that are changed. This is most likely your Maya file in the scenes folder of your Maya project folder. If you have made a change in your texture file(s) then also copy the affected texture file(s) from the sourceimages folder on your computer to the sourceimages folder on the shared file storage.
Rendering with Arnold for Maya on the BK Renderfarm 2/3
Running a render with Maya for Arnoldlink copied
Before you go to https://renderfarm.bk.tudelft.nl:9891 make sure you are still connected with TU Campus network through eduroam Wi-Fi or wired network on campus, or eduVPN.
Submitting a render job
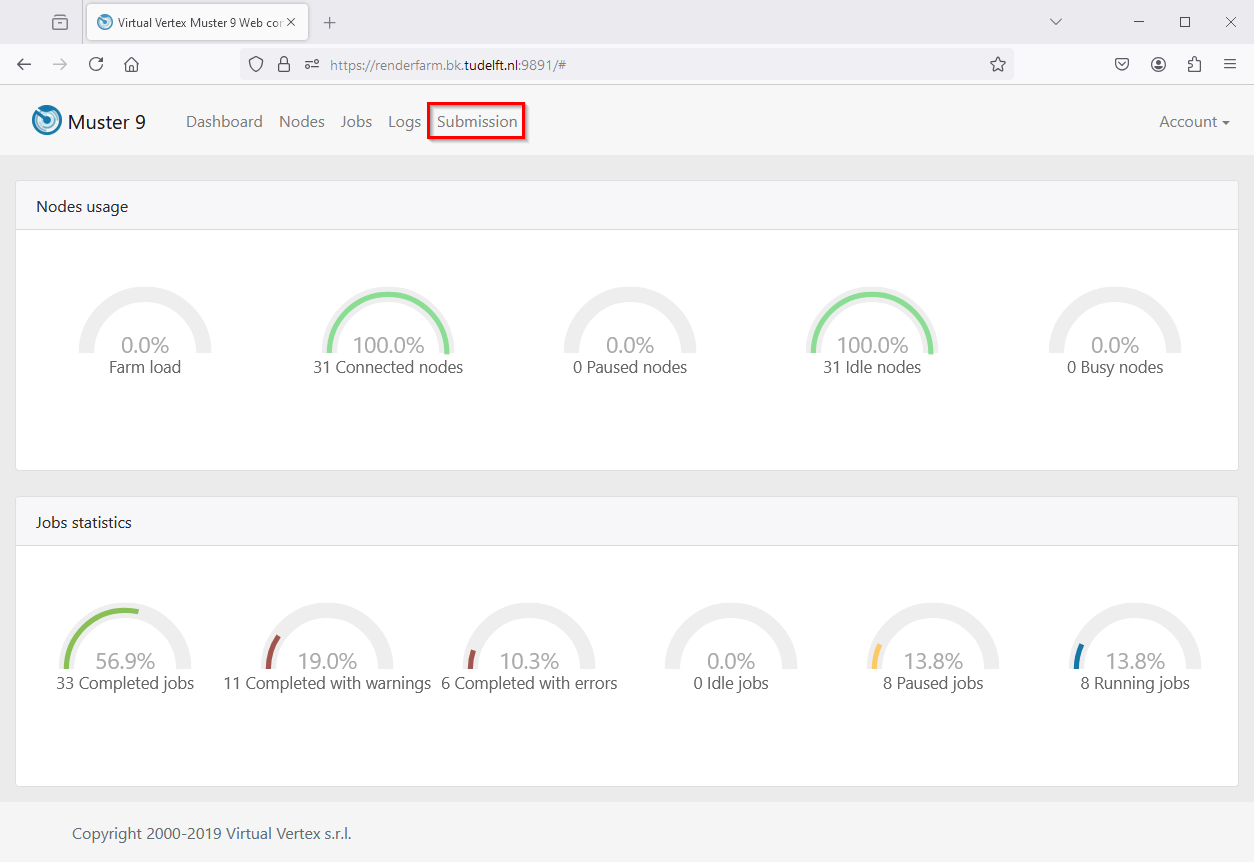
- Login with user maya_user (no password) to open the Dashboard.
- Click on Submission.
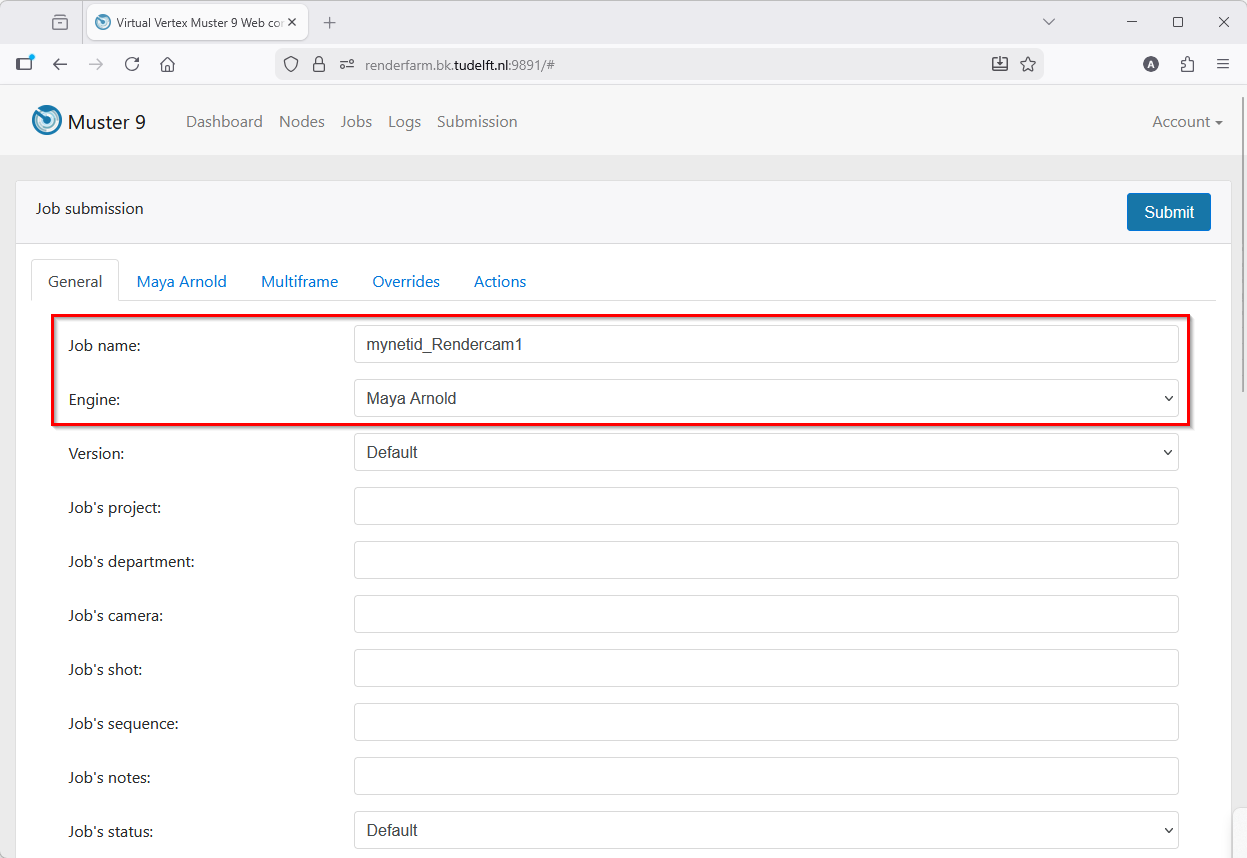
- Under the General tab, set a job name and choose Maya Arnold as engine.
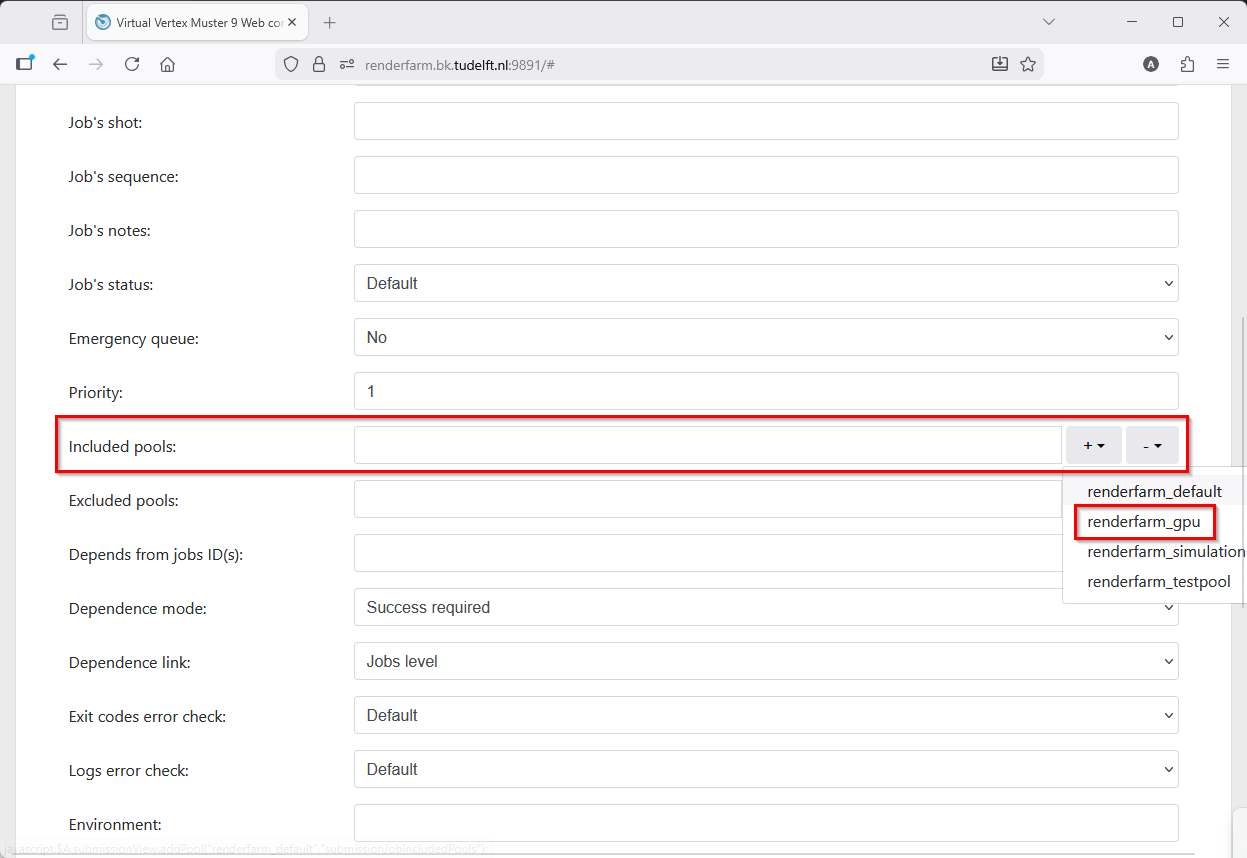
- Optionally add renderfarm_gpu if you need your renders to use Arnold GPU.
Check Autodesk support for supported features and known limitations.

- Open tab Maya Arnold and select your Maya file. Click on the three dots to navigate to your Maya file.

- Click on the triangles to unfold R: Drive and subsequent folders to select the Maya file in the scenes folder of the Maya project.
- Click Select to return to the Maya Arnold tab.
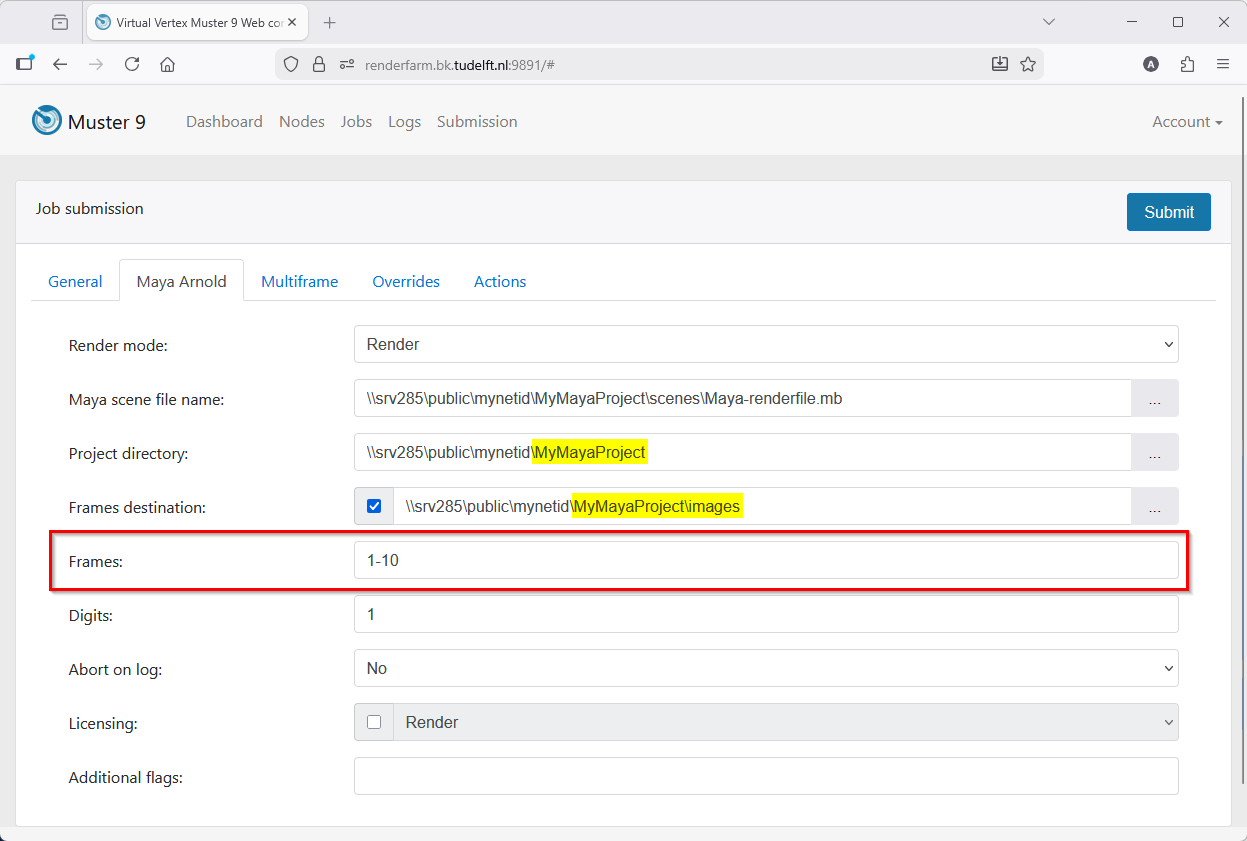
Now you can see that fields Project directory and Frames destination are automatically filled out.
- Enter which frame(s) you want to render. For an animation enter a start frame number and an end frame number like in this example (1-10).
For a single image it would be in general frame 1. However, if you want to render a still from an animation it could be another frame number. - Click on Submit to start the render job. Your job will immediately start if a render node is available.
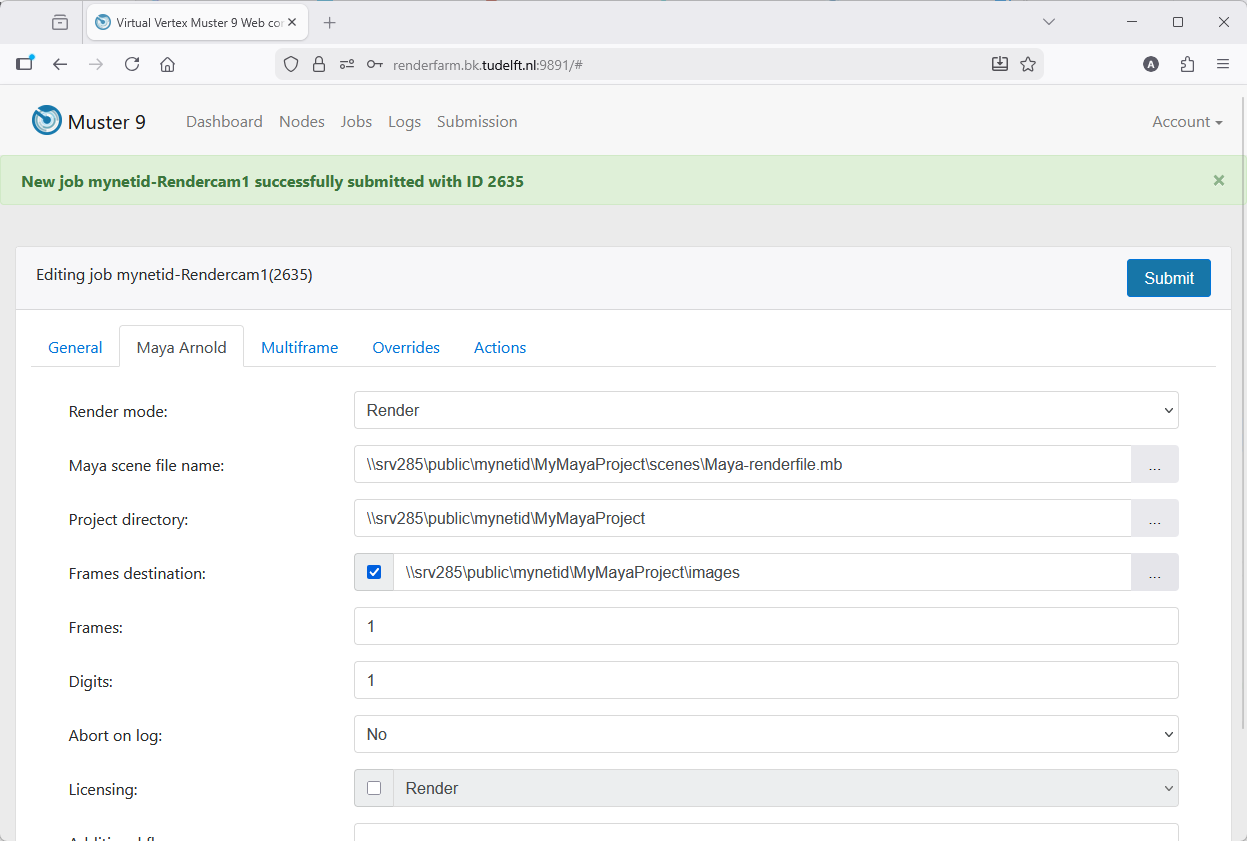
- After a successful submission a green bar on top will show your job name and an ID number of your submitted job.
Rendering with Arnold for Maya on the BK Renderfarm 3/3
Usefull linkslink copied
Write your feedback.
Write your feedback on "Rendering with Arnold for Maya on the BK Renderfarm"".
If you're providing a specific feedback to a part of the chapter, mention which part (text, image, or video) that you have specific feedback for."Thank your for your feedback.
Your feedback has been submitted successfully and is now awaiting review. We appreciate your input and will ensure it aligns with our guidelines before it’s published.